Methods to incorporate natural timbers into your custom work
As a deck builder, I find that using large timbers can transform utilitarian posts and beams into a display of craftsmanship. Structurally these decks aren’t much different from a regular deck: The log posts and rough-sawn beams support the gravity loads, and I use appropriate hardware to make connections so the assembly resists wind and seismic loads.
However, there are always challenges when you’re working outside the norm, and timber decks are no exception. To begin with, codes provide little design information, so it’s likely you’ll need to have the structure engineered. The building department may require you to have the timbers graded, which means finding a certified lumber grader. You probably won’t be able to find treated logs and timbers, so you’ll have to pay close attention to assembly details to protect the wood from moisture. You may be able to find locally grown rot-resistant species — such as cedar, black locust, or white oak — but otherwise it will be necessary to apply some sort of preservative.
Buying Logs and Timbers
You’re not going to find big logs and heavy timbers at your local box store, and even many lumberyards have trouble getting them. Local sawmills, though, are a good source for timbers, as is Wood-Mizer (800/553-0182, woodmizer.com), a company that makes portable sawmills and maintains a list of customers who are commercial sawyers. You might also have luck with log-home companies in your area, or with pole yards, which supply telephone poles.
There are two types of logs, milled and handcrafted. A milled log is perfectly round and the same diameter top to bottom, whereas a handcrafted log is tapered, just as the tree grew. The taper can vary dramatically from one species to another. I always order logs longer than I’ll need: Typically, 1 foot to 2 feet of extra length is enough.
Raw logs fresh from the forest will need to be debarked, which you can do with a power plane, a draw knife, or an adze (Schroeder Log Home Supply, 800/ 359-6614, loghelp.com). Fresh logs cut in spring when the sap is running can actually be debarked using a power washer set at 3,500 psi or higher and a turbo nozzle. This method leaves the smooth cambium layer of the wood intact.
Footings
One reason I use big timbers is to span greater distances. But bigger spans call for bigger footings, which may have to be engineered.
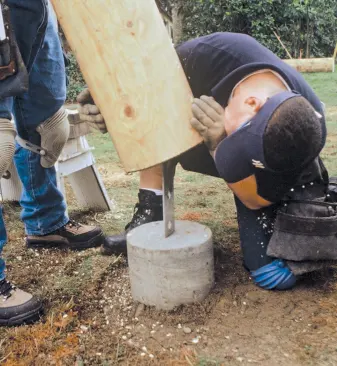
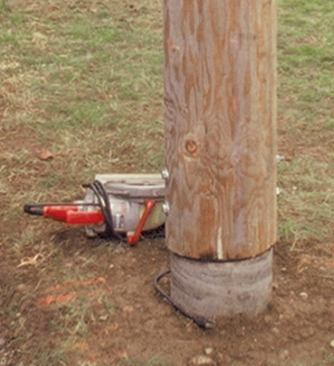
Regardless of the size of the footing where it bears on the ground, the top of the concrete — which I call the pedestal — needs to be 1 inch to 2 inches smaller than the bottom of the log post. This provides a drip edge around the bottom of the log, helping to keep water from running underneath the bottom of the posts. To prevent water from splashing onto the base of the log or wicking up from the ground, I keep the top of the pedestal at least 6 inches above grade.
Typical post-base hardware for 4×4 and 6×6 posts allows for some lateral adjustment. With round logs, however, which are larger than the pedestals, it’s more critical to accurately place the footings so that you maintain a consistent overhang.
To form a hold-down for the post, I embed a Simpson HD-10A about 10 inches into the pedestal, leaving 8 inches of the anchor protruding. This will be fitted into a slot cut into the log with a chain saw, forming a blind connection that’s more visually appealing than an exposed hold-down.
Preparing Log Posts
I determine the heights of the posts as I would for any deck. If I intend to seat the beams in pockets cut into the posts, I cut the posts to the elevation of the beam top. If the beams will sit on top of the posts, connected with hardware, the posts are cut to the elevation of the bottom of the beam, less 1/4 inch for angle-iron hold-downs.
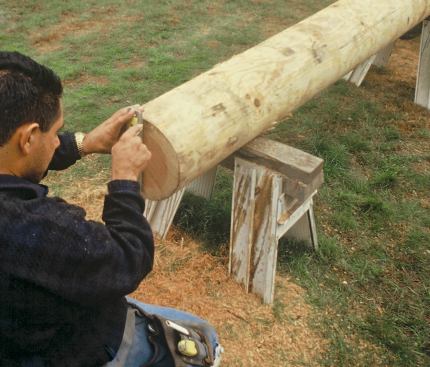
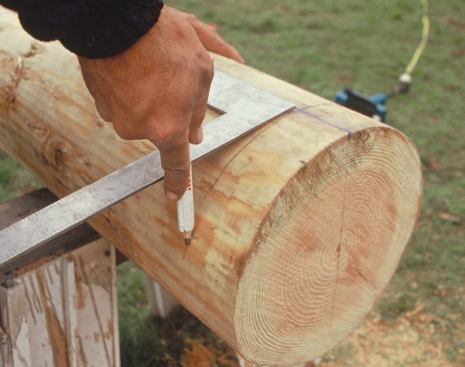
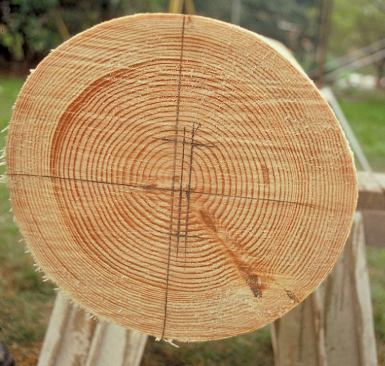
For either design, it’s important to cut the log ends square — a tricky proposition when working with natural logs. To do this, you first find the center of the log’s end by measuring three ways: horizontally, vertically, and diagonally. For each measurement, mark the center. You’ll usually end up with a triangle of dots; the center of this triangle is what you’ll use as the center point. Repeat this at the other end.
Next, with the log braced against rolling, use a level and a pencil to draw a plumb line up from the center point to the top edge of the log. Again, do this at both ends. Then, using a chalk line filled with white or blue chalk (which won’t leave a permanent mark), snap a line down the length of the log connecting the top points of the two plumb lines. I call this the layout line.
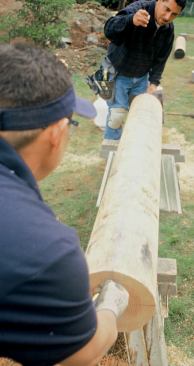
Place the long side of a framing square against the layout line and draw a perpendicular line 2 inches from one end of the log. Some eyeballing will be required. Finally, use a chain saw with a sharp chain to cut the log.
My favorite saw for this kind of work is the Makita model 5012B electric chain saw, a little workhorse that generates a chain speed of 5,500 feet per minute — equivalent to a gas-powered saw, without the mess.
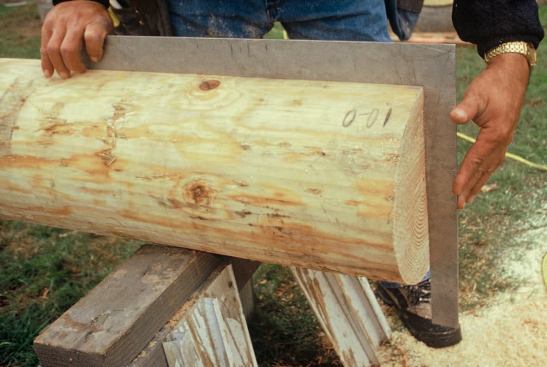
After making the cut, I check for square at several points. Tapered logs require some approximation. Assuming a fairly uniform taper, find the difference between the diameter at the end of the log and that at the far end of the square, 24 inches from the end of the log. Half this difference is the size of the gap you should see between the end of the square and the log as you check the cut.
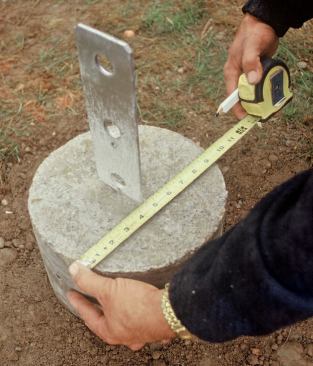
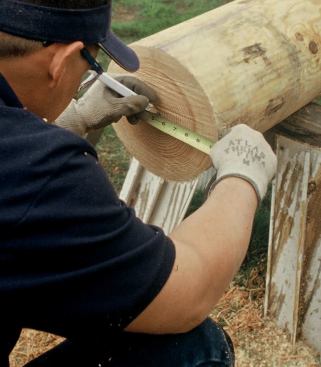
Cutting the slot for the HD-10A requires another layout at the bottom end. Using the chalked layout line and a level, draw a vertical line on the log’s end, then measure down this line to find the center of the log. Next, measure where the HD-10A protrudes in relation to the center of the pedestal and transfer that location to the base of the log, so that the log will be centered.
Plunge cutting with a chain saw takes a little practice and a lot of caution. If you contact the log with the top of the chain saw’s bar, the saw will kick back. I typically start a plunge cut with the saw at a 45-degree angle to the bottom of the log and in line with its length (see “Safe Plunge Cuts,” below). As I start the cut, I gradually raise the chain-saw bar to horizontal while applying downward pressure and pushing the bar forward into the log. If you don’t apply continuous downward pressure, the bar will jerk violently upward. You need to go in only about 2 inches deeper than the height of the HD-10A.


