Some of my fondest memories of being an apprentice carpenter are from the summers I spent building and remodeling in Saratoga Springs, N.Y. It was in that small city, filled with late 1800s and early 1900s Victorian houses, that I learned the fundamentals of installing clapboard siding. Fast forward two decades later, and I still find hand-nailing clapboard siding to be very gratifying; it’s one of my favorite jobsite tasks. As each course of siding is installed, covering the weather-resistive barrier (WRB) one piece at a time, the house looks increasingly refined.
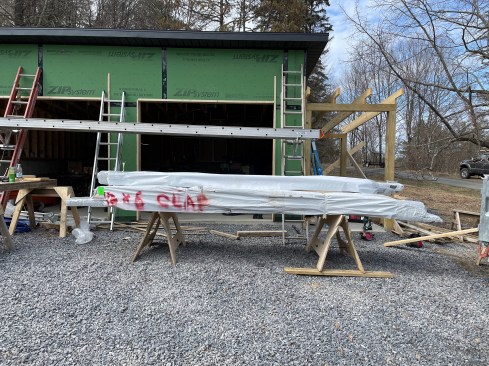
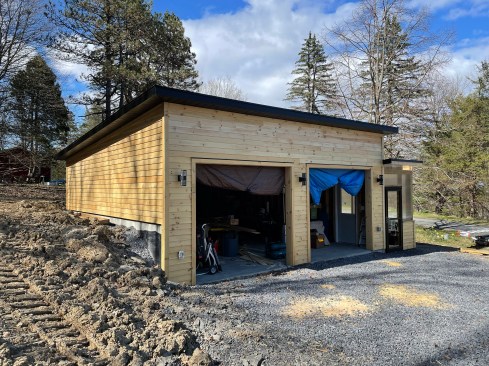
A few years ago, we built a custom home on the Helderberg Escarpment in upstate New York. The house was clad with vertical cumaru siding, which gave the building a dark, rich, modern look. But for the freestanding garage, the customer wanted a more budget-friendly cladding that would provide visual contrast to the house. He opted for 1/2-by-6-inch beveled #2 pine clapboard. This regionally sourced white pine is abundant, easy to procure and install, and compatible with many finishing options. It also smells great when being cut and handled. While the oiled cumaru on the house would have a deep, strong appearance, the pine was to be left raw to the weather. The pine clapboard and trim boards start off blond, then turn to a medium brown and, eventually, a neutral gray.
Planning
As with any construction project, it’s crucial with a siding project to be thinking 10 steps ahead. Having a clear idea and a strong visualization of the finished product is important. Good foresight will help determine where and how certain materials will plane out, layer, project, and create reveals.
Though the garage is not living space and is completely unconditioned, we used the best principles for installing the siding with long-term durability in mind. As such, we installed the pine over vertically oriented furring strips and also paid close attention to flashing details and insect mitigation.
The goal was for the entire cladding of the build to look correct not only at a quick glance but also when scrutinized. I believe that a correct install is one where nothing stands out.
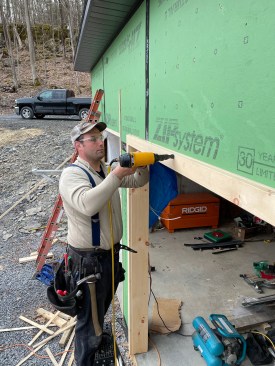
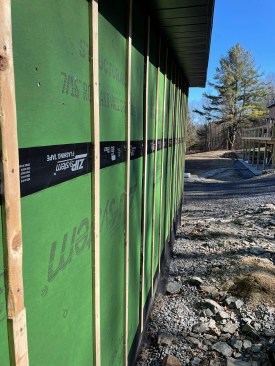
The exterior trim and siding work begins once the garage has been framed and weathered in.
Overhead Door Jambs and Casing
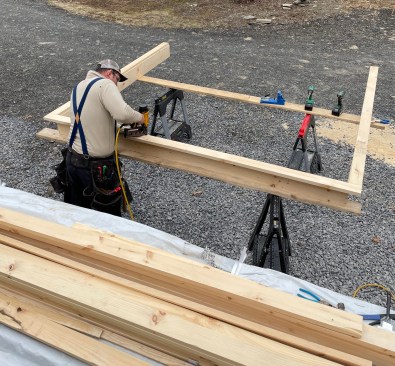
After framing the garage and making sure that the Zip System sheathing was fully taped and rolled, we turned to the first step of the siding process: building and installing door jambs and casing. Similar to the siding, the stock for the trim on the garage was simple #2 pine—in this case, 5/4 stock. Because the outside of the WRB would have 1/2-inch furring strips installed over it to create a drainage plane, we needed to install furring around the rough openings and extend the jambs 1/2 inch past the sheathing so the casing would be well supported and tight to the jambs with a traditional reveal.
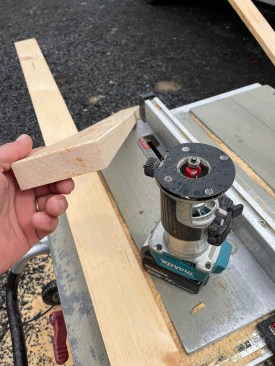
We cut the 5/4 jamb components to length, then fastened them to each other with coated deck screws. We butted the casing joints and joined them using Kreg pocket holes with blue-coated screws. This would keep the faces nice and tight. Running a 1/8-inch round-over bit over the pieces softened the edges and eliminated splintering. We prefastened the casing onto the jamb sets with 15-gauge stainless trim nails, using a carpenter’s pencil as a gauge to create a uniform reveal. The end grains that would sit close to (but not on) the concrete floor would be waxed.
Slideshow: Jambs, Casing, and Corners
The crew prebuilds the jambs and casing for the garage doors usi…
Finally, we installed the site-made preassembled jamb and casing sets as whole units. Here, we also used 15-gauge stainless trim nails, giving thought to the fastener layout. Because all the pine material would be left to naturally age, we did not fill any nail holes.
Flashing
We chose to make the main flashing components for this job with 24-gauge black galvalume because it’s durable, and we were able to have it fabricated by a friend in his local metal shop.
The vertical (wall) leg of the head flashing sits tight against the WRB. This leg is taped to the Zip System sheathing at the top to create a water-shedding lap. The head flashing is bent slightly more than 90 degrees, so the horizontal leg has a slight downward angle to promote drainage and prevent water from sitting on it. We hemmed the outer edge and turned it down slightly to tuck over the top edge of the head casing. Later, furring strips would be applied over the top of the flashing but held about 1/2 inch above the metal to prevent water wicking into the end grain of the furring strips.
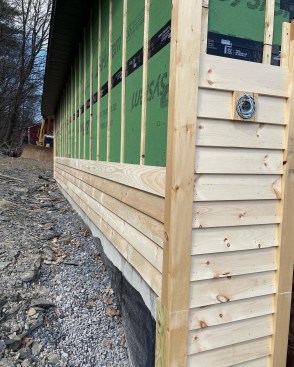
Corners
Similar to the door casing, the outside corners, also made of 5/4 stock, would need furring strips behind them for the siding to plane out nicely. We built the corners using the same Kreg pockets and coated screws as on the casing. We ripped the adjacent corner board minus the thickness of the stock so that visually the corner has the same width on both faces. (It drives me nuts when carpenters don’t take the time to do that. It looks goofy to have one side wider than the other.) These corners also got dressed with the 1/8-inch round-over bit and waxed end grain. The assembled corner pieces were fastened to the building with 15-gauge stainless trim nails, again with thoughtful layout given to the fasteners.
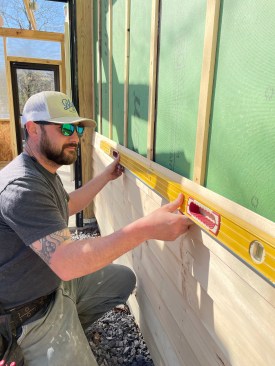
Story Pole, Reveals, and Full Coursing
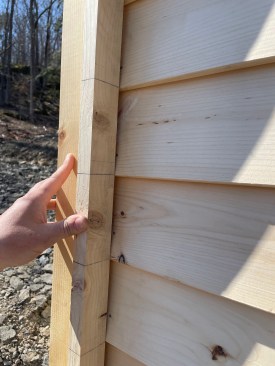
With the heights of the tops of the casings established, as well as the corners set, we could create a story pole for the siding courses. A story pole is simply a stick of wood that has all the siding coursing and reveals marked on it. The user can simply hold the story pole next to a trim board and lightly mark the board where the siding will be fastened. In this case, we could also mark the furring strips.
The important thing about making a story pole is understanding the limitations of the siding boards. On this project, we were installing “half by six” bevel pine clapboard with a finished dimension of 1/2 inch by 5 1/2 inches. The “reveal” of the board is what is exposed to the weather. Because each upper course will cover the top edge of the course below, we can “cheat” the reveal of the boards. The minimum overlap, which changes the reveal, can vary based on the supplier’s recommendation. Typically, the wider the board, the larger the overlap. It’s important to check with the supplier or mill to find out what that minimum overlap is.
Slideshow: Clapboard Installation

With the trim installed, the crew employs a story pole to align …
The other thing to think about is to what degree you are comfortable pushing the limits of the recommended overlap. For example, in this case, the mill recommended 1 inch, but if a 7/8-inch overlap would enable having a full course over a series of doors or windows, we would opt for that. In this build, the risk of water infiltration and sheathing damage was mitigated by a rainscreen and a proven WRB, so pushing the limits of the overlap carried minimal risk.
For the most traditional and appealing look, it’s best to shoot for a full course of siding below and above all doors, windows, and mounting blocks. The way to do this is to align the bare story pole at the bottom of the wall, mark the tops and bottoms of those features on the pole, and divide the remaining space(s) by the recommended reveal of the siding board. For example, if the space between the top and bottom of a window is 48 inches, and the recommended reveal is 4 1/2 inches, we would use 10.67 courses of siding. But because we want full courses, we might increase the number from 10.67 to 11 and shrink or “cheat” the coursing to approximately 4 3/8 inches. Adjusting clapboard siding reveals in this manner is barely noticeable at a quick glance yet yields a very intentional finished look with full coursing where wanted.
Ultimately, we always try to strike a balance between level, parallel, and full boards. In a new construction project, this is typically much easier because we have controlled the process from the start and have level sill plates, level doors, and plumb corners and trim. In a remodeling scenario, on the other hand, there are generally a raft of challenges. Windows may be out of level and multiple windows may not be level to each other. Siding may not be level and may need to run parallel to the top or bottom of an opening. Maybe the tops of all the windows don’t line up, so the coursing at the head or sill needs to be notched. Often, the solution is picking the lesser of two evils and going with what looks right rather than what is truly level and square.
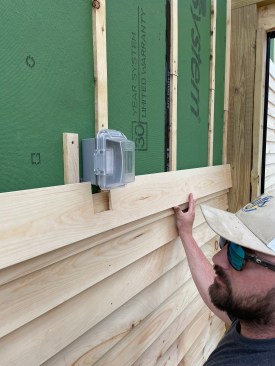
Mounting Blocks
With the courses of siding established by the story pole, we could locate the exact location and course where receptacles and lights would be installed. This was made much easier in our case because we self-performed the electrical work (which we are allowed to do in this municipality). Be sure to check with the local building department on licensing and inspection requirements. If you can’t do this work, it will take some coordination with an electrician.
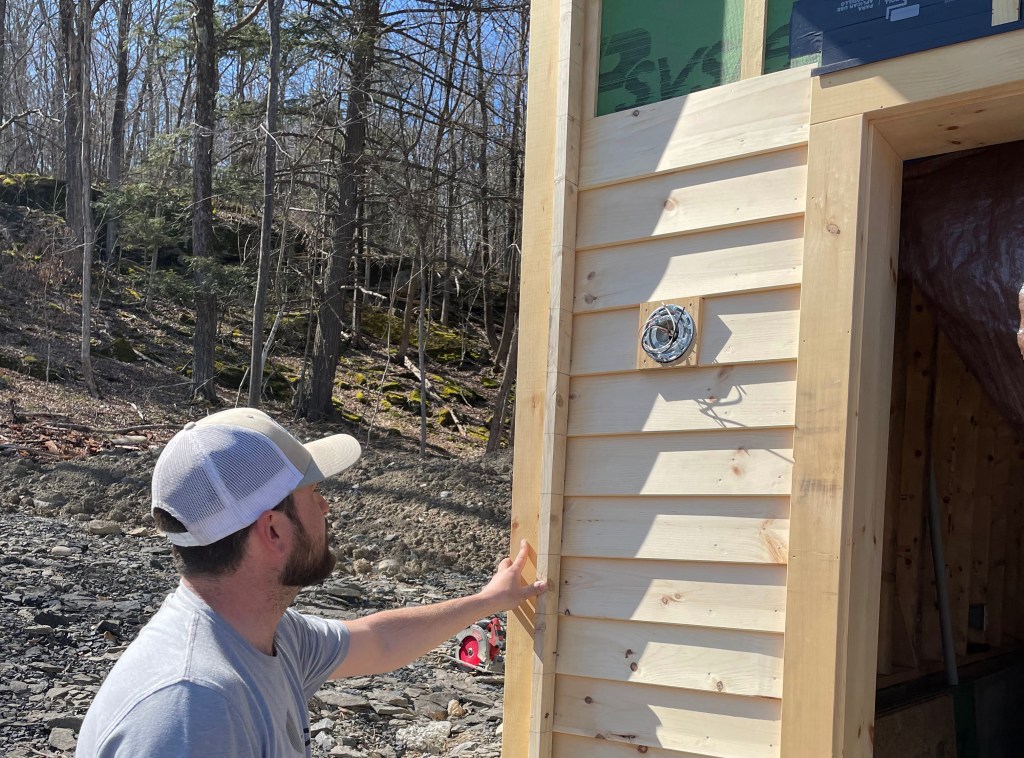
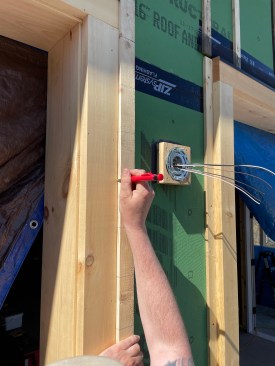
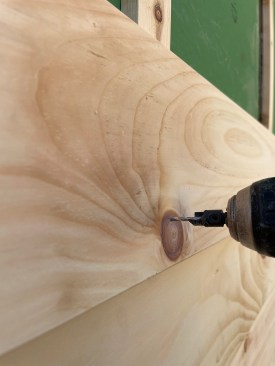
Because we knew the exact width of the siding course, we could then make a square mounting block that would fill that coursing space. Most outdoor lights that we handle have a 4-inch round base. Coursing that is about 4 3/4 inches wide leaves a nice margin around the fixture base.
Due to the nuances of the electrical boxes, light fixtures, and wood mounting blocks, I found it easier to weatherize these areas with fluid-applied liquid-flashing rather than hard, metal flashing. I was also afraid that hard flashing over these blocks might be asking for water to travel behind the fixture base.
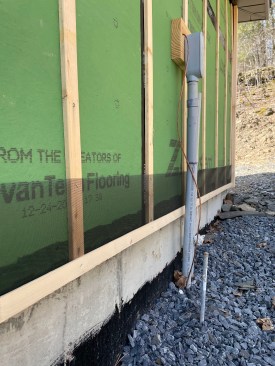
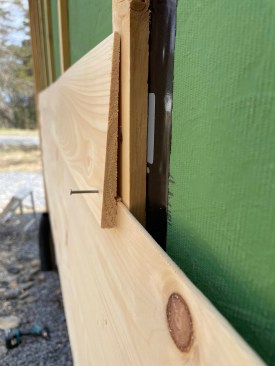
Furring Strips
With the furring strips installed behind the trim components, we then needed to apply furring strips across the field of wall sheathing. We ripped regular dimensional 2-by stock down to 1/2 inch thick, placed the strips in line with the studs, and shot them with a 2 3/8-inch ring-shank nail. The furring strips can be made using nearly anything—corrugated plastic, Zip sheathing scraps, strapping, sheet goods, and the like. We chose to use dimensional lumber because we had plenty of it on site. We did not fasten the furring strips at the bottom of the wall, so that we could slide insect screening behind them.
Insect Screening
The furring strips created a gap between the back of the siding and the face of the WRB, and we needed to block that gap with insect screening. This would keep insects out but still let water drain out should it get behind the siding. We simply took a roll of fiberglass window screening and crosscut it to 8-inch widths on a miter saw. We unrolled the screening, tucked the back of it behind the bottom of the furring strip against the WRB, and shot the bottom of the strip; then we rolled the front flap of the screen up onto the face of the furring and held it in place with a T-50 staple.
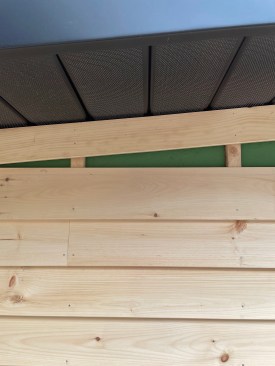
Frieze Board
The final trim component we installed prior to putting siding on the garage was frieze board. The low roof pitch of 1:12 made for very long angle cuts where the siding would meet the frieze. We made those long cuts with a track saw, but it was still difficult to make the angle cuts perfectly. Because the siding was not being caulked and painted, we chose to make a rabbet in the bottom of the frieze to allow the siding to tuck in nicely. This worked well to hide any imperfections, and in hindsight, I wished we had rabbeted all the trim boards. It leaves such a nice, clean look where the siding basically terminates into a shadow.
Installing Clapboards
As with most efficient and successful construction, remodeling, and finishing projects, the prep work is where all of the heavy lifting takes place. Once all the trim, flashing, and furring strips are in place, and the casings and corners are marked using the story pole, the easy part is to start installing the siding.
This build did not have a water table or skirtboard but rather just the first course of siding. We started by ripping a 1-inch-wide “starter strip” off the top of a siding board. Installing this strip behind the first course replicates the cant or angle of having a course below, since there is no full course below the first one. The remainder of the board that we use to make a starter strip can often be used as a finisher higher up the wall.
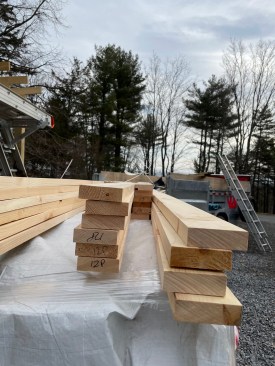
Our strategy for installing siding boards is to use long boards along big sections of wall and use offcuts and shorter pieces between doors and windows. It’s important to be mindful of what lengths were sent from the mill, to develop a plan on how to best use the material and mitigate unnecessary waste. When a single piece of siding can’t be used in a section, we like to snap a chalk line from one story-pole mark to the other to create a reference on the furring strips where the full course will be fastened. I avoid red or blue chalk and opt for baby powder or purple chalk. The latter will not stain anything and can be easily wiped off. Some folks use a slip sheet of tar paper or flashing behind joints, but I don’t find that to be necessary with today’s high-quality WRBs, and especially not over a rainscreen. Any water that infiltrates the assembly should run down the drainage plane and out.
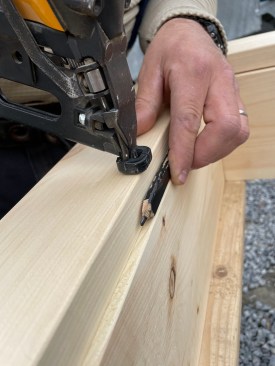
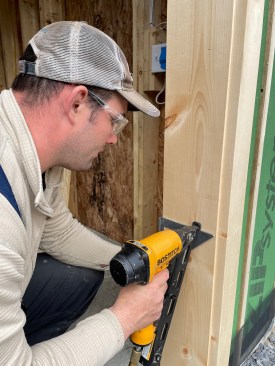
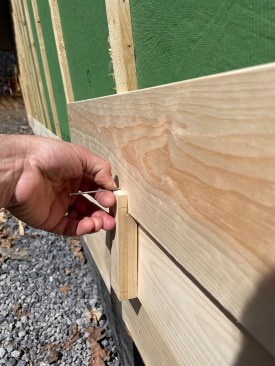
There are several schools of thought when it comes to nail placement on clapboard siding. We use a visible face nail, which can be installed in two main ways. The first is to nail close to the bottom edge of the board, ensuring that the nail punctures and captures the top of the course below. This means that each clapboard will have two fasteners in it—one low in the face and one high from the course above. While this securely fastens the board, it can create some challenges. Removing a damaged board from the middle of the field can be more challenging because there are double the number of nails to pull out. Additionally, and perhaps more importantly, seasonal changes affecting the expansion and contraction across the grain could result in a cracked or broken board. For those two reasons, I prefer an alternative method, which is to nail through the face of the bottom of the board high enough that it drives just above the top of the board below. The course above exerts enough holding pressure to keep the top of the course below tight to the wall, and we eliminate the previously mentioned concerns.
To ensure proper nail placement, we made a small jig that spaces the nail just above the top edge of the course below. While an experienced carpenter may find this to be an unnecessary step, I find it to be helpful. I quickly developed muscle memory to hold the jig and the fastener with my left hand while grabbing my hammer off my belt with my right hand. It’s important to note that as the reveal of the boards changes, so does the nail placement: A larger reveal means a lower nail placement, while a smaller one means a higher placement. We adjust to the reveal by simply scooting the jig up or down while fastening.
For fasteners, we went with 2-inch stainless, ring-shank siding nails. While siding nailers are undoubtedly faster, I continue to find hand-nailing to be superior. A slower pace promotes proper nail placement, and I find it easier to set the nail heads perfectly flush. Hand-nailing, however, causes vibration on the wall from hammering. In a remodeling or re-siding scenario, consider removing hanging pictures from interior walls. Drywall nail-pops can also occur.
I have always found a smooth-face, 20-ounce hammer works best for nailing siding. It has enough oomph behind it to easily drive nails but isn’t so heavy that it becomes laborious to swing all day. Some carpenters prefer a 16-ounce when installing siding because they can swing a lighter hammer faster. And a smooth face is a no-brainer—no one wants waffle marks on their siding from a framing hammer.
As I work my way up the wall installing one course at a time, I vary board lengths so butt joints don’t have a “stepped” look—like I have seen on some production homes clad in vinyl. I prefer a random appearance, similar to a hardwood floor. Creating this look means being thoughtful about being what I call “intentionally unintentional.” We try to use the offcut of the “finisher” board of a course to be the “starter” of the next course above, always moving in the same direction, whether from left to right or right to left.
As we cut and install siding boards, using our story pole as a guide, these are things we stay mindful of:
- To avoid splitting clapboards, predrill for nails near board ends and knots.
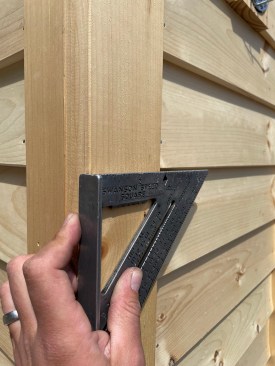
- Use a square to check that courses line up around corners.
- Every few courses, check that the siding is level.
- Keep tabs on our stock of material lengths and waste factor.
- Reserve the straightest boards for starters.
- Beware of creep. One-sixteenth inch out of level or not in line with story pole marks isn’t a big deal, but repeated 1/16-inch mistakes compound quickly.
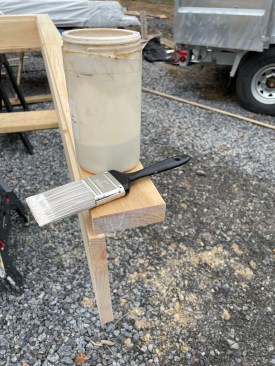
The installed clapboards will be left to weather to gray without any applied finish.
Wrapping up the siding job was pretty simple. When we began running the siding, we ripped the top of a fresh piece of siding to create a starter strip. At this point, we took the remainder of that board and used it as a finisher. We ripped the final course at the top of the wall to the width that was prescribed by our story board and butted it up tight to the underside of the frieze board. Sometimes, the top of the last piece needs an additional nail because there is no course above it to hold it tight to the wall. Here, we used a smaller, trim-head stainless steel nail.
All photos by the author.


