Siding Grades
Moisture Content
Nearly all wood siding shrinks somewhat after installation. If the wood is too wet when installed, excessive shrinkage can lead to splitting, warping, cupping, or paint checking. Problems can be minimized by specifying “S-Dry” material, which contains no more than 19% moisture, or by using premium-grade materials.
MC on Delivery
Unseasoned or green wood has a moisture content (MC) of more than 19%. Dry wood has a maximum moisture content of 15% or 19% depending upon grade. Premium grades are dried to MC 15, meaning that the wood has 15% moisture content or less (and that 85% of the pieces are dried to 12% or less). Dry siding will acclimate more quickly to its final surroundings and will have less dimensional change, before or after installation, than unseasoned or green siding.
MC at Installation
Condition all board siding. Moisture content will vary from piece to piece, but the material should average about 12% MC at the time of installation (individual pieces ranging from 9% to 14%). In dry southwestern states, siding should average 9% MC.
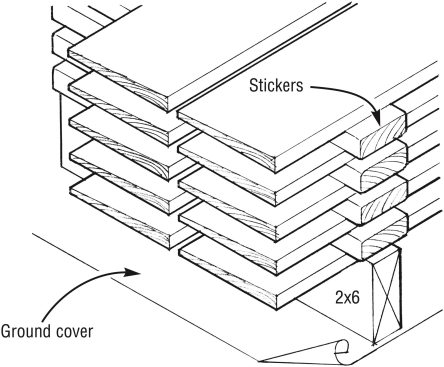
It’s best to get any wood siding at least a week early and store it at the job site to let it adjust to the site’s humidity. Extend drying period to 30 days for unseasoned siding or during very humid seasons. Keep siding out of weather in the driest space available. Break apart bundles and restack the material on evenly spaced, vertically aligned stickers to allow air to circulate freely. If stacked over the ground or concrete, lay poly down first, and then use 2x6s to elevate the first layer. Stack siding in a dry area where plenty of air can flow through the stack, and protect it from weather.
Board Siding Patterns
Pattern is more than just an aesthetic choice. Certain patterns respond better than others to climate changes (Board Siding Patterns, below).
Pattern Width
Narrow patterns perform best because there is less movement from wet to dry periods and with seasonal climate changes.
Wide patterns will cover an area faster, thus reducing labor costs, but any savings may be offset by callbacks due to warping, cupping, or checking. Avoid patterns over 8 in. in width.
Horizontal Siding
Bevel siding is the most forgiving pattern because it’s designed to shed water, and cross-grain shrinkage will not expose the wall beneath.
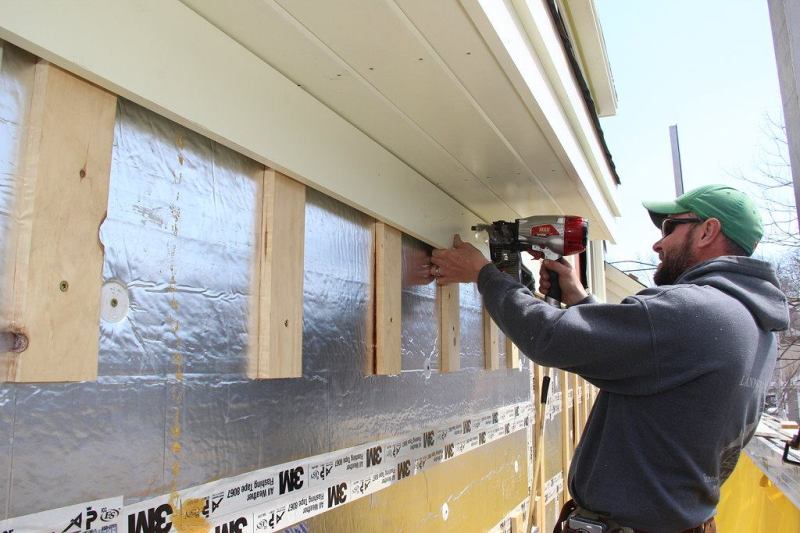
- To avoid siding failures, install all wood siding over an air gap created by battens or another spacing material.
- Problems can develop from too much overlap. Buy bevel siding only 3/4- to 1-in. wider than the desired reveal. A large overlap may require double nailing (which can cause splitting) or nailing through the thinnest part of the board (which can lead to excessive cupping).
Installing Horizontal Siding
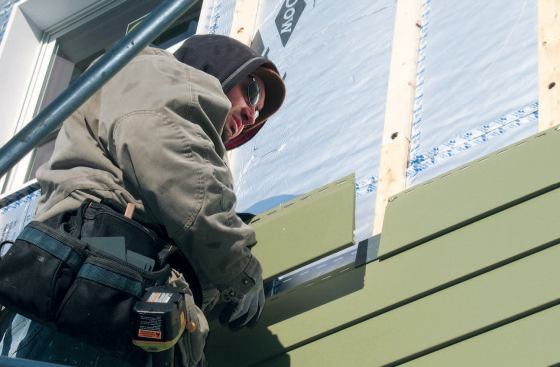
See this slideshow for horizontal siding best practices and step-by-step instructions.
Using a Story Pole for Variable Reveals
Variable reveals can be laid out with a story pole, usually made from strapping. See this slideshow for best practices and instructions.
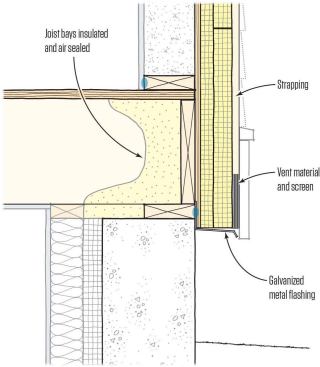
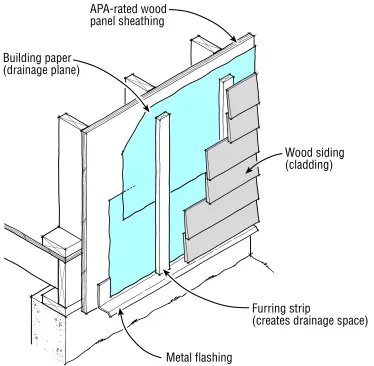
Drainage Plane
The easiest way to create a drainage plane is to use a self-draining rainscreen mat, such as Home Slicker® (Benjamin Obdyke; 800/346-7655; www.obdyke.com). This material is thin enough that windows, doors, and corners don’t need to be packed out when used with 5/4 trim stock.
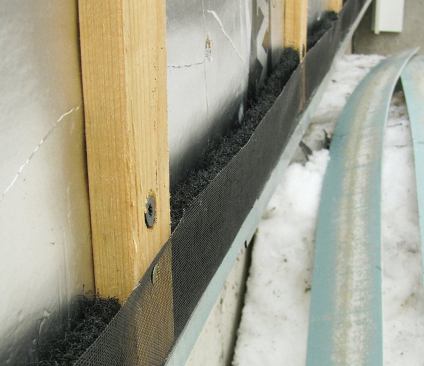
Also, siding may be installed over vertical battens spaced 16- to 24-in. apart to create the air space (Drainage Plane for Board Siding, below). In this case, door and window jambs must be extended to accommodate the added thickness, and a vent strip or screen should also be included over weep channels to keep out insects (Drainage Plane Details, below).
Vertical Siding
Installing vertical siding over battens to create a rainscreen can be problematic. Battens must be run horizontally to hold the siding boards, but then the channels won’t drain. Install vertical siding over a self-draining rainscreen backing material. See the figure below for vertical installation details.
Vertical T&G siding is more weatherproof than board-and-batten or edged-butted boards. However, all vertical siding is more prone to leaks than most horizontal board siding. Take extra care with sheathing wrap and flashing behind all vertical siding.
Extend the lower ends of vertical siding below the sheathing to allow water to drain. To prevent wicking and water staining, seal the bottom end-grain of vertical siding with water repellent.
Diagonal Board Siding
Diagonal siding is not recommended. The joints in diagonal siding act like gutters, collecting and channeling water downward at an angle against the sides of windows, doorways, corner boards, and any horizontal or vertical piece that stands in its path. Without very careful flashing and drainage plane preparation, the runoff will gush into the building at these points.
Nailing Checklist
Proper nailing is essential to the performance of any wood siding.
- Always use non-corrosive fasteners.
- Drive siding nails flush with the surface of the siding. Nails that are set and filled are prone to popping with any movement or shrinkage in the wall framing, and may promote cupping and splitting. However, casing nails used to fasten exterior trim should be set and filled.
- Nails should penetrate at least 1- to 1 1/2-in. into studs or blocking.
- Ring-shank or spiral-shank siding nails are recommended for increased holding power.
- Never double-nail solid wood siding materials. If the siding is pinned along both edges, it is likely to split. See Board Siding Patterns, above, for proper nailing configurations for different siding patterns.
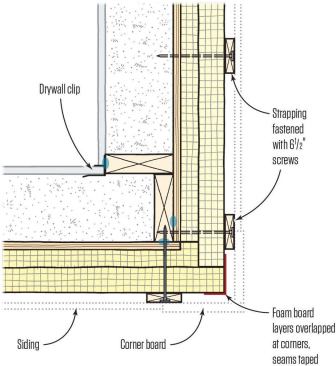
Board Siding Over Foam
Siding applied directly over rigid insulated sheathing has a history of failures because moisture gets trapped between the siding and the foam. Continued wetting and drying can lead to paint failure and cause siding to cup and curl.
Rainscreen over Foam