
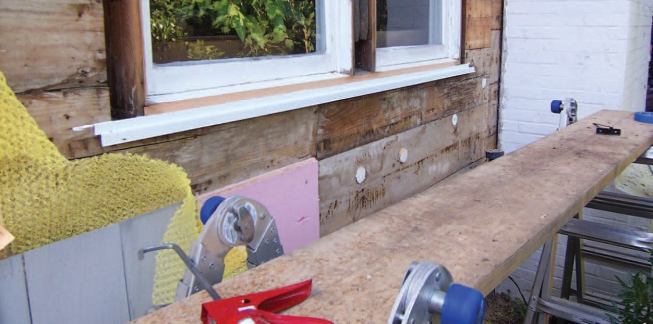

My clients’ 80-year-old Rhode Island home was suffering from chronic peeling paint, deteriorating shingles, and high energy bills. It was a prime candidate for new siding installed over a layer of rigid foam insulation. The standard 2×4 stud walls were already insulated with blown cellulose, but we estimated we could improve their thermal performance by almost 50 percent just by retrofitting an inch of R-5 XPS rigid foam to the exterior. The new foam also promised to significantly cut down on air infiltration — a big problem that we discovered during our initial blower-door testing — without overly complicating the installation of new red-cedar shingles.
Although the house could have used new high-performance replacement windows, too, the budget was already exhausted. Fortunately, the existing 6-over-1 double-hung windows and triple-track aluminum storms were in decent condition — but even with sizeable back band moldings, the casings and sills weren’t really deep enough to accommodate an inch of foam plus the 1/4-inch-thick Home Slicker (benjaminobdyke.com, 800/346-7655) that we planned to install underneath the shingles.
Rather than try to fit the foam around the windows, we decided it would be better to remove the old casings along with the existing shingles and tar paper and retrim the windows with low-maintenance PVC trim assembled to look just like the original. That way, we’d be able to insulate the sash-weight pockets and get the tricky drainage plane, air barrier, and flashing details around the windows right without changing the outward appearance of the home.
Window Prep
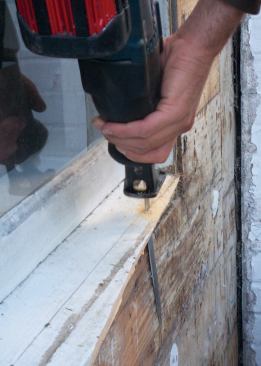
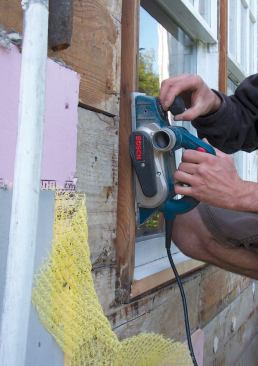
There’s no easy way to extend existing sills by an inch and make them look good, so we decided to trim the old ones flush with the sheathing and then add new stock sills padded out with extensions made from 5/4 PVC trim. We made our rough cuts with a reciprocating saw and cleaned up the sills with a power plane.
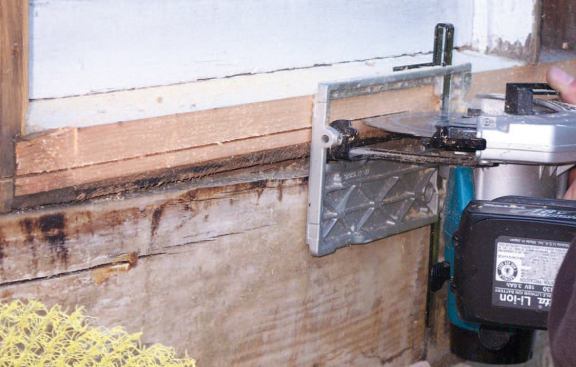
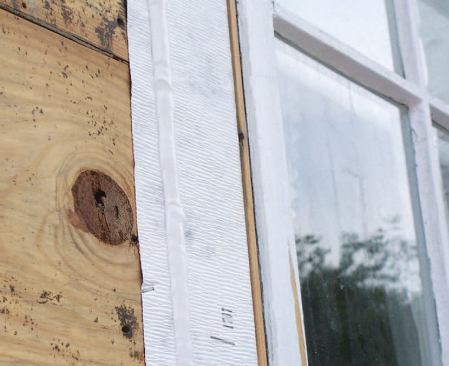
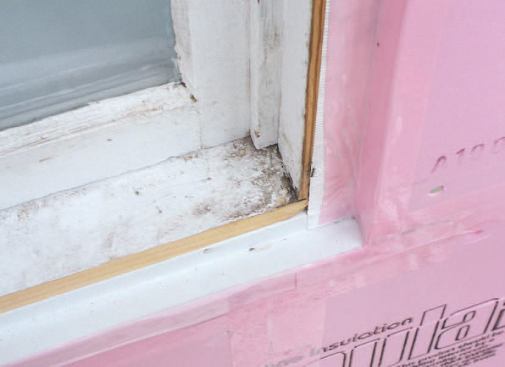
The old jambs had tongues that fit into dadoes cut into the backs of the original casings. We planed the tongues down until they were about 1/8 inch proud of the edge of the jambs, so that the paint-encrusted sash wouldn’t bind up against the new casings, which would act as stops for the top sash. Next we ripped a 1/2-inch-deep kerf into the face of each sill with a circular saw equipped with an edge guide. The kerf extends slightly beyond the window into the sheathing on either side of the sill and receives a custom-bent flashing made from aluminum coil stock. We used Bond&Fill Flex (877/822-4615, bondfill.com) to bed the flashing in the kerf. Though expensive — more than $12 per 10.1-ounce tube — this sealant is extremely tenacious, flexible, and paintable. The flashing projects an inch away from the face of the sheathing to overlap the insulation underneath.
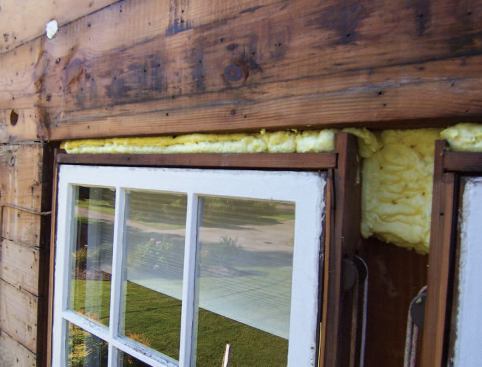
The sash-weight pockets on old windows like these are cavernous, but it’s hard to insulate them without interfering with the weights and pulleys. We did the best we could with strips of rigid foam and our foam gun, concentrating mainly on air-sealing the cavities.
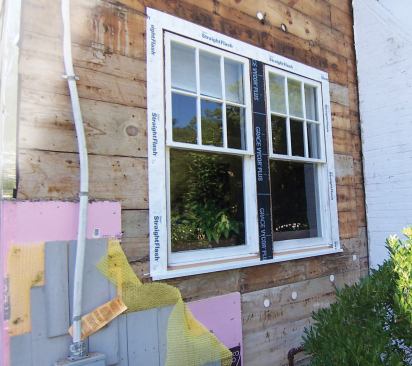
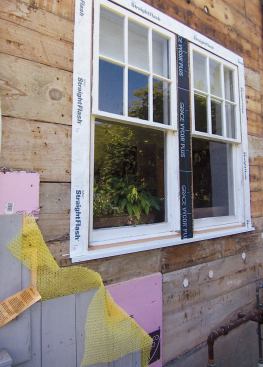
On most of the windows, we flashed the jambs to the sheathing with Grace Vycor Plus, an asphalt-based self-adhering flashing. We also stapled the Vycor to the jambs. While Vycor is fine here, because the adhesive doesn’t contact the foam, it doesn’t seem to be compatible with XPS insulation. Petroleum products don’t mix well with some plastics, and we’ve noticed significant discoloration with some housewraps and rigid foams that have come in contact with Vycor. On the window shown on these pages — the last one on the job — we also used DuPont’s butyl-based StraightFlash, but only because we ran out of Vycor. StraightFlash is about four times more expensive than Vycor, but has better adhesion and is compatible with Tyvek and XPS foam; normally we use it to tape head flashings to the foam.


