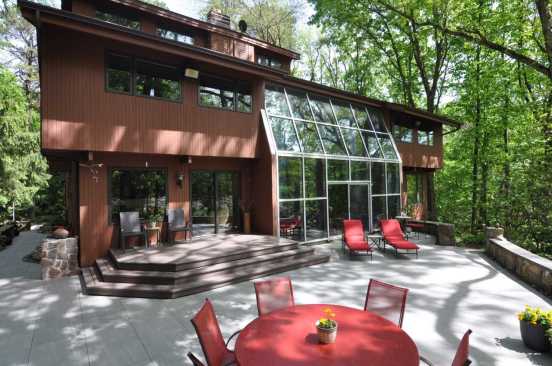
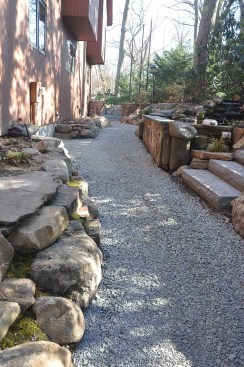
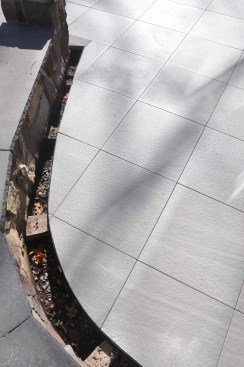
This 1982 New Jersey house was built on a sloping one-acre, heavily wooded lot. The area immediately surrounding the house had previously been hardscaped. The existing patio and walkways (see photos, below) along the rear and sides of the home consisted of 8-by-4-inch concrete pavers set in rock dust on a base of crushed stone over sandy soil, with the joints between the pavers left open for water drainage. Over time, the joints would become clogged with moss, weeds, and debris and require periodic cleaning with a power washer. The pavers had also developed uneven surfaces, where water puddled after every rain.
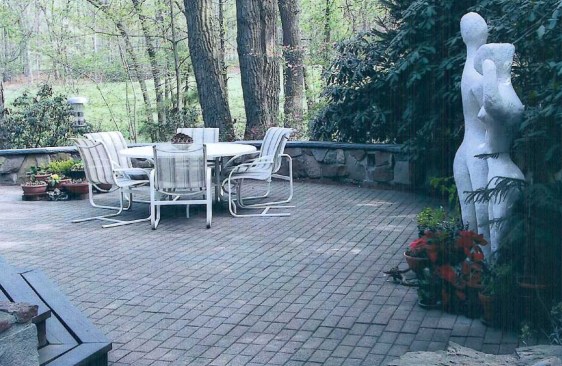
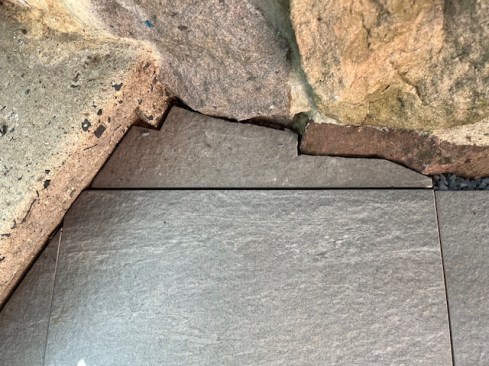
Before. The concrete pavers on the existing patio …
… and walkways had settled, leaving depressions where water would puddle.
The patio and walkways were obviously in need of a facelift. We decided to replace the old pavers with large-format porcelain stoneware tiles, which are available in 20mm (3/4 inch) thicknesses for outdoor paving. The quickest and least costly solution would have been to install the new tiles over the existing pavers, but the patio had no pitch, so water drainage was marginal. To fix the drainage problem, I decided to excavate to the old gravel base and add clean gravel before retiling. To complete the scope of work, we hired Landscaping by Craig (landscapingbycraig.com). Although the crew had never used porcelain stoneware pavers, company owner Craig Mandell agreed to take on the project with my guidance.
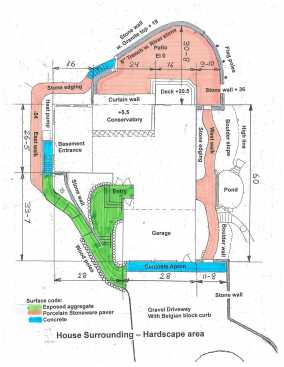
The author’s plan shows which areas would be resurfaced with porcelain tile.
Planning and Design
For the new surface, I selected 600mm-by-600mm-by-20mm Caesar Aextra20 Graustein porcelain stoneware pavers (caesarceramicsusa.com). The pavers look and feel like granite and have a textured, anti-slip surface. They’re rectified for precise installation; putting them in place is more like tile setting than like installing typical hardscaping. They also weigh just 36 pounds each—compared with 108 pounds for a 2 1/4-inch-thick concrete paver—so they can be handled by a single worker.
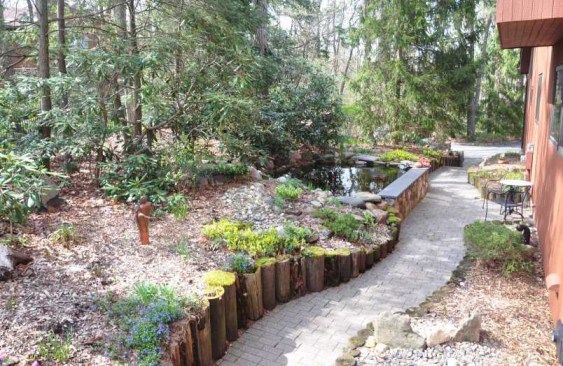
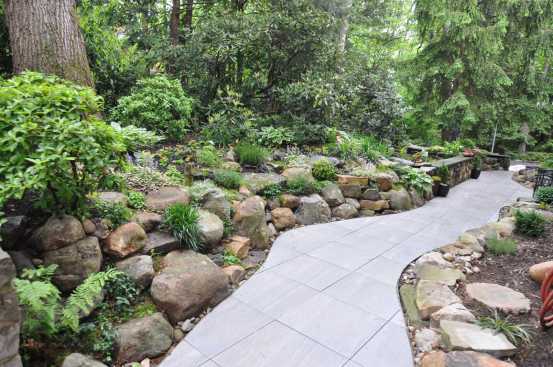
With the exception of a short stone wall in front of a 100-square-foot fish pond, the walkway on the west side of the house had been edged mostly with wood poles. Eight-inch-diameter landscaping poles ran along the edge next to the house, and salvaged power poles ran along the opposite edge at the base of a small hill. The poles were deteriorating, so we decided to remove them and use natural stone instead. For the hill side of the walkway, I sketched a design using boulders with small plantings between them.
The edges of the patio and walkways would be lined with powder-coated steel edging, which can be bent around curves and held in place with long stakes. This type of edging was already in place along a stone wall that surrounded the back patio, but we had to extend it vertically because the new surface would be higher than the old one (see photos, below). The metal makes for a neat look (the pavers need not be cut to fit the irregular stone wall surface) and creates a gravel drainage channel between the tiles and retaining walls.
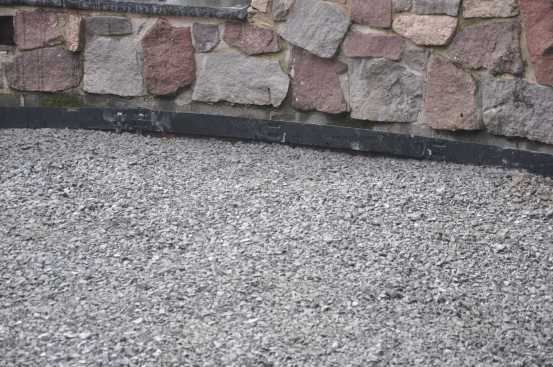
Steel edging was already in place along one stone wall.
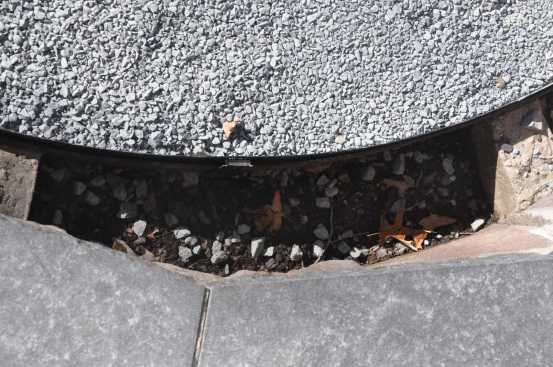
However, this edging had to be reset to match the new surface elevation.
Demolition and Prep Work
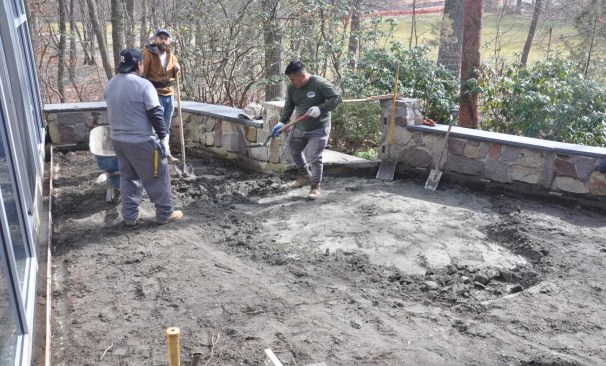
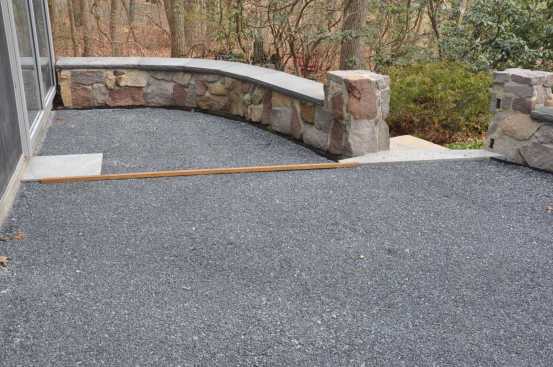
Demolition consisted of removing the wood steps leading to the home’s deck, the wood poles along the west walkway, and all the concrete pavers. Workers also removed the rock-dust bedding (below), leaving a clean gravel base.
Because access was limited, all work had to be done manually; the crew carted removed material to the driveway and loaded it onto trucks for recycling or disposal.
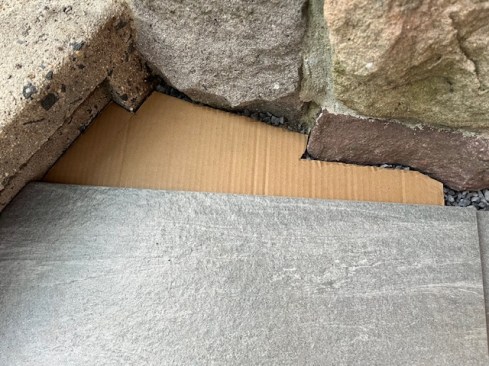
The patio has a free-form D-shape, with a stone wall along the curved part of the D. In the stone wall are two openings, to which the author added 2-inch-thick bluestone sill plates.
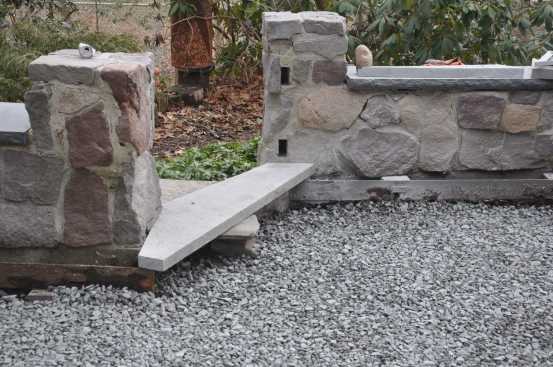
One of the openings (see photo, above) had an angular shape that required multiple cuts to the bluestone; these were laid out using a cardboard template.
On the west walkway, the crew redid the hill retention with boulders placed on the steep slope. They also replaced the original timber steps leading to the east walk with bluestone (see photo, left).
Creating a Level Base
A well-prepared base and a perfectly leveled bedding layer are preconditions for a neat installation. The design of the gravel base depends on the site, soil, and climate to ensure good drainage and stable conditions for setting pavers.
The first step was to complete the steel edging. Where new edging was needed, the crew used two different installation methods. For the patio and west walk, they placed some base gravel, installed the edge plates at the correct elevation, and added the remaining gravel. For the east walk, they set the pavers on a wide gravel base before embedding the edge plates into the gravel. Then, they removed the gravel outside of the plates.
The second option proved less than ideal: Pounding down the edge plates after the tiles were in place caused voids to form below the tiles’ edges. Those tiles had to be lifted out with a spreader tool, the gravel leveled, and the pavers reset (see photo, below left). The crew had a stable substratum to work from, on which we added a base layer of clean, open-graded 3/4-inch gravel, compacted in layers. This was topped with a 1 1/2-inch-thick bedding layer of 3/8-inch split gravel.

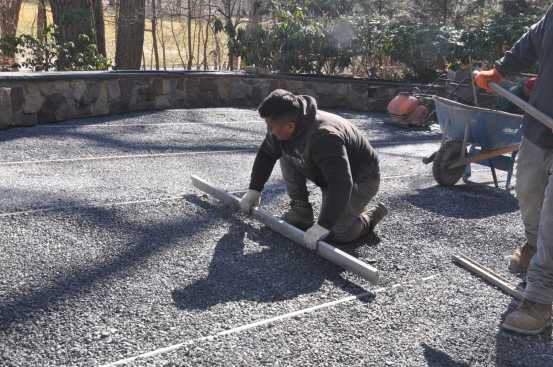
Workers had already used a transit to ensure that the edge plates at the patio periphery were all at the same level. When it was time to level the gravel, they wrapped strings around the plates and stretched them from one side of the patio to the other. They worked pipes into the gravel, checked the pipes’ elevations against the strings, and added more gravel in spots where it was needed to level the pipes. They then used a 2-by as a screed, pulling it across the pipes to level the gravel. Finally, they removed the pipes and filled the grooves where the pipes had been (see photo, above right).
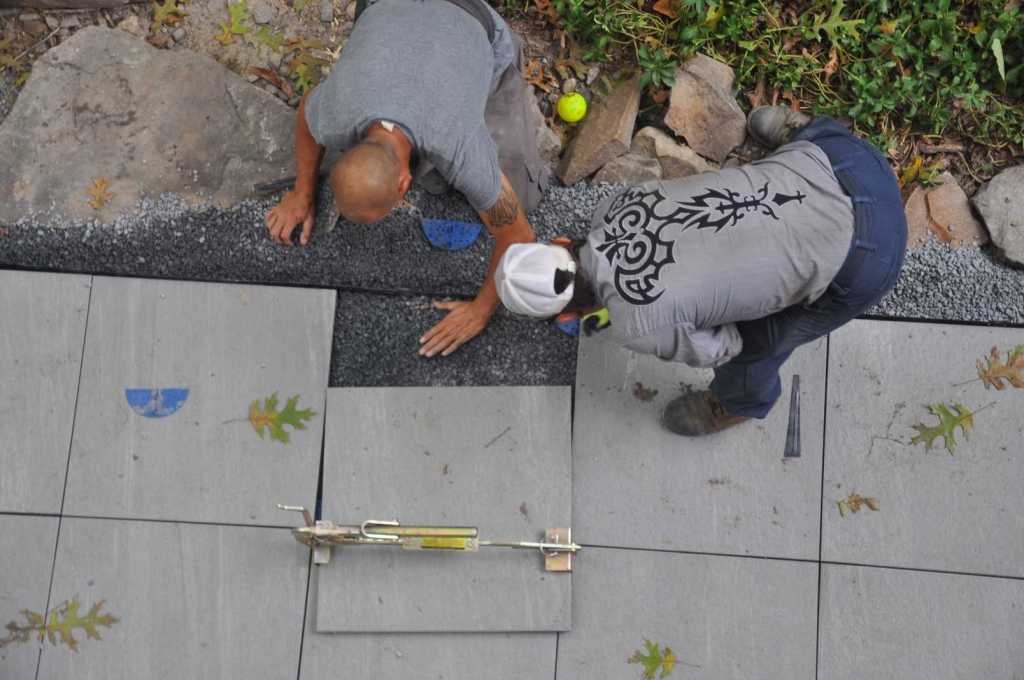
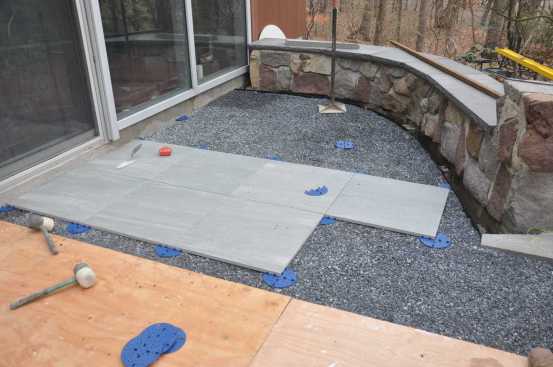
The Importance of Spacers
Paver setting is precision work, but the use of plastic spacer plates where the corners of the pavers intersect makes it relatively easy (see photos, below). The spacers need to be pushed snug against the edge of a paver before the next paver is put into place. The crew used rubber mallets at the paver corners to sink the thin spacer plates into the bedding gravel until the entire paver rested firmly on the gravel. This ensured that there would be no “hollow” sounds when someone walked on it.
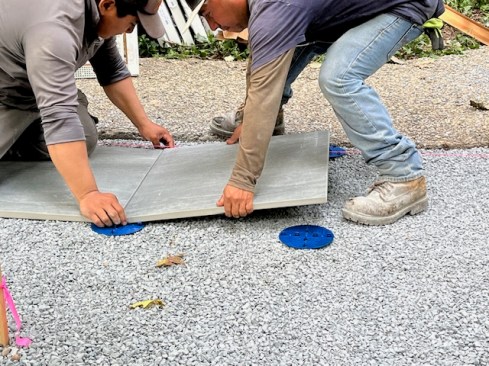
All four corners of each paver need to be set onto spacer plates.
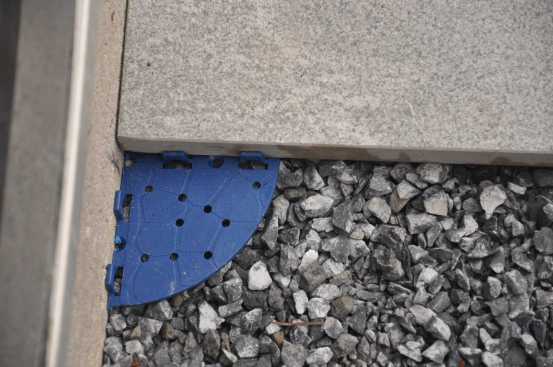
The plates consist of a 6-inch-diameter plate to set the pavers on and 1/8-inch stub-ups for spacing joints. They can be cut into halves or quarters as needed.
If the surfaces of adjacent pavers aren’t perfectly flush, hammering them with a rubber mallet may solve the problem. Otherwise, it may be necessary to lift the paver, level the gravel, and reset it.
We filled small gaps between pavers and steel edging with TEC slate gray sanded Caulk 850 from a cartridge. This helped secure the paver periphery, especially in spots with small cut pieces.
Cutting Pavers
With the right tools and a bit of practice, we were able to cut the outdoor porcelain pavers with ease. For clean, precise cuts, we used a continuous-rim diamond cutting blade.
For curved cuts (see photo, left), putting the blade on a hand-held tile saw or an angle grinder worked well.
For linear cuts, we used a diamond blade on a table saw.
The smooth steel edging allowed a close fit with simple paver cuts.
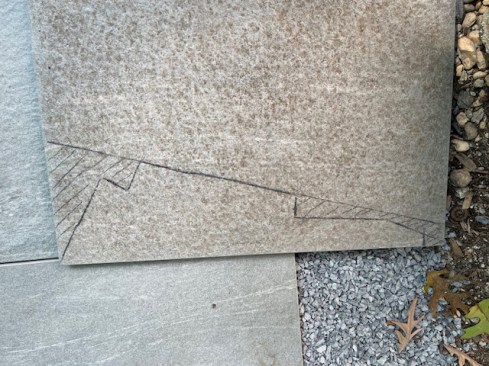
Where tiles needed to be cut to fit irregular stone walls, we made cardboard templates and transferred the lines to the pavers (see photos, below). The cut tiles were set in a masonry adhesive added to the spacer plates.
Wet cutting is best. Dry cutting porcelain stoneware creates a crystalline silica dust that’s harmful if inhaled, especially with prolonged exposure. Proper respiratory and eye protection need to be worn. In fact, my contractor started dry cutting with a gasoline-powered saw and a large-diameter blade but stopped when it spread too much dust into the air and caused some paver chipping.
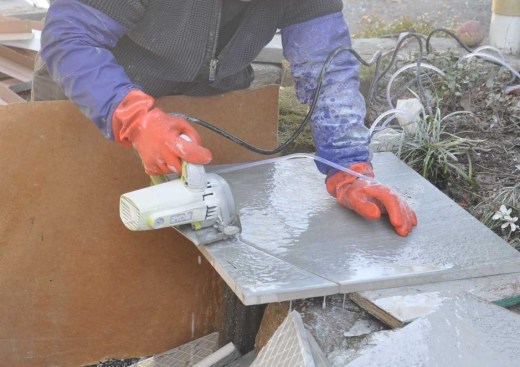
Switching to a wet tile saw with a 4-inch continuous rim blade produced clean cuts and solved the dust issue. Be aware that the sludge that forms during wet cutting may obscure the cut mark. A solution is to dry-scar along the cut mark and then turn on the water for cutting.
Layout and Tile Setting
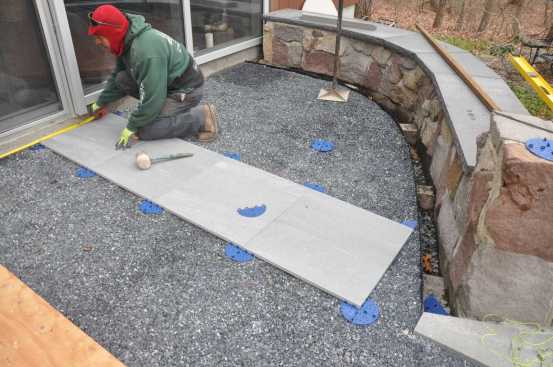
For a modern look, the author arranged the tiles in a simple grid pattern.
The starting line for the patio ran perpendicular to the house foundation toward the gate pillars in the stone wall.
After setting the first paver (above left) along the starting line, the crew set the rest of the first row of pavers (below left). Additional rows were then installed (below right).
For the west walk, the starting line ran along the retaining wall in front of the fish pond.
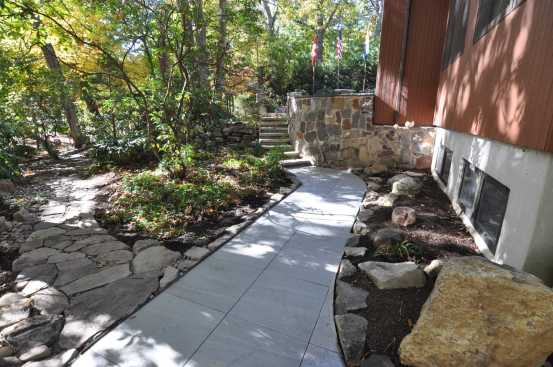
For the east walk, the starting line ran along the basement stairwell. When calculating the accumulated length of installed pavers, we needed to work with the rectified paver dimensions (which are less than the nominal dimensions) and add the joint spacer width.
Finish and Maintenance
After completing the paver installation, I built new steps to the existing redwood deck—three steps on three sides, as shown in the photo below.
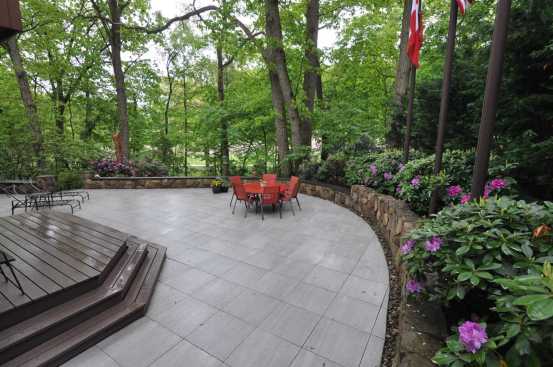
Gaps between the new pavers and the stone walls were filled with river stone or pebbles, depending on the location. We added plants, which also help hold the soil in place, to the “stone hill” next to the west walkway.
At the east walk, large stones on the raised bed along the house provide a minimalist look. Salvaged flagstone was reused for the beginning of a nature walk leading to the adjacent woods. All disturbed areas were restored.
Porcelain stoneware pavers require minimal maintenance. They are nonporous, do not need sealing, and do not stain like natural stone or concrete do. They’re easily cleaned with a garden hose, and dirt can be scrubbed off with a bristle broom and flushed with water. If cleaning products are used, make sure they don’t leave a residue behind that could aid dirt adherence. For power washing, a modest pressure setting with a wide-angle nozzle spray is suggested.
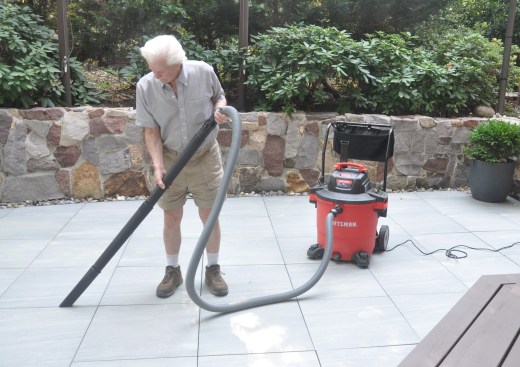
I decided to leave the narrow paver joints open for drainage. Over time, debris may accumulate in them, but it can be removed using a shop vacuum with a narrow nozzle guided along the joint. If necessary, caked build-up may be scraped loose with a saw blade.
Bottom Line
As my first project with porcelain stoneware paving, this was a learning experience for all involved. I carefully planned the project, prepared detailed drawings, determined and ordered the paver and spacer quantity, wrote specific installation instructions for the subcontractor and crew, and provided guidance where necessary.
I can’t stress enough how important the preparation of the base, the edging installation, and the leveling of the gravel surface are for a successful project. The use of corner spacers makes for a perfectly aligned and level surface.
The result of this project is that the original rustic look has been replaced with a modern appearance for a moderate cost. In the unlikely event that a paver gets damaged, it can be simply lifted out with a spreader tool and a new paver set in its place.


