
A multilayer cementitious coating provides a walkable waterproof…
In a past job managing condo associations, I spent a lot of time dealing with damage caused by leaks in decks over living spaces. The damage was often quite spectacular. In one case, a seemingly minor flashing error led to rotted framing below eight decks. It cost $114,000 to repair the decks and structural members. That episode convinced me there was a future for contractors who knew how to properly waterproof decks, so I went to work for a coating company. A few years later, I opened my own deck waterproofing business in Arroyo Grande, Calif.
There are about a dozen cementitious waterproofing systems that can be applied over wood framing. They are distributed primarily in the West, a region where there is significant demand for fire-rated waterproof decks. We use a product called Desert Crete (Hill Brothers Chemical Co., 800/994-8801, desertbrand.com), because its maker has been in business for 80 years and its products have a good track record.
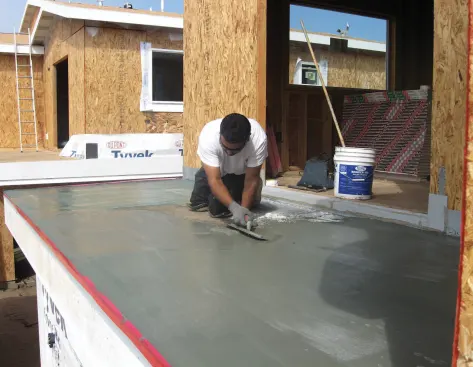
Desert Crete is a multilayer cementitious system whose main components are polymer modified cement and a fiberglass-reinforced acrylic resin membrane. The waterproof membrane is sandwiched between layers of the cement, which provides a tough and durable Class A and one-hour fire-rated traffic surface when installed to the manufacturer’s specifications.
That three-layer sandwich is then covered with a suitable finish material. If the framing below is sufficiently stiff, Desert Crete can be used as waterproofing under tile or stamped concrete. More typically, though, we apply a colored textured coating. Although the project described here involved new construction, we frequently install the product on existing decks provided that the framing and sheathing are in good condition.
View Drawing, p. 2
-
DownloadDry Deck Over Living S…
 (1079kb)
Waterproofing Details
Use the Right Substrate
The deck joists should be sized and spaced to carry the expected load and installed in such a way that the surface slopes at least 1/4 inch per foot toward where it is supposed to drain. I prefer to see 3/4-inch plywood on my jobs, although 5/8-inch plywood is also acceptable. Either way, the sheathing must be blocked at the edges and have a minimum 1/8-inch gap between sheets. If the sheets are not properly gapped, we ask the contractor to saw a kerf between the pieces. Oriented strand board (OSB) is not an acceptable substrate for a waterproof deck — it will void the manufacturer’s warranty and negate the fire rating of the assembly.
There’s a saying in this business: “If you cover it, you own it.” To avoid taking ownership of bad work, I carefully inspect the deck and surrounding walls at the start of every job, using a printed checklist to ensure that all the existing work is up to standard. Occasionally a GC will ask me to waterproof a deck after the doors are installed and the weather-resistive barrier and siding are on. There is simply no way to properly flash such a deck, so unless the GC is willing to remove the doors and strip off some of the siding, I leave those jobs to someone else.
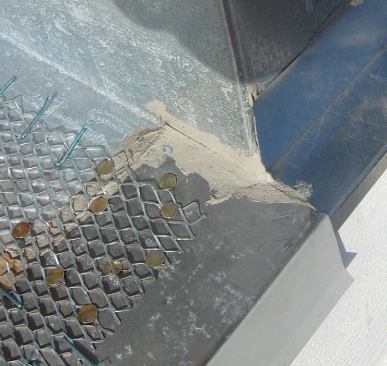
Metal Flashings
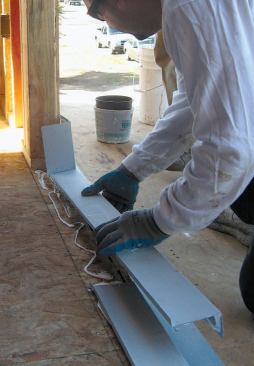
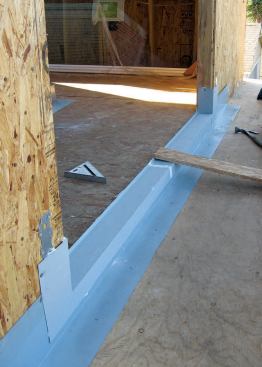
A correctly waterproofed deck requires at least three types of flashing: L-shaped metal at the junction between wall and deck, a gravel stop drip at the edge, and pan flashing under any doors. Decks that are entirely enclosed by pony walls will also require floor drains or scuppers (or both).
Code-approved metal deck flashings include 16-ounce copper and galvanized steel of at least 26 gauge. Standard galvanized metal must be cleaned and primed before use, so we prefer bonderized steel, which is galvanized material that has been factory treated for improved adhesion of paint and other coatings. We get our flashings from a sheet-metal shop that specializes in scuppers, drains, and other types of deck flashing.
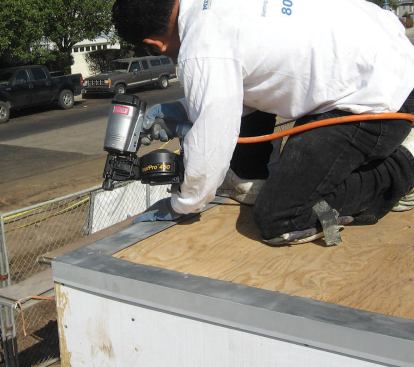
All flashings must lie tight to the substrate and have continuous support from behind. If the house isn’t sheathed — a common detail on older homes in this area — I’ll ask the GC to install horizontal blocking at the level of the wall flashing. Galvanized flashings are fastened with galvanized ring or roofing nails. Copper flashings can be fastened with copper nails or stainless steel ring nails. We prefer stainless fasteners because they are available for use in coil guns.
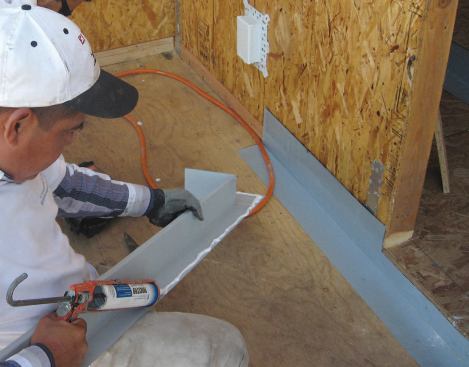
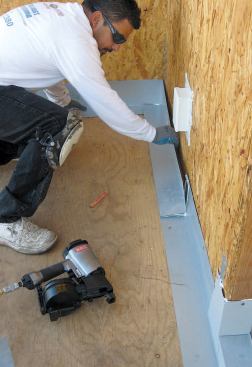
Door pans. Our first step is to install an L-shaped wall flashing below door openings and lap a sill pan over top. The horizontal leg of the wall flashing is 4 inches wide, and the 6-inch vertical leg is notched at the door opening so it finishes flush with the interior subfloor.
Although the sill pan could be made as a single piece, that would involve expensive custom work. Instead, we have the sheet-metal shop provide us with a simpler two-piece pan that can be adjusted to fit the opening. The two halves of the pan are installed over continuous beads of polyurethane caulk, such as Moistop Sealant (Fortifiber Building Systems Group, 800/773-4777, fortifiber.com), Sikaflex-1a (Sika Corp., 800/933-7452, sikaconstruction.com), or RainBuster 900 (Top Industrial, 800/473-1617, topindustrial.com). The pieces overlap one another near the center of the opening, and are fastened in place with nails driven through the vertical flanges and into the trimmers on either side of the opening, so there are no penetrations in or near the bottom of the pan.
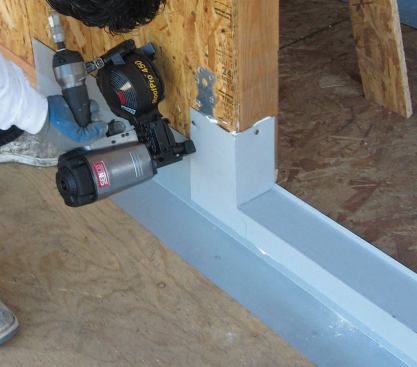
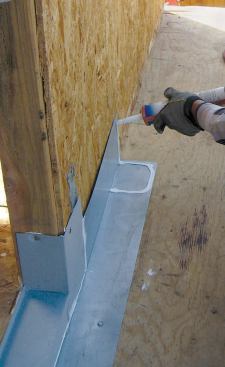
Flashing the perimeter. Once the door pan is in place, we install L-shaped flashings over the remaining joints between walls and deck. The horizontal leg is slit at inside and outside corners to permit the required bend in the vertical leg. All laps are sealed with double beads of polyurethane caulk.
The vertical leg of the flashing is fastened to the wall with a line of nails on about 8-inch centers, which are positioned just below its top edge to prevent leaks. Nails in the horizontal leg are placed 3 to 4 inches apart in a W-shaped pattern. Leaks in this area are not a concern because the nail penetrations are covered by the waterproof coating.
Finally, the open edge of the deck is covered with a low-rise gravel stop, which is a drip flashing that extends 3 or more inches onto the deck sheathing and 2 or more onto the fascia below. A 1/8-inch lip on top of this stop allows us to trowel an even thickness of the coating material all the way out to the edge.


