As a business owner, I try to minimize marketing and warranty costs. The most sensible way to do that is to build a finished product that looks as good in ten years as it does right after completion. A good looking job provides free advertising for my company, and the low maintenance of a durable exterior cuts down on callbacks and increases customer satisfaction.
I make it a policy to return to past projects regularly to see how the materials and techniques I use are faring. This practice has sometimes taught me more than I really wanted to know, but at least I’ve learned which exterior details do and don’t work over time.
Good exterior work should weather gracefully and require a minimum of maintenance. Paint should gradually wear off rather than peel off, and discoloration from wear and grime should be even and unremarkable. Wood should never rot — where there is rot, there is poor craftsmanship or poor design. A durable exterior will need rejuvenation only every ten years or so, and even then the work should be limited to simple, inexpensive preventive maintenance.
Flashing and Caulk
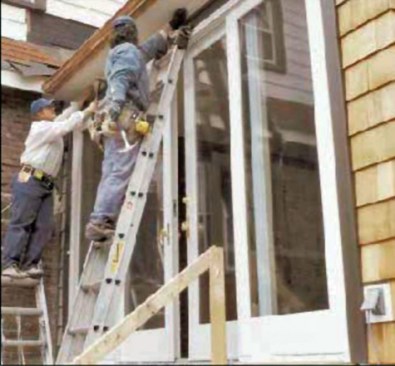
One key to long-lasting exterior finish details is proper flashing. Generally speaking, any piece of wood that sets more level than 45 degrees should be flashed. Along skirt boards and cornice returns, I like to use lead flashing rather than water table or aluminum flashing because it performs well and ends up looking better in the long run. Cornice returns need flashing that continuously covers their entire tops and runs up and under the siding. And, although stock flashing profiles are good for many applications, I always have a metal brake on my job sites so that we can bend custom flashing when we need to.
One of the most common flashing failures I see is at the top of wall openings. When windows and doors are trimmed out, make sure that metal flashing caps off the trim to divert water that hits the siding. Behind the siding, make sure that the building paper overlaps this flashing. One related problem I sometimes see is siding that has been installed tightly against the window trim flashing or the skirt flashing. In these cases, the trim bends the flashing inwards so that it forms a trough where water either gets trapped or drains out towards the vulnerable joints at the end of the flashing. To prevent problems, hold the siding up and away from the corner of the flashing. For even better results, bend flashing to 95 or 100 degrees to ensure that water flows off the front edge.
Minimize caulking. If a joint doesn’t look good without caulk, it will probably end up looking worse with caulk. Apart from being just about impossible to install well enough to act as a longterm water barrier, caulk can trap as much water in as it keeps out.
While most of us know how caulk is supposed to be applied, few of us actually take the time and effort to do the job right. The result is an awful lot of wishful thinking, wasted effort, and hideous joints. It is far better to detail your work in such a way that it doesn’t need caulk. The most obvious way to minimize caulking is to install even joints between pieces so they look good with no caulking at all.
Although I’m tempted to dismiss most uses of caulk as a band-aid approach to construction detailing, it’s inevitably used. You’ll do well, though, if you can limit caulk to uses where it acts as a behind-the-scenes sealant. Caulk works best when carefully applied to narrow joints between parallel surfaces that have been prepped with backer rod. It does not work at all when applied on top of an inside corner joint — which, of course, is how 90% of all caulk is applied.
Keep Joints Simple
My rule of thumb is to avoid fancy joints when installing exterior trim. Although I do advocate using scarf joints for corner boards and rakes, I steer clear of laps and rabbets. While these more intricate joints can increase strength and alignment in cabinetry, in exterior work they decrease durability by increasing the surface area and complexity of a joint. Joint strength and alignment are not problems with exterior details. Instead, the main objective is to avoid nooks and crannies where moisture can sit and collect.

Figure 1. Miter joints stay tight only when temperature and humidity match the day they were installed. When the weather changes, miters tend to open up and allow water to get in and cause rot.
Miters should be avoided because they fit tightly only at the humidity and temperature conditions at which they were first installed. In my New England climate, this is perhaps 25% of the time. The rest of the time, the joint is slightly open and the endgrain soaks up moisture like a sponge (see Figure 1, above). Premature paint failure and rot result. Try using butt joints that don’t really butt — square ends with a 1/8-inch space between them. Spacing butt joints prevents water from getting trapped and will allow joints to dry out faster. Believe me, it requires as much skill and time to do a porch and stair with rigidly consistent 1/8-inch reveals between finish pieces as it does to do it with tight miters, so this should not be viewed as cheating. Furthermore, the 1/8-inch reveals will look good long after the “tight” miters are rotting and peeling.
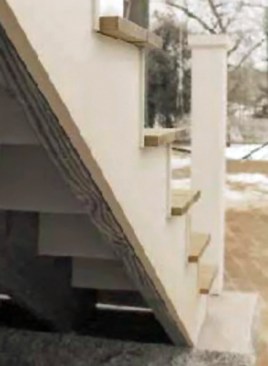
Figure 2. Avoid miter joints on porch and deck stair trim. Instead, run stair risers long and butt the skirt board into the risers.
There are also other trim-out tricks that avoid miter joints. For example, unlike interior stairs, which almost always have mitered joints between risers and an outer skirt board, the risers on a porch stairway can run long past the skirt (Figure 2, right).
On corner boards and other wide trim, it’s important to craft vertical and horizontal intersections in ways that prevent moisture from penetrating and getting trapped behind the exterior surfaces. I’ve found that stopping a vertical corner board on top of a properly flashed skirt board makes for a more durable detail than the other way around. With this detail, it’s important to keep a 1/8-inch space between the bottom of the corner board and the skirt flashing. A shallow back-cut will also help prevent wicking of moisture. The problem with corner boards that run down past the skirt is that water ends up getting into the butt end of the skirt. From there, moisture soaks the sheathing and creeps upwards.
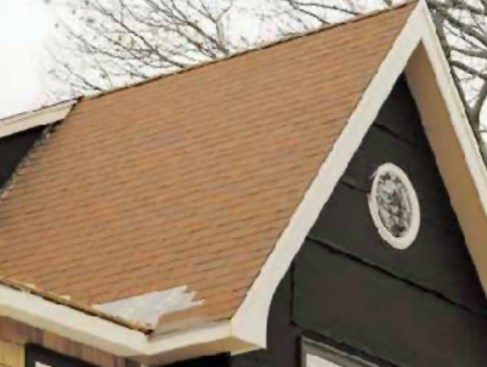
Figure 3. The deep eaves on this remodel give extra protection to walls and windows beneath.
Eaves and gutters. Always try for deeper eaves and rakes — 8 inches at a minimum — to help prevent water from sheeting down exterior siding (Figure 3, at left). Drip edge should also be spaced about 1/4 inch off the fascia to keep water from running down the fascia and discoloring it (Figure 4, below). Adding a second molding along the top of the fascia can help position drip edge even further outwards. Although it goes against what some people want to see, an even more durable design detail is to cut rafters square instead of plumb to lower the chance of roof runoff draining onto fascia boards.
DeKorne, Clayton
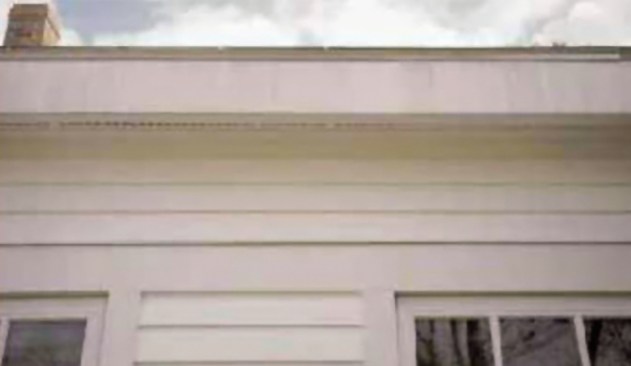
Figure 4. If drip edge is installed too close to the fascia, rain runoff will drain over the boards and lead to discoloration. The author recommends spacing drip edge slightly off of exterior trim to direct water outwards.
Finally, install gutters so that there’s no way for water to run between a gutter and the fascia. Use flashing rather than caulk to bridge this gap (Figure 5).
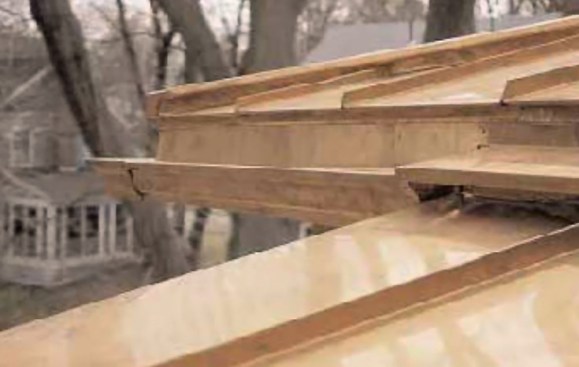
Figure 5. Properly flashed gutters keep water out from between the gutter and fascia boards. Gutters should also be cleaned frequently to prevent clogging and overflow.
Clogged gutters don’t work and inevitably lead to water damage. In my experience there are two ways to handle this problem: Chop down all trees within 100 feet of the house, or clean the gutters regularly (four times a year or more). Stress to homeowners that they need to clean their gutters more frequently than they probably do now. It’s a relatively cheap way to protect their investment.
Decks and Porches
Exterior living spaces must be detailed differently from interiors because everything must shed water and dry easily. If you install a pine baluster so that the bottom end butts tight to the bottom rail and the assembly is exposed to weather, I can almost guarantee that within five years you will be able to put your thumb clear through the bottom 2 inches of the baluster. A few subtle design changes can keep baluster bottoms relatively dry, such as running balusters through the decking or setting them onto a chamfered bottom rail (Figure 6). If you can’t detail the railing to avoid a horizontal butt joint, soak the ends of the balusters in preservative or coat them heavily with primer before assembly.

Figure 6. Running balusters through the decking is one way to avoid deterioration of a bottom rail.
Chamfering the edge of the bottom rail so they don't hold water is another common way to stave off deterioration.
You also have to be careful where sloping top and bottom rails hit a newel post. Although there is no way to entirely prevent moisture from collecting at this junction, there are ways to minimize the problem. First, avoid rails that are wide and flat on the top side. Secondly, if you’re wrapping a post with trim boards, avoid running the rails through to the structural newel underneath, because water will also run through and become trapped in the void between the wrapping and the newel (Figure 7). Also make sure to adequately prime and coat the end of the rail to prevent excessive wicking of moisture.
Wide and flat or minimally pitched surfaces — like wide railings, wall caps, or newel caps — also present problems. My rule of thumb is to use metal flashing whenever the wood is wider than 51/2 inches. For example, I run a piece of flashing completely over column caps (Figure 8).
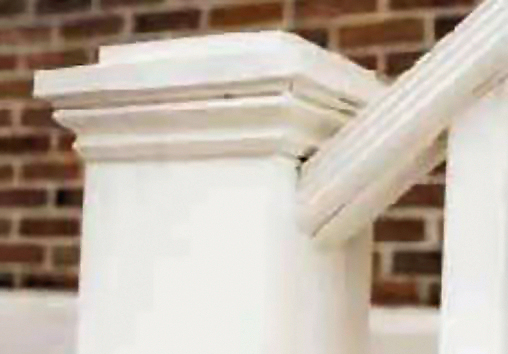
Figure 7. Prevent water penetration where rails join newels by adequately priming the end cut of a rail. It also helps to avoid rails that are wider than 51/2 inches. When newels posts are wrapped, butt the rails directly against the trim instead of running rails through to the post where water will get trapped.
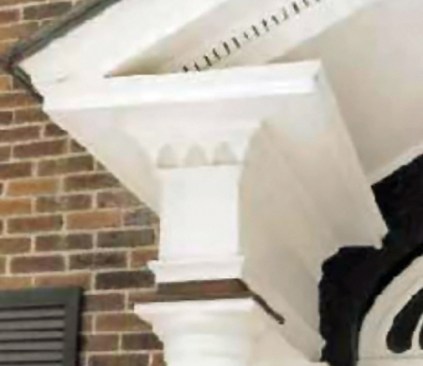
Figure 8. Flat surfaces are especially susceptible to water damage. To fend off problems, the column cap here is completely capped with metal flashing, and the eaves return is also extensively flashed.
Decking. The recent spate of nailfree wood deck fastening systems has developed in response to the fact that nails don’t work so well over time. Big fat-headed nails create water-collecting depressions if you set them too deep; or they rip the skin off bare feet if you don’t set them deep enough and the wood shrinks around the nail. Alternatively, you can use a lot of finish nails, but they won’t hold over time, yielding a creaky deck.
The deck fastener we like best is the Eb-Ty (ebty.com), which is installed in grooved deck boards or with a biscuit joiner. If you’re not using grooved deck boards, you’ll have to be careful estimating a job using these fasteners because they take three to four times longer to install than conventional fasteners. And, the Eb-Ty only works well with stable decking lumber. Don’t try them with shrinkage-prone pressure treated wood because shrunken wood can actually slip off the plastic biscuits. But for clients who are willing to pay the premium, nail-free decks are worth the extra hassle. A well-done deck or porch with no surface nails is about the smoothest and most glorious sight you’ll encounter on a project. Waltz on it in your bare feet without fear (or even in nylons, for those carpenters out there who wear nylons).
Clear preservatives just don’t work to control color even though they might work to preserve the wood. Clients often see a gleaming new wood deck and say “I want it to keep looking just like that.” So we obligingly put down a clear preservative. And the deck looks “just like that” for a few months, then starts becoming a mottled gray-black that’s not all that attractive. The only way to control the color of decks over time is with a pigmented preservative. I prefer to use a semi-transparent stain and recoat every one or two years.


