
When most folks hear the term window trim, they think of beautiful interior casing and sill details around a living-room window. While the interior trim is traditionally a place to showcase finish carpentry, most windows also have trim on the outside, which plays a part in defending the windows and the home against the elements. So proper execution and installation of exterior window trim is probably more important than that of the flashier interior trim and is something just about every house carpenter will be asked to do on a regular basis.
Trim Material
Wood was typically used as exterior trim on houses for centuries, but wood trim demands regular care to keep it protected from exposure to the elements. In the last couple of decades, synthetic materials have taken over as a more durable choice for exterior trim, and I have switched over to these materials almost entirely. Synthetic trim materials come as flat stock or in conventional stock profiles. For the trim in the photos, I used standard PVC brickmold for the jamb and head casing. I fabricated my own sills from PVC flat stock (see “Windowsill Retrofit,” Apr/20).
Measuring
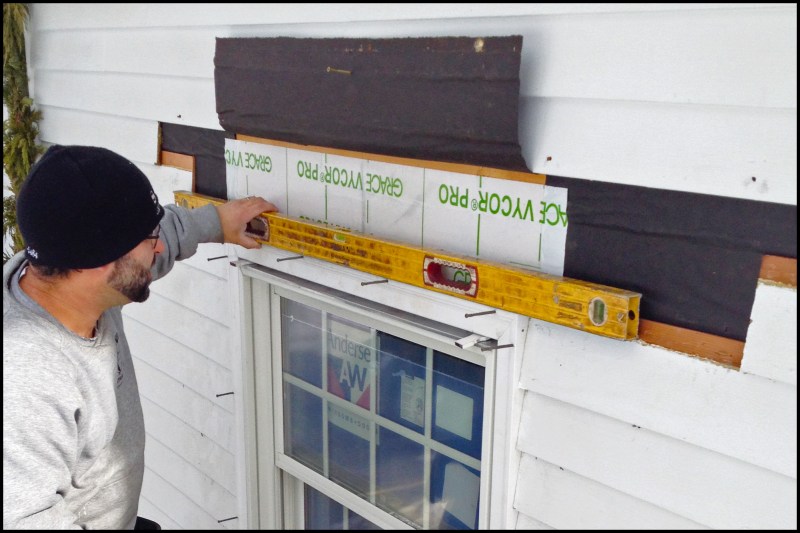
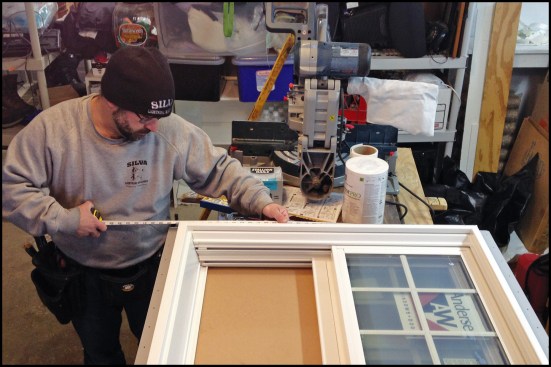
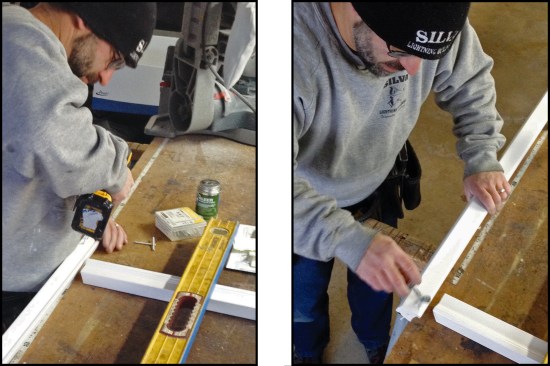
It’s possible to install window trim in place one piece at a time, but it’s quicker and more efficient if you preassemble the trim as a picture frame that is installed in one piece—what I call a trim kit—and the result looks much better. Before installing and flashing the window correctly in its opening (see “Retrofitting New Windows,” Apr/15), I take accurate measurements of the window width and height (see photo, above). For the inside dimensions of the trim kit, I add 3/4 inch to the width of the window (for a 3/8‑inch gap on either side) and 1/2 inch to the height, which keeps the sill snug to the underside of the window and makes room on top to adjust the trim kit for level during installation. The width of the brickmold is 2 inches, so I add 4 3/4 inches to the width of the window to find the overall width of the trim kit. For the overall height of the trim above the sill, I add 2 1/2 inches to the window height.
Cutting
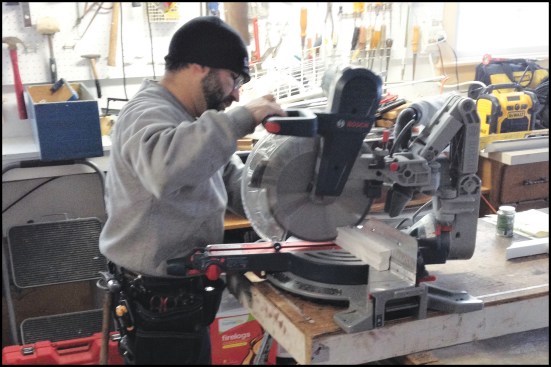
I typically make the sill about 1/2 inch deeper than the side trim. The brickmold I used here was 1 1/4 inches deep, so for these windows I ripped my sill stock (at a 3/12 slope, or 14-degree angle) to 1 3/4 inches wide. Armed with the measurements, I begin by cutting the bottoms of the jamb pieces to the windowsill angle (above).The top corners of the kit are mitered, so I cut the two jamb pieces (with the angled bottoms) to the overall height measurement—the long point of the sill angle to the long point of the miter. Next, I miter both ends of the head trim, cutting that piece to the overall width of the kit (long point to long point). Finally, I cut my sill stock to that same length.

Assembling the Kit
For longevity, I used PVC material for these windows, so all the joints could be chemically welded together with PVC cement. To assemble the kit, I first apply PVC cement to the mating sides of one set of miters (above).
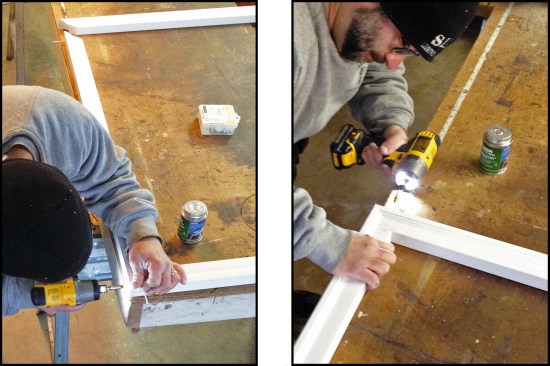
I then join the corners together and drive a stainless steel screw in from each direction to secure the miter joint (above left). I repeat the process for the opposite mitered corner (above right).
When I’m finished assembling both upper corners of the kit, I predrill holes through the bottom face of the sill (above left) and apply cement to the bottom end of the jamb piece on one side, as well as to the upper face of the sill where the jamb will land (above right).
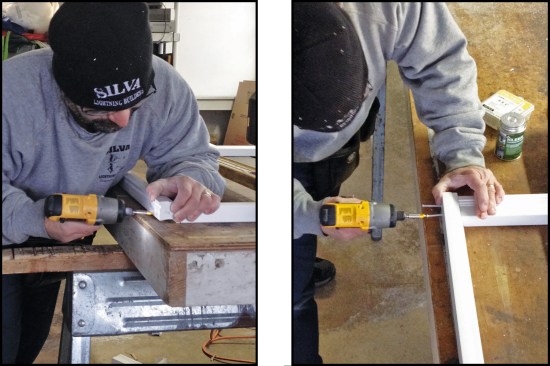
After mating the faces together, I drive the stainless steel screws through the bottom of the sill and into the end of the jamb trim to secure that side (above left). After completing the process on the opposite side (above right), the kit is complete and ready to install.
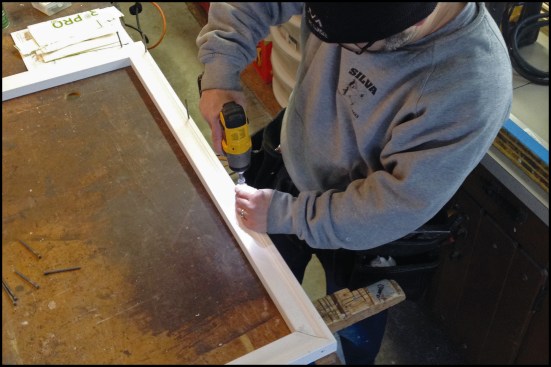
Before taking the kit to the window for a test fit, I predrill and partially drive screws along the kit’s outer perimeter (above). I used the Cortex screw and plug system for these windows.
Trim Installation
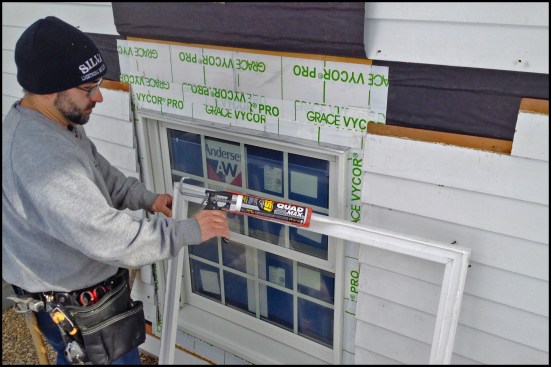
When I’m ready to install the kit, I apply a bead of caulking to the back surface of all the molding pieces in the kit (above). I press the kit into place around the window, centering it side to side. I slip a couple of spacers between the flashing over the window and the head casing to hold it in place at the proper height.
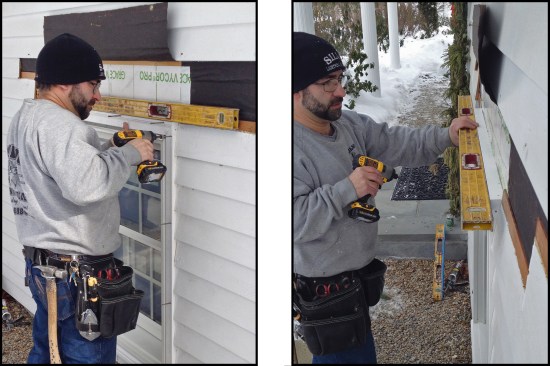
After setting a level on the head jamb, I adjust it if need be (see lead photo, above) and sink the screws one at a time (above left). I take care not to overdrive the screws, using a level as straightedge along each length to check that it’s perfectly straight, flat, and not distorted by the fasteners (above right). I can back out or tighten the screws in any area that needs adjusting.
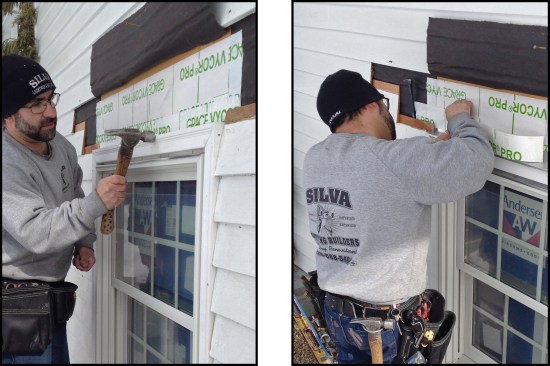
When I’m happy with how the trim fits, I tap the Cortex filler plugs into the screw holes (above left). I finish the installation with a length of aluminum drip cap over the trim, and then apply self-adhering flashing tape over the vertical leg of the cap (above right). The WRB folds down over the flashing and I’m ready to install the siding.
Photos by John Simmons.


