High-performance windows and doors are an essential feature of an advanced energy-efficient home. And when the house is a high-end custom project sited on a property with sweeping water views, architects these days are likely to call for European-style lift-and-slide glass doors.
With triple or quadruple glazing, thermally broken frames, and beefy hardware, those Euro units get heavy fast. So while they offer superb insulating qualities, airtight seals, and easy operation, they are not easy to install.
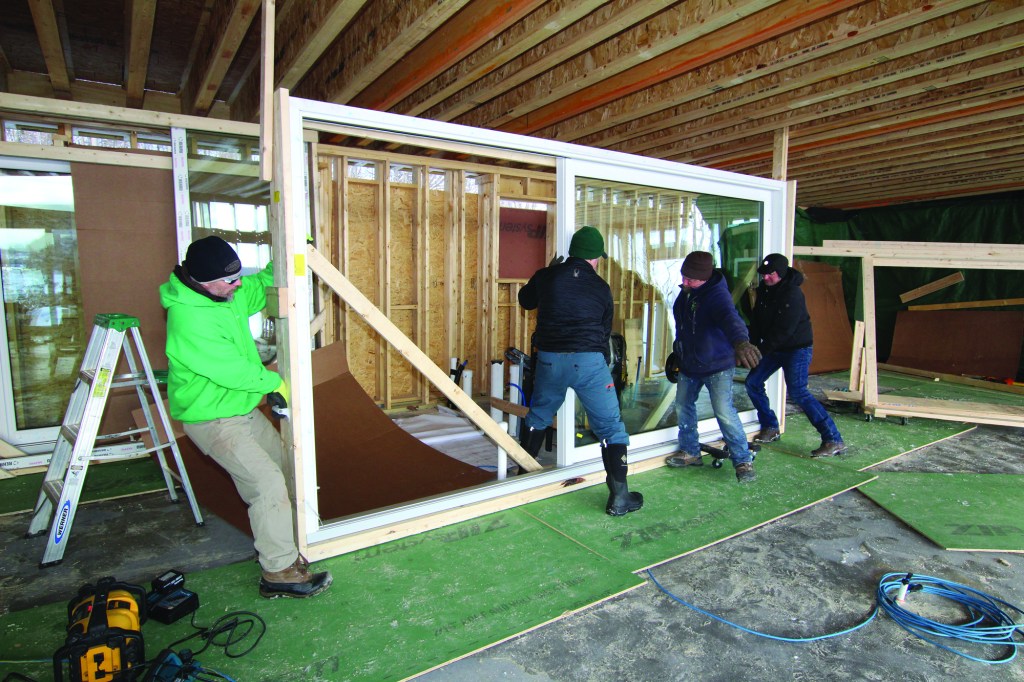
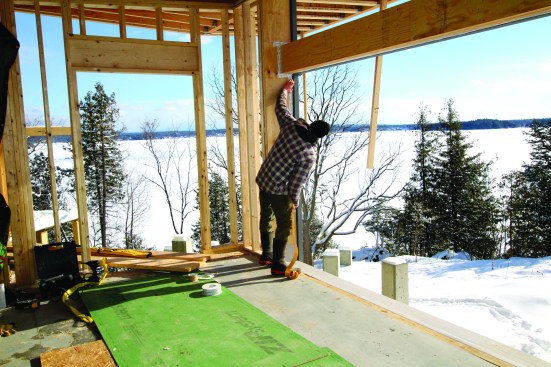
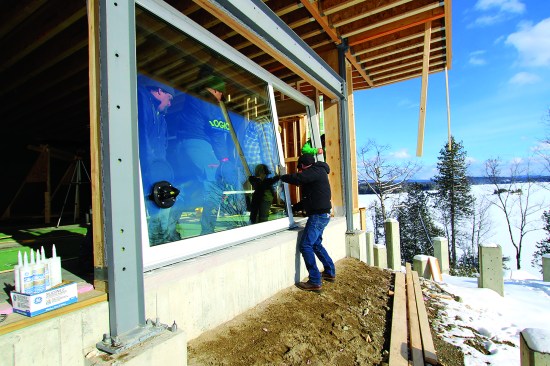
This winter, Hayward Design Build (haywarddesignbuild.com) installed two lift-and-slide units in a custom home on the shore of Lake Champlain in Vermont. JLC editor Tim Healey was on site to see Jim Bradley, along with framing contractor Mike Lovejoy and a crew of carpenters, set the massive units into a foot-thick, double-stud wall. Even with extra hands on site, Bradley said, just moving the doors around was a challenge: “They weighed about 750 pounds apiece without the slider, and more like 950 pounds with it.”
Lift-and-slide doors need stiff headers; typically, manufacturers specify deflection no greater than 1/16 inch at mid-span. That usually requires a steel header, and this case was no exception—structural designer Chris Hill (engineeringventures.com) called for a steel I-beam skeleton outlining the door openings and supporting the overhanging roof above.
Heavy steel in a wall always complicates the energy calculations, because of steel’s thermal conductivity. In this design, the steel lies outboard of the insulated wall assembly, bearing on its own foundation footings.
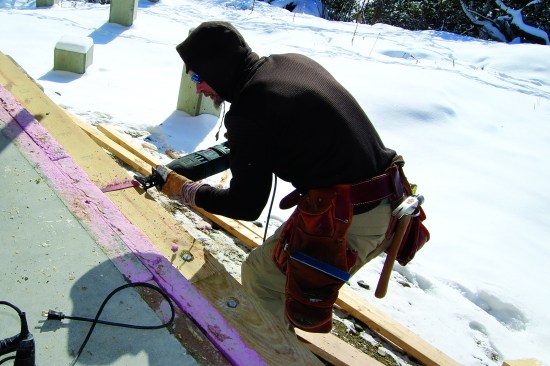
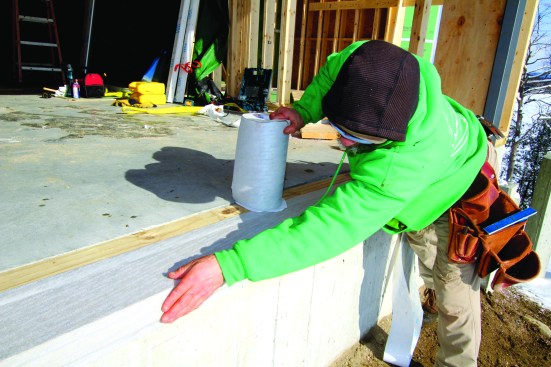
The foam was run proud. Once the slab was poured, it was cut flush.
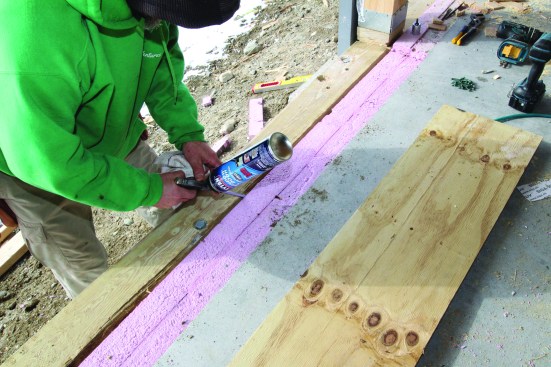
The gap between the insulation and the concrete stem wall was filled with one-component expanding foam.
The interior floor is an exposed polished-concrete slab, and that mass also had to be thermally broken from the exterior-exposed concrete footing. “We used 6 inches of rigid insulation board to separate the slab from the stem wall,” Bradley noted. “I told the foundation crew to run the foam proud and then pour the slab. Before we set the door, we cut the foam off flush with the top of the slab. Then we injected one-component expanding foam to fill the gaps between the rigid insulation and the concrete stem wall.”
Prepping The Opening
After the foam was trimmed flush at the door opening, Mike Lovejoy prepared the door sills by screwing down a strip of treated plywood to span from the outer 2×6 mudsill in over the 6 inches of rigid foam. The plywood protected the foam insulation and provided a solid, continuous substrate for wide Siga Fentrim self-adhering weather barrier membrane.
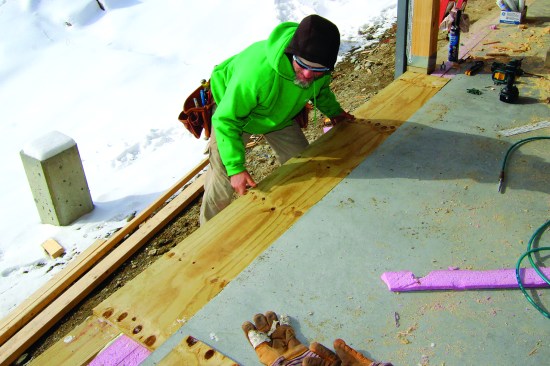
A strip of treated plywood was fit over the mudsill and the rigid foam.
It provided a substrate for wide Siga Fentrim weather barrier membrane.
The low-expansion gun foam that had just been injected below the plywood continued to expand slightly to seal the plywood into place, Bradley said, adding a redundant layer of air-sealing as a failsafe for the adhesive-backed Fentrim.
“Later, we are going to come back with a riftsawn oak threshold that will bridge from the plywood to the polished concrete floor,” Bradley explained. “And the nice thing about the wide Fentrim fabric is that it has a split back. We left the paper backing on the inside part of the piece. Then once the threshold goes in, we are going to bend the Fentrim upwards, perpendicular with the floor, and stick it to the threshold to get an air seal there as well.”

Silicone caulking was used to seal the door sill to the Fentrim membrane.
The jack studs were sealed with Siga flashing tape.
On top of the Fentrim, the crew ran a bead of silicone adhesive caulking to seal the door sill down to the fabric. Around the sides of the doors, they sealed the sheathing to the jack studs with Siga flashing tape. “We’re also going to slide rigid insulation by the sides of the doors, inject foam into the gap, and seal on both sides with Siga or ProClima tape,” said Bradley.
Manhandling The Doors
With the openings prepared, the next order of business was to get the massive door frames set into place and correctly plumbed, leveled, aligned, and fastened. For this step, the crew had help from consultant John Mokas, an expert in Euro-style doors and windows who spent years learning the craft in Germany and Greece.
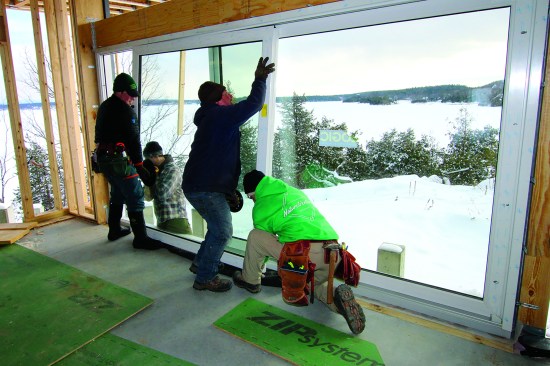
“These are baby doors,” Mokas told JLC. “If you want to see big doors, I’ll show you some pictures.” On some other jobs, he said, doors were too heavy for muscle power. Mokas has gone as far as to install an electric hoist on the roof of an apartment building and cut holes in the floors below for a steel lifting cable.
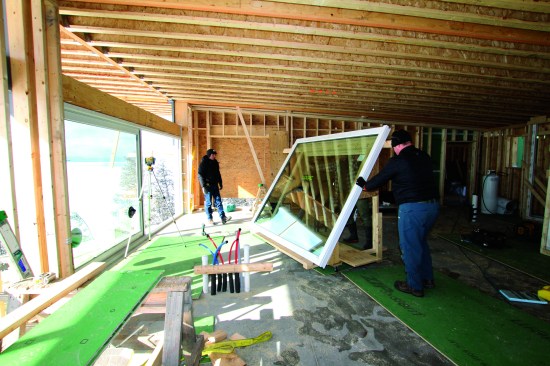
To roll the doors around the concrete floor, the crew relied on heavy-duty floor dollies, along with a sitebuilt wooden cradle on casters devised by carpenter Richard Coffin.
Still, a half ton is no small door—especially since the home’s roof overhang on this site made a crane impractical. To roll the doors around the concrete floor, the crew relied on heavy-duty floor dollies, along with a site-built wooden cradle on casters devised by carpenter Richard Coffin. “Those worked great,” said Mokas. “They were a big help.”
Mokas was also a big help, said Bradley, especially with advice on the fine points of aligning the door components and adjusting the mechanisms. “They have to be spot on, and they’re not like ordinary doors,” Bradley said. “You have to use lasers. If they’re not completely plumb and square, then they’re going to whistle when that wind comes in off the lake.”
A level base is critical, Mokas told JLC; if the track slopes even 1/8 inch, the door may be easy to open but hard to close (or vice versa). Beyond that, he said, maintaining square and plumb may be less critical than making sure that the doors align and meet up as intended, and that all the hardware is properly installed. “The point is to get it where it works perfectly,” he said.
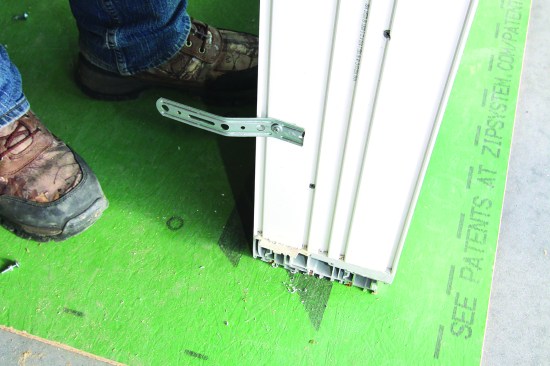
Strap connectors screw into the jams from the back.
The doors were muscled into position.
At this jobsite, Bradley said, the door supplier recommended Mokas on the day the doors were delivered to the site. But because mix-ups can be costly and disruptive, Mokas told JLC that he prefers to get involved earlier in the job. That way, he said, he can verify the measurements and specifications before the doors are custom-built, first by double-checking the plans, and then later by measuring on site after the rough framing is complete.
Structural screws are set into the framing through predrilled holes in the jams. Then the crew places the sliding doors onto their tracks.
Attachment Points
To set and align the doors, the crew used the supplied strap connectors, which screw into the jambs from the back, then muscled the doors into position. Then, for a permanent structural connection, they set structural screws through the jambs into the framing through the predrilled holes in the jambs before placing the sliding doors onto their tracks. “Once you’ve got them dialed in,” said Bradley, “they open and close really nicely. I have to admit they’re pretty slick.”
Photos by Tim Healey


