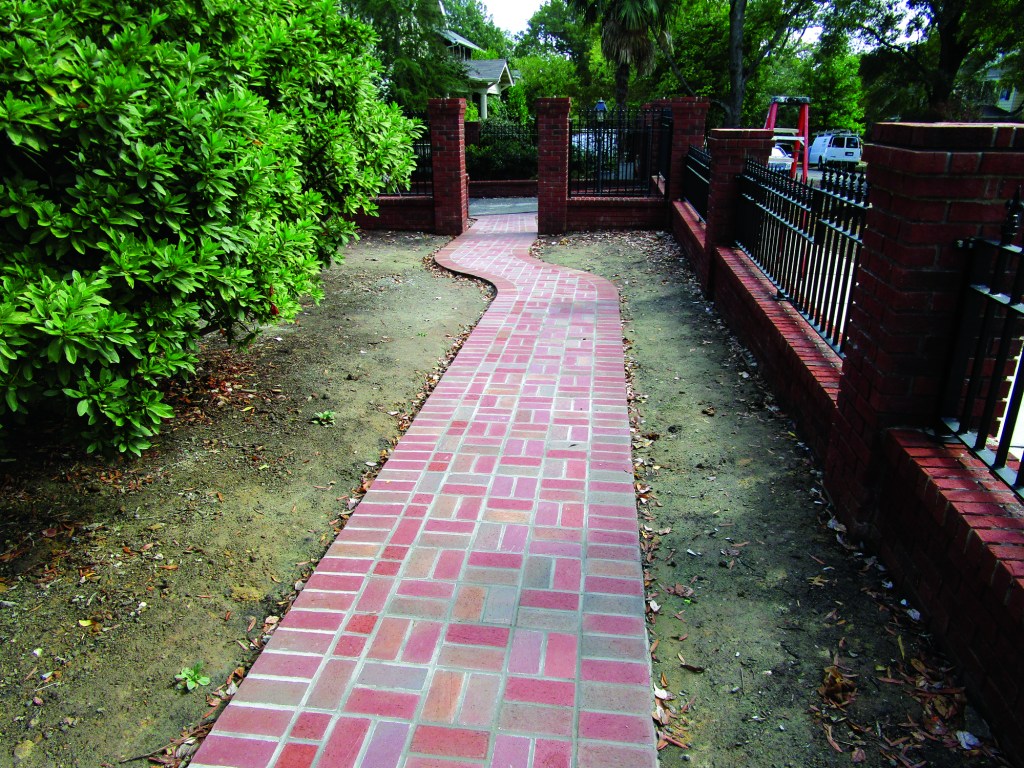
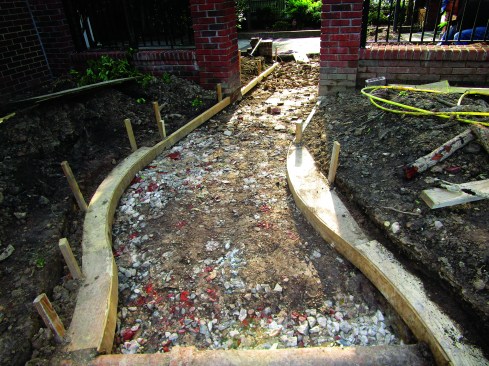
In the August issue, I wrote an article called “Durable Brick Walkways,” in which I discussed the details for building a brick walkway to the entry of a home near Duke University, in North Carolina. That walk was one of two that I built at the house. The second walk began between two brick pillars and traveled along the side of the house. And while it may not have been as grand as the walk leading up to the main entry, this other walk presented some unique and fun challenges. Unlike the main entry, this “side” walk had to jog around some mature shrubbery next to the house.
An angled jog would have made this mason’s life much easier. But straight lines can be boring and, as in this case, awkward looking as well. Instead, I decided to use an S curve to shift the location of the walk. This gave me the chance to use one of my favorite under-appreciated tools—the lowly beam compass.
Start with a Drawing
A beam compass is essentially a large version of the dividers that most carpenters carry; I used my dividers to make a scaled drawing at the beginning of the project. The gateway was 44 inches wide, which set the brickwork at an even 5 1/2 units wide (7 5/8-inch brick + 3/8-inch grout joint). The transition would happen over a distance of 100 inches, and the two sections of the walk would be offset by 44 inches (the width of the walk). I also wanted the width of the transition area to be fairly consistent.
Tim Healey
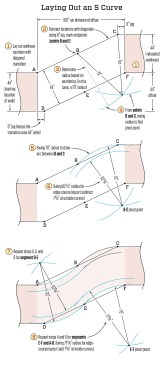
The author first drew the curved transition as diagonal lines. After dividing those lines into two sections, he swung arcs for the concave and convex parts of the S curve and then swung arcs for the border bricks.
I started by drawing the transition between the two sidewalk sections as straight diagonals (see Laying Out an S Curve, above). For the transition section to be the proper width, the starting point of the bottom diagonal had to be 8 inches farther along than the starting point of the top diagonal. I divided each diagonal line into two equal lengths of 54 1/2 inches, which gave me three points on each diagonal: A, B, and C on the top diagonal and D, E, and F on the bottom diagonal.
Finding the Radius
Each side of the transition section was to be an S curve with a double arc, so I needed to find a radius for the arc that looked right and that would work with the brick layout. In true Goldilocks fashion, I started with a 50-inch radius, but that gave me an arc that was too deep. A 100-inch radius produced an arc that was too shallow. I settled on 70 inches, which seemed just right.
To create the arc in my drawing, I scaled my dividers to 70 inches. I swung an arc from point B and did the same from point C; the intersection of the two arcs marked the pivot point for drawing the B–C arc. I repeated the process for the other three line segments and I had my matching S curves.
Plywood Templates
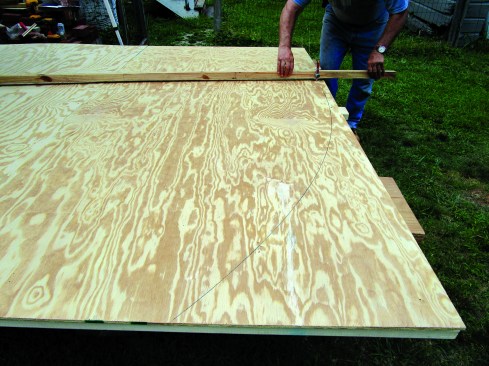
The next step was to draw the arcs full scale. There were two arcs to the S curve: a concave curve and a convex curve. I set the points on my beam compass to 70 inches and used it to make plywood templates for both shapes to the dimensions on the drawing. As I swung the arcs for the template, I established the beginning and end of each curve, as well as the correct arcs for the curves.
John Carroll
To lay out the curves full size, the author swung an arc using a beam compass.
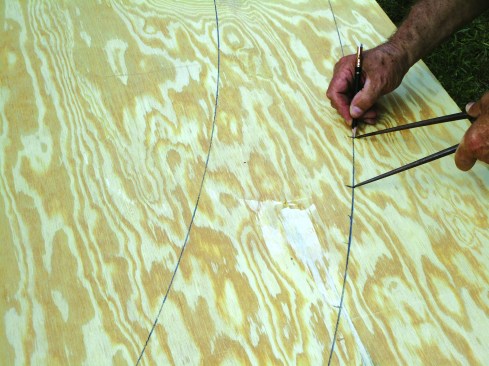
A crucial part of the templates was laying out the inside and outside curves of the border bricks and the positions and shapes of all those bricks. For the convex arc, I subtracted the length of a brick (7 5/8 inches) from the 70-inch radius and set the beam compass point to 62 3/8 inches. I swung an arc at that measurement from the same pivot point to find the inside edge of the bricks for the convex part of the S curve. For the concave arc, I added 7 5/8 inches to find the inside edge of the border bricks, setting my beam compass to 77 5/8 inches.
John Carroll
For the convex curve shown here, he subtracted the length of the brick and swung a second arc.

John Carroll
Then he marked out the positions of the bricks and used the side of the beam compass to draw the outlines.
Having established the beginning and end points of the arcs, I was able to lay out the positions of the bricks along the outside edges of each arc. Then it was just a matter of pivoting the beam compass to each layout point and drawing a line along the side of the beam to create the tapered shapes of the bricks.
Putting the Plan into Action
As with the main walkway, I needed to pour a concrete slab to support the bricks, but for this walkway, I had the curved sections as well as the straight ones. I used the templates to rough out the forms for the slab. I wasn’t too concerned with accuracy at this point; any concrete that extended past the outer edges of the brick would be covered with soil. I formed the S curve with bending plywood.
Brett Arnold
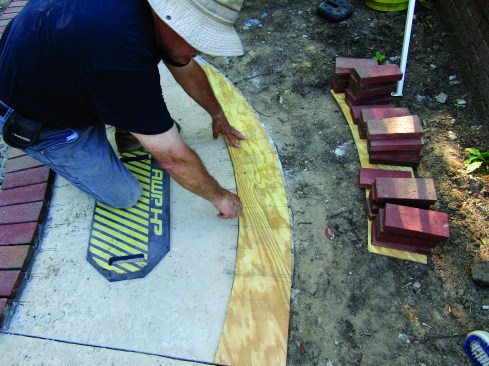
He cut out the templates and used them to position the forms for the slab under the walkway.
John Carroll
When the slab was done, he set the template on the concrete and marked out the positions of the bricks.
John Carroll
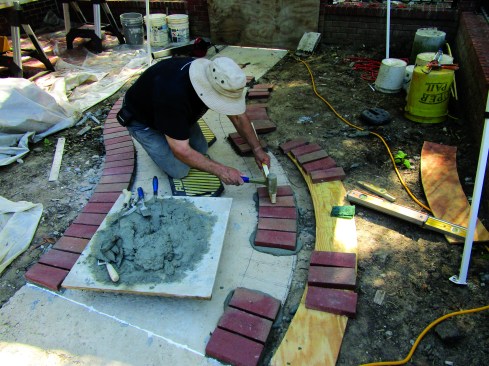
After I had stripped the forms from the slab, I used the template to lay out the curves and brick positions directly on the slab. I taper-cut all the bricks, custom-cutting the ones where one curve transitioned to the other and where the curves transitioned to the straight sections of the walk. I squared lines across the slab to establish a starting point for the border bricks. Then I used the same leap-frog installation technique that I used with the main walkway to install the border bricks through the curved section. Once the border was complete, I just continued the herringbone field pattern from the main walk right through the S curves.


