Homes that are more than 100 years old are the norm in the part of the country where I work, and many of them have very small basement-access doors that were made to fit the height of the exposed foundation. These undersized openings were built primarily for moving things in and out of the basement, but they don’t work well for large items such as appliances, and they certainly don’t make good entrances for a finished basement.
The doors were often cobbled together from construction scraps such as beadboard or 1-by stock left over when the original house was built. And occasionally builders simply used an interior door and modified it to fit the foundation opening.
I recently was asked to replace one of these access doors in a client’s home. The grade outside the door was too high relative to the wooden threshold, and the wood had rotted. The interior door that had been used was not insulated, nor was the opening sealed, which made for a cold basement. My plan was to install an insulated fiberglass door with a composite jamb that would offer energy savings and rot resistance. Additionally, I would trim the outside of the door assembly with low-maintenance PVC material.
Raising the Threshold
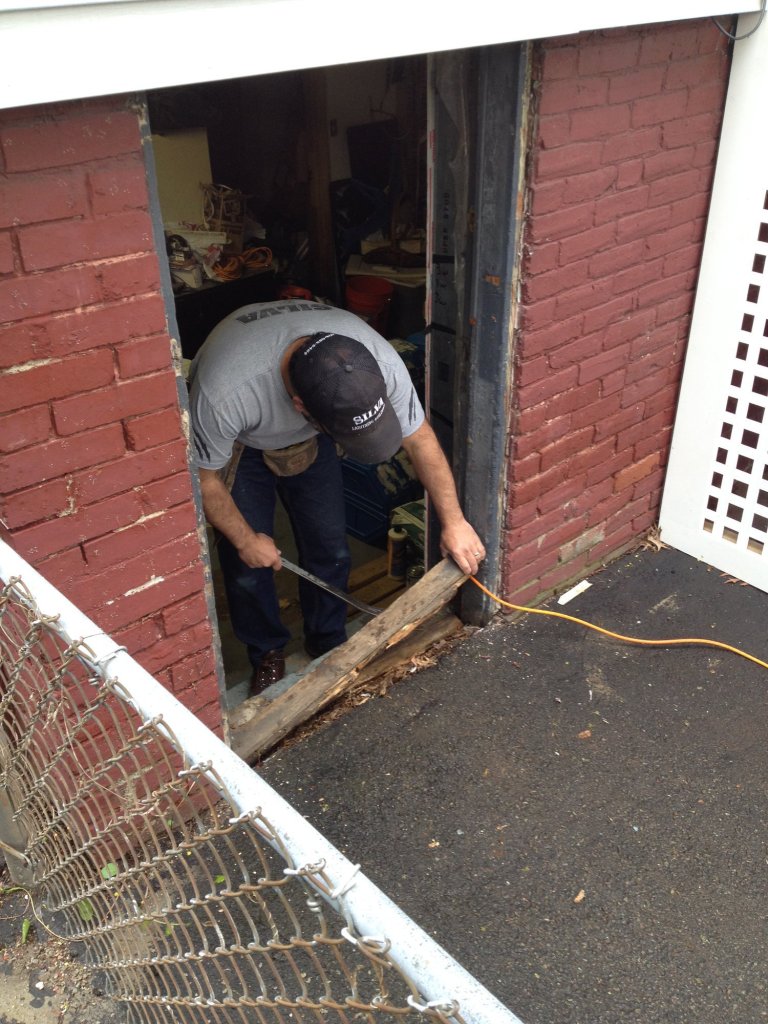
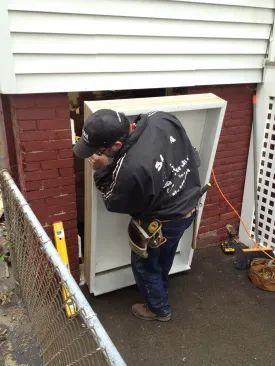
I started by removing the existing door, jambs, and threshold and thoroughly vacuuming the entire opening. The foundation of the home consisted of two layers of brick with an air space between the layers. The bottom of the door opening—which was also the top step of concrete stairs that led down to the basement floor—sat about 4 inches below grade, probably because the grade around these old houses tends to fill in and build up over the years.
I wanted the new door to sit above the grade, so I custom-ordered a new door from my local lumberyard that was slightly shorter than the original door to allow for raising the threshold. The new door was also a little narrower than the original to provide space for insulation and for better attachment along the side jambs.
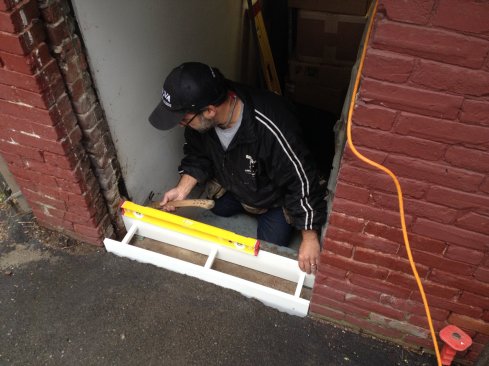
To raise the threshold above grade, a concrete curb was formed and poured on top of the concrete steps into the basement. The PVC form is leveled in the opening and will stay in place after the concrete cures.
After drilling and inserting rebar to connect the concrete curb to the step below, Silva uses spray foam to lock the form into place for the pour. A coat of bonding adhesive on the old concrete will help bond the curb in place.
So that the new door sill would be above grade, I formed and poured a small concrete curb on top of the existing concrete step. I made the form for the curb out of 1-by PVC stock, with spacers between the two sides to strengthen the form.
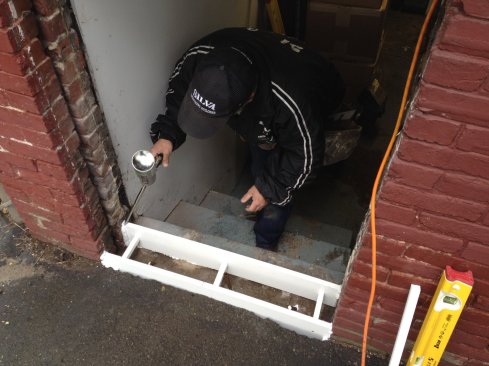
After setting the form into the opening, I lined it up with the exterior foundation walls and leveled it in both directions. To anchor the curb to the original concrete, I located holes for three lengths of 1/2-inch rebar where they wouldn’t interfere with form spacers and then removed the form to drill the holes. After inserting the rebar, I reinstalled the form in the opening. To seal around the form and to help keep it in place during the pour, I sprayed foam insulation around the edges.
Before pouring the concrete, I applied a coat of Quikrete bonding adhesive inside the form to help bond the new concrete to the old. After pouring quick-setting concrete into the form and letting it set for a while, I screeded the top with a board for a smooth finish. The rot-proof PVC form stayed in place after the pour.
Prepping the Opening
Although the bricks and the mortar in the old foundation of this home were in good shape, I did not want to attach the door jambs directly to the brick. To create more-reliable attachment points and to address the space between the inside and outside layers of brick, I installed spacer blocks made from scraps of 1-by PVC stock—two on the hinge side of the opening and three on the latch side. The blocks bridged the gap between the brick layers and acted to stabilize them.
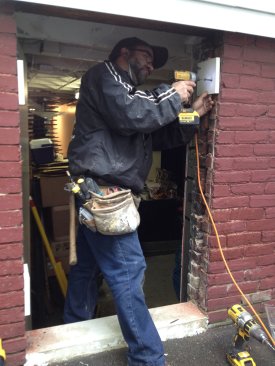
After the threshold is poured, 1-by PVC pads are screwed into the brick on either side of the opening. The pads span the gap between the layers of bricks to help stabilize them.
For the strongest connection, I had to make sure that the fasteners for attaching the blocks went into the brick, not into the mortar joints. After drilling the appropriate size holes in the brick with a hammer drill, I drove Tapcon masonry anchors to secure the blocks to the brick.
Installing the Door Unit
Before setting the door in the opening, I screwed a metal security plate to the back of the latch jamb. This plate has openings for both the deadbolt and the latch and will help to keep the jamb from splitting in case someone tries to break open the door.
When I dry-fit the door in the opening, the first thing I noticed was that the foundation was out of plumb—the outer layer of brick leaned in quite a bit at the top—a problem I decided to take care of with the installation of the exterior trim. The only good news was that the bricks leaned in about the same amount on both sides of the opening.
The custom pre-hung door slips in between the PVC blocks. Because the foundation was out of plumb and leaned in at the top, the tops of the door jambs were flushed with the brick, leaving the unit inset slightly at the bottom.
I took the door back out of the opening and applied a generous bead of Geocel sealant to the interior edge of the curb where the back of the aluminum door sill would sit. I then set the door in place, keeping it centered side-to-side in the opening. To deal with the out-of-plumb foundation, I kept the tops of the jambs flush with the brick and let the jambs sit just inside the opening at the bottom.
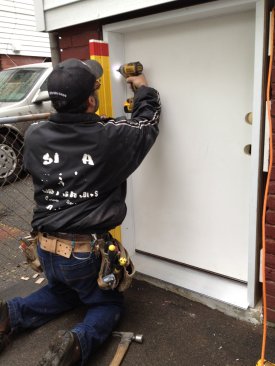
Plumbing the door jamb in both directions, the author drives a screw near the top hinge to hold the unit in place. After he double-checks that the door is level, the rest of jamb is shimmed and anchored to the PVC blocks.
I checked to be sure that the sill was level sitting on the new curb. Then starting on the hinge side, I shimmed and plumbed that jamb in both directions, driving screws through the side jamb and into the block to secure it in place. I attached the latch jamb the same way, making sure the door opened and closed evenly. Before moving on to the next step, I cut PVC plugs and tapped them into the screw holes in the jambs and then cut the plugs flush with a handsaw.
Flashing and Trimming the Door
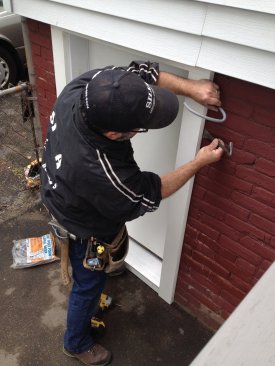
To keep air and moisture from entering around the jamb, I applied a layer of 4-inch Vicor self-adhering flashing around the opening. The pieces were wide enough to bridge from the edge of the jambs to the brick foundation. I applied the membrane to the sides first and the top last to create the proper drainage plane.
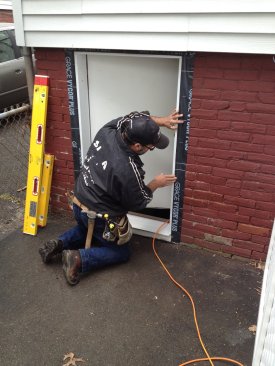
Self-adhered flashing tape weather-seals the gap between the door jamb and the brick.
It was pretty easy to attach the tape to the smooth flat surface of the jamb edge. But making sure that there was good contact over the uneven surface of the brick foundation wall—especially in the mortar joints between the brick courses—required more care.

The PVC exterior trim kit is assembled on the workbench. Here a slight build out screws to the back side of the trim to compensate for the out-of-plumb foundation.
I preassembled trim kits for the interior and exterior on my workbench. I used 1×4 PVC stock for the exterior and wood for the interior. The exterior trim was made in two layers. To adjust for the out-of-plumb foundation, I glued and screwed a jamb extension onto the back of the trim. I made the extension slightly thicker than the distance that I had stepped back the bottom of the door to make it plumb, which gave me room to seal the trim to the brick.
The exterior trim kit attaches to the door jamb. The screw holes are filled with plugs that are cut flush with the face of the trim.
The trim compensates for the out-of-plumb foundation, leaving a space behind the trim at the top of the door. Foam backer rod is inserted into the gap before caulking is applied around the perimeter of the trim.
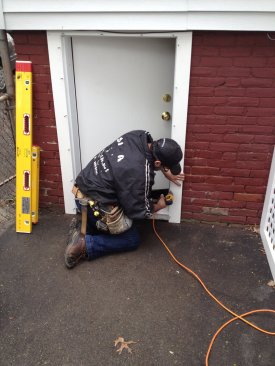
I secured the exterior trim kit to the jamb using Cortex screws and filled the screw holes with PVC plugs. That still left a gap between the brick and the back of the trim from the leaning foundation. I filled that gap with foam backer rod and then applied OSI Quad sealant to weather-seal the opening.
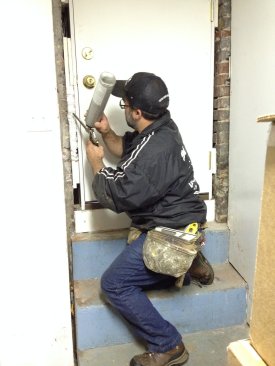
Low-expansion foam sprayed between the foundation and the jamb air-seals around the new door.
On the inside of the door, I first sprayed low-expansion foam insulation around the door between the jamb and the brick to help air-seal the opening. With two layers of brick and a 1-inch space between them, the foundation was more than 8 inches thick. The prefabricated door jambs were sized for a 2×6 wall, which meant that I either had to build extension jambs for the inside trim, or just scribe the trim to fit inside the brick. Because the inside was an unfinished basement, I opted for the second choice.
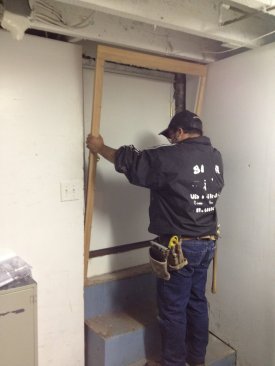
Before the foam insulation solidifies, the pre-assembled interior trim is set in place and nailed to the jambs. It fits between the sides of the opening and helps to keep the foam from expanding out past the door jamb.
With the interior trim preassembled and ready to go, I slipped the kit into place and fastened it to the jambs before the foam insulation had a chance to cure, which helped to keep the foam from expanding out past the jamb. I finished with a bead of caulk to seal the spaces between the brick and interior trim.
In the end, my clients had a new access door for getting in and out of their basement that should last as long as the house. But more importantly, this door is much more secure than the old one, and with the drafts sealed out, their basement should be a lot warmer this coming winter.
Photos by Emanuel Silva


