Paint takes a real beating on a beachfront home. The keys to a lasting coastal paint job are careful preparation and top-quality paint.
I’ve been painting houses on the island of Martha’s Vineyard, Mass., for 25 years. Most of my work is on new “trophy” homes for the rich and famous. Their owners aren’t just wealthy; they’re also extremely demanding. They expect perfection. There’s no tolerance for work that’s not done right or that has to be redone in a few years.
Those expectations present a challenge for any painter, but what makes my job even more extreme is the fact that nearly all of the homes I paint are on the ocean. Getting meaningful life from an exterior paint job — one that will bear the brunt of intense summer sun and salt spray blown by winter storms — takes extra consideration here. Over the years, I’ve learned what procedures work to get the most out of a coastal paint job.
BUY THE BEST PAINT
Paint, by its very nature, is a somewhat temporary covering: Eventually, it will need to be redone. The question is how soon. The minute you apply a coat of paint, the sun’s ultraviolet (UV) rays start to break it down. Next to the water, where few trees offer shade, UV light is stronger than in wooded areas, and it breaks paint down much faster. The only real solution is to use the best-quality paint you can find. Don’t buy an economy-, or even a contractor-grade paint if you expect it to last. Go with the premium lines (see “Top-of-the-Line Latex,” page 46).
I’m a diehard traditionalist, so until recently I wouldn’t even have considered using anything other than an oil-based paint. In fact, I still use an oil-based primer because it seeps into the wood better than latex. For topcoats, though, I’ve become an acrylic convert. Some paint company reps I’ve spoken with say that the formulas used to make oil-based paints haven’t changed much over the years, but my experience is that today’s oil-based paints don’t stand the test of time as well as they used to. Twenty years ago, I could confidently guarantee oil-based topcoats for ten years. Now, they look faded and mildewed after only three years. By contrast, acrylic latex paints have gotten better, and I can usually coat a house with acrylic and not have to worry about coming back for five years.
USE THE RIGHT WOOD
You can’t talk about paint durability without talking about wood choice. How long a finish lasts has as much to do with what you put it on as it does with the finish itself. When I started in the business, most of the homes I worked on were trimmed with pine. Today, I’m happy to report that almost all of the waterfront homes I’m painting have cedar trim and siding.
Cedar stands up to the weather and holds paint much better than pine. It’s more dimensionally stable, which means it doesn’t expand and contract as much with changes in humidity. That means caulk joints are less likely to crack, and the paint itself will last longer because there’s less stress on it.
What pine I do see these days seems to have more knots and other defects than the clear boards that were used to trim older homes. It’s not unusual, in fact, to see sap marks bleeding through a recently applied finish on new homes. So if I have to paint over pine, I start by hitting the knots with pigmented shellac. I usually have to put on three coats, as the shellac doesn’t cover very well. I seal the knots first with two coats of the stuff, then prime everything with an oil-based primer. Then I prime the whole job again with the shellac before moving on to my two acrylic topcoats. The process is expensive and time consuming, and can easily offset any savings the owners tried to realize by using pine rather than cedar trim.
DO EXTRA PREP
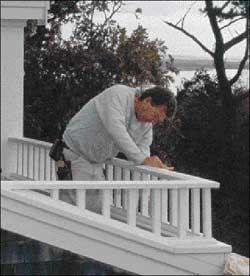
Prep work is also key to a quality paint job, especially on the coast. A lot of painters skimp on prep work, but by doing so they reduce the life of the paint job, no matter where the house is located. On coastal homes, the prep work includes a few more steps than it does inland.
Before recoating, the author washes all trim with a combination of trisodium phosphate (TSP) and bleach to remove any salt film. This also removes surface mildew that may have collected on homes that are a few years old.
Wash down the surface. The most important of these steps have to do with salt and mildew. Mildew, because it thrives in high humidity, is a bigger problem near the water than it is inland. To make matters worse, many of the homes I work on have irrigated lawns and bushes planted close to the house. In this environment, even an acrylic with a mildewcide additive will start mildewing after a couple of years. (I know of at least one mildew-proof paint, but most of my customers want a refined-looking finish, and this product looks too much like plastic.)
Salt is constantly attacking seaside homes, too. Fierce winds whip up ocean whitecaps and send spray through the air and right up against the house. Once the spray dries, it leaves a thin coat of salt on the wood. My experience is that any coating applied over salt won’t adhere very well or for very long.
Twenty years ago, I could confidently guarantee oil-based topcoats for ten years. Now, they look faded and mildewed after only three years. By contrast, acrylic latex paints have gotten better. |
A good wash will take care of both problems. I wash the salt off of any surface I intend to coat, and I usually figure on coming back to a home a few years after it’s coated to take care of any mildew that has started to grow. For both purposes, I dissolve powdered trisodium phosphate, or TSP, in a half-and-half mixture of bleach and water. (How much TSP I add depends on how dirty the surface is. I recommend starting with a small amount, then adding more if necessary.)
I coat as soon after the wash as possible — I prime with an oil-based primer the next day if it’s new wood, and if it’s a second or third coat of acrylic latex, the paint goes on an hour or so after washing. I also keep a close eye on the weather forecast: It takes only one good storm to cover the house with a salt film. If there’s a blow between coats, I wash before putting on the second coat.
Back coat. I actually do a lot of painting before the trim ever goes up. The intense sun on the beach tends to suck any moisture that does get behind the trim right through the wood, where it will push against the surface coating. To keep water from getting into the wood in the first place, I not only back-prime all trim boards, but I put a coat of finish paint on the back of them as well.
Seal the end grain. Another problem area is the end grain, which soaks up moisture like a sponge. On older homes, I see a lot of trim boards rotting near the end grain. To keep this from happening, I completely seal all end grain on new trim by applying a coating of West System epoxy, a two-part epoxy manufactured by Gougeon Brothers (www.westsystem.com; 866-937-8797) and available from marine supply stores.
Sealing end grain with a marine-grade epoxy prevents the wood from soaking up water.
Sand between coats. I take time to sand every surface between coats. A lot of painters skimp on this step, but it’s one of the most important things you can to do in any location to help a coat of paint adhere to a surface.
All this prep adds time and money to the job, of course, but the payoff is worth it: My paint jobs last longer. I see many nearly new homes with peeling, blistering paint. Recoating these homes requires a lot of scraping, sanding, and stripping. By contrast, I can come back in a few years and touch up the surface with a light sanding and a wash. So while my clients pay more the first time, they save over the long run.
Richard Conover is a painting contractor from West Tisbury, Mass.
| TOP-OF-THE-LINE LATEX | |
| Most paint manufacturers recommend using their premium-quality acrylic latex system for coastal environments. | |
Benjamin Moore MoorGard/MoorGlo California Paints 2010 Fuller O’Brien Weather King II | Pratt & Lambert Accolade Sherwin-Williams Duration Zinsser Perma-White |


