Painting experts, Scott Burt and Todd Pudvar, painstakingly remove a hail-damaged Sikkens finish using Festool sanders with dust extraction—no chemicals. While time consuming and costly, the surface restoration was still significantly less than a siding replacement. (All photos by Scott Burt.)
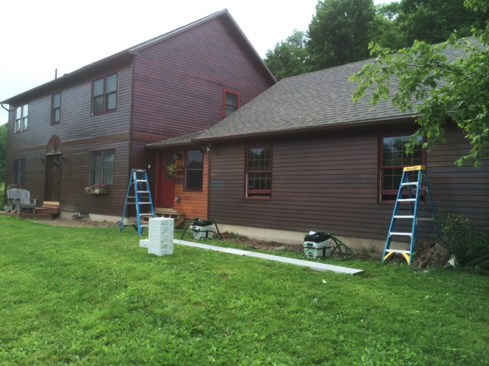
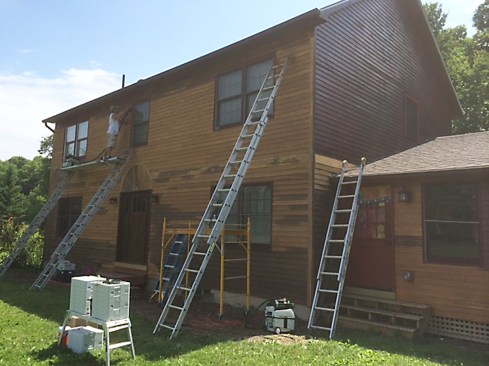
A year ago, my company worked on the surface restoration of a home’s exterior wall finish. Hailstones from a severe thunderstorm pelted the siding on three of the building’s four walls, with the front, northwest façade taking the brunt of the storm.
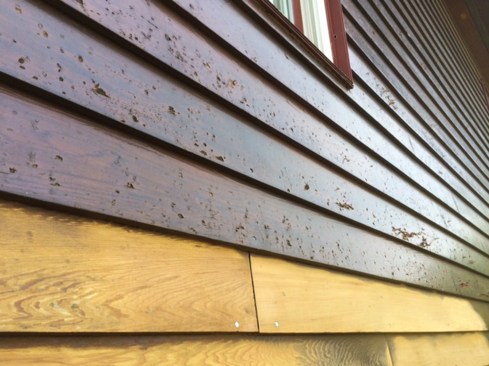
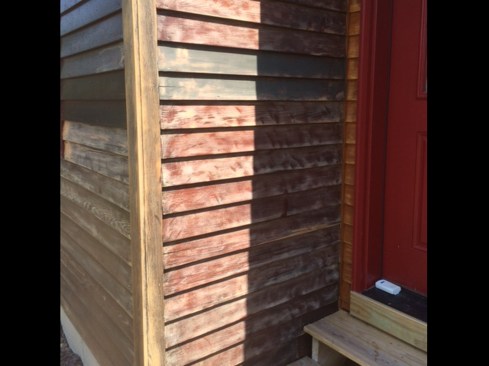
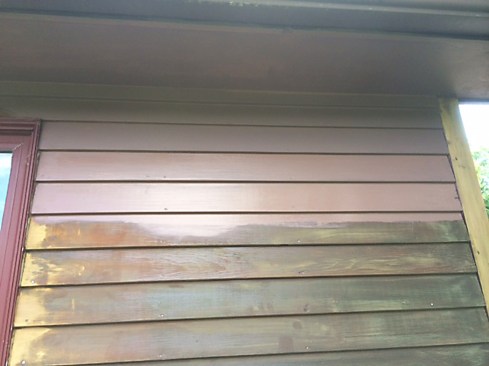
The existing siding and trim was finished with Sikkens – an alkyd-based stain that produces a hard, glossy film. The hail essentially shattered the Sikkens film coating on impact. However, the damage was largely confined to the film, leaving the underlying red cedar siding relatively untouched.
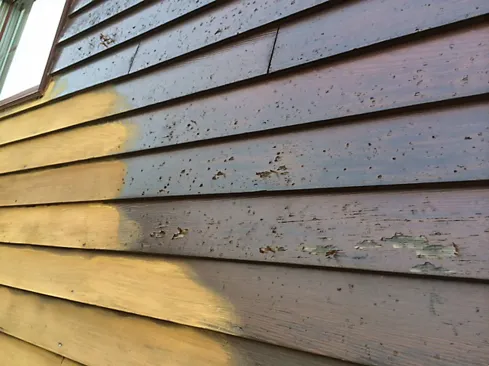
The Sikkens was showing signs of failure prior to the storm, as well. On sunny, exposed areas it was peeling. In some protected areas, such as under roof overhangs and on the one side of the building undamaged by hail, the finish was not pockmarked and was still well bonded to the siding and trim. But on the whole, the finish was beyond repair and needed to be replaced.
There are only two ways to get rid of Sikkens – with chemicals or by sanding. Both methods are messy and time-consuming, but in my experience, sanding is the better option. Chemical stripping with caustic liquids is an unappealing exposure risk, and it is difficult to keep the chemicals from affecting window cladding and perimeter gardens.
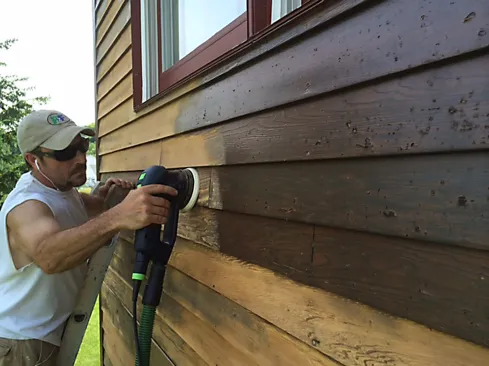
Depending on the extent of the damage, we made the decision on the fly whether to sand down to bare wood or just scuff-sand to induce bonding of the new finish. Using Festool Rotex RO 125 sanders attached to Festool CT Midi Dust Extractors, we worked our way from the bottom of the building to the soffit.
On hail-damaged clapboards, we found sanding down to raw wood eliminated 95% of the pitting. However, in a few spots the impact of the hail stones penetrated deeper, and we had to spend a little more time sanding out these deeper dings in the wood grain.
The pitting was random in its intensity and location. For instance, this small return wall adjacent to the front façade needed only to be scuff-sanded.
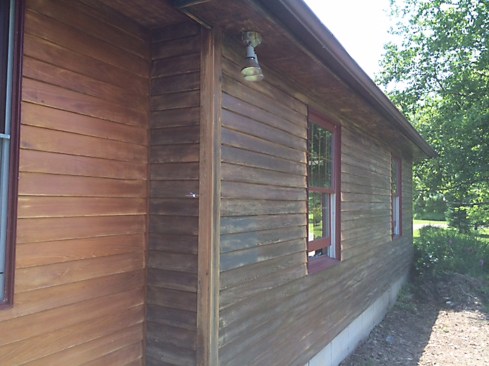
On the building’s one undamaged façade, the finish was not pockmarked at all, and the Sikkens was for the most part well-bonded to the siding and trim.
Our clients wanted to maintain a dark brown exterior, but didn’t want a transparent stain. We suggested using a deep-base acrylic primer, which we could tint to match the finish coat. The tinted primer afforded a degree of coverage, allowing us to apply just one finish coat. Working from the top down, we applied Sherwin Williams Multi-Purpose Latex Primer/Sealer primer, a high-adhesion primer that helps hide surface imperfections. We brushed it on, rather than spraying; the brush mechanically forces the primer into the grain for better adhesion.
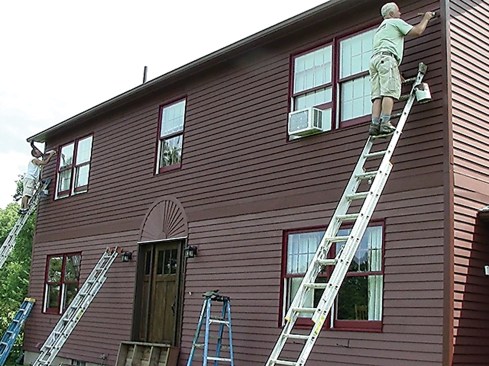
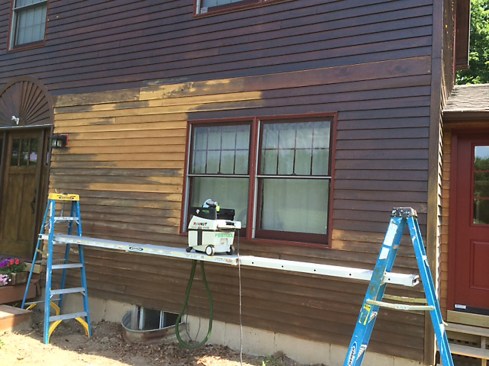
For the finish coat, we used Sherwin Williams’ Duration Satin on the trim and Sherwin Williams’ Woodscapes on the siding. Woodscapes is a solid stain with a flat finish and is good for hiding all the cosmetic defects left over from removing the Sikkens. We applied the topcoat in the same way we applied the primer – generously, wet and continuously. Todd and I had to work fast to keep the materials flowing in the hot summer sun, applying it in sections that we could cover alone (between windows) …
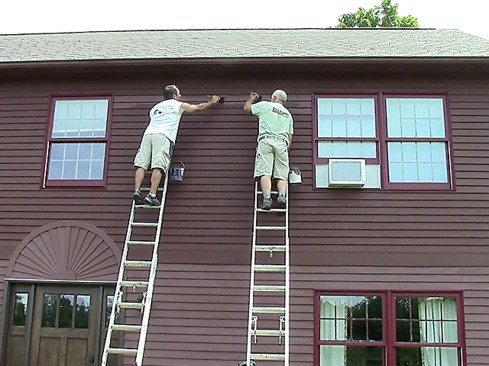
… and working together on sections where we needed to blend longer runs into each other's work to avoid flashing. We like using 2 1/2” Purdy XL medium/stiff angled brushes to apply the primer and topcoat. They work well for applying finishes liberally and fast in order to keep the surface wet. This size of brush works well on clapboard reveals to spread paint in long passes, while still allowing us to point and cut where needed.
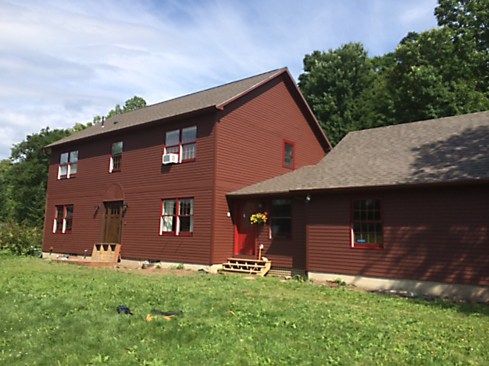
A surface restoration like this costs about twice as much as a straight-up exterior repaint, but it's still significantly less than a siding replacement. It was the appropriate option, because despite the failed coating, the cedar siding underneath still had a lot of life left in it. The finish system we installed will last for many years, although we expect by the third year it will need some touch-up in high exposure areas.


