Q. I’m getting a lot of requests for deck remodels, and I’m not sure how to price the jobs, or whether it’s a problem to reuse the existing frame. Do you have any guidelines or points to consider?
A.Greg DiBernardo, a deck builder in Waldwick, N.J., responds: At least half of my deck projects are “re-skins,” where worn-out wood decking, railings, and staircases are removed, but the existing joists are left intact to be used as a base for new (usually synthetic) decking and railing.
For obvious reasons, if the clients are willing to pay for a complete demo and rebuild, the deck will be better for it. But a re-skin is a great lower-cost alternative, provided the existing framing is up to the task. If the clients are satisfied with the design of their existing deck, a re-skin can get them a renewed look quickly. Plus, I’ll often change the shape by clipping a corner, adding a new staircase, or extending the existing deck.
Inspect the structure. While I’m taking measurements on the sales appointment, I make a careful inspection, looking for obvious signs of rot, mildew, or decay on the deck surface. More often than not, if the deck boards have begun to rot, the framing beneath them is also rotted. Simple things like a leaky gutter or downspout in a shady corner can destroy an isolated section of an otherwise structurally sound deck.
If I can access the underside of the deck, I’ll poke and prod to identify framing that needs to be replaced. I’ll also note the cause of the rot and add the cost of remediating it to my proposal. If the root of the problem is not corrected, failure down the road is guaranteed.
While I’m under there, I inspect the ledger to make sure it’s flashed and fastened to the house properly; I make sure all joists have hangers and that any hangers present are in good condition; and I check for signs of rot between the layers of built-up girders. I also check built-up girders to ensure there’s no separation between the 2x10s or 2x12s. If there is, I’ll draw the layers together using TimberLok screws (800/518-3569, fastenmaster.com).
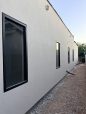
It’s critical to have access under the deck to ascertain whether the framing is worth reusing. My rule of thumb is if the deck is too low for me to get underneath to inspect, the framing has to be demolished and rebuilt. Generally, the low-to-ground decks of yesteryear weren’t built with airflow in mind. Most of the ones I’ve come across are examples of rot, mold, and decay. There’s no point installing a modern synthetic decking product with a 25-year warranty over a frame that’s past its prime.
Although my inspection is thorough, some issues may remain hidden until the decking and railings are removed. Therefore, I include a clause in my contract permitting me to replace framing members at a fixed cost as I deem necessary once I begin.
Removing the existing decking. Another important consideration is how the existing decking is attached to the joists. If the decking is nailed down perpendicular to the joists, it can be pried up with little damage to the joists. That goes for diagonally installed nailed decking, too, but it takes a bit longer.
Screwed-down decking, though, can be difficult to remove. Unscrewing each fastener usually doesn’t work because the heads strip. Prying up the boards is difficult and can damage the joists.
The fastest way to remove screwed-down deck boards is to cut them on either side of the joists, letting the pieces of decking fall between the joists. The 11/2-inch-long pieces of decking remaining on the joists can be removed with a pry bar, leaving the screws in place. The fastest way to remove the screws themselves is to cut them with a grinder equipped with a cut-off disk.
Most of the time, if a deck has screwed-down decking, I trash the entire deck. I cut the decking with a chainsaw run in between the joists; then I cut the joists, now with short pieces of decking attached to them, into manageable pieces to cart to the trash bin.
Replace the stairs. I always tear off existing staircases and rebuild them to my spec. I have never encountered a staircase I couldn’t build stronger and safer. Most do not have the proper tread width to accommodate typical 5 1/2-inch synthetic deck boards, with a 1/2-inch-thick riser and a 1-inch nosing.
I also make sure the old stairs landed on a solid surface, such as a concrete slab or pavers. If the existing stairs land on the ground, I include the cost for installing a 4-inch-thick concrete pad for my new staircase to sit on.
The Q&As in this month’s column originally appeared in Professional Deck Builder magazine.