Ben Kelley
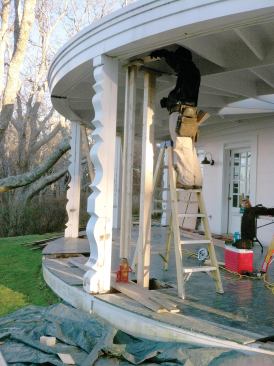
The author and his crew set up temporary supports for the porch …
Ben Kelley
The author and his crew set up temporary supports for the porch …
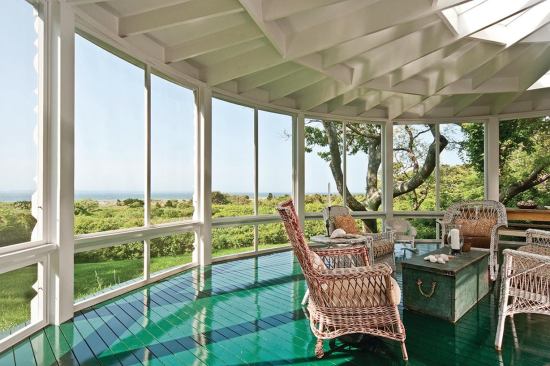
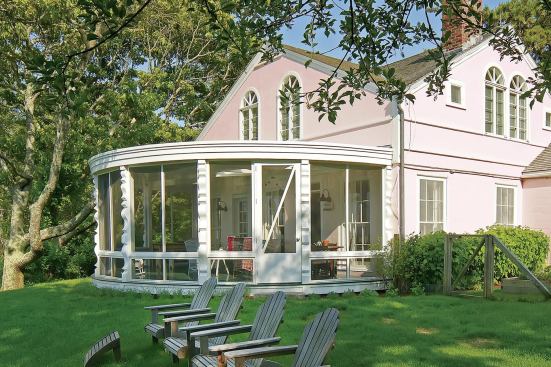
Recently we renovated a semicircular screened porch, one of the key features on a classic 1930s Martha’s Vineyard home. Like a lot of coastal porches, this one had rot issues, particularly at the base of the sculpted fir posts. The posts had been repaired more than once, but the underlying problem had never been corrected. Our plan was to retain as much of the original woodwork as possible, replace what we had to, and incorporate details that would prevent future rot.
Column Repair
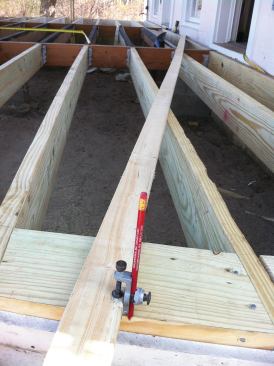
Before pulling the supports, we documented the existing ceiling height, the distances between the posts, and the size of the openings for the screen panels. This would make it easier to replace everything in its original location and replicate the appearance of the original porch. The posts were held in place with 20d nails driven down through the top plate, a surprisingly strong connection that was difficult to disassemble. (After seeing how durable this connection proved to be, we used a similar detail when we re-installed the posts, replacing the 20d nails with 6-inch TimberLok structural screws, four per post.)
Epoxy to the Rescue
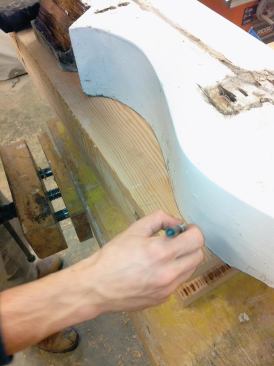
Back in the shop, we inspected each post carefully for rot — at least the portions that didn’t disintegrate on removal. Because the bottoms had been resting directly on the sill plates or decking, most of the damage was within a couple of feet of the base. There was also some rot where horizontal sections of the scrolled profile had caught water. We cut off the rotted sections, but saved them to use as templates.
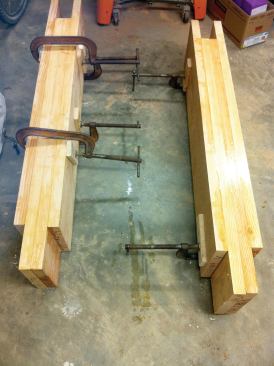
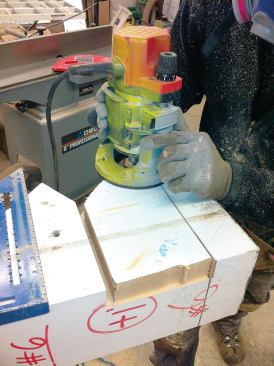
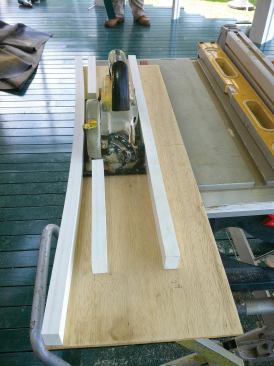
We assembled the replacement sections from four layers of 2×10 vertical-grain fir laminated together with West System two-part epoxy (see slideshow). We clamped the laminations together as the epoxy set, and also reinforced the assembly with torque screws and 1/2-inch-diameter through-bolts, countersinking the bolt holes and later filling them with fir plugs. To create a T&G profile that we could use to join the new and old column sections together, we offset the two outer laminations by 6 inches.
Using the removed column sections as templates, we scribed the appropriate profile onto each of the new blanks, then cut the profiles out on our band saw. We used a router with a 2-inch straight bit to give us a clean joint for the tongues on the old columns, then finished and fine-tuned the tenons with a chisel and belt-sanded the cuts smooth.
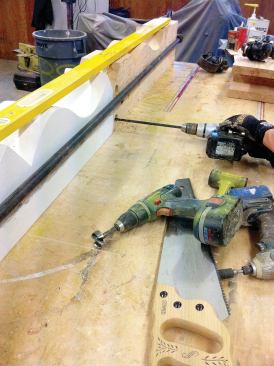
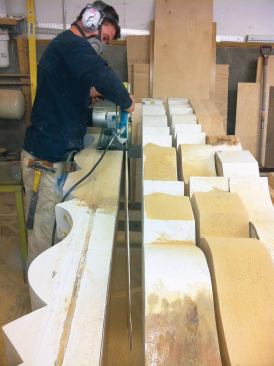
We joined the old and new column sections together with more epoxy, reinforcing the joints with 1/2-inch-diameter galvanized carriage bolts, which we drove through predrilled holes. We also countersunk these holes, and later filled them with wood plugs. Some of the old 6-inch-by-9-1/2-inch columns were warped, so we trued and cleaned them up with our 16-inch beam saw. We patched blemishes and minor areas of rot with epoxy thickened with epoxy filler, then smoothed the cut edges with a belt sander. To clean up the scroll work, we used a drill-mounted paddle-style sanding wheel and a Fein detail sander. Then we primed the columns and brought them back to the site.


