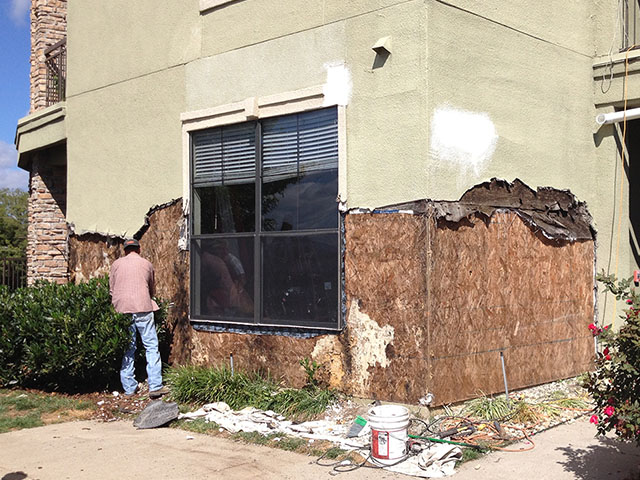
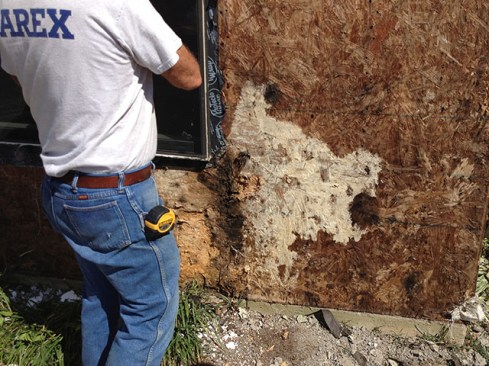
As a consulting architect specializing in moisture protection of buildings, I’ve seen my fair share of water damage around windows. Often the installers had carelessly assembled the pieces—peel-and-stick flashings, housewrap, and the window itself. Typically, this results in extensive damage at the sill-jamb intersection, at what I call the “X-Y-Z” points.
While poor workmanship is common, sometimes I come across damage during forensic investigations where it appears the installers attempted to follow manufacturer’s guidelines, but leaks still occurred. In these cases, I suspect the flashing material was stressed beyond its material limitations when the installers stretched it across the “X-Y-Z” juncture at the sill, and despite all attempts to apply patches in the corner, the installation failed.
Contributing to the failures are mistakes like using housewrap as the primary flashing, not installing the products “shingle-fashion,” and relying on adhesive products, such as tape and peel-and-stick, to remain sticky forever. Part of the problem, I suspect, is that while code says to follow the manufacturer’s instructions, the question is often: Whose instructions do you follow?
With most windows installations, there are competing instructions. First, there may be instructions from the manufacturer of the peel-and-stick flashing tape. There are likely to be instructions from the housewrap manufacturer. There may be a detail from an architect. And, of course, the window manufacturer has its method. So, whose method takes precedence? 
Flashing
My Way. On the jobs I consult on, I advocate the installation method shown above. This illustration is the type of drawing I typically provide to the owners and  contractors. The photos shown in this article are from a job that is typical of a lot of the jobs I have been involved with—large apartment complexes with around 200 to 300 windows. On a job this large, quality control is difficult, but a drawing like this helps make each step clear to everyone—and that's half the battle.
Flashing My Way. On the jobs I consult on, I advocate the installation method shown above. This illustration is the type of drawing I typically provide to the owners and  contractors. The photos shown in this article are from a job that is typical of a lot of the jobs I have been involved with—large apartment complexes with around 200 to 300 windows. On a job this large, quality control is difficult, but a drawing like this helps make each step clear to everyone—and that's half the battle.
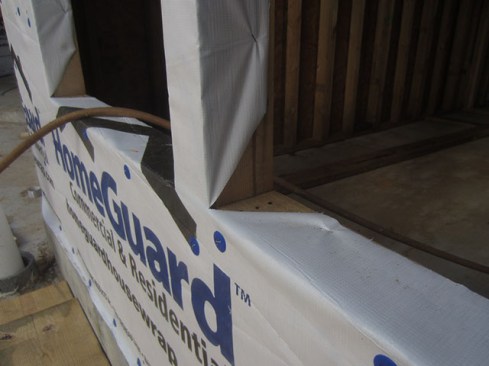
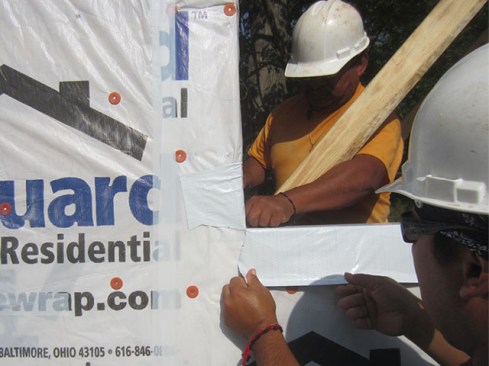
Housewrap. Most window-flashing instructions tell you to cut the housewrap in an inverted “Y” and turn the housewrap in along the sill and jambs. In doing so, the housewrap serves as a primary jamb flashing. In my opinion, this is wrong. If peel-and-stick is not adhered directly to the rough openings’ wood surfaces, water has the potential to travel between the framing and the housewrap. The whole point of using a peel-and-stick flashing is to protect the innermost wood components.
Instead, I recommend cutting the housewrap flush with the window’s rough opening at the jamb and sill. At the head, I recommend providing a square cut (as opposed the conventional method of angle-cutting the housewrap) at least 6 inches horizontally beyond the rough opening and 12 inches high (see Step 1 in the illustration above). This head detail keeps the cuts away from the opening and allows the ends of a peel-and-stick to adhere directly to the sheathing.
Sill flashing. Whether you’re using a flexible flashing or a straight peel-and-stick, most window flashing instructions call for turning the sill flashing up the jambs a full 6 inches. This seems excessive. Is this done to protect the sills against ponded water? I submit that if water ever rises to that height on a jamb, there will be plenty of other issues to be concerned about other than a window leak. Compounding the problem, most window flashing instructions show (but may not specifically call out) the sill flashing lapping about 6 inches over the housewrap below the opening. Doing all this with flexible flashing often results in lots of wrinkles, and I suspect it overstresses the material limits—if not of the flashing itself, certainly of the housewrap it’s lapping onto.
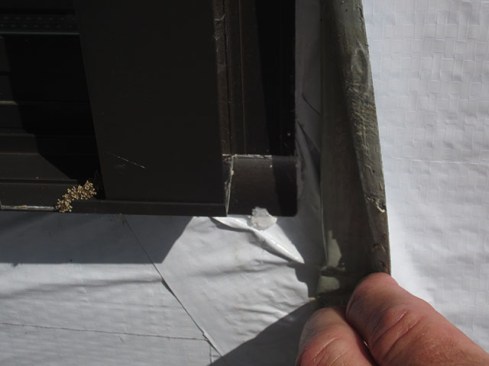
With straight flashing, the recommendation is to avoid all this material stress by taking a utility knife and cutting the flashing at a 45-degree angle from the corner. For me, this unravels all the good intended by turning the tape up in the first place. Cutting the peel-and-stick essentially exposes the “X-Y-Z” corners. And applying a “patch” to cover this exposed corner just provides another avenue for water to hit against an adhered edge and attack what it’s trying to protect. Also, the patch (usually a “bow tie” shape is recommended) is stretched beyond its material limitation when applied. This has the potential to cause more wrinkling, and increases the likelihood of the flashing delaminating from the sill.
Instead, I recommend turning the jamb edges up no more than 1 inch, and lapping the housewrap no more than 2 inches.I believe this is enough to cover the critical “X-Y-Z” corners, and allows enough vertical height to be lapped by the jamb flashing. It’s also provides enough length to lap the top of the moisture barrier or a separate through-wall flashing sheet, if one is needed for masonry veneer.
Instead, I recommend turning the jamb edges up no more than 1 inch, and lapping the housewrap no more than 2 inches.

I believe this is enough to cover the critical “X-Y-Z” corners, and allows enough vertical height to be lapped by the jamb flashing. It’s also provides enough length to lap the top of the moisture barrier or a separate through-wall flashing sheet, if one is needed for masonry veneer.

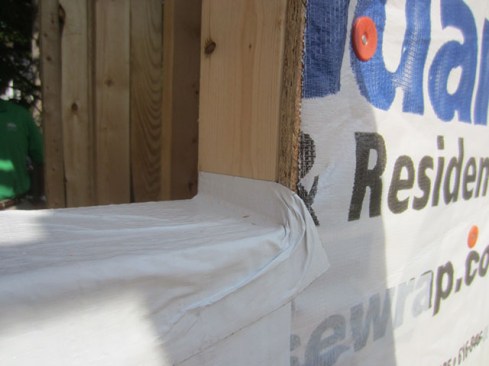
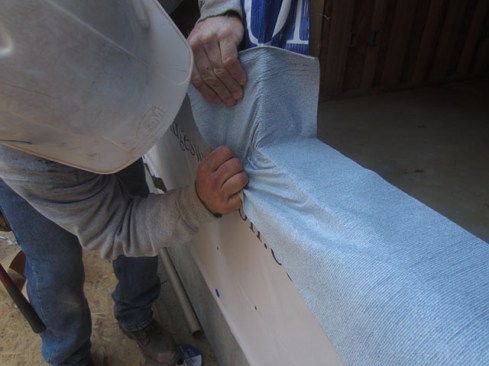
I prefer using a flexible sill flashing, which allows the critical corners to be formed easier and increases the chances of the sill flashing staying flat. On a recent project, I compromised and allowed the builder to install straight flashing, applying it with a 1-inch lap onto the jamb (without cutting the corner). Flat flashing tape tends to retract when being applied to two disparate planes because of its relatively rigid polyethylene backing. Going up only 1 inch, the corner was difficult to achieve, but it was passable—albeit with some wrinkles.
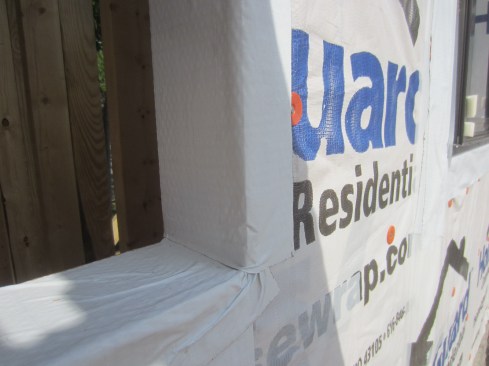
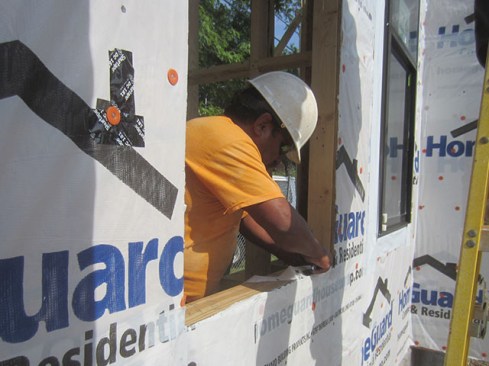
Jamb flashing. For the jamb flashing, I recommend installing a straight peel-and-stick flashing adhered to the housewrap on the face and to the wood in the rough opening. Where the jamb flashing laps the sill flashing, the lap is not perfect (there are still wrinkles) but it is sufficient; any water that finds its way to the flashing will “shingle off.” Once the jamb flashing is in place, the window is installed with the flanges caulked (just not at the sill) and fastened to the wall.
Head flashing. The head flange is covered with a piece of straight peel-and-stick. This flashing must adhere directly to the wall sheathing. Make sure it extends past the outer edges of the window, preferably past the outer edges of the sill flashing tape. The last step is to fold the housewrap back down over the head flashing, and to tape the slits in the housewrap closed.
Warranty
vs. Liability. The biggest push-back to this method I get from contractors—both the general and subcontractor installers—is the argument that following my way of flashing (and not a manufacturer's) will void a warranty. I argue that avoiding the liability associated with water damage is far more important than any warranty (any of which is usually next to impossible to redeem). I don’t always get my way, but often I can persuade the owner and the building inspector that my way offers the least chance of failure.
Warranty vs. Liability. The biggest push-back to this method I get from contractors—both the general and subcontractor installers—is the argument that following my way of flashing (and not a manufacturer's) will void a warranty. I argue that avoiding the liability associated with water damage is far more important than any warranty (any of which is usually next to impossible to redeem). I don’t always get my way, but often I can persuade the owner and the building inspector that my way offers the least chance of failure.