I used to work out of a long-bed cargo van. Initially, it seemed like the right way to go — plenty of sheltered cargo space, rear- and side-door access, and lockable storage to deter theft. Basically, I drove a fully loaded toolshed to work. A roof rack handled ladders and long stock. And the exterior surface provided a generous area for an eye-catching graphic to advertise our presence on the job. But the pluses soon gave way to the minuses: Access was awkward — I had to climb inside, stoop over, and rummage around by the dim glow of the dome light to find tools and supplies. Organized storage was compromised — inward-sloping sidewalls, wheel wells, and those not-so-handy side and rear doors didn’t leave enough usable area for shelving. With the shelves stuffed full and their contents soon forgotten, the remaining narrow floor area became more or less permanently choked with miscellaneous hand and bench tools, buckets, cords, parts, and items long assumed lost. My best intentions for getting organized were overwhelmed by sheer impracticality. After a few years of growing frustration, I finally decided to upgrade my rig.
Towing the Line
I didn’t want to be tied to my tool collection everywhere I went, so a bigger truck wasn’t the solution. A trailer, pulled by a pickup, would allow me to park the tools and ride unencumbered between work and home, run errands, and transport other cargo and passengers independently.
I bought a 16-foot, dual-axle Haulmark (800/348-7530), with 6 1/2 feet of arched headroom and an 8-foot-wide cargo area. I pull it with a Chevy C-2500 4×4 Duramax Diesel. The trailer, empty, weighs 2,900 pounds and is rated for a 7,000-pound payload with its optional heavy-duty axles. Oddly, the trailer came equipped with a hitch rated for a measly 6,000 pounds gross weight, so I had to immediately spend an additional $300 for a heavier-duty, 12,000-pound-rated weight distribution hitch.
Built-ins. I set up the interior for production, with a 10-foot sheet-metal brake on a long workbench along one side, and a drop-in miter saw centered on a bench on the opposite side (see Figure 1). A shop-vac under the bench, ported to the miter saw’s exhaust, keeps the bench clear of sawdust. Even on a rainy day, I can usually keep something going on inside the trailer. On sites where power isn’t readily available, I’ve got a battery backup feeding a power converter. And, conversely, I’ve got an external hookup so that I can power the trailer from a job-site source. Above and below the benches, I installed storage bins and shelving, using hollow aluminum extrusions for uprights to add strength and keep the dead weight down. Most of the bins lift out for easy transport of parts and equipment. Many of our most frequently used tools hang from quick-release carabiner clips at the front of the bins, so they can be seen easily and returned (Figure 2). The clips also keep the tools hung during travel — like a boatbuilder, you have to keep the effects of swaying, rocking, and bouncing in mind if you don’t want to find everything on the floor by the time you pull up on site.
Figure 1.A power miter saw and a swing-up 10-foot sheet-metal brake are always ready on their respective benches. A built-in shop-vac dust collector under the bench keeps the cutting table clear of sawdust.
Figure 2.Frequently used tools hang from quick-release carabiner clips for easy access and return, and to prevent spilling during travel. Bungee cords and raised shelf lips help keep stored items in place.
Bells and Whistles
Job-site pilferage, in the form of grand-theft auto, is, unfortunately, a distinct possibility where I work. Seeing all of my equipment in one place and ready to roll could be more temptation than an enterprising thief could resist. I considered installing a motion-sensing alarm, but too many nonevents, like a strong gust of wind, could set it off. Also, if the trailer does embark on an unauthorized trip, I want it back as quickly as possible, before it can be stripped. For peace of mind, I purchased InterTrak (866/346-3631), a satellite tracking alarm system, for the trailer. Now, if it moves even a few yards after hours or any attempt is made to intrude, I get an immediate alert on my pager and cell phone, and the security company can home right in on its physical location. The service costs less than $20 per month.
A trailer this size is somewhat challenging to position and park, especially after dark. I upgraded the back-up lights to provide bright illumination and installed a set of warning strobes, mounted above the rear doors, for safety.
Inside, fluorescent lighting above the benches provides plenty of illumination to work by and to find whatever we’re looking for in the storage bins.
I didn’t install an under-counter refrigerator, because I didn’t want to give up the space for something we wouldn’t really use. But there is a microwave oven, which is great for heating soup, water, sandwiches, and day-old doughnuts.
Voice of America
Of course, the first piece of equipment to be set up on any job is a radio (it’s also one of the most frequently replaced tools, as accidents do happen). I installed a stereo inside the trailer, on its own shelf — it’s always ready to play, never has to be moved, and doesn’t occupy an extension cord that could be put to better use (Figure 3). An upcoming embellishment will be a pair of built-in, waterproof, outdoor speakers, which will make this boom box pretty hard to top.
Figure 3.A microwave oven provides on-the-spot hot lunch; a built-in stereo will eventually connect to a pair of outdoor speakers. The plywood cabinet to the right houses the backup batteries and converter.
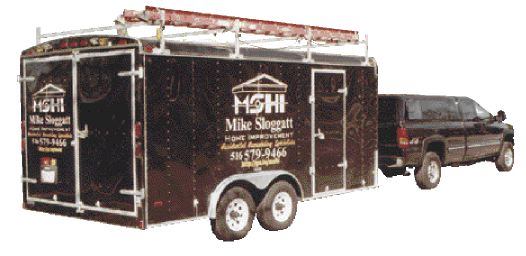
Signage loophole. A real added benefit of the trailer is the billboard-sized graphic I’ve got painted on the sides and rear doors. The township where we do most of our work doesn’t permit any signs to be posted on the job site. But there’s no regulation against vehicle signage, and there’s no way to miss seeing mine when it’s parked on the job.
Have Shop, Will Travel
The first thing I look for when I’m handed a set of plans for review is parking space — that is, a staging area that the trailer could occupy during the job. At 8 feet 6 inches wide, it’s a bit unwieldy, and job-site access can be difficult, but a 7-foot-wide trailer actually uses the same 8-foot axles, and you lose that extra foot and a half of interior space. Bigger, or wider, is definitely better. (The legal width limit in most states is 102 inches.) If there’s no room at the prospective site for the trailer, I won’t even bid the job. I’m not equipped to do the kind of job that requires daily setup and breakdown, load in and load out (Figure 4). Rather than an inconvenience, I consider that a built-in efficiency filter, forcing me to focus on what we do best.
Figure 4.Unencumbered by the daily setup and breakdown required by an occupied remodel, the author can park his trailer within inches of the work site and is always ready to work.
Older and Wiser
All told, I’ve invested a little under $11,000 to buy and customize the trailer. I’d do a few things differently if I were trailer shopping today. The side panels are a light-gauge metal, which, although adequate, gives the trailer a slightly flimsy, quilted appearance. Heavier side panels are an available upgrade option — I’d have spent the extra couple of hundred dollars if I had appreciated the difference at the time. More seriously, the roof panels aren’t made to be walked on, which is truly inconvenient considering the otherwise ample roof-rack storage that’s available. Reinforced framing and roof panels, to support our weight, would make loading and unloading materials 8 1/2 feet off the ground a lot safer and easier.
The floor frame comes standard with 2-foot on-center steel tubing; instead, I opted to have the frame built 16 inches on-center to stiffen the floor. However, I ended up laying strip oak flooring over the stock 3/4-inch plywood to provide a durable work surface. Two-foot centers would easily have handled this floor system — as it is, the extra steel adds a few hundred pounds to the rig.
The wood shelf components would look nicer and stay cleaner with a couple coats of urethane, but I outfitted the interior during a winter cold spell and moved right in. Recently, I touch-sanded the floor to clean it up and applied a couple of coats of urethane to protect it. Basically, though, the trailer’s not a showcase but a tool, and one that quickly paid for itself in time-saving convenience.
Mike Sloggatt is a remodeling contractor in Levittown, Long Island.


