
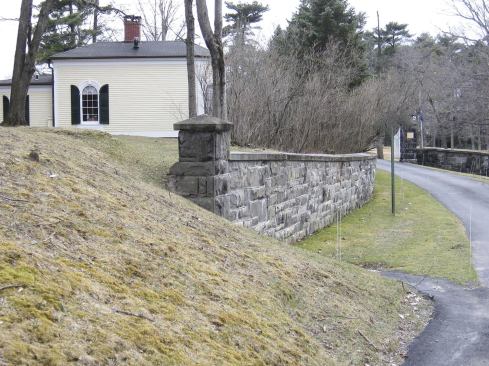
I’m a general contractor in New York’s Hudson River Valley, where my company specializes in historical restoration work. We pride ourselves on our ability to develop effective solutions for reconstruction problems of all kinds. Our skills were put to the test in one recent project, where we were asked to repair a century-old stone wall that ran along one side of a private road.
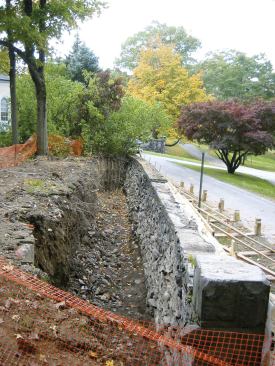
It was evident at a glance that the 6-foot-high wall had some serious problems. There was no provision for drainage, and soil pressure had tipped a 70-foot section – plus the pilaster at one end – up to 20 degrees beyond vertical. Most of the coping stones along the top had long since come loose as a result of seasonal freezing and thawing. Still, the quarried bluestone wall itself appeared to be almost completely intact, so we thought it might be possible to ease it back into its original position without doing any further damage.
Developing a Plan
The leaning wall was just one piece of a much larger restoration project we were doing for the client. Because so many unknowns were involved, we agreed to tackle it on a time-and-materials basis, and I was careful to explain that our attempt to repair the wall might end up reducing it to rubble. Really, though, our approach didn’t hold much risk, as the owner was prepared to build an entirely new wall if necessary; if the attempt at repair failed, we’d shift directly from repair mode to demolition. The excavation work wouldn’t be wasted, since it would be required for a replacement wall in any event.
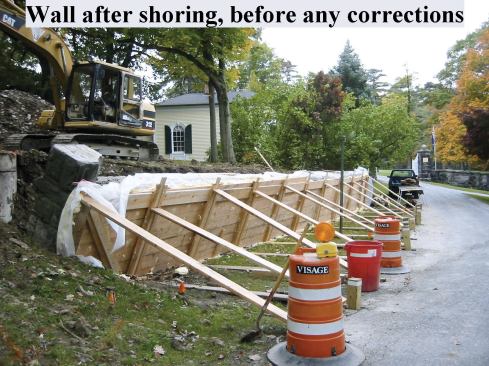
Our plan for saving the wall had two stages. First, we’d stabilize it in its current position with a bombproof system of posts, plank shoring, and diagonal braces. The shoring would prevent the wall from toppling while we excavated behind it, and later serve to distribute the pressure that we’d bring to bear against the wall to return it to an upright position.
Then – if we succeeded in getting that far – we’d pin the straightened section of the wall together with rebar and add a system of tiebacks and soil anchors to hold it in position permanently.
Shoring and Excavation
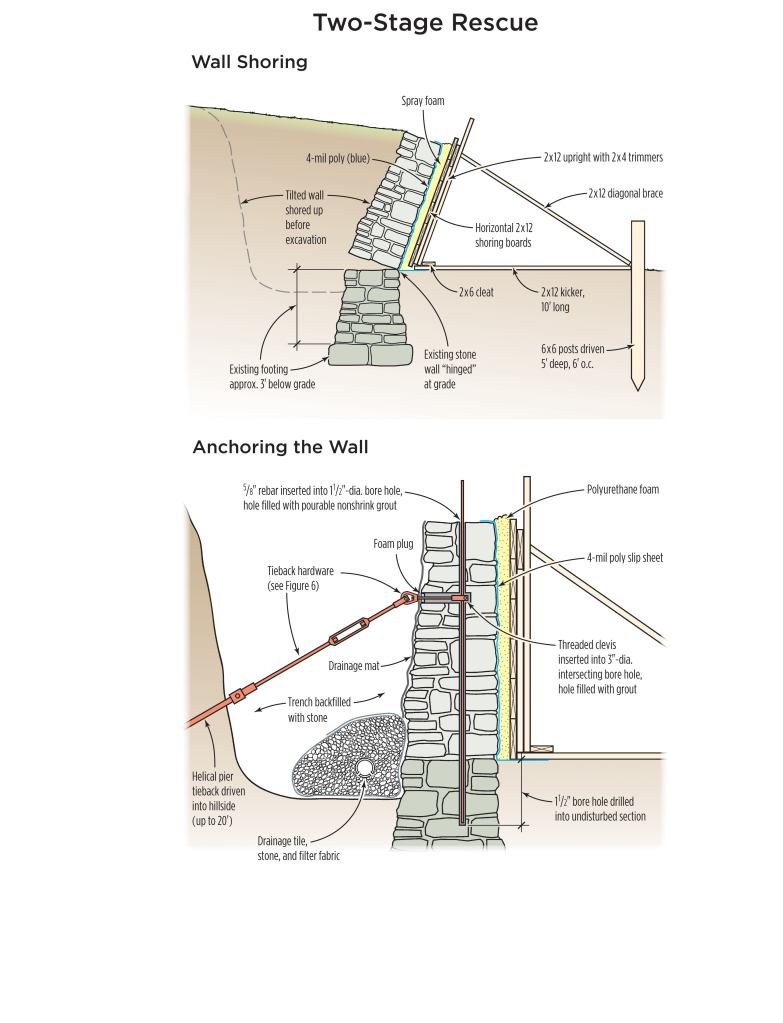
The first step in assembling the shoring was to use a jackhammer attachment on an excavator and a steel plate to drive a series of pointed 6×6 posts about 5 feet into the soil, spaced 6 feet apart along a line 10 feet or so in front of the wall. We then ran a horizontal 2×12 kicker from each post toward the base of the wall, where it butted against an upright 2×12 with two attached 2×4 trimmers. We used Timberlok screws to fasten 2×12 diagonal braces to the kickers and uprights.
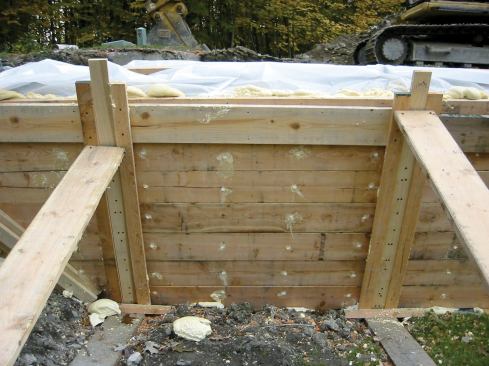
Once the system of posts, kickers, uprights, and diagonal braces was in position, we draped a sheet of 4-mil poly between the uprights and the wall and screwed horizontal 2x12s to the uprights. The result was a solidly braced wall that stood parallel to the face of the stone, with several inches of space between the two. Next, to ensure uniform bearing along the entire face of the wall, we had a spray-foam contractor inject 2-pound polyurethane foam into the void through 1 1/2-inch holes bored through the horizontal shoring planks. The expanding foam – which was prevented from sticking to the stone by the poly slip sheet – created a perfect “dental impression” of the wall, minimizing any chance that the stones would shift position when we moved the wall.
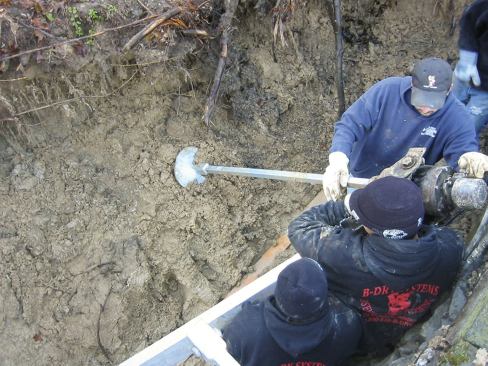
To expose the back of the wall, we began with an excavator and then progressed to shovels and – to clean the dirt from between individual stones – hand trowels. This face of the wall was much rougher than the front, but it was equally sound. We were encouraged to find that the only real problem was right at grade level, where the upper part of the wall had broken cleanly away from the section below and swung away as if on hinges. A few test borings told us that the wall itself continued below grade for another 3 feet, where it met the footing. And the absence of any nonparallel cracks told us that the footing itself hadn’t settled significantly since the wall was built.
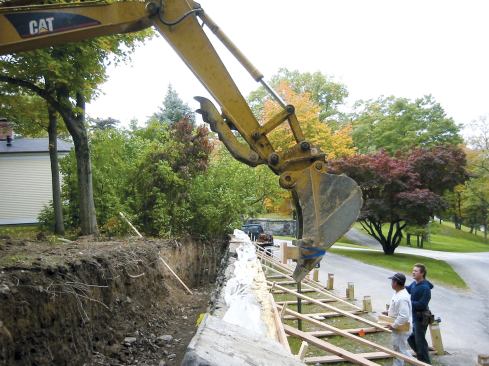
Easy does it. We’d originally thought of using jacks to stand the wall upright, but we soon realized – given the amount of movement needed at the pilaster end of the wall – that this would make for extremely slow going. Instead, we decided to use the boom of the excavator to grab onto the wall from behind and ease it back into position.
Fortunately, there was enough open space on the bank behind the wall for the operator to position the excavator as needed. Starting just beyond the pilaster, he eased the bucket against the top edge of the shoring as we removed the screws at the outboard end of the diagonal brace, then gently used the hydraulics to pull the wall an inch or two further upright. We then repositioned the diagonal brace and screwed it back against the kicker – with a 4×4 block just behind it to further distribute the load – before moving the machine 6 feet down the wall and repeating the process.
This part of the job took only a few hours, with less and less effort needed to move the wall as it approached the vertical. Much credit goes to our excavation sub, who showed a master’s touch on the controls – it was no job for a journeyman.
Anchors and Tiebacks
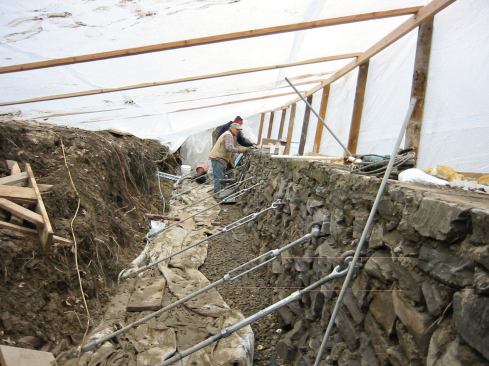
Once the wall was standing upright, we began preparing the system of internal pins and external tiebacks that would lock it in position. The first step was to have a helical-pier contractor drive a series of soil anchors into the slope behind the wall, at about the same spacing as the diagonal braces for the shoring. Some of the anchors had to be driven to depths of nearly 20 feet to achieve the required 15,000-pound withdrawal force.
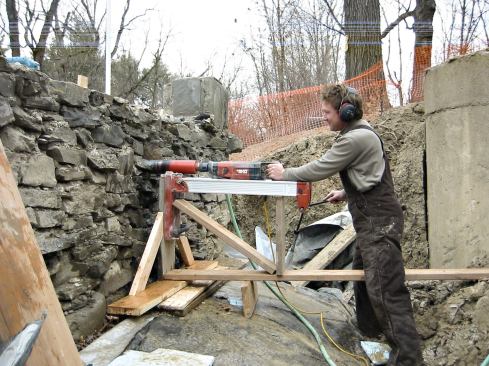
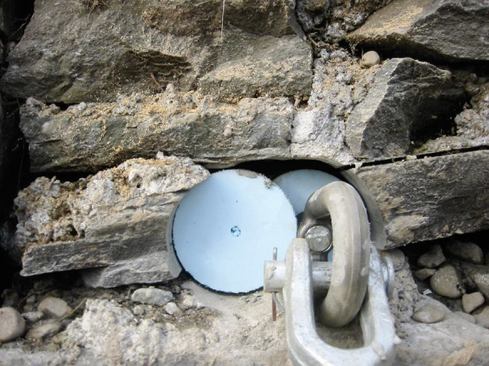
The next step was to drill holes for the rebar. We began by marking a point on the top of the wall directly in front of each soil anchor; then we used a 1 1/2-inch cruciform bit in a Makita rotary hammer drill to bore from there into the undisturbed section below grade. Progress was slow, mostly because the bit had to be pulled out frequently to clear the dust from the holes. Once we’d finished the vertical holes, we used a regular Hilti core drill rig to bore a series of intersecting 3-inch horizontal holes about 2 feet below the top of the wall. These larger holes would accept the connecting hardware that would link the internal rebar to the soil anchors.
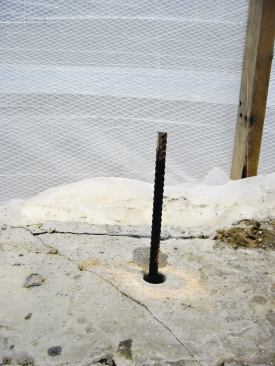
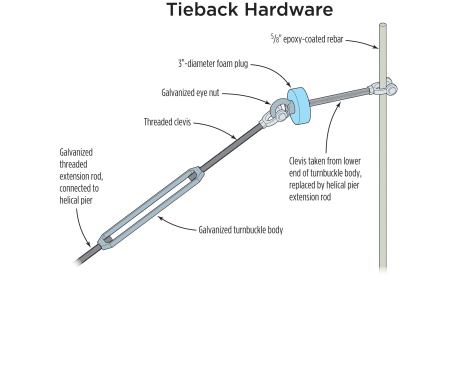
We assembled those connectors from heavy-duty eye nuts and galvanized turnbuckles purchased from a distributor of marine hardware. As we inserted a threaded clevis in each horizontal bore hole, we dropped a 5/8-inch strand of epoxy-coated rebar into the intersecting vertical hole so it passed through the eye. After repeating this process at each set of holes, we poured nonshrinking machinist’s grout into the hole in the top of the wall, embedding both the rebar and the attached clevis. Once the grout had set, we screwed the ends of the turnbuckle assemblies to the threaded extensions supplied by the soil-anchor manufacturer.
Finishing Up
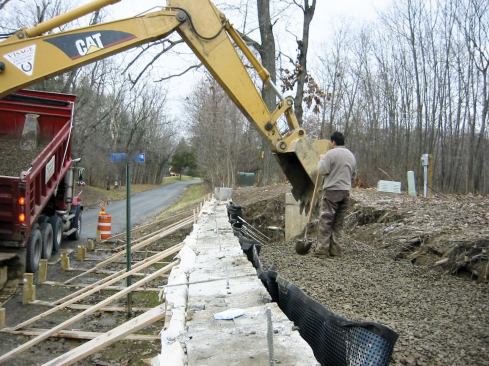
After snugging up the turnbuckles, we waited several days before backfilling to make sure that there were no signs of shifting or settling. When we were satisfied on that score, we hung a dimpled drainage mat against the inner face of the restored wall – slitting it in places to pass around the tieback anchors – and backfilled with clean stone. (We’d already run drainage tile at the base of the wall to keep our feet dry while we worked.) We then cut off the protruding rebar and bedded the original coping stones in fresh mortar, sealing the joints where the stones butted together with a polyurethane sealant.
Cost breakdown. This job required a lot of man-hours. Labor costs came to $19,000. The helical anchors cost $7,000, and machinery and trucking added another $3,200. The insulation contractor charged $1,500 to foam the space between the stone and the shoring. The cost of materials – hardware, masonry supplies, drainage materials, and lumber – came to another $3,500, bringing the total project cost to $34,200.
But compared to the cost of building an entirely new wall, the repair project was a bargain: Estimates for reconstruction ran upward of $90,000. Moreover, our approach retained the wall’s original materials and historic character, making it a win-win situation by any standard.
Michael Pelletier is manager of The Housewright in Germantown, N.Y.


