This is a story about my wanting to build something that I liked but that others said couldn’t be done. The stone supplier and the stone mason said it couldn’t be done, and I couldn’t find any published construction details for doing it. But if nothing else, I’m persistent and have come to learn that there’s always a way to reach your goals.
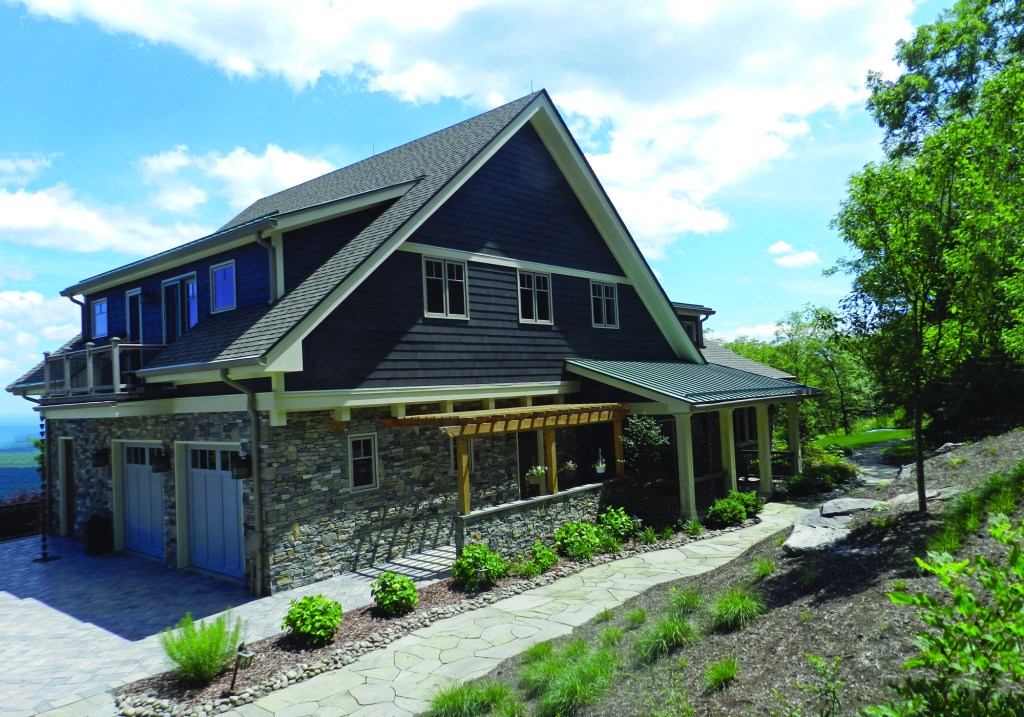
The project, located in the Hudson Valley in New York, called for a low-maintenance, energy-efficient house. We were aiming for a durable, maintenance-free exterior using Nichiha fiber-cement lap siding on the second-story and real stone on the first floor and walk-out side of the basement. Everyone involved wanted real stone, not “cultured” or “cast” stone. Touching and seeing the real thing provides a visual, sensory, and emotional experience that comes only from authentic materials.
To make the house as energy efficient as possible, we used closed-cell spray foam to fully fill the 3 1/2-inch stud cavities, and 1 1/2 -inch-thick foil-faced polyisocyanurate foam on the exterior to create a thermal break. This gave us a total R-value of around 34 in a wall only 6 inches thick, allowing us to use windows and doors with standard-depth jambs.
In my search for information, I made contact with an engineering firm that wrote a white paper for the Foam Sheathing Coalition on installing claddings over rigid foam. (This report eventually became the basis for the New York State Building Commission’s approval of generic fastener requirements for installing claddings over exterior foam.)
The process outlined in that article started with determining the weight of the cladding. The real stone we specified weighs 13.4 pounds per square foot. Adding the weight of all the wall components—including the foam, rainscreen, expanded metal lath, and mortar scratch coat—gave us a total weight of 21 pounds per square foot. Based on that, we were able to use the 25-psf category in published design specs—namely, the guidelines in the Evaluation Service Report for FastenMaster HeadLok screws, the fasteners we eventually chose for securing the cladding assembly to the framing.
The process for building this assembly is described in the photos and captions.

As the framing went up, plywood sheathing was installed, and polyiso foam was installed right behind it. We chose polyiso because it has the highest R-value per inch (6.5), allowing us to add almost 10-R to the wall without having to incur the expense of custom windows. The choice of plywood as the sheathing was dictated by a more subtle performance issue.
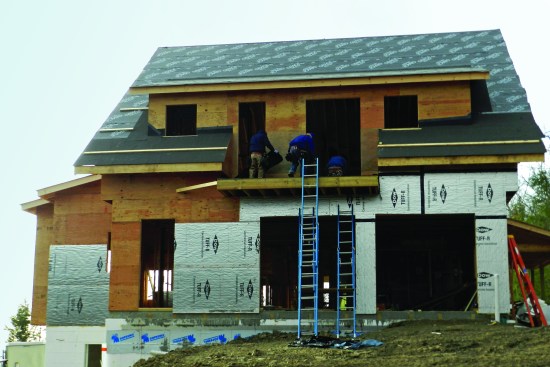
When plywood gets wet, it swells consistently across the panel dimension. It also dries out relatively quickly and returns to its normal dimensions. OSB takes longer to get wet but also longer to dry, and it can swell unevenly. While swelling edges are unlikely to telegraph through and crack the mortar, we wanted to hedge our bets. With stone—a “reservoir” cladding that can soak up and hold much more moisture than wood or fiber-cement siding materials—we wanted as forgiving a wall as possible.
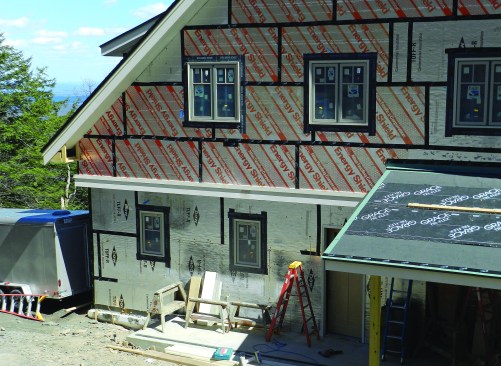
A critical element in the process of installing the polyiso is to seal all the joints. We used Zip System tape, which of all the tapes we’ve used had the greatest ability to stick to the foil facing. Before applying the tape, though, we had to wipe off the foil surface with lacquer thinner to remove an oily residue left from the manufacturing process. Below grade on the side and front of the house, we used a Delta-Dry system to create drainage against the ICF (insulated concrete form) foundation and flashed the top edge with Soprema—a peel-and-stick membrane recommended by the ICF manufacturer. It’s critical to use materials that are compatible.
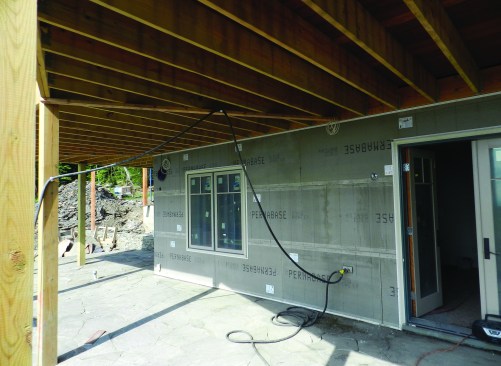
Above grade on the walk-out side, we installed PermaBase over the ICFs. This provided a nail-base to which we could apply the same rainscreen material and scratch coat that we used on the rest of the above-grade walls.
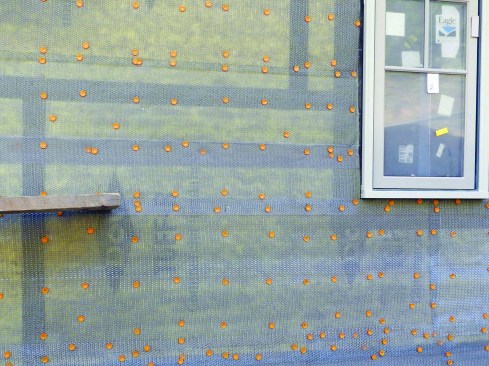
Once all the polyiso had been installed around the house, the carpentry crew installed a drainage-plane material—in this case, Benjamin Obdyke’s Home Slicker. This material is a dimensional matrix that provides a channel to drain any water that is driven through the stone face and mortar joints.
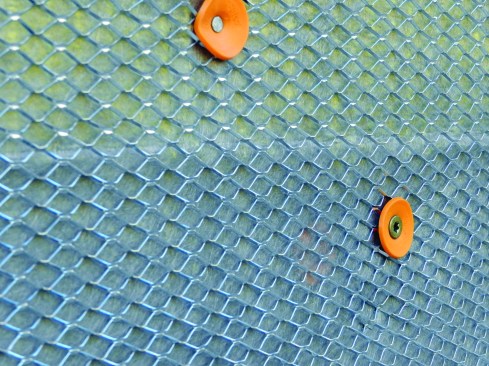
It has a continuous backer, is easy to bend, and is lightweight enough to be tacked up with a hand stapler. The mason then followed, installing an expanded diamond mesh lath, first with 8d nails into the sheathing to hold it in place, then with screws to help flatten out the lath laying over the rainscreen material.
Since the lath carries the full weight of the mortar scratch coat and the thin-stone veneer, the carpetry crew secured the lath every 6 inches vertically along the studs with 4 1/2-inch HeadLok screws (with grey washers). This fastener specification for securing cladding through foam, for a cladding weight of 25 pounds per square foot, came from the FastenMaster Technical Evaluation Report (TER 1009-01) for HeadLok screws.
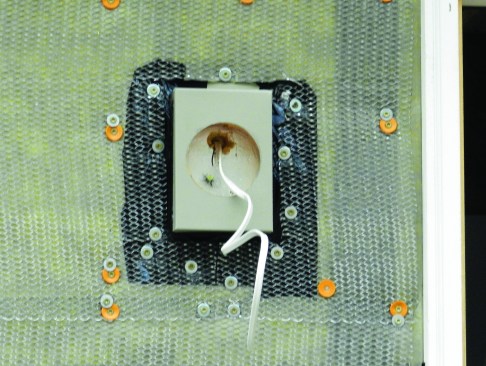
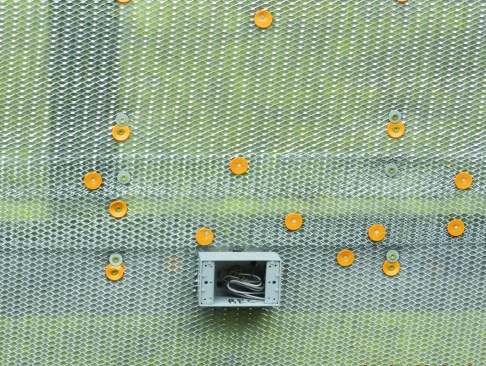
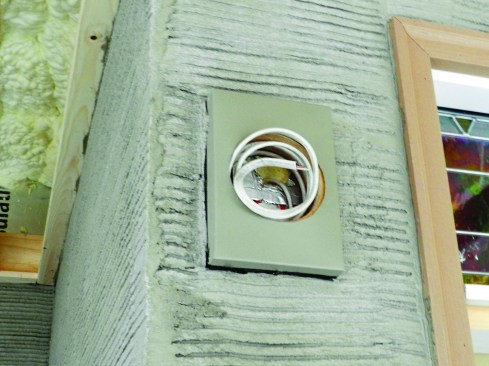
As the carpentry crew came through to secure the lath, they also worked with the electricians to set the outdoor electrical fixtures. All the fixtures and standoffs needed to be installed and flashed properly before the scratch coat was applied.
The mason applied a very heavy scratch coat to provide a secure bond for the stone veneer. For the mortar, he used Spec Mix Stone Veneer Mortar VM-01
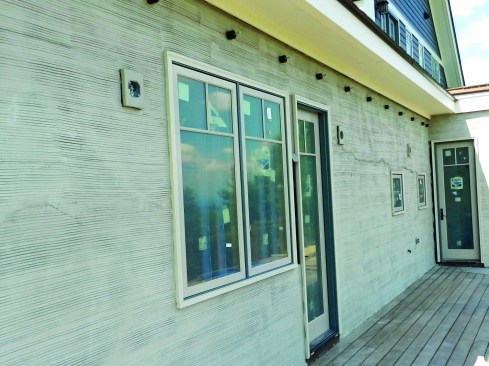
The entire first floor below the second-story beltline was stuccoed, including above the rear deck. Note: The standouts just below the soffit are for a ledger board that will support a trellis. With any cladding material, especially one like stone that can hold a considerable amount of water, it’s important to promote drainage and drying.
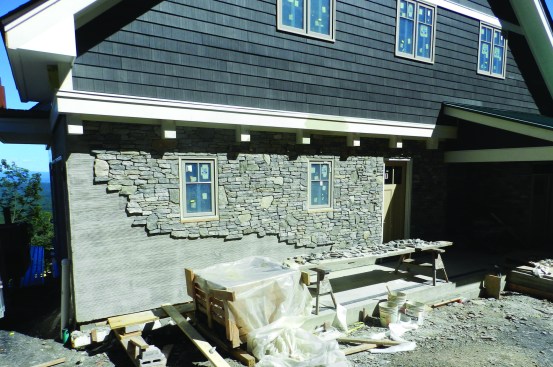
Working from the top down (so all the mortar that might fall off the trowel or the back of the stone would fall harmlessly to the ground without creating a mess on the face of the stone below), the mason could start installing the stone veneer. We selected material, from Stoneyard.com, that is consistent with the natural stone in the area. We specified a mix of 80% Ledge Stone and 20% Mosaic.
The mason artistically integrated both shapes into a consistent, beautiful whole. The larger stone had the effect of moving the eye along and breaking up any possible linear effects. The mason selected stone from each of the wood crates to create the pattern, cutting pieces as necessary. We used the same stone on the face of the fireplace, which nicely ties the inside and outside together.
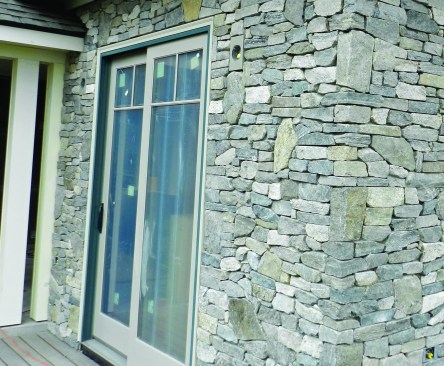
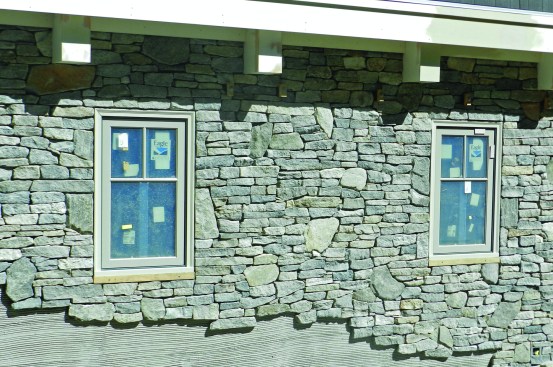
Each crate of stone comes with premade corners that are offset so that the mason can easily set each corner and then work to that row. The beauty of real stone is that when a piece is cut, it is uniform throughout the material—nothing has to be hidden and no quality needs to be sacrificed, as might be the case with manufactured stone.
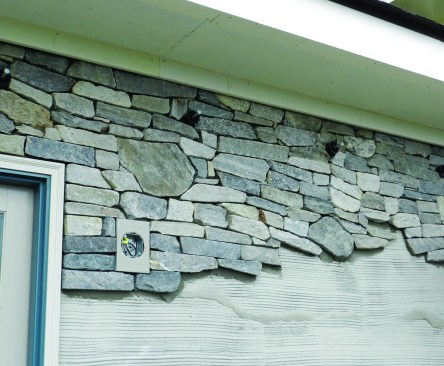
One additional important detail to keep in mind when using a drainage plane is to provide a means for the water to get out at the bottom and for air to get in from the top. At the top and the bottom, we installed a Delta-Dry insect screen, hidden at the top by a small fascia board and simply compressed at the bottom. We also incorporated some weep holes at the bottom that were hidden between the joints.
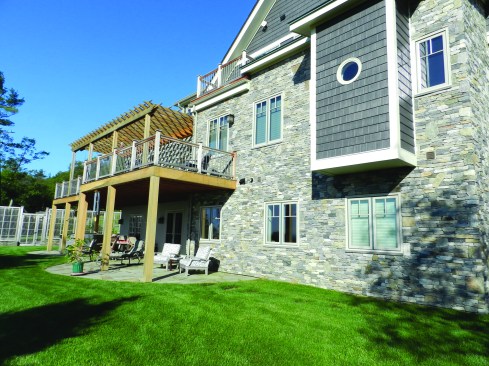
By the end of the project, everyone involved was a convert to the idea that real veneer stone could be successfully installed on top of relatively thick foam. The clients are extremely happy with the way the stone looks after three and a half years. There are no indications of any cracking, none of the stone has come off, and the exterior surface is self-cleaning when it is rained on, so it still looks quite good.


