On rare occasions, I work on homes with grand entries, such as the one written about in the August 2017 issue (“Refinishing a Brownstone Stoop”). But most of my work is on more humble homes, like the one I was recently asked to re-side the back wall of. When I was looking at the job, I noticed that the landing for the rear entry—a tiny concrete platform—was horribly inadequate. There was no room to stand when you were opening the storm door, and the step down from the door was uncomfortably high. The client agreed that the landing needed to be updated.
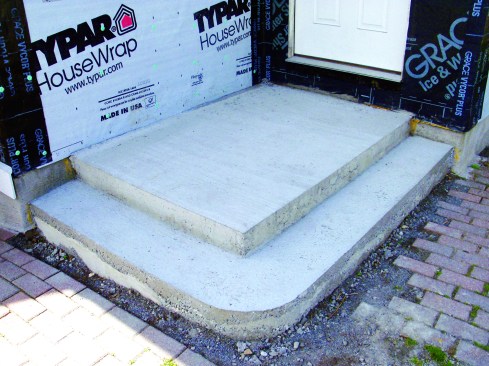
One option was to break up the old landing and pour a new one, but the old concrete was extremely hard and removing it would have been difficult and messy. Pouring a new full-height stair would have also meant having the top of the concrete above the top of the foundation—a situation I wanted to avoid. Instead, we decided on a hybrid landing a step down from the door. We would encase the old landing with a new poured-concrete platform and top it off with mahogany decking. We would also pour a step below the landing.
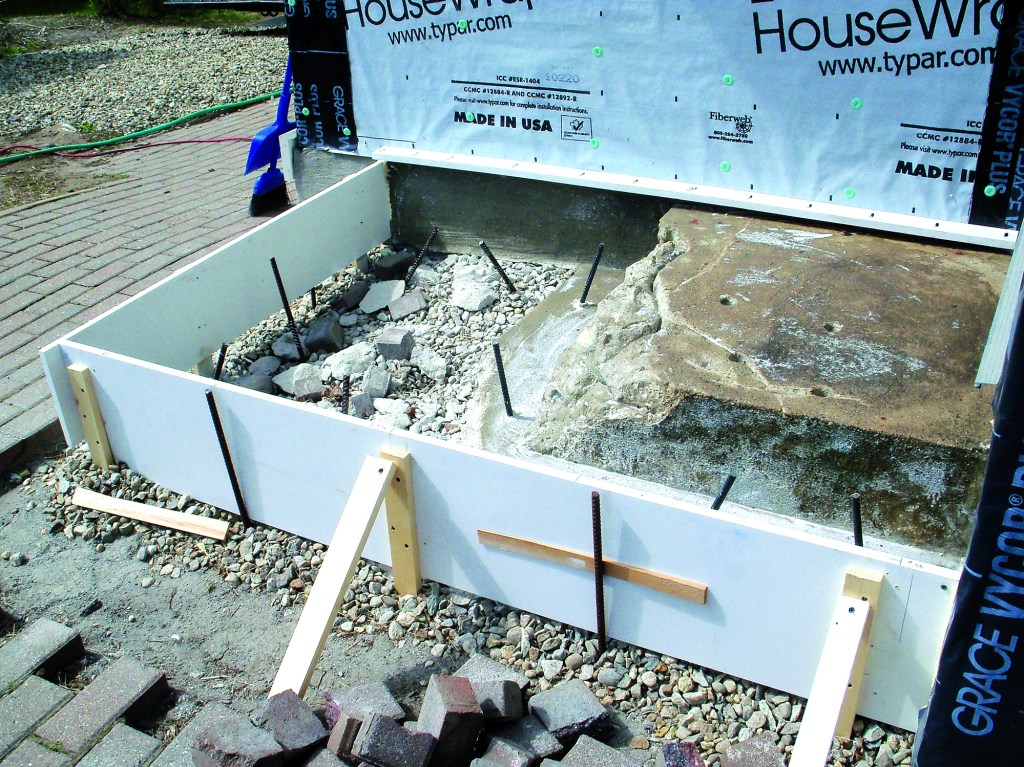
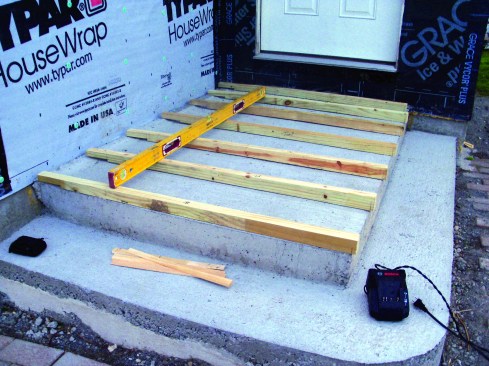
TWO POURS FOR THE CONCRETE BASE
The brick-paver patio was three steps down from the door, so the rise for each step would be a third of the total height from the patio to the threshold. I poured the landing and the bottom step in separate pours.
I wanted the concrete below the decking to drain properly, so I sloped the surface of the landing at about 1/4 inch per foot. The highest edge of the concrete was along the wall adjacent to the back door. After forming a weather lip along that edge, I sloped the concrete down from there. The height of this step didn’t need to be exact because I would make up for any difference when I installed the sleepers and decking.
I drilled and epoxied 1/2-inch rebar into the original concrete to tie it to the new concrete work, and then I formed the upper step with 1-by material. I poured that step and let it cure completely so that I could strip the forms before forming and pouring the lower step.
To add a decorative touch, I curved the outer corner of the lower step.
To add a decorative touch, I curved the outer corner of the lower step. To create the curved form, I cut kerfs across a strip of 3/4-inch plywood, with the saw blade cutting through to the last ply. The plywood then bent easily into the shape I wanted.
TAPERED SLEEPERS FOR THE DECK
Once the concrete was cured and the forms were stripped, I could build the wood “deck” on top. Because the top surface of the concrete sloped for drainage, I was able to make the wood deck above it level, which I did by installing the decking on tapered pressure-treated 2-by sleepers that I made from a site-built template. To put the step down to the deck at the proper height, I added 3/4 inch to the rise measurement to allow for the decking, which then gave me the height the sleepers needed to be.
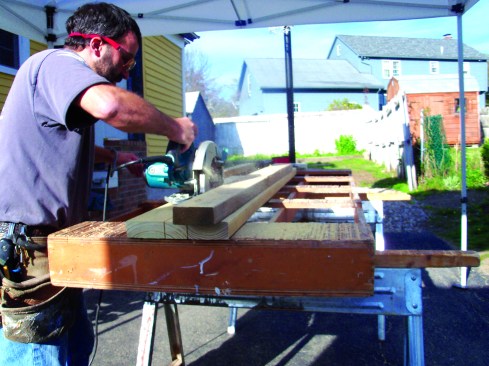
To cut the tapers, I made a simple jig by screwing one 2×4 to a second 2×4 at the angle of the taper.
I had been careful with the pour, so the tapered template fit closely for all the sleeper positions across the step. To cut the tapers, I made a simple jig by screwing one 2×4 to a second 2×4 at the angle of the taper. The overhang of the angled 2×4, plus the width of my saw table gave me a rip for the right height for the sleeper. After making the tapered cut, I cut a straight rip out of the remaining piece, giving me two sleepers from a single board.
I made the sleepers long enough to overhang the edge of the landing by 1/2 inch for anchoring the PVC trim; I also notched the end of each sleeper to fit over the weather lip. Once I had made all the cuts, I gave the freshly exposed wood a generous coating of Woodlife preservative.
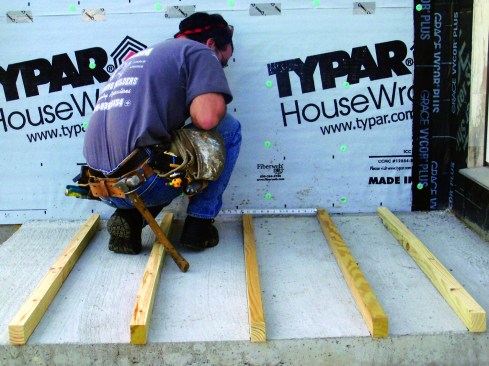
To support the decking, I laid out the sleepers on 12-inch centers.
I first leveled across the tops of the sleepers to make sure there were no high spots.
To support the decking, I laid out the sleepers on 12-inch centers. I set the sleepers in place and numbered the ends to keep them organized. I first leveled across the tops of the sleepers to make sure there were no high spots. Next, I drilled counter-bore holes in the sleepers to accommodate the heads of the GRK concrete anchors. Again, I brushed preservative into all the holes.
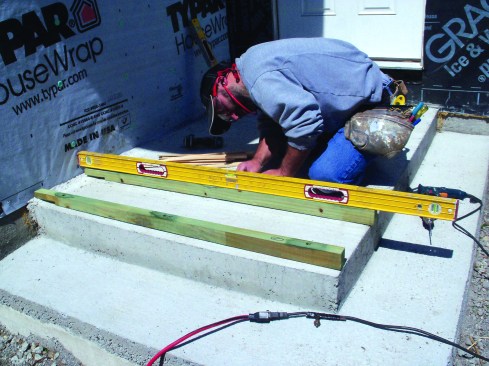
As I set each sleeper in place, I leveled down its length, adding treated shims to fill any voids below the fasteners.
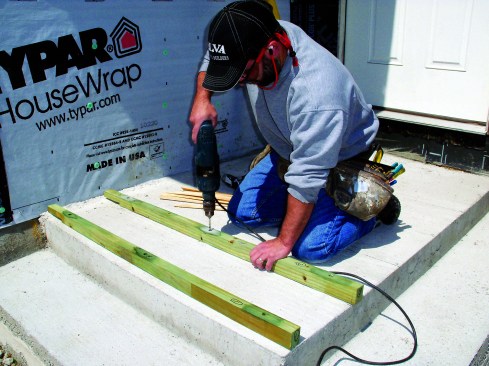
Then I drilled out the concrete …
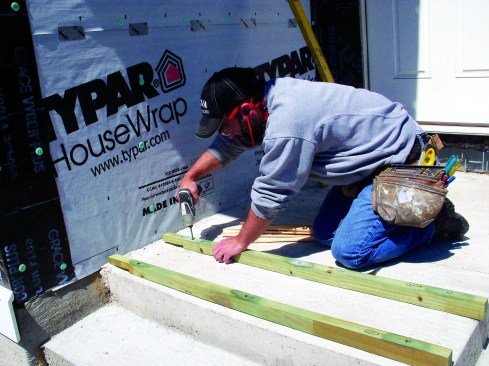
… and drove in the fasteners to secure the sleepers in place.
As I set each sleeper in place, I leveled down its length, adding treated shims to fill any voids below the fasteners. Then I drilled out the concrete and drove in the fasteners to secure the sleepers in place. Before adding the decking, I added a layer of flashing tape. I tucked the tape under the threshold flashing below the door, letting it extend out over the first sleeper.
On the adjacent wall, I tacked the WRB up on the wall temporarily and installed “L” flashing that I’d fashioned out of aluminum stock. I attached the aluminum to the wall with flashing tape and used pieces of flashing tape to isolate the flashing from the treated sleepers. With the flashing in place, I let the WRB back down and fastened it over the flashing system.
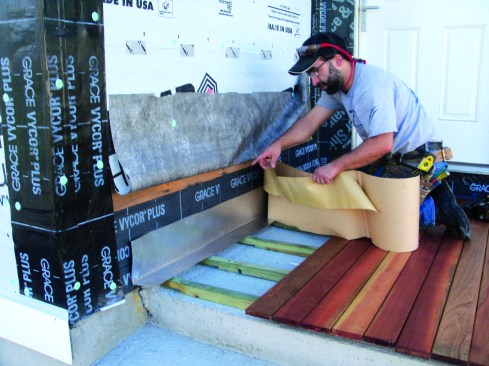
On the adjacent wall, I tacked the WRB up on the wall temporarily and installed “L” flashing that I’d fashioned out of aluminum stock.
DECKING AND TRIM
Before installing the deck boards, I sealed the sides and edges with a coat of Penofin decking stain and let them dry overnight. I started installing the boards at the outer edge of the landing, letting the edge of the first board extend 1 1/2 inches over the ends of the sleepers—3/4 inch for the trim plus a 3/4-inch overhang.
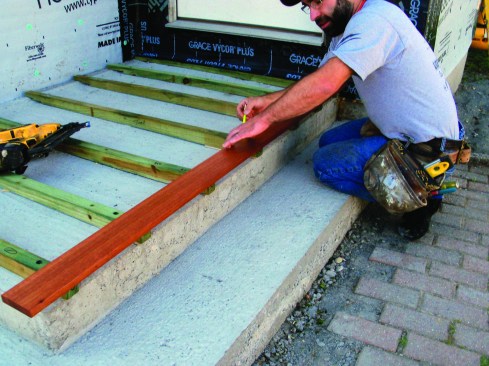
I started installing the boards at the outer edge of the landing.
To fasten the decking boards, I applied two 1/2-inch-diameter dots of 3M 5200 marine adhesive sealant at each sleeper. After setting a board in place (leaving a 1/8-inch gap between boards), I drove two 2-inch stainless steel finish nails at each sleeper to hold the boards tight until the sealant had dried. The holes from the finish nails are hardly noticeable in the stained boards, and once dry, the marine adhesive holds tenaciously. I left the decking boards long and cut them to length with a track saw after they were all installed.
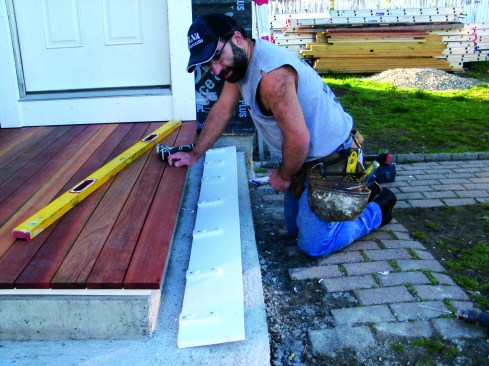
I stepped the trim out from the concrete using 1/2-inch spacers.
To dress up the landing, I wrapped the riser of the top step in 1-by PVC trim. To allow clear drainage from the concrete surface under the decking, I stepped the trim out from the concrete using 1/2-inch spacers. The spacers glued to the back of the 1-by on 12-inch centers, reflecting the same layout as the sleepers.
Stainless steel screws through the top holes secured the trim to the sleepers.
Before attaching the trim, I countersunk holes at each of the sleeper locations and then directly below at each spacer. Stainless steel screws through the top holes secured the trim to the sleepers; I drilled holes in the concrete and drove concrete anchor screws into the lower holes. I finished up by filling the holes in the trim with PVC plugs that I make myself.
Photos by Carter Silva


