Performance Data
The first step in choosing a structural anchor is making sure it’s strong enough to support the loads it must bear. All anchor manufacturers publish design values based on testing in concrete and masonry. While most structural connections require engineering, there are many applications that don’t typically fall under an engineer’s scrutiny yet still deserve a “structural” anchor. For example, anchors that hold siding to concrete walls or sleepers to slabs are subject to periodic changes in humidity and temperature that can affect holding power. Similarly, anchors for door and window jambs are subject to twisting, low-level vibrations, and shock loads. Before selecting any concrete anchor, it’s vital that you understand how a particular anchor responds, not just to immediate structural loads, but also to long-term use and conditions. Unlike wood, concrete is unforgiving, so a failing anchor won’t just creep or sag. Usually, when a concrete connector fails, it fails completely. Tension and shear. All anchor catalogs list ultimate values (in pounds) for an anchor’s resistance to tension and shear, the two primary loads that will be applied to the fastener. The ultimate tension load gives a measure of the anchor’s pullout strength, which depends not just on the strength of the anchor material and the strength of bond, but also on the strength of the concrete or masonry. Ultimate shear loads give a measure of an anchor’s resistance to forces across the face of the concrete or masonry — a force threatening to tear the anchor, and to crush the bearing material around the anchor. Base material. To make use of these performance values, you need to know the strength of the concrete. In new construction, you can go by the compressive strength of the mix design, provided you’re confident in the abilities of your foundation sub and ready-mix supplier. For important structural connections in existing base materials, you will need to take a core sample and perform an impact test. In less critical installations, you can investigate the base material with a three-pound sledge and a masonry nail. The condition of brick and block varies widely, but with experience you can learn a lot about how well the anchor will respond in a particular substrate. A hammer blow will hardly show on the surface of 4,000-psi concrete, whereas the nail will be relatively easy to sink in concrete less than 2,000 psi. Poorer base materials will crumble or spall with each blow. Embedment depth. Performance values for anchors are always listed for different embedment depths. This should not be confused with the length of the anchor. Anchors are almost always longer to account for the thickness of the fixture you are attaching. Ultimate vs. allowable working loads. The ultimate load, however, does not reflect the fastener’s performance in actual use. To find the allowable working load, you have to reduce the ultimate value by a safety factor to account for imperfect field installations and real-world concrete and mortar conditions. Industry standards call for a 4:1 reduction (in other words, 1/4 of the ultimate value) for the static loads found in most residential framing connections. The exception is powder-actuated fasteners (PAFs), where a larger reduction of 8:1 for static loads is required to account for imperfect use. For dynamic loads, such as shear wall loading or impact and vibration loads encountered in industrial applications, a reduction of 8:1 or more is common. In engineered applications, the designer may also make other reductions. For example, when anchors are embedded in a vertical surface, tension and shear forces combine, so the anchor must be stronger. Similarly, if the load is applied at a distance from the concrete surface, it imposes a bending load on the fastener as well. In addition to requiring a stronger anchor, this bending load may affect the substrate, particularly masonry, which is more likely than concrete to spall at the surface. Edge distance and spacing. With concrete anchors, more is not always better. Every anchor stresses the concrete around it, whether the anchor is driven or predrilled and tightened down. The size of this “stress zone” varies by size and type of anchor. If you crowd too many anchors together, these stress zones will overlap and the concrete may fail (see illustration).
To avoid overstressing the base material, pay strict attention to anchor placement. Manufacturers specify a minimum spacing between anchors to prevent stress areas from overlapping (top left), minimum distance from edges to prevent blowing out the slab (bottom), and a minimum slab thickness to prevent cracking (top right). Similarly, if an anchor is installed too close to the free edge of a slab or wall, it may not have enough solid material around it to support the loads. To prevent these types of failures, pay attention to the minimum edge and spacing distances for the anchor you plan to use.
The Cost of Callbacks
Performance data may help you compare the relative strengths of various fasteners, but they won’t account for the installation time involved. With high labor costs, ease of installation is almost always more important than the cost of the fastener. In general, the easier an anchor is to install, the higher the purchase price.
|
The Right Anchor for the Job
|
|
Application |
Anchor |
Sill to foundation |
|
Bearing wall |
Sleeve, wedge, or epoxy |
Partition wall |
PAF or hammer-in |
Floor sleepers |
PAF or hammer-in (no shims) |
|
Sleeve or wedge (with shims) |
Strapping for siding or drywall |
PAF or hammer-in |
Stair stringer |
|
Poured concrete |
PAF or hammer-in |
Masonry |
Sleeve or nylon |
Handrail to concrete |
Nylon or sleeve |
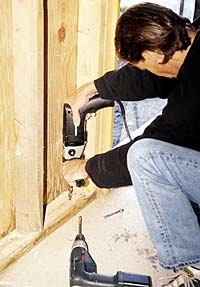
Jamb in concrete or block opening |
PAF or nylon |
Ledger |
|
Poured foundation |
Wedge |
Masonry |
Adhesive w/ screen insert |
Steel column to slab |
Wedge or adhesive |
Rebar dowel connection |
Epoxy |
Anchor selection is based not only on loads, but also on ease of installation. For example, nylon anchors will often hold furring for drywall or siding to concrete, and may be a good choice if you only have a small portion of the foundation to cover. But if you have an extensive area to cover, it’s usually worth the time and additional cost to send a helper across town to rent a powder-actuated tool. |
|
But the cost of a concrete anchor must be weighed against its reliability. A single callback can rapidly erase any cost difference between anchors. To make a cost-effective choice, contractors need to have a general understanding of how different anchors are installed and how different anchor materials respond to long-term conditions. Changes in moisture levels can have profound effects on connections over time, particularly those made with plastic anchors. Temperature variations can cause the fastener, fixture, and base material to move at different rates, which exerts additional loads. And vibration — even low-level, periodic vibration from operating doors and windows, for example, or using fixtures — can rattle an anchor loose, particularly if the material is already failing due to environmental conditions.


