Jason Fultz
When we arrived on site and checked his work with our transit, t…
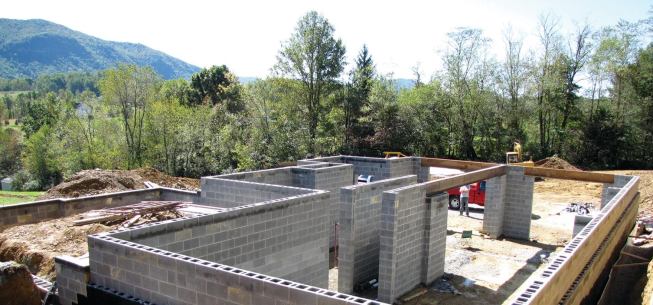
Recently we were hired to frame a new 3,000-square-foot house, but before we could get started we had to fix some serious problems with the block foundation. The mason who built it apparently had a broken level, because the interior bearing walls were at least an inch higher than the perimeter walls, which were neither level nor square. The project GC had hired a second mason to remove the top block course and level the foundation, but without much success: When we arrived on site and checked his work with our transit, the foundation was still out of level by as much as 1 1/2 inches. Anxious to get started, we decided we could correct these problems with some creative framing.
Squaring the Walls
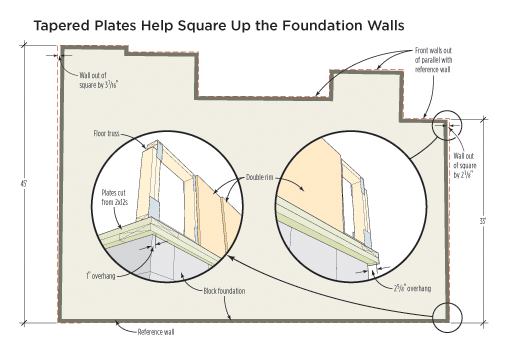
Using the longest foundation wall for reference, we found that one foundation wall was out of square by 2 1/8 inches over about 33 feet, while the opposite wall was out of square by nearly 3 7/16 inches over about 45 feet. The short offset wall sections at the front of the house were out of parallel with our reference wall by about 1 1/4 inches from one side of the offset to the other .
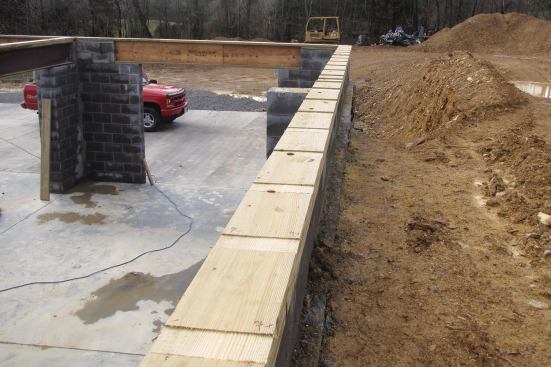
Since the foundation would eventually be covered with man-made stone veneer, we planned to extend our sill plates out past the 8-inch-wide block foundation by at least 1 3/4 inches (to account for the thickness of the veneer, sheathing, and siding). Normally we would do this with 2×10 PT stock, but by using wider 2x12s instead, we were also able to compensate for the out-of-square walls.
First, we aligned 2×12 plates on the 33-foot foundation wall with their inside edges flush with the inside of the wall. Then we marked them — as shown in the illustration on the previous page — so that there would be an inch of sill plate extending over the foundation at one end of the wall (3/4 inch less than the desired 1 3/4 inches), and 2 5/8 inches extending over the foundation wall at the opposite end (7/8 inch more than the desired 1 3/4 inches). We snapped a line from mark to mark and ripped off the excess, so that instead of being 2 1/8 inches out of square, the left-hand wall was now only 1/2 inch out of square over 33 feet.
We used the same technique on the opposite wall, but ended up with a larger 3 1/4-inch overhang at one end. This brought the wall to about 13/16 inches out of square (instead of 3 7/16 inches out of square) — not perfect but much more manageable.
We corrected the front offsets in a similar fashion to make them both square and parallel with the reference foundation wall. Later, the rock mason made up for the variations in the sill-plate widths by building up his scratch coat in the sections where the sill plates extended farther past the block foundation wall than they should have, and by cutting down the stone in sections where the sill plates didn’t extend past the block foundation far enough.
Leveling the Floor System
Instead of shimming the sills level and filling the gaps with grout, we decided that the best way to fix the out-of-level block work would be to level the trusses. We would shim the trusses that were low and cut slots in the sills with a router where the trusses were high, eventually bringing all of them to the same level. We started by setting up our rotary laser to take elevation readings all along the top of the sills. We found that there were very few floor truss locations that were “right” — almost everything would have to be modified to bring it to level — but we wanted to come up with a plan that would require the least amount of shimming.
Double plates. To make sure we wouldn’t try to cut slots where anchor bolts were located, we doubled up the plates. First, we marked our truss layout on the lower plates before attaching them to the block wall. Where an anchor bolt coincided with a truss position, we cut off the bolt flush with the top of the block using an angle grinder, then installed another anchor bolt beside it that was out of the way of our layout.
Once the lower plates were pulled down snug to the wall, we attached the upper plates, transferring the floor truss layout from the lower to the upper layer. Then we took elevations at each layout mark, starting with a section of the block foundation that was nearest to level and using that as our benchmark for elevation readings across the rest of the floor truss positions. The whole process sounds tedious, but it took only about an hour.
Before heading home, I transferred those elevations to a plan view of the foundation. While analyzing the data later that evening, I determined an elevation that would require the least amount of routing and shimming across all of the other floor truss locations. From that benchmark, I calculated the depth of each notch and the height of each shim and marked them on the floor plan.
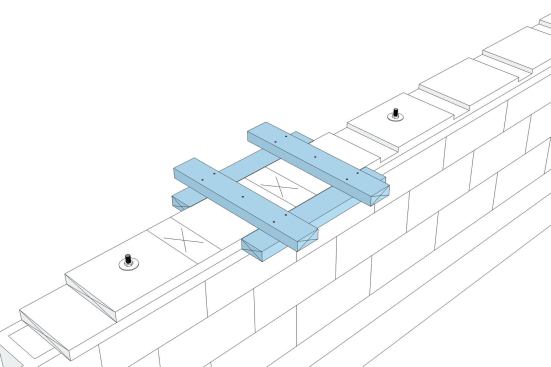
Notching and shimming. The next day, we notched the sills using a Porter-Cable fixed-base router equipped with a Bosch 3/4-inch double-flute straight router bit. This router has accurate micro depth adjustment, which made it easy to set it to the precise depth required for each notch. To accurately guide the router, I built a simple jig out of four short lengths of 2x4s. We ripped shims out of oak for the few places where the trusses needed to be shimmed; none were more than 5/16 inch thick.
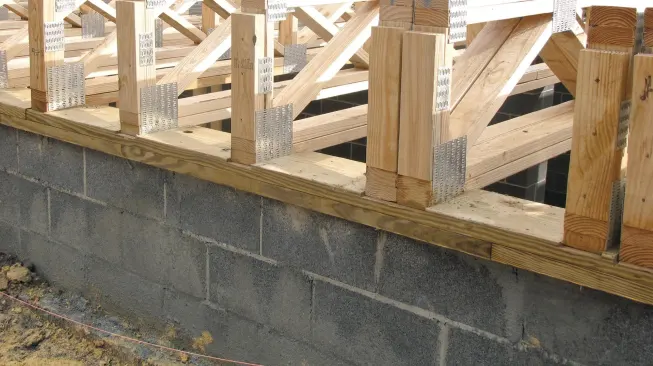
After installing the trusses, we scribed the 2 3/32-inch rim material to fit. To make sure there would be plenty of bearing, we doubled up the rims where we had corrected for the out-of-square walls.
Cost
We probably did a little more shimming and routing than we had to, but the floor system ended up no more than 3/16 inch out of level across the entire foundation. It took an additional day and a half to square and level the floor system, at a rate of $90 per hour for three carpenters. While this added $1,080 to the project budget (in addition to the amount the homeowner had already paid to the second block mason), the homeowners were happy to get their project back on track.
Jason Fultz and his brothers David and Robbie are partners in Fultz Bros. Construction in Norton, Va.


