Rob Corbo
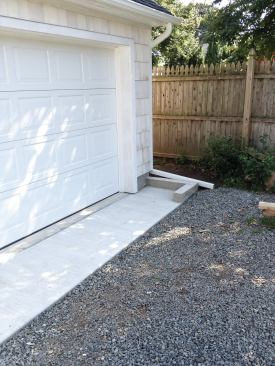
A teardown would have prompted the relocation of the new garage …
When I started my remodeling business, I found myself trying to sway clients toward my ideas rather than providing information to help them make their own decisions. I have since changed my ways. These days, I think of myself as more of an adviser than an advocate, and I believe this has helped limit my responsibility when things don’t go as expected (always a good thing in this business). So, when a past client asked whether he should salvage an existing garage or tear it down and rebuild, I provided an estimate to do both, gave my opinion, and waited for him to get back to me.
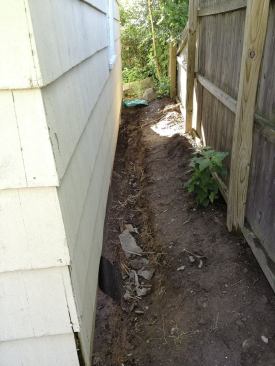
Often, there’s more to a decision than dollar amounts, and that was the case here. My estimate was around $20,000 to repair the existing structure and $30,000 to demo and rebuild new, but there were also appearance and zoning issues to consider. No doubt my client would have preferred to save money by rehabbing the existing structure, but the garage had shifted and settled over the past 80 years — so much so that we referred to it as the “fun house.” Its sill plates were rotted and almost completely gone, and the heavy, manually operated wooden overhead doors — while still functioning — were not sized for modern cars. This had my client leaning toward building new. However, when he found out that a teardown would require him to either meet his town’s side-yard setback ordinance or obtain a variance (a long, difficult process in my neck of the woods), he chose to repair the existing garage in place.
My repair estimate didn’t include digging 3-foot-deep frost walls, which are required by code here in New Jersey. They would have been tough to install given the site constraints — not to mention a 21-foot-wide by 20-foot-deep structure hanging overhead — and my partner, Danny DoCouto, and I thought it was possible to avoid putting them in. Our plan called for removing a couple of feet at the bottom of the existing wall, installing new 18-inch-by-18-inch footings at grade, then blocking up to the bottom of the wall. But when I first went to the town with our idea, it was rejected. This changed when we brought in an architect to draw up the construction documents. The architect, Derek Cox, noted an exception (freestanding light-frame accessory structures less than 600 square feet with an eaves height less than 10 feet, ) that applied to the existing garage. While not an optimal solution, installing footings at grade level was code-compliant, and the owner, the architect, and eventually the town all signed off on our plan. With the permit in hand we were ready to go.
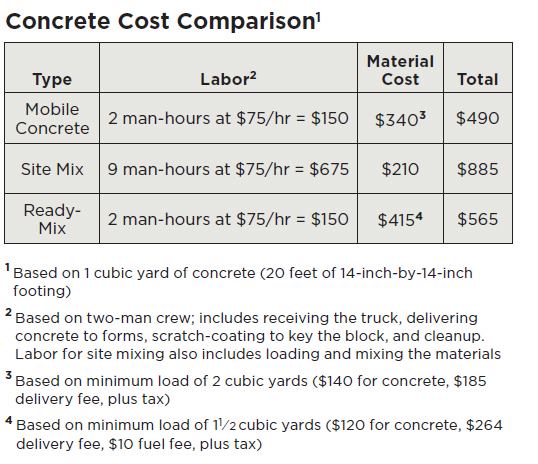
Mobile Concrete
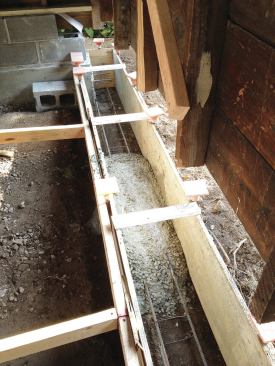
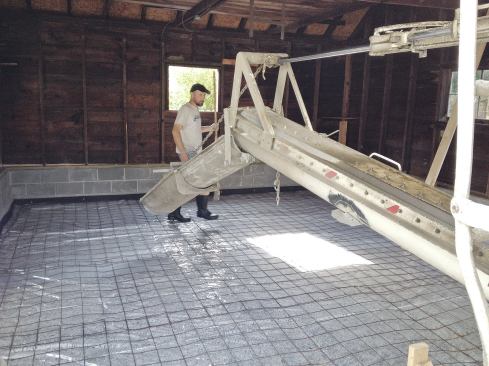
My original thought was to excavate, brace, and build half a wall at a time. But Danny felt we could support an entire side at once because there was so little weight from above. This sounded like a good plan because fewer concrete pours and inspections would keep the project cost down and help us stay on schedule. So, we planned for five separate pours: first, the gable-end wall footing (along the property line); second, the opposite gable-end footing; third, the rear bearing-wall footing; fourth, the slab; and fifth, the entry apron slab. (The footings for the front wall returns would be small enough to site-mix.)
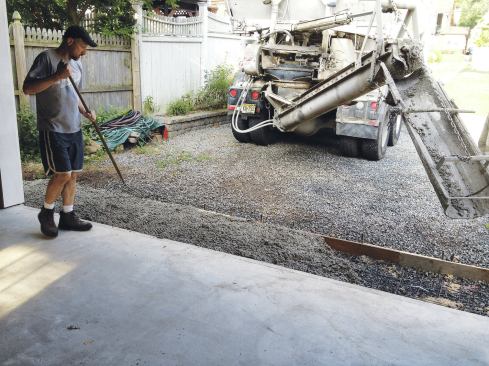
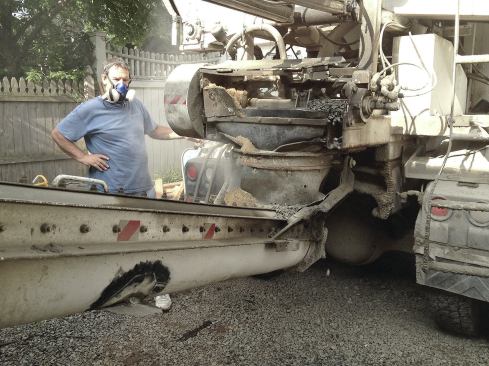
With four of these pours requiring around 1 cubic yard of concrete — I estimated the slab as being just under 5 cubic yards — I decided to look into having the concrete supplied by a mobile concrete mixer. I’ve had success using mobile concrete in the past, and have a good working relationship with the sub, Consolidated Fence, a local fence company that provides this service as a side business. Even with a minimum delivery load of 2 cubic yards, plus a delivery fee based on distance to job site (in this case, about 25 miles on back roads with lots of stoplights — the N.J. parkway doesn’t permit commercial truck traffic), mobile concrete still priced out cheaper than ready-mix. Also, my local ready-mix supplier’s minimum delivery is 1 1/2 cubic yards, so it made no sense to pay slightly more for a load and return a half-yard to the batch plant. Plus, it would take too long for our two-man crew to mix and deliver the concrete to the forms, and uneven curing could reduce the strength of the footing.
One Wall at a Time
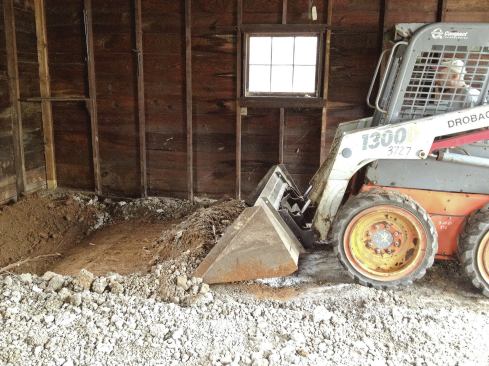
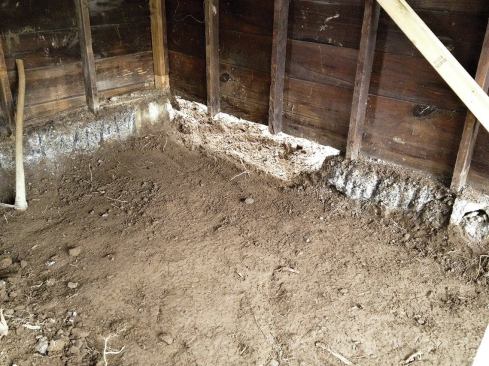
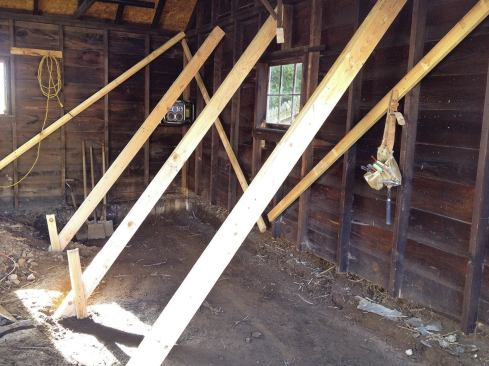
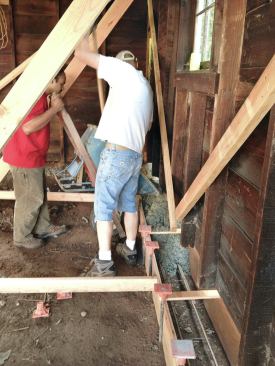
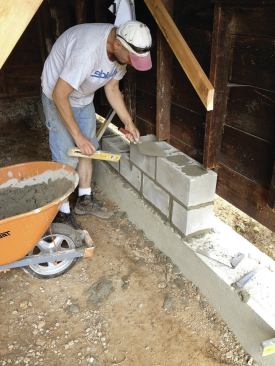
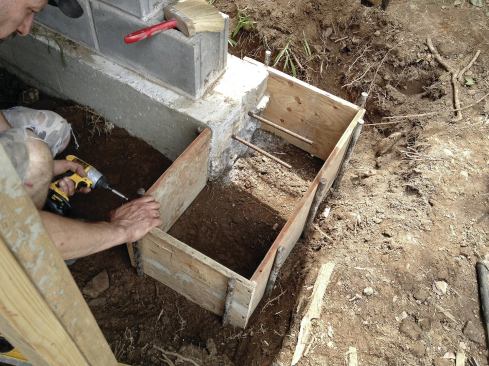
When I did my repair estimate, I thought the walls would be bearing on grade or on a thin slab, which is typical of detached garages of this age. But as Danny and a helper started to bust up the existing 2-inch slab, they discovered the walls were bearing on cinder blocks placed on their side with the slab keyed into the voids. After removing the slab up to the cinder block “footings,” they braced the first gable-end wall. Then Danny trimmed the bottoms of the studs (for better access) and they tore out the makeshift footing.
The formwork for the new footing was set at the same height as the existing slab/cinder-block footings. We originally were going to install 18-inch-by-18-inch reinforced footings at grade, but after consulting with the architect, we reduced them to 14 by 14 inches.
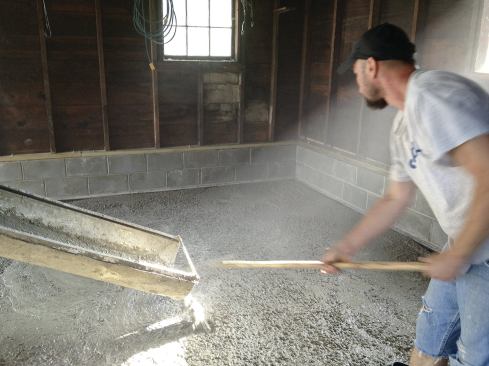
About a week passed before the town inspector was able to check our forms, so we didn’t pour the first footing until mid-June. From the time Consolidated Fence showed up on site, it took around 20 minutes to prep the first batch of concrete (see “Mobile Concrete Mixer”). Our crew used wheelbarrows to transport concrete from the discharge chute to the forms, weaving around the bracing. This added some time to the process, but one of the good things about working with a mobile concrete mixer is that time is not as critical as it is with ready-mix. The operator was pretty easygoing; he didn’t have to worry about a load of concrete setting up in his rig like the ready-mix guys do.
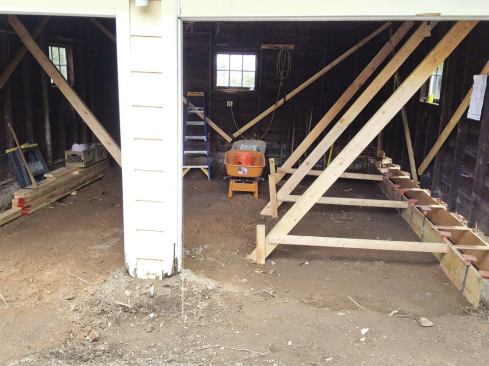
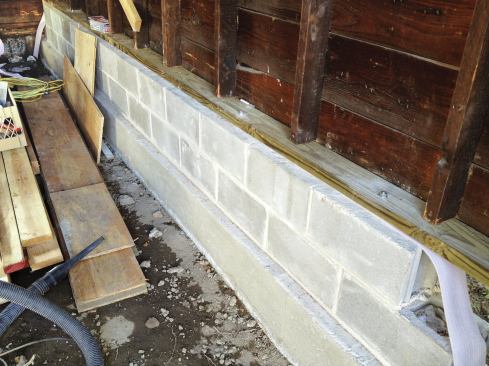
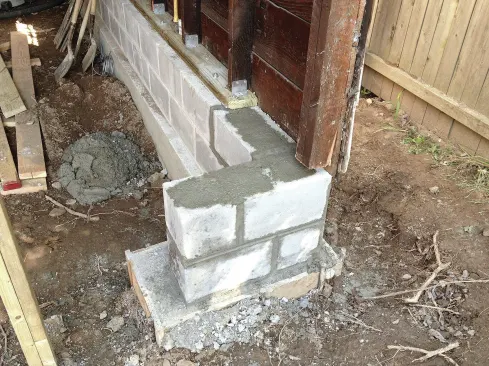
After the footing cured, we stripped the forms and proceeded to build the block stem wall.. A month later (after various inspections and holidays) we built the opposite gable-end wall the same way, then the rear wall a week after that.
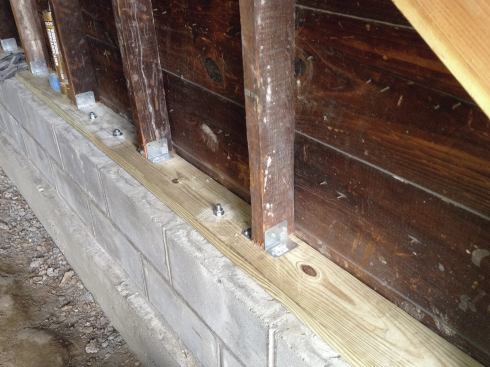
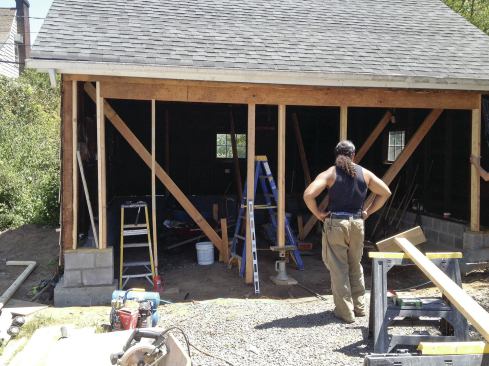
We were about to start on the front when the client decided to go with a single 16-foot-wide garage door rather than two narrow ones. This decision didn’t affect how the two front return walls were built, but it did involve extra labor and materials to install an LVL header, jack and level the building, and frame the new opening.
Slab Work
Since we didn’t have a package deal with Consolidated Fence to do the whole job (it billed separately for each pour), we could have used ready-mix for the slab and saved some money. But we decided to go with mobile concrete here, too. Consolidated was easy to work with, and it had been good about waiting for our guys to wheelbarrow concrete around all the bracing. Plus, we wanted to keep this good relationship going, in case we needed to use the company in the future.
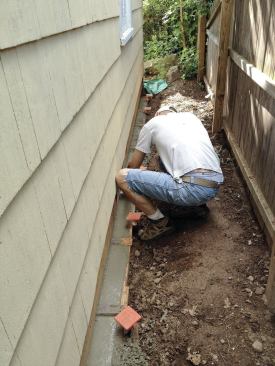
The architect had wanted an apron slab with an integral drainage grate tied into footing drains, but this idea was dropped for budgetary reasons. A few weeks into the project, however, the client asked that the apron be put back in the project. We did it as an extra, which meant our fifth and final pour occurred almost two months after the first footing was done.
Finishing Up
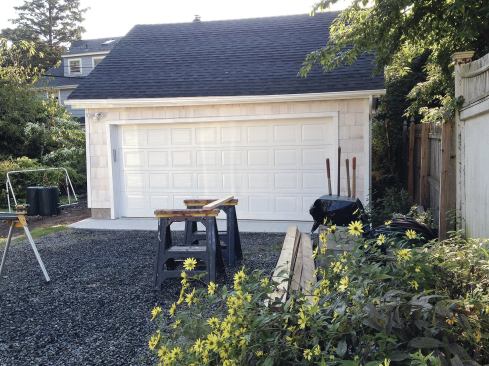
We saved some money by leaving the existing roofing and the siding on the rear and gable-end walls in place. The front, however, received a facelift, with the large automatic garage door taking up most of the façade.
In the end, we pretty much broke even on the project. It brought in around $26,000 in revenue, but costs came to $25,000 (the $5,000 in extras included framing for the new garage door, plus the install from the door sub; a new 3-foot-by-7-foot side door; gutter installation; some electrical work; and labor and materials for the entry apron). This left us with a modest net profit — but more important, it led to the client asking us to price out a kitchen/bump-out addition, which we plan to start in the next few months.
Rob Corbo is a contractor in Elizabeth, N.J.
Rob Corbo
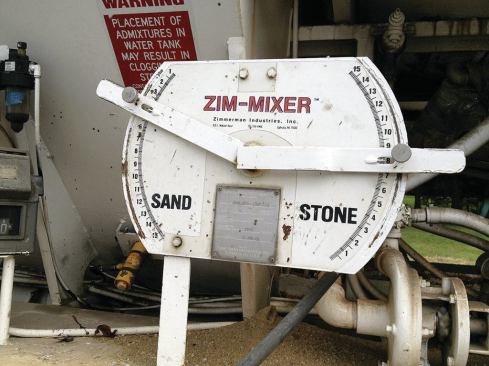
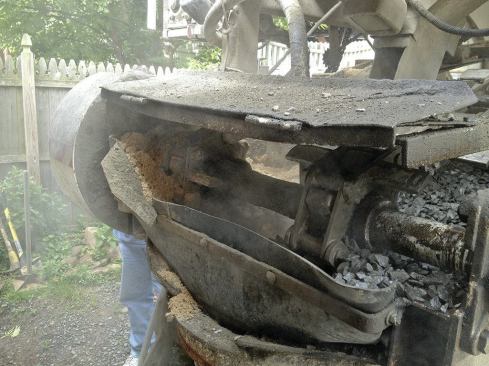
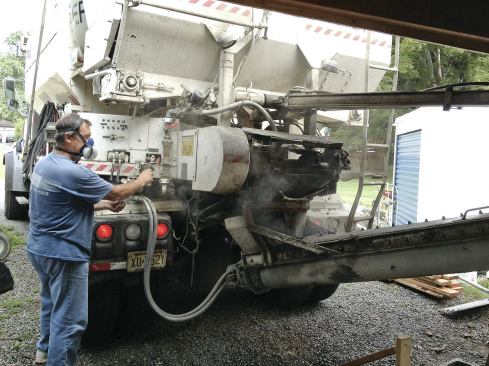
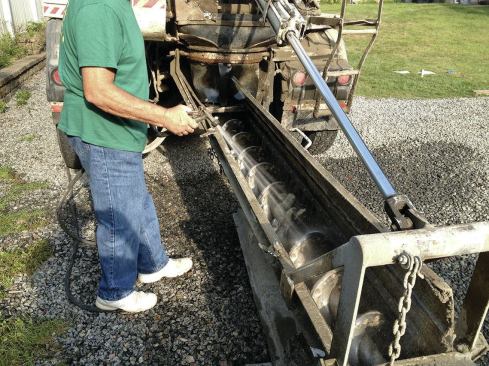
The ingredients are combined in a mixing auger.
Mobile Concrete Mixer
A mobile concrete mixer, also known as a volumetric mixer, is a portable concrete batching plant that produces concrete to spec in exact amounts on site, using raw materials — cement, sand, stone, water, and admixtures — that are stored separately in individual compartments. The ingredients are combined in a mixing auger — a long chute with hinged covers — according to a “recipe” determined from known volumes relationships, such as the ratio of sand and stone to water and cement. Independent shutter gates at the base of the sand and stone compartments control the proportion as the materials are delivered onto a chain-driven conveyor. Cement and water pre-mix with the sand and stone as they pass through a funnel-shaped discharge chute at the end of the conveyor and into the mixing auger. From the control panel, located at the rear of the mixer, the operator can view all of the materials and make adjustments, as well as start and stop the flow of batched concrete as necessary. Cleanup is easy because only the mixing auger needs to be hosed clean; unused materials can go to the next job or be off-loaded individually, cutting down on waste.


