Here in the Pacific Northwest, we typically frame our roofs with Douglas fir 2x12s because it’s easy to get good-quality pieces up to 24 feet long. But when we need to span long distances, we usually use I-joists for rafters.
Benefits of I-Joists vs. Sawn Lumber
Uniformity and length. I-joists are manufactured in 60-foot lengths, so there is no upcharge as the lumber gets longer. Each joist is exactly the same depth and width — no wane, no hook, no defects. And we can order I-joists in 1-foot increments, which cuts down on waste.
Engineered strength. To span long distances with solid-sawn lumber, we can decrease the on-center spacing, upsize to a deeper piece of lumber, or install intermediate support to reduce the span. But I-joists are manufactured with several possible strength ratings for each joist depth, which means we can usually keep the on-center spacing the same and avoid sizing up to the next depth. This helps us preserve consistency and keeps things simple.
Light weight. I-joists are much lighter than equivalent-size dimensional lumber, which makes them easier to handle. On one recent job, we set about twenty 27-foot-long, 14-inch-deep rafters, twenty-five 22-footers, and thirty 20-footers — all I-joists and all much easier to handle than the same-size 2×12 Douglas fir rafters.
Sustainability. I-joists are a resource-efficient product, both in how they are manufactured and in reduced job-site waste.
Overcoming negatives. While there are clear benefits to using I-joists for rafters, there are also drawbacks, most of which come down to additional labor and costs. Typically, we make several decisions early, including: Will the rafters sit on top of the ridge, or will we use hangers to support them? Will we cut birdsmouths, or will we seat the joists on beveled plates? Will the I-joist rafters overhang the plate, or will we cut them flush with the wall and add tails to create the overhang?
In each case there is added prep work, so it’s important to be clear on these details up front. No matter what the details are, though, the key to being productive is breaking the job down into small steps that you can accomplish easily and quickly. In the pages that follow, I’ll demonstrate some of the ways we do this.
Planning
I have found that if I do the layout in SketchUp or a CAD program and send that to the supplier, I can cut down on a lot of head-scratching at the job site. On my drawing, I provide the layout I want to follow, show bearing points, and specify whether I want the joists to hang from the ridge or sit on top. The supplier can then do the sizing and provide a dimensioned drawing for the building official. One of my goals in this design phase is to end up with as many rafters of the same size as possible so we can gang-cut them.
The drawing also puts all the details in one place. Being familiar with the different rafter details provided by the manufacturer is crucial to reducing the time it takes to cut and install I-joist rafters. I can look at the drawing and plan what will work best for my crew with the tools we have.


Gang-Cutting
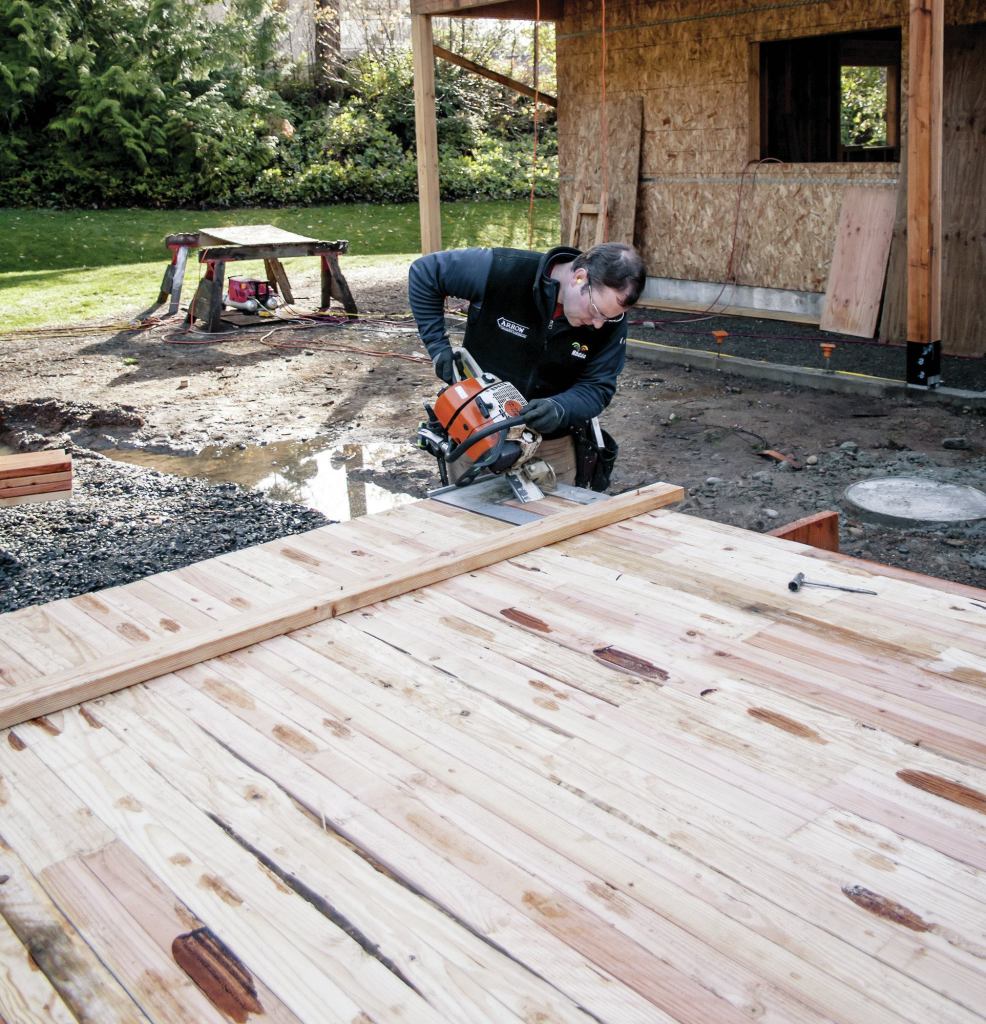
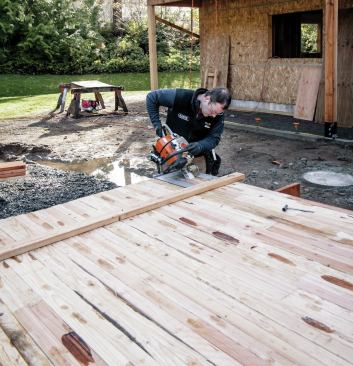
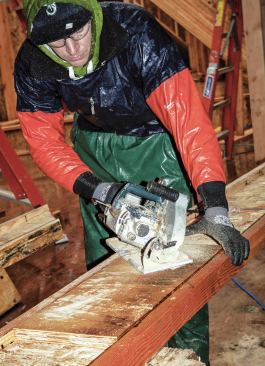
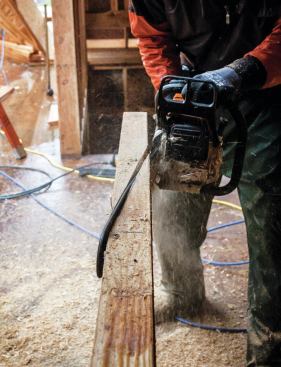
Plumb cuts on I-joists can be handled with a simple plywood jig. But making each plumb cut one at a time can be tedious on a whole house or large addition. Instead, for about the last eight years we have been using a Big Foot Head Cutter — a table attachment that goes on a chain saw — to gang-cut rafters.
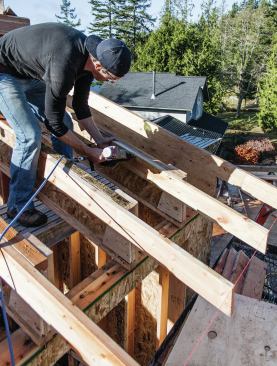
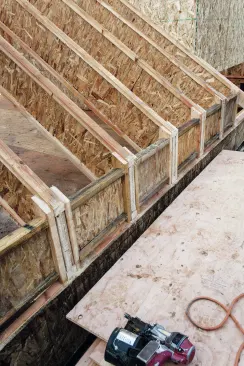
Racks. To set up for gang-cutting, we stack joists of the same length side by side on racks we build from 2x12s braced on edge. The supplier makes this easy by bundling the joists by length. Pieces of 2-by scrap — screwed to the top edge of the 2×12 on either side of the bundle — clamp the I-joists in place, and a 2×4 tacked across the top edges at each end serves as a saw guide.
Head and tail cuts. With the I-joists firmly supported on the racks, we can make our head cut for the ridge and tail cut for the eaves. After these plumb cuts are made, the rafters are ready to have web stiffeners installed.
Web Stiffeners
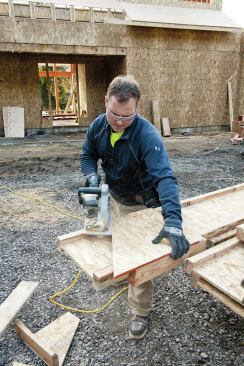
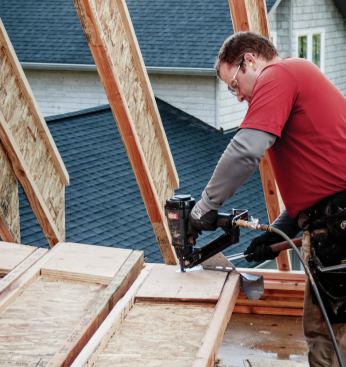
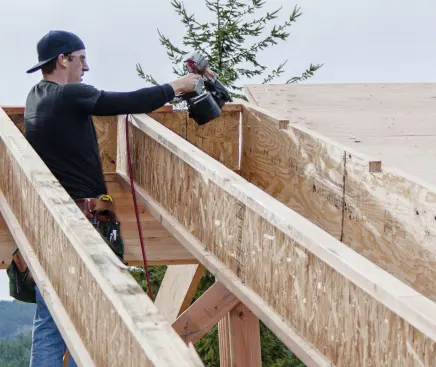
One key to speeding up the job is to pre-install as many of the pieces as possible on the ground so less time is spent fumbling up top. This applies especially to web stiffeners, which we like to nail to the I-joists before we begin setting rafters. Plywood web stiffeners, ripped to fit between the top and bottom flanges, are always needed at the eaves to provide a flush surface for nailing eaves blocking. We may also need them at the ridge if we are using hangers, in which case it is best to also install all the hangers on the I-joists while the rafters are still on the ground. That way, as the framer at the ridge installs each rafter, he just has to nail the hanger to the ridge, greatly reducing the amount of time he needs to work off a ladder.
To quickly rip web stiffeners, we like to use a table saw with an outfeed table or our DeWalt crosscut saw with a ripping guide. Then we stack the strips of plywood, so we can cut multiple pieces to length at once using the Big Foot saw. In a half-hour, we can cut a lot of web stiffeners.
Tim Uhler
For open soffits, however, we cut the rafters plumb with the pla…
Soffits and Squash Blocks
For enclosed soffits, it is much faster — and there are fewer pieces to deal with — if we let the I-joists run past the plate. When doing this with gang-cut rafters, it is important to string the ridge to keep it very straight and running parallel with the wall plates. Otherwise, you have to run the rafters long and come back later to cut them in place to get a straight fascia line.
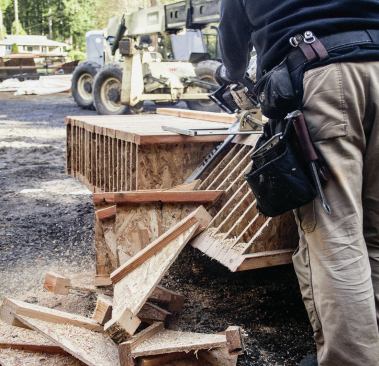
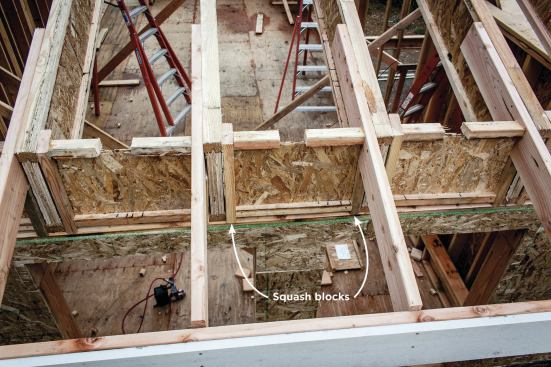
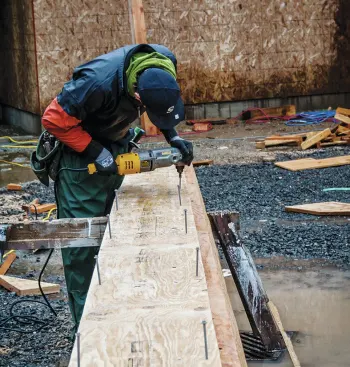
For open soffits, however, we cut the rafters plumb with the plate line and add 2×6 tails flush with the top flange of each I-joist rafter. For this work, we need to install squash blocks — short 2x4s that transfer the roof load to the wall and help tie down the roof (completing this tie-down requires metal connectors). We install the squash blocks on each side of the rafter — one below the 2×6 tail and one on the opposite side.
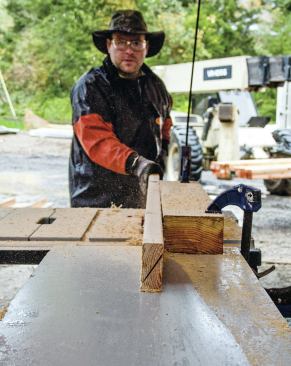
To cut squash blocks, we use the Big Foot saw again, chopping multiple pieces at one time. If the weather is decent (which isn’t always the case in the rain-drenched Northwest), we might use a miter saw for this. It only takes a few minutes to set up the stops, and then the cutting is foolproof.
Eaves blocking. We cut eaves blocking from I-joist stock. Whenever possible, we like to install it as we go when setting the rafters, just like we do when setting trusses. We cut the blocks 1/16 to 1/8 inch short to prevent us from “growing” off layout.
Beveled Eaves and Ridge Strips
One detail I insist on using is a beveled strip at the eaves to eliminate any birdsmouth in the rafter. Having to cut a birdsmouth complicates things, and adds much more time than it takes for us to rip beveled strips on a table saw. By using beveled strips, we are also able to keep the full depth of the rafter, which maximizes the amount of insulation at the plate line. (An alternative is to use the Simpson VPA variable-pitch connector, which eliminates the need for the beveled strip and serves as a tie-down connector, too.)
Sometimes we use the same type of beveled strip when the rafters are set on top of the ridge. Blocking above the ridge is required in this situation, but before installing it you need to decide how the rafters on each side of the ridge will be joined. If you use plywood gussets, you will need to fasten these to the webs before installing the blocking. Or you can install the blocking first, and after the roof is sheathed, you can install metal strapping over the ridge, nailing it off to the top flanges on both sides of the ridge.

Tim Uhler
On this house we had a split-pitch roof — 8/12 on one side of …
Valley Rafter Tricks
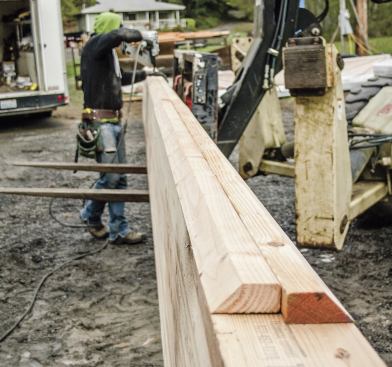
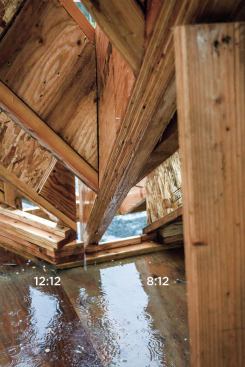
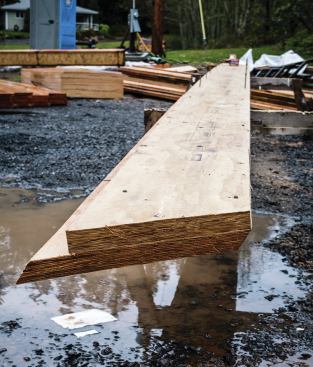
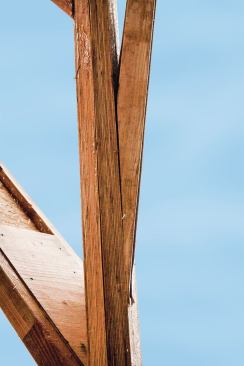
We usually use two pieces of LVL for valley rafters. On a regular valley, there’s nothing unusual: We bevel the top edge of each LVL to match the slope of the roof, and the tops of the rafters plane into the valley. The two LVLs meet at the centerline of the valley, which is where the two roof planes come together.
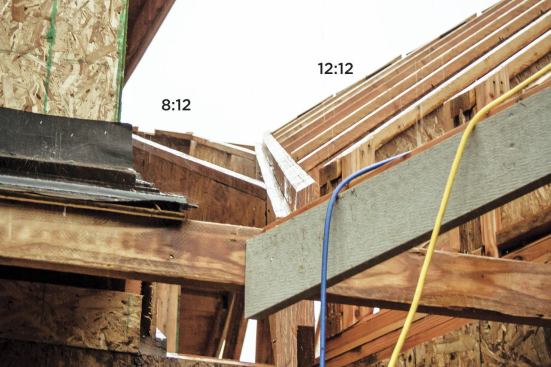
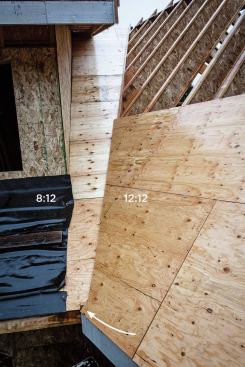
But on this house we had a split-pitch roof — 8/12 on one side of the valley and 12/12 on the other. In this situation, known as a “bastard valley,” the roof planes don’t land at the center of the valley, but are offset to the side with the shallower pitch. This is a big headache when you have a cathedral ceiling inside. In our case, we also wanted to keep the overhangs equal on both sides without cutting birdsmouths in the rafters.
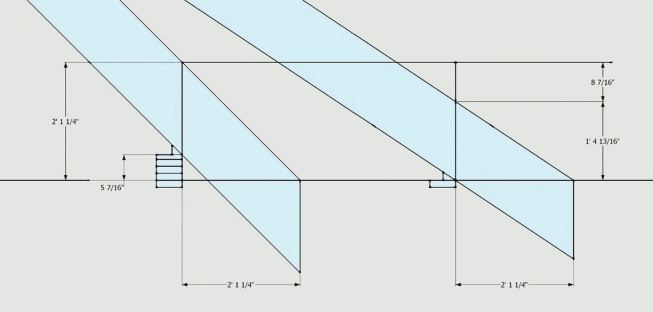
The plumb depth of a 14-inch rafter is shorter for an 8/12 pitch than for a 12/12 pitch. This means the roof surface on the 12/12 side is higher. The valley sits on the beveled plate on the 8/12 side, so we left the bottom edge of the LVL on that side square, while on the 12/12 side we ripped a bevel to match the steeper slope. Working from a section drawing, we were able to measure how much we had to build up the plate to support the 12/12 rafters. Doing it this way meant the bottom of the valley would have a crisp edge that matched both slopes, making a perfect surface on the inside where the two drywall planes join.
We took the plumb depth for each pitch and ripped two pieces of LVL — one to match the plumb depth of the 8/12 rafters, and one (deeper) piece for the 12/12 side — and screwed them together with the tops at different heights to create the valley rafter. We sheathed the 8/12 side first, then the 12/12 side. The valley doesn’t line up perfectly with the intersection of the fascia, but the offset is very minor. Unless you knew the offset was there, you wouldn’t notice it.
In roof framing, absolute perfection is hard to come by. It all comes down to preference. On this job, the two constraining variables were a cathedral ceiling inside the house that needed to be crisp, and the owner’s insistence on equal overhangs.
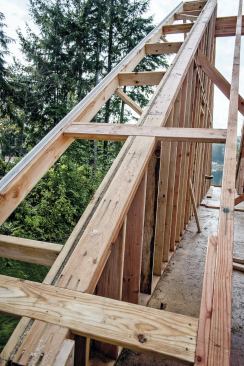
Gable-End Overhangs
On any roof (I-joists or sawn lumber), we speed things up by framing the gables on the ground as rake walls, with the overhangs pre-installed, and then lifting the assembly into place. Or, we may order LVL for the gable rafters, as we did on the shed-dormer area, and notch for the lookouts
Tim Uhler
While we’ve had success using hangers, we prefer to make cheek…
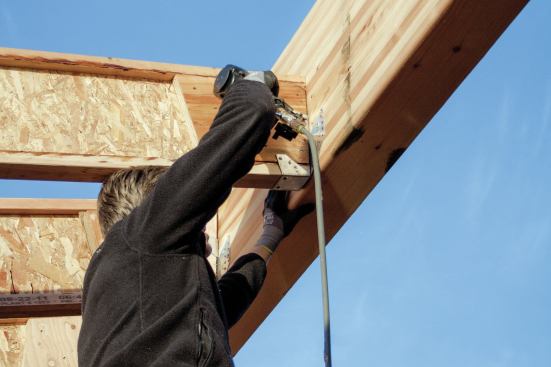
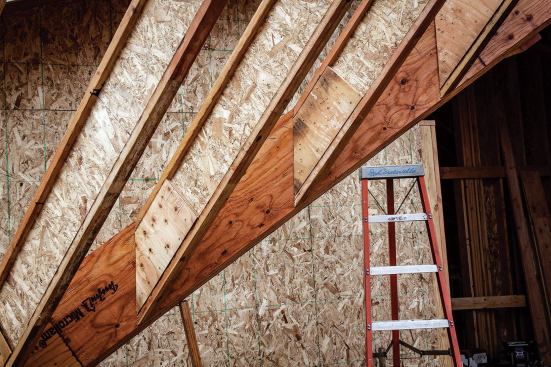
Hip and Valley Fill
While we’ve had success using hangers, we prefer to make cheek cuts in hip and valley jacks. After installing the jacks, we add Simpson LS Angle clips to reinforce the connection. These clips can be bent (just one time) to the angle the jack makes with a hip or valley (0 degrees to 135 degrees), and can be installed using Simpson SDS screws for added strength.
To cut the jacks, we first nail the web stiffeners to both sides of the I-joist, then make the cut with our Big Foot 10 1/4-inch saw. If the cheek cut is greater than 45 degrees, we use our Big Foot with its swing table, which will bevel up to 75 degrees. On the steeper cuts, we will more than likely need to finish the cut with a recip saw.
Super-steep bevel cuts. On the bastard valley, the jacks on the 8/12 side landed on the valley at an 8-degree angle. The only way we could cut this was to freehand with a chain saw, but the cuts came out perfectly.


