


Ted Cushman
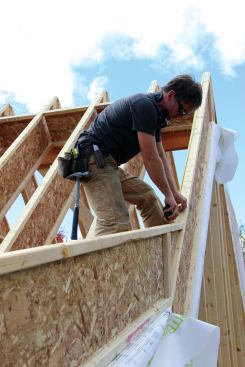
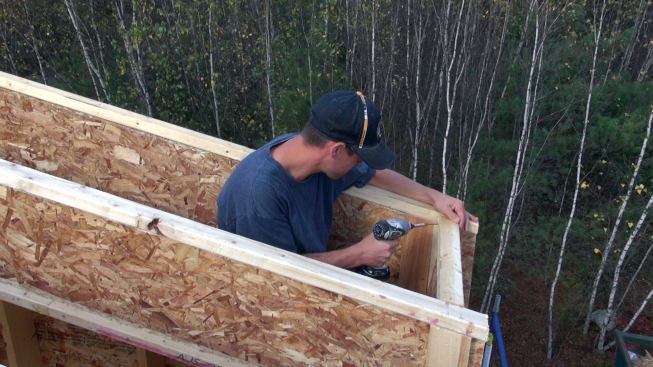
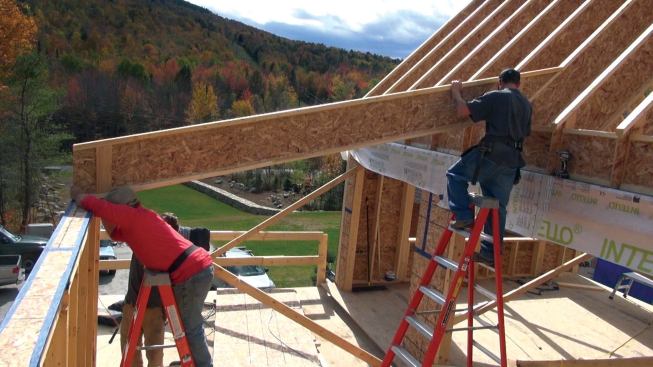
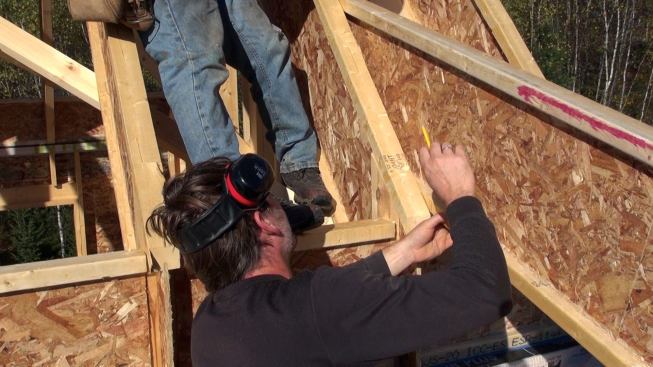
After setting the gable end rafter for the lower section of roof…
In the fall of 2014, my company built an addition to a ski lodge in Greenwood, Maine. The job is close to where I live, so I was eager to get the contract. But I also wanted to stick with my company’s specialty: high-performance energy-efficient buildings. I’ve been trained as a Passive House consultant, and I like to apply the Passive House method to every project. Fortunately, I was able to persuade the owner that spending another 10% of the project cost on improved airtightness and increased insulation would be justified by the reduced heating and cooling costs and the improved comfort in the new building. Working on the plans with architect Eric Sokol, of Winkelman Architecture in Portland, Maine, we added our typical details—essentially, increasing the depth of the roof rafters and the thickness of the walls by using a wood I-joist buildout for super-insulation.
Two Roof Pitches
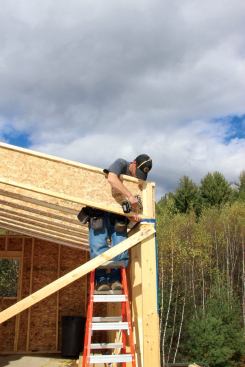
We used 16-inch-deep wood I-joists for the cathedral roof of the addition, with a supported ridge. The deep joists were overkill for the building’s roof span, obviously. But we did have to scratch our heads a little to figure out the framing details for the two-pitch roof system. The roof above the main room of the addition is framed on a 12 pitch, while the roof of the adjacent room has a shallower slope. We framed the addition so the lower roof’s rafters would bear on the upper roof system, with the intersection located above the bearing wall that separates the two rooms. After setting the gable end rafter for the lower section, I measured down from the main roof ridge to establish the point of intersection. We then set another rafter at the other end of the roof and snapped a layout line to guide the placement of the remaining rafters.
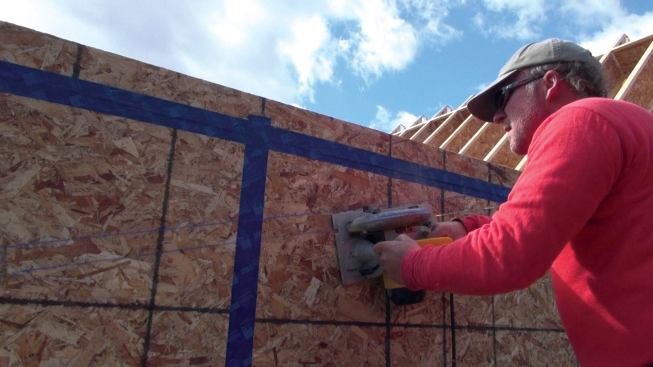
Connecting Air Barriers
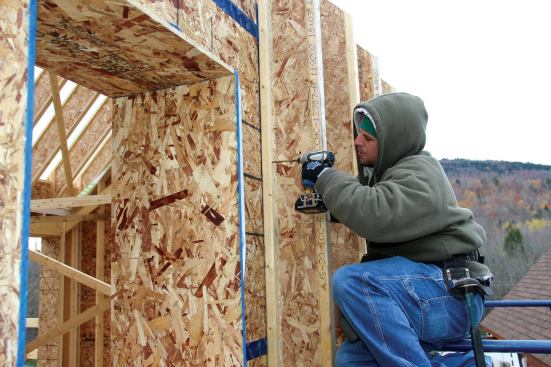
One of the tricky things about building an airtight energy-efficient home is maintaining a continuous air barrier, or “air control layer,” around all the occupied space. For this house, the plywood sheathing would form the air barrier for the stud walls, and a layer of Pro Clima Intello smart vapor barrier membrane (proclima.com/systems) on the ceiling would form the air barrier for the roof system. We needed to make the connection between the wall air barrier and the ceiling air barrier as we framed: A layer of OSB taped at the seams formed the joint at the wall plate where the rafters would sit, and later the interior Intello membrane would be taped to that wall edge.
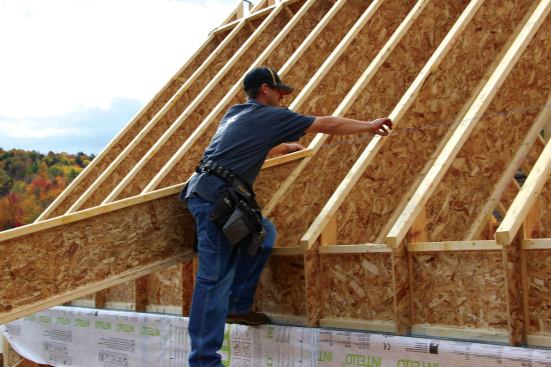
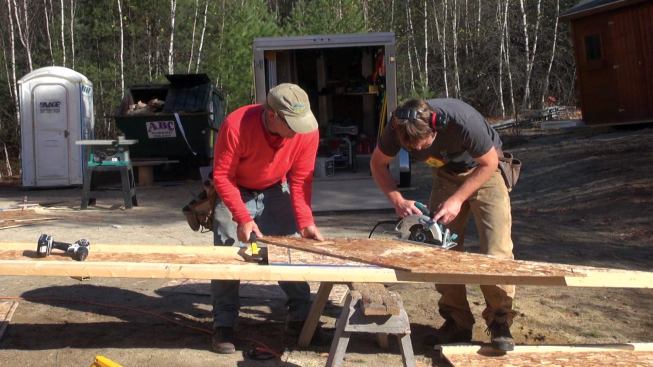
Cutting Rafters
To make my pattern for the lower rafters, I first made a seat cut and a plumb cut freehand, based on the roof pitch. Then we held the rafter in place to scribe for the cut where the lower rafter would intersect the already-framed main roof. To make it easier and faster to cut this upper angle on the rest of the rafters, we put together a jig made of OSB: We laid up two layers of OSB cut to fit snugly between the flanges of the I-joists, then screwed on another layer of OSB at the proper angle to guide the circular saw when we made the cut.
Where the lower rafter would sit atop the upper rafter at the joint, we applied 1×6 web stiffeners to the I-joists, fitting them snug between the I-joist flanges and aligning them so that they would line up vertically above the web stiffeners in the lower roof and above the bearing wall.
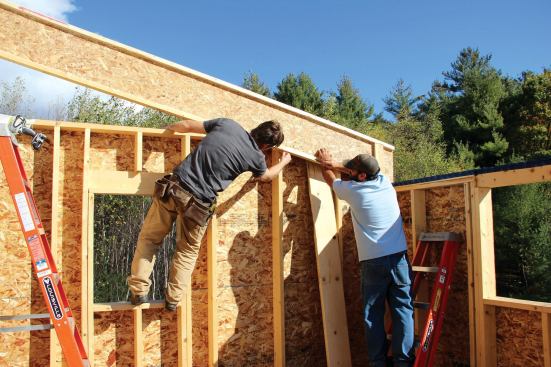
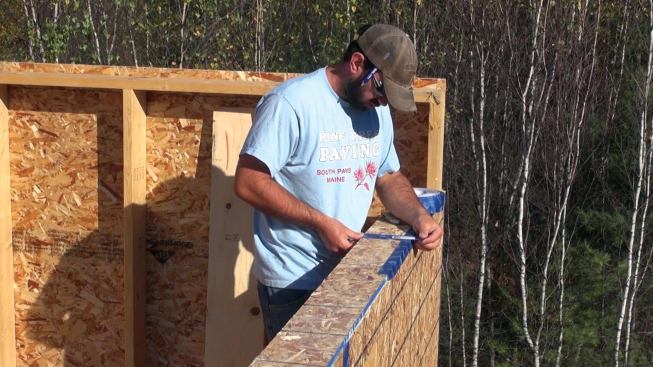
Trimming the Walls
When we had framed the walls for the room that would be under the shallower roof, the upper roof (above the main room) hadn’t been framed yet. So at that time, we didn’t try to frame the appropriate wall angle to match the gable rafter’s slope; instead, we framed the wall straight across. But now that it was time to trim the wall to match the angle, we laid our rafter against it and scribed for the cut. Then we transferred the line to the outboard face of the wall and cut the scrap part off (through the sheathing) using a circular saw and cut the studs using a recip saw. We pulled the little scrap piece off, framed in the gable, and then set our end rafter on the new plate.
Structural Concerns
There’s no point in making a roof energy-efficient if it isn’t structurally sound. So we took several measures to make sure that the rafter system was ruggedly attached and braced.
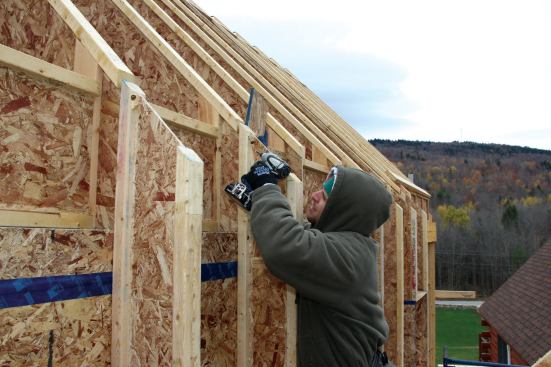
Bracing the slope transition. At the broken-back angle where the upper and lower rafters meet, we applied pie-shaped OSB gussets to each side of the joint and nailed them with plenty of 8d nails.
Rafter connections. At the wall plate, the rafters are attached with GRK structural screws. We also blocked between all the rafters with short pieces of I-joist. In addition to preventing toppling of the rafters at the plate, these I-joist blocks also provide an attachment point on the underside of the rafters for strapping and the air-barrier membrane.
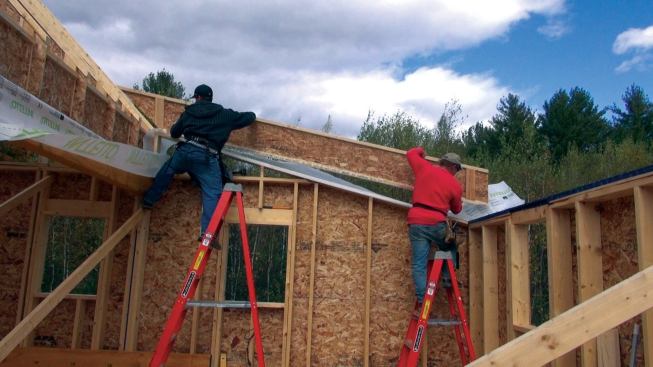
Uplift connection at eaves. Although we’re not close enough to the ocean to have extreme wind loads, wind uplift is still a concern. Our I-joist wall buildout, mainly intended to provide an insulation cavity for the house, also helps address wind uplift: Because the I-joists are securely screwed into the wall with GRK structural screws as well as into the roof rafters, the wall I-joists help hold down the roof system.
Jesper Kruse owns and operates Maine Passive House, a green building and design company located in Greenwood, Maine (mainepassivehouse.com). For more information about this job, see the interactive slide shows at jlconline.com.


