The area where I work — northern Virginia — is not exactly in the frost belt. So it surprises me to see the increasing number of homeowners who are interested in radiant snowmelt systems for driveways and sidewalks. We can count on at least a dozen snowmelt jobs a year, either new construction or remodeling. Typical residential jobs involve installing snowmelt systems on driveways, walkways, carports, decks, patios, and breezeways.
Residential snowmelting is sometimes regarded as a luxury item for people who don’t want to shovel snow. But in fact, most of my jobs are requested by homeowners who have fallen on the ice or who have dangerously steep driveways, and who want to ensure safe access to their homes.
As with any new technology, most contractors are a little apprehensive. There are the usual questions: Who’s in charge of design and installation? How will it affect the estimate and the schedule? How will it impact my crew and day-to-day operations? Who will supervise the paving crew to make sure nothing gets damaged? And who’s liable in case of failure?
In this article I’ll explain how a radiant snowmelt system works, then describe how to work with the heating contractor in the field.
How Snowmelt Systems Work
Radiant snowmelt systems have actually been used for many years in critical outdoor areas where snow and ice cannot be tolerated — on hospital emergency ramps, around public buildings like churches and theaters, and on helipads, for example. These applications are similar to industrial-grade radiant floor heating systems used inside airplane hangars, terminals, warehouses, and commercial garages. Residential systems are simply smaller-scale versions of these commercial systems.
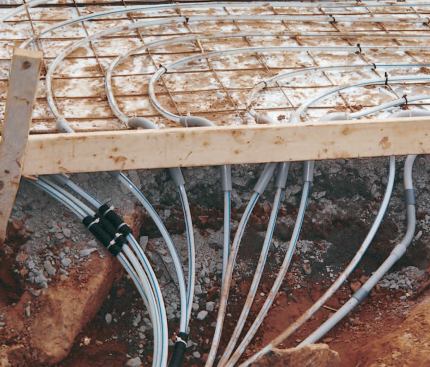
A radiant snowmelt system uses flexible pipe — PEX, or cross-linked polyethylene — embedded in the concrete or the sub-base of an asphalt drive. PEX — the same tubing used in indoor radiant heat applications — can withstand temperatures up to 200°F at 80 psi pressure, while at the same time being tough enough to withstand the rigors of concrete or asphalt placement.
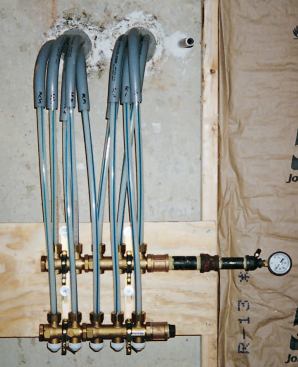
Since snowmelt applications typically require long runs, 3/4-inch or 1-inch pipe is often used (compared with the 1/2- or 5/8-inch sizes used most frequently for interior jobs). The ends of the piping are connected to a supply and return manifold, which connects to a boiler inside the home. Usually, the snowmelt system requires a separate, dedicated boiler to meet the large load required for snowmelting. Depending on size, a typical driveway may require 120,000 Btu/hr. or more — as large or larger than the home’s heating load in some cases. To try to satisfy this heating load with the home’s boiler would mean the boiler would be oversized most of the time, since snowmelt loads are of short duration.
Other system components may include mixing valves, heat exchangers, tempering tanks, circulating pumps, and controls.
The PEX carries a mixture of water and nontoxic antifreeze. For radiant snowmelt to be effective, the pavement surface needs to be maintained at a minimum of 33°F — theoretically. But wind and snow add considerably to the heat load, so usually a 37°F to 40°F surface temperature is more realistic. For faster response, we place high-density rigid foam insulation under the pipe to direct heat upward where it does the most good.
Controls may range from a simple on/off switch and manual valves to a fully automated system. Special sensors detect the slab temperature and air temperature, and whether the slab is wet.
The sensors trigger the circulator and boiler to supply the needed amount of warm fluid, and can modulate the fluid temperature as needed to ensure good performance and efficiency.
Turning on the heat when the snow starts falling is more effective as well as more energy-efficient than waiting until snow has accumulated. Using remote activation online or by phone is a good way to respond to changing weather conditions.
Drainage critical. It’s very important to plan and install drainage to carry off melted snow and ice. Since refreezing is a concern, snowmelt systems are generally designed to run until the surface is completely dry. When it’s not snowing, the system can be turned off or run at an “idling” temperature of 28°F to 30°F.
Cost. Cost for these systems varies widely, depending on size, complexity, and the sophistication of the control system. As an example, we recently installed a system on a 17×45-foot drive for $16,500, including a high-efficiency boiler and a simple control system.
Working with Snowmelt Contractors
As with any custom building project, good communication is the key to success. The nice thing about a radiant snowmelt installation is that the general contractor doesn’t have to worry about his crew or subcontractors performing any complex procedures. For a typical snowmelt installation in a concrete driveway, the GC is involved mainly in planning and coordination. The actual installation is the responsibility of the heating contractor.
Planning meeting. The GC usually arranges a meeting with the homeowners, the heating contractor, and the paving subcontractor. At that meeting, the heating contractor presents the design, describes the procedures, coordinates the schedule with the GC, and determines who needs to do what when.
The homeowners are typically concerned with leaks in the system, but PEX is extremely rugged and is no more at risk in a snowmelt installation than in an interior radiant installation. Any leaks are rare, and are usually caused by someone on site failing to take proper precautions in protecting the pipe.
Preparatory garage plumbing. The snowmelt piping hooks up to a manifold, which is usually located in the garage. Typically, the PEX piping is routed through a protective sleeve of 2- or 3-inch PVC conduit, which is embedded in the garage floor slab just like electrical conduit would be. We run this sleeve before the paving contractor puts the crushed stone base in for the slab. The garage slab can then be poured and finished normally.
Installation in a Concrete Driveway
A typical production schedule for installing a snowmelt system in concrete looks like this:
Day 1, Morning. Paving contractor lays down gravel and crushed stone, then applies a 2- to 3-inch layer of stone dust to form a solid base. He then builds perimeter forms using 2x4s and plywood.
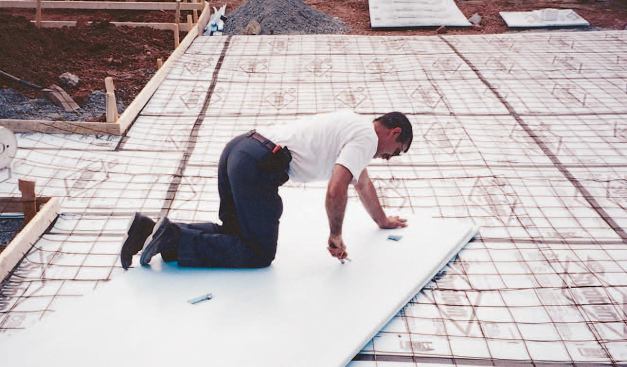
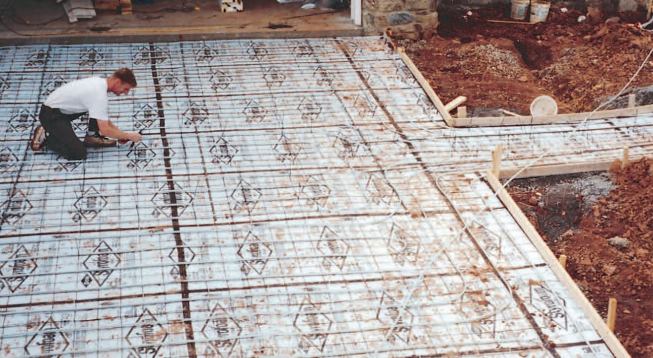
Day 1, Afternoon. Laborers lay down high-compression-strength extruded polystyrene (XPS) insulation over the stone base. On top of that, they lay flat sheets of 10-gauge welded wire mesh, which creates a 6-inch grid for strapping the tubing in place.
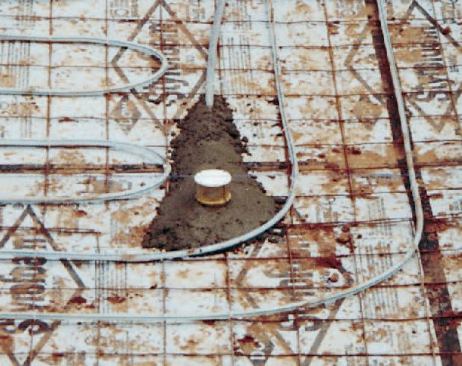
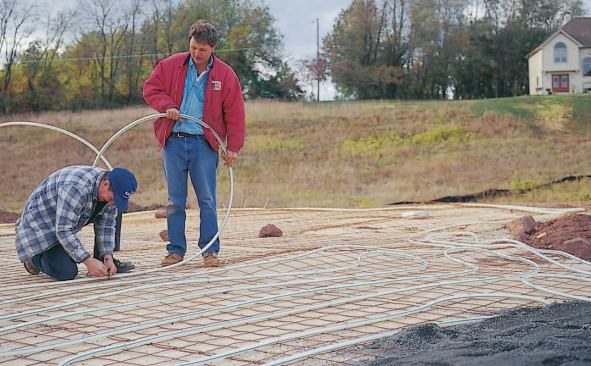
Day 2, Morning. Heating crew uncoils the PEX tubing and attaches it to the wire mesh grid, using plastic cable ties. It’s important to be on the lookout for sharp points and rough edges in the wire: These should be avoided or knocked flat.
At this point, the GC and heating contractor should plan for embedded slab control joints: To avoid damage to the tubing, no control joints should be cut into the slab. The heating contractor will run a plastic sleeve around the piping at the control joint (we use closedcell- foam pipe insulation) to allow for slab expansion and contraction without stressing the piping.
After the tubing is installed, the pipe should be air-pressure-tested to 30 psi to ensure there are no leaks. Since the piping is exposed at this point, take care to avoid any driving, staking, shoveling, or raking in the area. Also, keep cigarette butts and matches away — though it’s unlikely, they could melt a pinhole in the PEX.
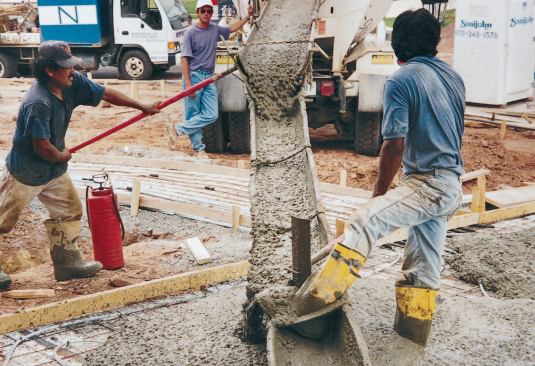
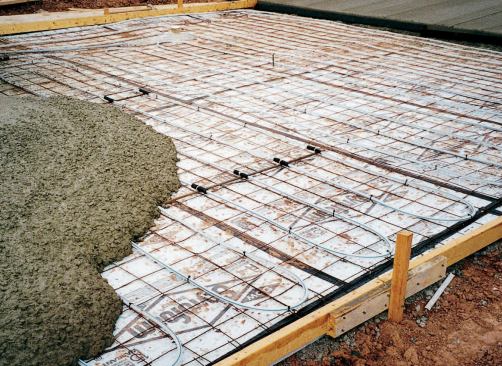
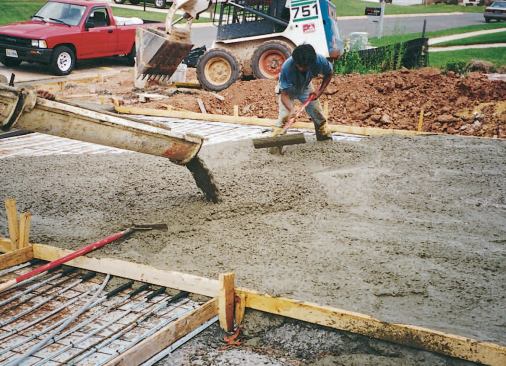
Day 2, Afternoon. The paving contractor pours the concrete, usually 4 to 5 inches thick, measured from the wire mesh. The heating contractor should be on hand to provide technical help during this crucial phase.
The wire mesh should not be hooked and pulled up into the concrete — though this is sometimes recommended in interior radiant slab installations. The mesh is there simply to hold the tubing in place; it provides no structural support. If wire mesh reinforcement is required for the structural strength of the concrete, then a second layer of wire mesh can be laid on top of the installed heating pipe.
To protect the tubing, the workers should avoid using rakes, shovels, or hoes to move the concrete. Instead, tampers should be used. Throughout the process, the heating contractor should stand by to monitor the workers and make sure the air pressure in the tubing is constant. In the rare event of a leak, the heating contractor can halt the pour and splice in a repair coupling or replacement pipe.
Installation in Asphalt Drives
Radiant snowmelting works on asphalt drives, too, though the installation details are a little different.
After grading the driveway and covering it with crushed stone, the workers lay down a layer of 1/2-inch high-compression XPS insulation and the 10- gauge wire mesh. (While 1-inch insulation works fine with concrete, asphalt is a softer, more flexible surface. It’s typical for asphalt to form “valleys,” or tire depressions, over time. By using 1/2-inch XPS, you limit the depth of these valleys in case the insulation compresses.)
After the insulation is laid, the heating crew lays out the tubing, attaching it to the wire mesh.
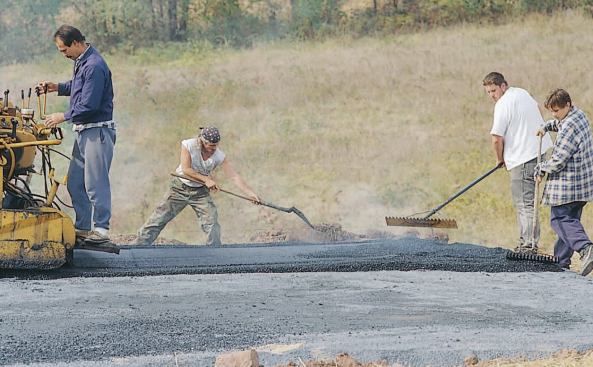
Next, the paving contractor applies finely crushed stone dust on top of the piping. The best method is to dump the stone dust in piles, then use a small skid steer with a flat bucket angle to push the dust ahead and work it down around the piping. Spraying the dust with water helps with compaction.
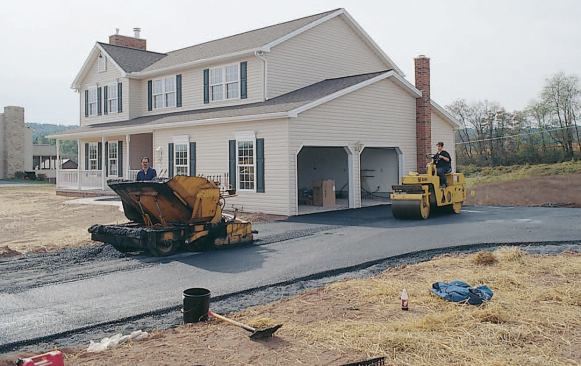
The paving contractor then applies a 3-inch topcoat of asphalt using the normal application equipment. The 3-inch base of stone dust surrounds and protects the tubing, so shovels and even a full-sized roller can be used without fear of dings or compression. Throughout the process, the heating contractor should be present to watch the workers and monitor the pressure in the tubing.
The stone dust also protects the tubing against the heat of the asphalt. PEX can withstand hot water temperatures up to 200°F, which is higher than the temperature of the asphalt as it’s actually applied. However, it never hurts to play it safe by choosing a cool day for installation. On a recent installation, fellow contractor Jeri Donadee even ran cold water through the tubing while the asphalt was going down. He reports that the temperature of the water rose only 1°F, which he credits mainly to the insulating value of the stone dust.
Dan Foley is vice-president of Arlington Heating and Air Conditioning in Arlington, Va. Thanks to Jeri Donadee, vice president of H.B. McClure Co., a heating and plumbing firm in Harrisburg, Pa., for providing information on snowmelt installation in an asphalt driveway.


