I talk a lot about air-sealing and building tight houses on my blog and in my videos, and I’m still shocked at the comments I receive from building professionals of all stripes about how a house should “breathe.” Houses don’t have lungs and can’t breathe; people and animals breathe. Houses should be tight and well air-sealed so that the money our clients pay to heat, cool, and dehumidify the interiors isn’t wasted by outdoor air leaking in and requiring additional energy to condition.
Where I work in Texas, the air leaking into a house typically brings with it humidity, as well as pollen and allergens. This humid air can easily find a spot inside the wall cavity where the dew point makes it condense. Typically, this spot is the paper facing on the back of drywall; I find lots of moldy drywall when I remodel homes.
To prevent such problems and to maintain energy efficiency, I want to build the tightest house possible and introduce and distribute fresh, filtered air only where and when my clients need it.
How efficient or comfortable would your houses be if your clients left their doors cracked open by an inch or two? Not very. Air-sealing is vital to an efficient, durable, healthy build, and I believe it’s more important than most other energy-efficiency measures. And in the building of a home that’s both durable (meaning it won’t rot or develop mold) and energy efficient, air-sealing is second in importance only to waterproofing. No matter how much insulation you stuff into your walls or roof, it’s all worthless if hot or cold air leaks in.
Foam Fiction
This article, in which I survey the good, better, and best air-sealing strategies that have worked for me, has been some 10 years in the making as I’ve been working on tightening the houses I build. When I started taking building science seriously (led to this topic by the mold crisis, which erupted in Texas and blew up in importance nationally soon afterward), in the early 2000s, I initially believed I could achieve all the air-sealing I desired for my houses by installing spray polyurethane foam for the entire envelope.
Spray polyurethane foam insulation works well to resist heat flow but it is not a whole-house air sealing solution.
The first all-foam house I blower-door tested had 2×4 walls with 3 1/2 inches of open-cell foam, and 2×6 rafters with 5 1/2 inches of foam. That met code for climate zone 2 (Austin, Texas) at that time, and I expected a very low blower-door score. So I was surprised when the house scored a 4 ACH50. That was acceptable and below what was needed at that time for code, but the house was still not as tight as I had hoped.
Closed-cell foam will block air pretty well in wall and ceiling cavities, and is one of the best ways to seal band joist areas. But foam insulation will not seal all the penetrations in a house.
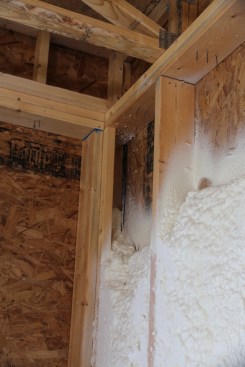
Cracks at plate lines are one obvious example of areas that will need extra attention. The author has also noticed that cracks can develop at the edges of framing cavities and the insulation over time. When he does use foam, his crew pre-foams the gaps and cracks in framing cavities before the bays are filled.
Since then, I’ve been tinkering with various materials and methods to ratchet down my blower-door scores. My company, a general contractor that doesn’t do design work, specializes in architect-driven projects, and most of our jobs come from architects who refer us to the clients at the schematic design stage—or sometimes even further along in the design process. As a result, I have limited influence over the design. I push hard to achieve as tight an envelope as possible to offset the eventuality of the architect or owner coming in with a fancy door or unusual windows that aren’t optimal for airtightness. In many cases, the rest of the shell needs to be as airtight as possible for the house just to meet code.
In this article, I’m going to begin by covering strategies for meeting the current 2012 IECC requirement of 3 ACH50 (for most of the country), and then I’ll move on to some of the products and techniques you can use to ratchet that airtightness toward Passive House levels (0.6 ACH50).
Air-Sealing to Meet Code
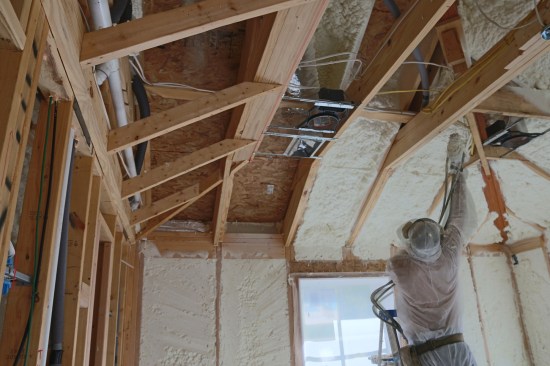
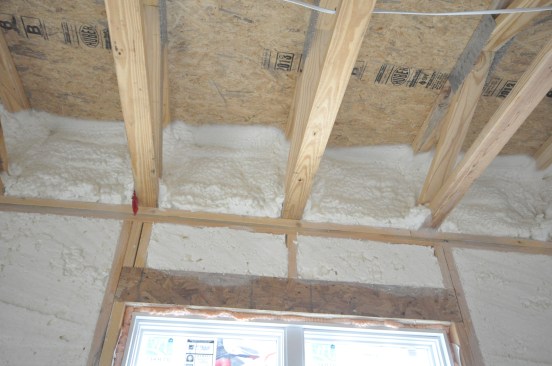
Meeting the prevailing energy-code requirements is the starting point for “good” air-sealing options. I am a fan of using spray polyurethane foam (open-cell above grade; closed-cell below grade or wherever you can afford it). It’s a good choice because it can air-seal some potentially difficult areas, like band joists and rim joists, and it’s great for creating conditioned attics—which we do often in the South because we don’t have basements for mechanical rooms.
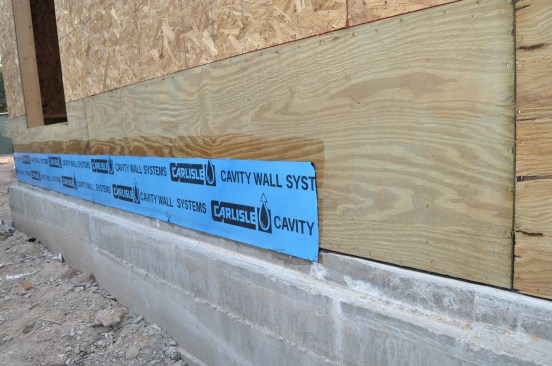
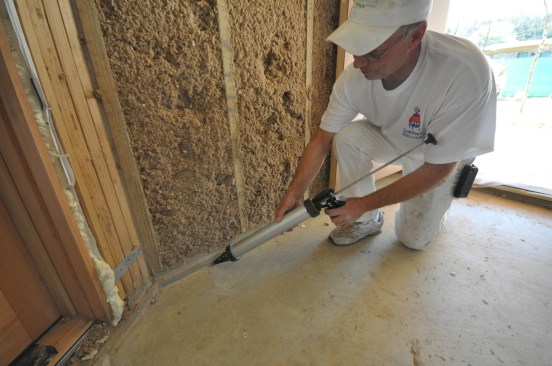
To meet minimum air sealing requirements (3 ACH50 for most of the U.S.) the author air seals between the foundation and the wall framing with peel-and-stick flashing.

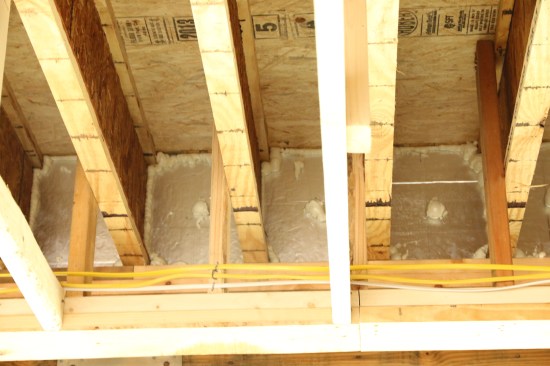
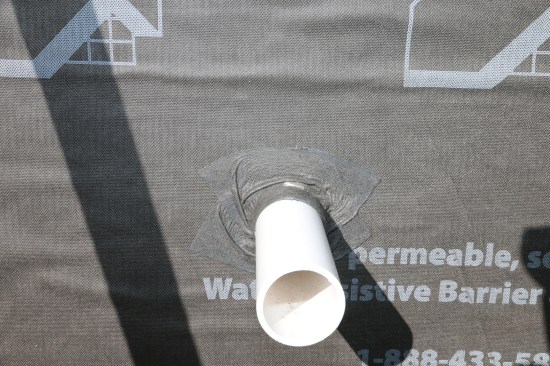
Before drywall, all plumbing and electrical pentrations in walls are sealed with expanding foam to stop air flowing between the lower floors and the attic.
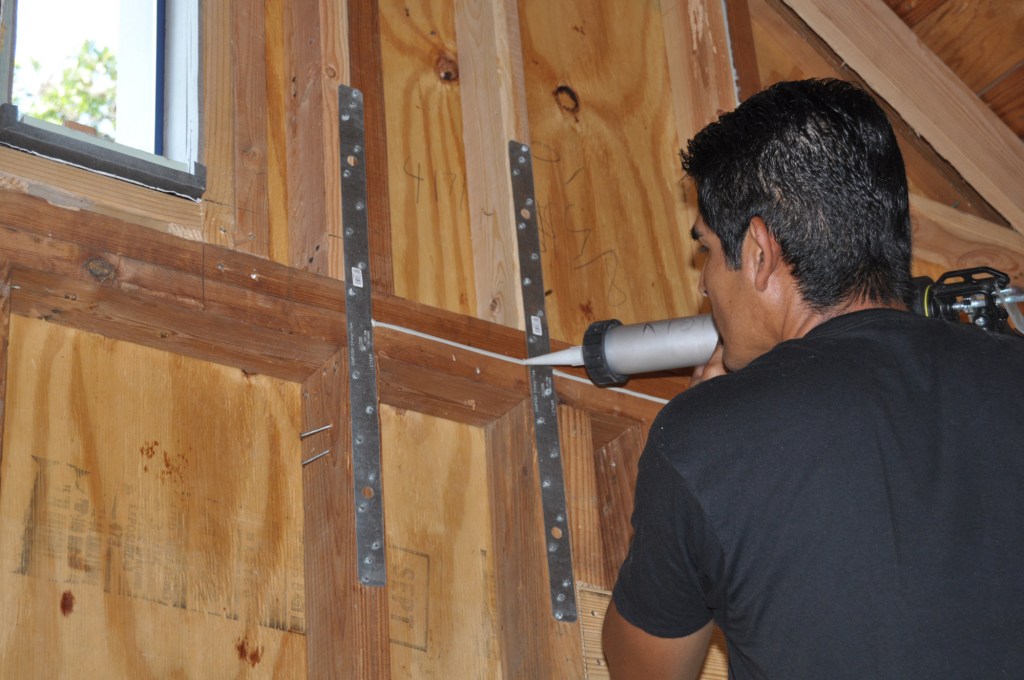
Before installing spray polyurethane foam insulation, I like to “prefoam” my houses by having one of my carpenters detail all the cracks and penetrations with canned foam and caulk. We focus on breaks in the framing, penetrations, overhangs, mechanicals, and where framing meets the foundation. I initially used lots of caulking for sealing these areas, but now I use flexible flashing tapes where possible, especially where framing meets concrete.
Large openings, such as the opening into an attic from an attached garage, get sheathed and the edges foamed.
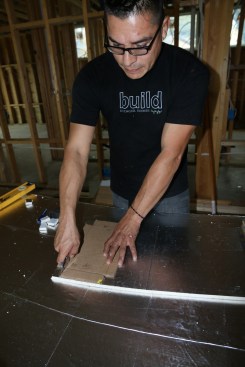
To seal rim joists, a carpenter cuts blocks from rigid foam using a template that has notches for the top and bottom flanges of I-joists.
Rigid foam blocks sealed in place with expanding foam sealant effectively air seal the rim joist.
You’ll also want your drywall contractor to caulk drywall to HVAC vents, use low-expansion foam around windows and doors, and caulk bottom wall plates. If you follow these general guidelines, you’ll more than likely achieve blower-door scores of 3 ACH50 or less.
Better Options
I want all my houses, no matter the design, to blow as close as possible to 1 ACH50. If this is your goal, here are the measures I’ve used to successfully take my projects to an average blower-door score of around 1.5 ACH50—despite some less-tight door and window products being specified.
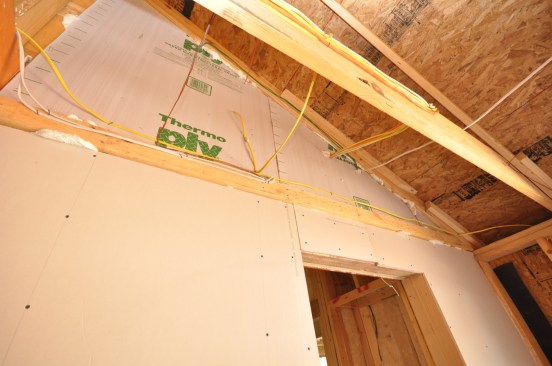
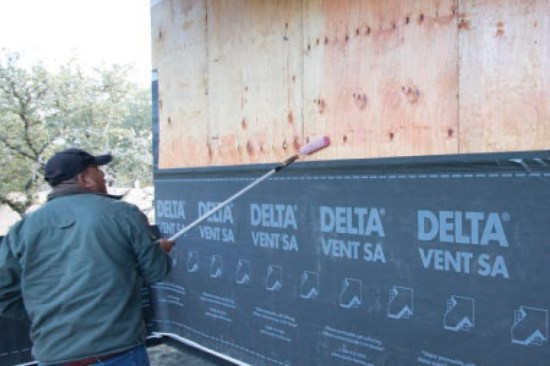
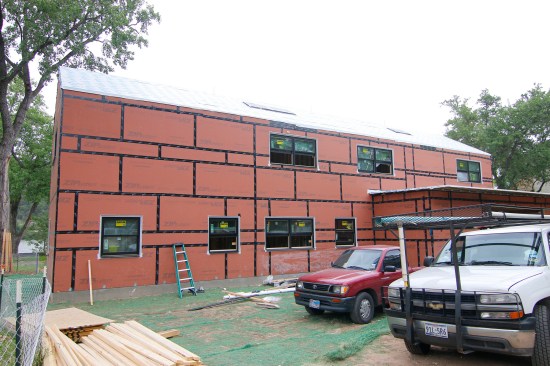
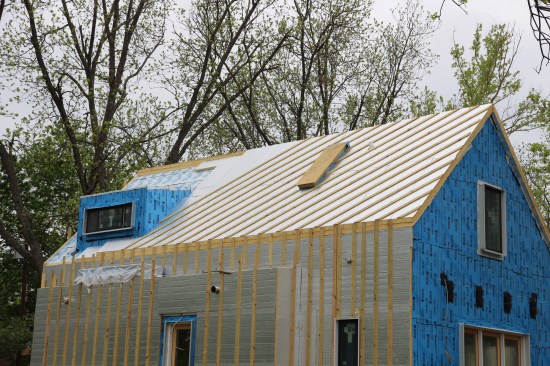
To reach a “better” level of airtightness, you need to use a peel-and-stick or a fluid-applied weather-resistive barrier (WRB). Zip System sheathing that’s fully taped will also work.
In the South, I often use Poly Wall Aluma Flash Plus, which is a foil-faced WRB. But foil is a zero-perm product, which is not a good option in a colder climate. You’ll want to avoid this unless you work in the hot-humid regions of the southern U.S. I also like Cosella Dorkin’s Delta Vent SA, which is a peel-and-stick WRB that has a perm rating of 50 and works in all climate zones.


Better air sealing (tightening to around 1.5 ACH50) requires a p…
Just like with the “good” air-sealing methods, I “prefoam” framing cavities and take care sealing details and penetrations with foam, caulk, and tape. This is time well spent. Once the drywall is hung, these areas will be inaccessible.
At the “better” level, we are doing everything we can to stop air flow at the outside wall. This includes taping framing to the foundation on the outside, as well as caulking or taping the inside.
Better windows and doors. At this level, I also upgrade from standard lumberyard exterior and garage doors, and I want the architect to steer clear of pivoting or sliding doors, unless they are PG50 rated.
A PG50 rating takes design pressure, or DP, into account. A DP50 rating means the window or door can withstand an equivalent wind pressure of 50 pounds per square foot (as measured by an independent company in a lab). There actually are three DP tests, however—one for air, one for water, and one for “structure.” A window with a DP50-Air rating has withstood the equivalent pressure of a 142-mph wind, without leaking air. DP50-Water involves an 8-inch-per-hour rain with the equivalent wind acting on the window, without water leaks. DP50-Structure means the window or door can withstand the same levels of wind and water without deformation or failure.
A PG50 rating (PG stands for “Performance Grade”) refers to a window or door that has passed all three DP tests—for air, water, and structure. If you are looking to ratchet down your airtightness to near 1 ACH50, it’s helpful if PG50 windows and doors have been specified. Some manufacturers disclose this on their bids, but for others, you’ll have to dig this rating up. The Marvin windows and doors I often use are all PG50 rated.
Doors that are made by some of the other window manufacturers and that come with multipoint lock mechanisms often have a PG50 rating. They are certainly much tighter than the standard lumberyard models.
Best Options
When we are looking to ratchet down the airtightness below 1 ACH50, radical things must happen. First, all the windows and doors must have a PG50 rating. We can’t use any pivot-hinge, steel, or architectural doors or commercial products that “seal” with a brush sweep.
Next, the house must be designed from the start with airtightness in mind. I have two suggestions for framing.

Reaching the tightest air sealing standards (below 1 ACH50) star…
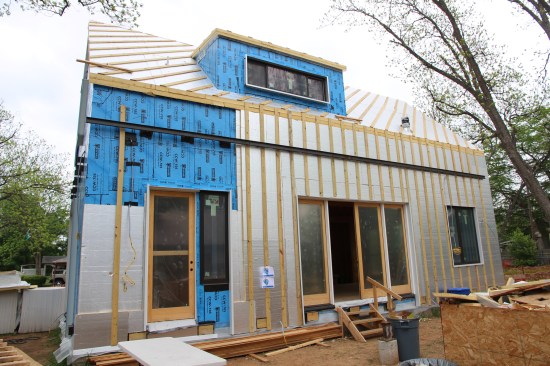
Modified SIP house. I recently had the opportunity to build one of the homes developed by the legendary timber-frame company Bensonwood, here in Austin. The walls and ceiling panels are factory-framed and result in a super-tight and extremely well-insulated shell. The panels have Zip System sheathing, I-joist studs, and an interior layer of OSB. Everything gets taped inside and outside. Wall panels are joined with double bulb gaskets, including where walls intersect with the slab foundation and where roof panels join at the ridge. The house had no overhangs when it was first framed so that the air barrier (Zip System with a peel-and-stick roofing membrane) could run continuously up the walls and up and over the ridge.
Most SIP homes are similar and are also a “best” option.
Perfect Wall. One option for super-tight construction without factory framing is a “Perfect Wall” house. We recently completed one that used standard wall framing with conventional lumber; again, the design had no overhangs so the WRB could run continuously from the foundation, up and over the ridge, and back down again. This makes for a super-tight house from an air-sealing perspective.
The author of this method, Joe Lstiburek, of Building Science Corporation, calls this a 500-year house. It can be built in any climate zone in the U.S. just by varying the thickness of the exterior insulation to provide condensation control. In our case, we used 4 inches of polyisocyanurate foam board on the exterior walls and 8 inches of polyiso on the roof. No cavity-fill insulation on the inside of the home was needed.


