Greg Whitchurch
The air barrier under the footing and slab is also a vapor retar…
In Vermont, at Montpelier Construction, we strive to be energy-conscious builders. One of our founding partners, Malcolm Gray, studied energy-efficient construction and renewable energy at Goddard College in the 1970s and remembers doing heat-loss equations on a slide rule. While the technology has certainly advanced since then, we continue to pursue the same goals, now with our Passive House and weatherization work.
We now have two PHIUS certified Passive House Consultants (Malcolm and myself) and one PHIUS certified Passive House Builder, Chris Miksic. The core of our business will always be the traditional craftsmanship but incorporating Passive House air-sealing techniques and energy modeling has become important as making every piece of finish trim fit just right.
Even if you aren’t building to the stringent German standard, there’s a lot to learn about methods and materials for creating a draft-free, energy-efficient home. In this article I’ll explain some of the techniques we used in a recent Passive House build, shown here in the photos. But I’ll also talk about how these techniques can be used in more conventional buildings (shown in the illustrations).
Air-sealing is the cheapest way to reduce energy use in homes. Without airtightness, insulation is useless. Airtight buildings are much more comfortable and less drafty too. The Passive House standard places emphasis on airtightness to protect the wall assembly from moisture-laden air finding its way in. In super-insulated assemblies, the potential for mold and moisture damage to occur can be great. Therefore, keeping airborne moisture out of the wall or roof assembly with proper air-sealing is key to a healthy and resilient high-performance building.
Achieving the Passive-House airtightness requirement is painstaking, but not impossible. In the design phase, we defined the boundaries of the house’s air barrier, then used airtight membranes, high-quality acrylic tapes, caulks, and other special products—most made in Europe but available in the U.S. (See page 61 for a list of air-sealing products we used.) One of the first things a Passive House Consultant does when planning a project is work with the builder to define the boundaries of the house’s one continuous air barrier. A decision must be made about every part of the house and whether it will be conditioned space. Communication is critical to developing a strategy that will work on paper and in the field.
Everyone from the homeowner to each tradesperson needs to know what we are trying to accomplish and how we are going to do it. All it would take is one member of the team who doesn’t understand or care about the airtightness goal to undermine our efforts with a hole or two poked in the wrong place.
Starting Under The House
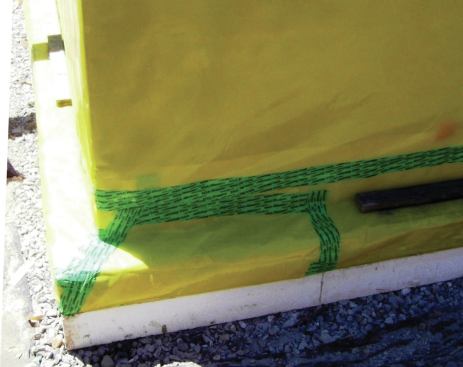
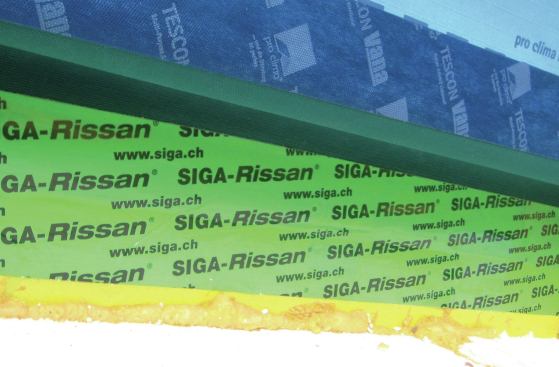
The air barrier begins under the house. Surprisingly, there is some air movement below grade. The air barrier under the footing and slab is also a vapor retarder and radon retarder. For this, we used 10-mil Stego Wrap. We weren’t satisfied with the adhesion from the tape that is sold with the Stego Wrap, so we switched to Siga Rissan tape. Rissan is so sticky that the reinforced tape will pull apart before the bond with the plastic gives out. As you can imagine, this created a number of interesting folds at the four corners of the house, similar to wrapping a present.
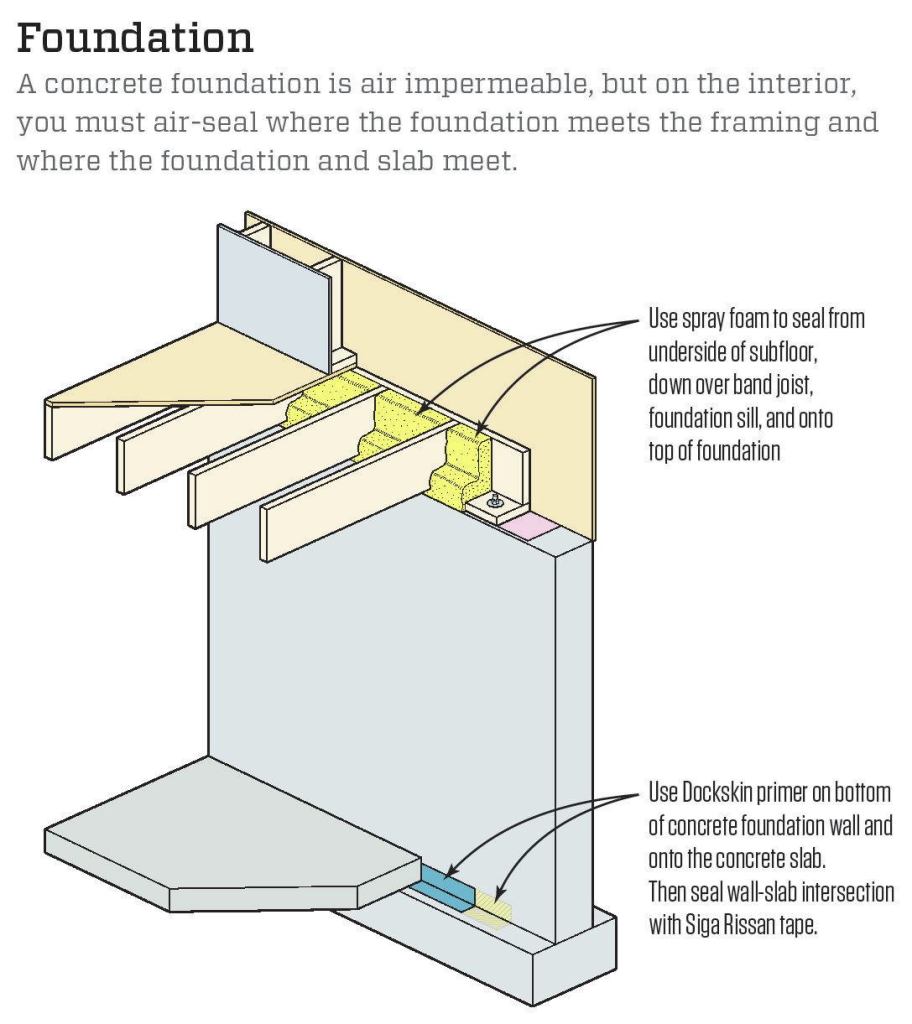
If you aren’t aiming for Passive House airtightness, but still want to do a good job in a conventional building, pay attention to the junction between the foundation wall and slab, which is a potential air leak when there isn’t a continuous plastic layer below. This seam can be sealed with Siga’s Rissan tape after you’ve primed the concrete with Siga’s Dockskin liquid sealer (see Foundation). The tape, available in 2.5-, 4-, and 6-inch rolls, has a divided peel-away strip, so it’s easy to fold into corners.
If the foundation wall is poured concrete, no separate air-barrier layer should be needed, as concrete is fairly airtight. Be sure to seal any service penetrations before they are inaccessible. Make sure to air-seal and insulate behind electric service panels.
If you have a CMU foundation, depending on the type of block, it could be fairly leaky and needs to be sealed with a coat of plaster or a fluid-applied air barrier. By the way, basement windows are notoriously leaky and provide little useful light. If they don’t serve a good purpose, don’t put them in.
Foundation To Framing
The connection from the foundation air barrier to the wall air barrier is often a difficult junction to seal in a conventional house. Typically, builders install sill seal between the masonry and the framing, which is marginally effective, especially when the foundation’s J-bolts pass through the sill seal. The top of the foundation wall is rarely flat enough for generic sill seal to fill the gap between the concrete and band joist, resulting in serious air leaks as well.
In our Passive House, though, that connection wasn’t an issue. Because the foundation air barrier ran up the outside of the foundation and was more or less in line with the air barrier running up the outside of the structural wall, there would be no J-bolts penetrating the air barrier or gaps between the top of the foundation wall and the mud sill to worry about.
In some buildings, taped housewrap might be your best air barrier. Instead of just stapling it at the bottom of the wall sheathing, tape it to the foundation wall with a 6-inch-wide piece of 3M flashing tape or Siga Rissan tape after priming the concrete with Siga Dockskin.
If the foundation is insulated on the outside, leave a section of insulation off at the top of the concrete wall until the connection between the air barriers is made. If the concrete itself is the finish above grade, hold the apron board trim 2 inches down to hide the taped seam (see Foundation to Framing, above) .
Another way to seal the foundation-wall-to-framed-wall connection is from the inside with spray foam. With a froth pack, foam from the underside of the floor sheathing down the band joist and connect it to the foundation wall. This approach still leaves the subfloor-to-wall-bottom-plate connection as a potential air leak that will need to be sealed with foam or caulk. The Passive House Institute doesn’t recommend relying on spray foam as an air barrier because it can crack over time, but I think it’s a significant improvement over relying on traditional sill seal.
Framed Wall Air Barrier
Defining a continuous air barrier on the framed-wall part of the building can be tricky. In a conventional building it could be drywall or vapor retarder on the inside, or housewrap on the exterior. An interior air barrier is preferable from a moisture-control perspective, but every electric outlet and floor seam needs to be sealed, which is time-consuming. An exterior air barrier is less desirable from a building-science perspective, but makes it easier to achieve continuity—by simply taping the seams and holes in the housewrap or by using the Huber Zip System.
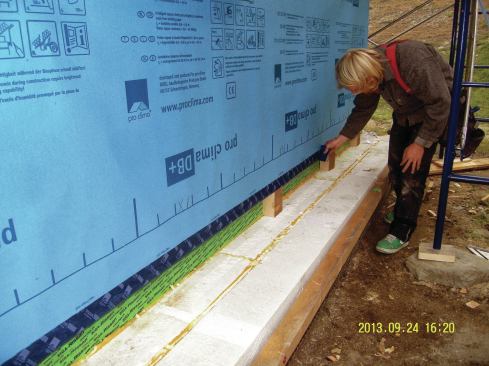
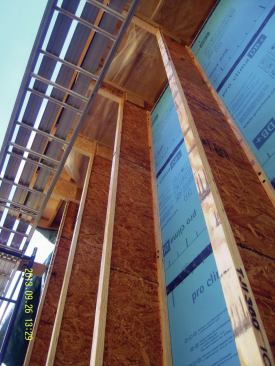
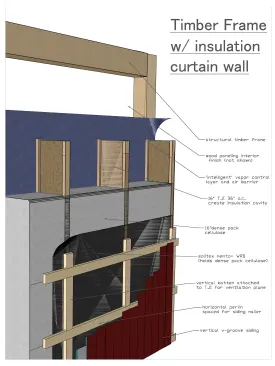
In a Passive House or super-insulated wall, the air barrier needs to be on the inside to prevent inside moisture from getting into the wall assembly and condensing. While polyethylene sheeting is a good choice for an air barrier under and around the foundation to keep out as much ground moisture as possible, it isn’t a good choice for a framed wall, except in the coldest climates. Where there is a possibility of vapor drive both from the inside out and from the outside in, a variable-perm vapor-control layer, such as the Pro Clima DB+ that we used on our Passive House, can be a safer option. The vapor-control layer can also serve as the air barrier.
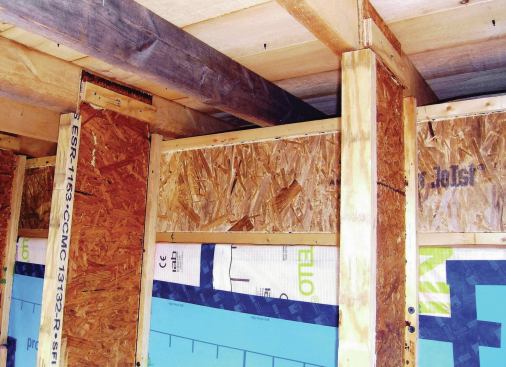
With a complete and permanently sealed air barrier, not destroying it as we built our insulation curtain wall was our only remaining challenge. Our insulation curtain wall consisted of 16-inch vertical wood I-joists spaced 36 inches on-center filled with dense-pack cellulose. Six-inch-long HeadLok screws were used to attach the I-joists. These screws would penetrate the air barrier, so to seal the screw holes, we pre-drilled each joist while it was on the ground, then applied Pro Clima’s permanently flexible caulk, Contega HF (OR-F), to each hole. The screws cinched the joist tight to the DB+ and the caulking was compressed for a good seal.
DB+ is a reinforced paper-based product that requires a certain amount of care during installation. It comes in 4-foot rolls, which are easy to handle. The membrane is stapled to the building only at the seams, where they will be covered with tape (see Framed Wall Air Barrier). We used Tescon Vana from Pro Clima to tape the seams and any rips or tears from the installation.
Windows And Doors
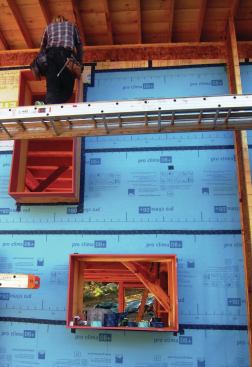
The most challenging part of the wall air barrier is the airtight connection to the windows and doors. The windows on our Passive House project were going to be “outies,” so a connection needed to be made from the DB+ air barrier on the sheathing to the windows set on the outside of the wall. Our 3/4-inch plywood bucks were set in place before we started wrapping the building with DB+. The DB+ was carefully cut around the window and taped to the buck with Tescon Vana. All the seams in the buck were sealed with Prosoco’s R-GUARD Joint and Seam Filler. The outer half of the window buck was then protected with Prosoco’s R-GUARD fluid-applied WRB. This is a vapor-open, waterproof, weather-resistant barrier that is simply rolled on.
Effectively taping the windows for airtightness on the interior side requires some skill and takes time to master. We still spray-foam windows in place for insulation, but the tape provides the real permanent air barrier.
When builders switched to using spray foam to seal windows on the interior, it was a big improvement over stuffed fiberglass. In some situations, however, the spaces between the rough opening and the window jambs are too narrow for the foam gun to fit into, and if the window or frame shifts over time, the spray-foam seal can break. Because of this, Passive House builders rely on high-quality acrylic tapes to seal the window to the rough opening. We’ve found that Siga’s Corvum tape is the easiest to use. It’s pre-folded on the roll with a narrow side and a wider side. The narrow edge is applied to the window frame, and the wider side spans the gap and is adhered to the rough opening. The four corners require an additional, specially folded piece of tape for maximum airtightness (see Windows and Doors, above).Siga’s Youtube channel has a good video on the process. Zip tape and 3M #8067 flashing tape also do a good job sealing the outside of windows, but are not as vapor-open.
Properly detailed head flashing and sill-pan flashing are still your first line of defense against water intrusion from the exterior. If a window or door isn’t properly flashed, then no amount of special European tape can make it last.
Walls To Roof
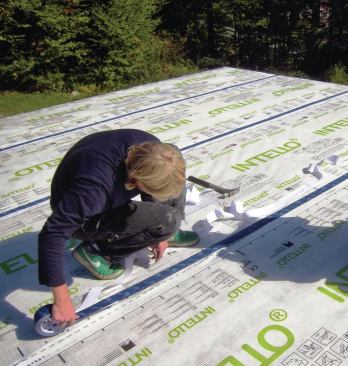
The soffit framing on our Passive House was built on top of the insulation assembly, which was above the air barrier, so there were no framing penetrations to deal with. The air barrier on the ceiling was our most important surface to completely seal. This roof assembly was designed to be both foam-free and unvented, utilizing the advanced moisture-controlling properties of Intello.
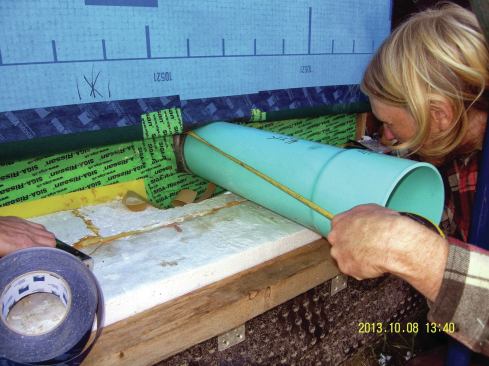
To seal the holes for ventilation intake and exhaust and for electric and water service, we used EPDM gaskets taped directly to the air barriers. A section of the conduit or piping must be placed through the gasket before insulating.
In most conventionally framed buildings, you’ll need to find a way to connect your ceiling plane to the wall air barrier. No matter how bomb-proof your wall and ceiling air barriers are, if they aren’t connected all the way around the building, neither will be effective.
Cap off the top of your wall by attaching a strip of plywood to the top plate before setting your trusses or joists and rafters. Wrap housewrap from the exterior wall sheathing up and over the plywood strip, and then staple it to the underside of the strip. The strip can also serve as the first course of strapping (see Walls to Ceiling).
It’s not uncommon to stand on the top plate when setting trusses or joists and rafters. Be forewarned that wrapping the plate area with housewrap might make it very slippery, and you’ll want to use a fall protection system.
Once the building is dried in, you can strap the rest of the ceiling, then hang and fire-tape the ceiling before framing the interior walls. This way, the drywall air barrier isn’t broken by the top plate of each wall partition.
The concept of one continuous air barrier from under the slab to the roof is simple enough to apply to any building. Penetrations of this barrier should be identified in the design phase along with a strategy for dealing with them. Our success on our Passive House project was a product of this approach.
Indigo Ruth-Davis is a PHIUS+ Certified Passive House Consultant and builder. He is a partner at Montpelier Construction.


