A potential client contacted me about an energy upgrade project on behalf of his father, who lived in a log cabin in Vermont, right on the U.S.-Canada border (if you crossed the road, you would be in Quebec Province). During our brief conversation, he mentioned a couple of times—almost in passing—that “some of the walls needed to be replaced,” and that he had reached out to a number of other builders but none was interested. I told him I was willing to visit the home and arranged an on-site meeting. On the long drive north to see the property, I kept wondering what the son meant by “some of the walls needed to be replaced.”
Upon arrival, I could see that the cabin’s exterior had seen better days. Its white pine log walls were severely deteriorated from a combination of years of hard Northeast weather, the exposed location (the cabin sat in the middle of hundreds of acres of open hayfield), and a lack of regular maintenance with wood sealer. On the positive side, the home’s floor and roof systems were in decent shape and it had recently been re-roofed with metal AG panels.
After a long conversation with the father and son, I agreed to take on the gnarly building-envelope retrofit, which encompassed removing the existing log walls, windows, and doors all while working around the homeowner and his indoor cat.
Starting out. It took some time to have an energy audit done and organize funding (the homeowner qualified for the maximum level of a state-sponsored Heat-Saver Loan program, which made the energy upgrade possible). We planned to start demolition in spring, so, before winter set in, I temporarily sheathed the home’s exterior walls to help keep wind and snow from entering the home through holes in the deteriorated walls. In late winter, the homeowner hired an insulation contractor, who dense-packed the rafter bays with cellulose just before COVID-19 hit and a statewide lockdown was imposed.
Built in the early 1980s, the cabin is situated on an exposed site in a region notorious for strong prevailing “Quebec” winds out of the Northwest. The home’s exterior envelope had deteriorated to the point where wind, wind-driven rain, and snow would enter the interior through holes in the log walls. Here, temporary sheathing was installed over the existing log walls by the author in an effort to help improve the homeowner’s comfort level through the 2019-20 winter (the rehab work was slated to begin in spring 2020).
Working Piecemeal, Alone
After the lockdown ended, I installed temporary support walls running the length of the home to support the roof and floor loads. I laid out the framework as well as was possible around homeowner’s living space, then began to remove the rotted log walls in small sections beginning at one end of the rear bearing wall. I worked piecemeal, removing only as much wall as I could replace and seal up in a day.
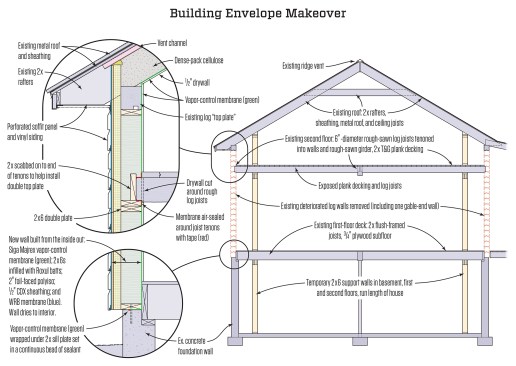
The “log cabin envelope makeover” began by installing temporary support walls in line from the basement to the second floor to pick up the home’s roof and floor loads. New replacement walls were then installed in piecemeal fashion as plumb and level as possible (given that the home’s roof had flexed somewhat over time). The new wall assembly is designed to allow drying potential to the interior.
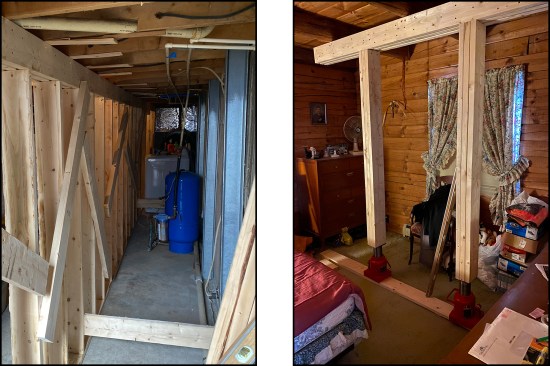
Temporary 2×6 support walls were installed in the basement (left), then on the first floor (right). The supporting framework was designed around the client’s living space as best as possible (the homeowner “lived” in the house throughout the three-month-long rehab project). Here, 50-ton jacks were used to raise the existing framing about an 1/8 of an inch to set the temporary support walls (right).
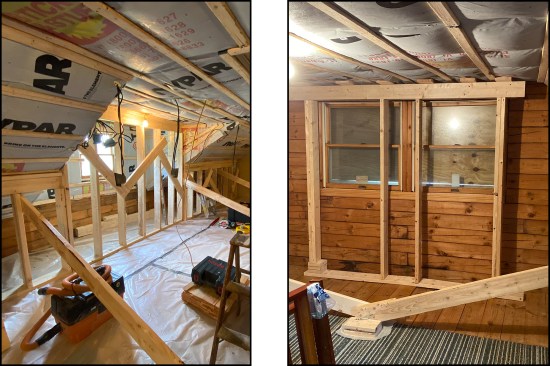
On the second floor, the temporary walls supporting the roof were installed similarly with 50-ton jacks, their top connection sloped to meet the home’s main and shed roofs (left). At the gable ends, the upper roof (and second-floor center girder, not shown) were supported by small sections of support wall running from the basement to the roof (right).
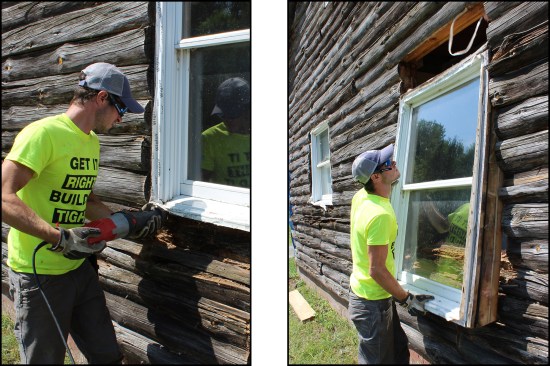
Overall, the outer 2 to 3 inches of the 8-inch-wide log walls were rotted, with the worst damage at sill locations (left). Most of the home’s existing flangeless windows were beyond the point of reuse (right); they were later replaced with new, mid-range-priced vinyl double hungs.
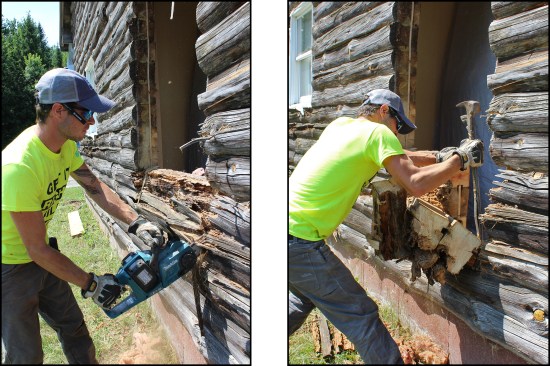
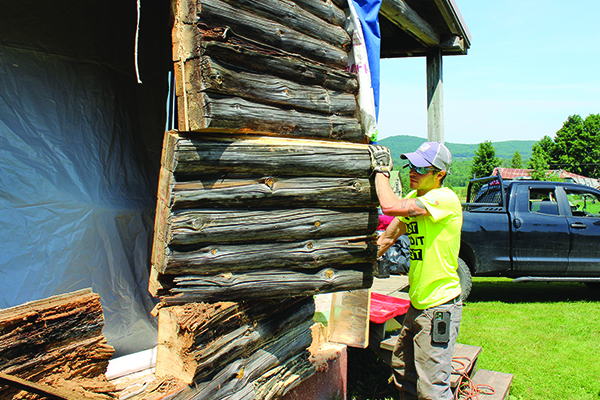
A cordless chain saw was used extensively during demo to cut up the deteriorated white pine logs (left) into manageable pieces to be removed by hand (right, and first photo).
New replacement walls. With one section of the wall open, I began building the new wall from the inside out. I applied a continuous bead of Pro Clima Contega HF sealant to the top of the existing foundation in the opened-up work area and installed an interior Siga Majrex vapor-control membrane. I turned the bottom edge of the membrane onto the foundation and set it in the sealant, then ran the membrane up the wall and taped the top to the remaining rough-sawn square top plate. I had to cut and seal the membrane around existing log “joist” tenons, which were supported by a new 2×6 double top plate.
Starting at one end of the rear south-facing bearing wall, the author removed only as much of the log wall as he could replace and seal up in a day.
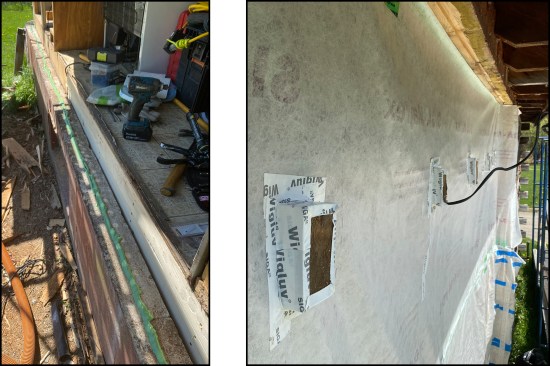
The new wall was built from the inside out, starting with a continuous bead of sealant applied to the top of the existing foundation (left). The vapor-control membrane was taped from the foundation up to an existing rough-sawn square top plate (right). The membrane was cut and sealed around existing log “joist” tenons, which were supported by a new 2×6 double top plate.
Next, I pieced together the studwall and infilled the bays with Roxul batts. Then I applied 2-inch foil-faced rigid polyiso, 1/2-inch CDX plywood sheathing, and a WRB membrane. With that wall section sealed up, I moved on to another section of the wall and repeated the process, working my way around the house.
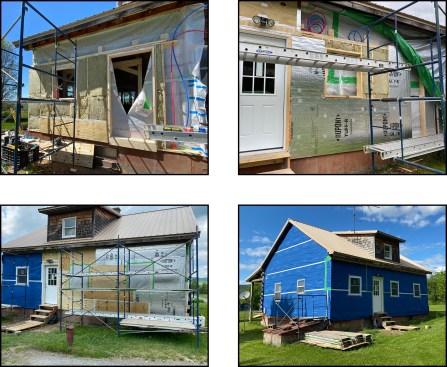
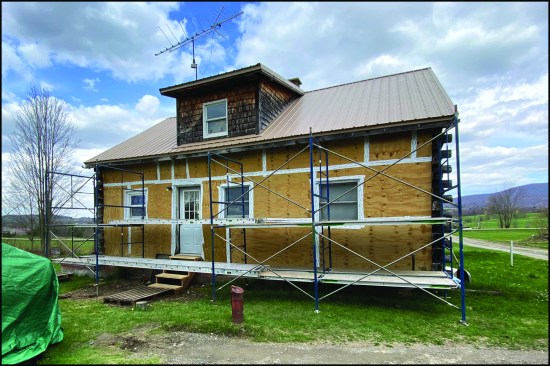
The replacement wall was pieced together from the inside out with the new wall components custom fit within the existing opening like a jigsaw puzzle (top left). The author worked his way down the rear south-facing wall in sections (top right; bottom left). Upon completion, he then removed and rebuilt the front bearing wall, finishing up with the east-facing gable end—the west-facing gable-end wall, shown here (bottom right), had been remediated a few years earlier by another contractor.
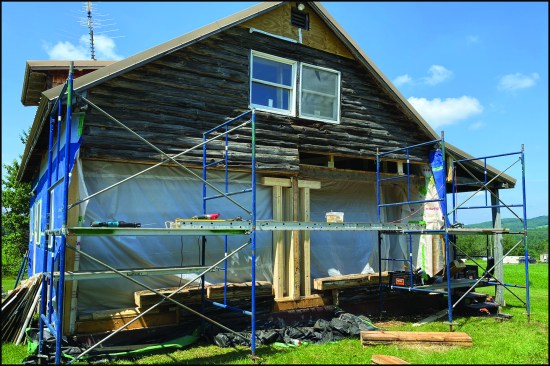
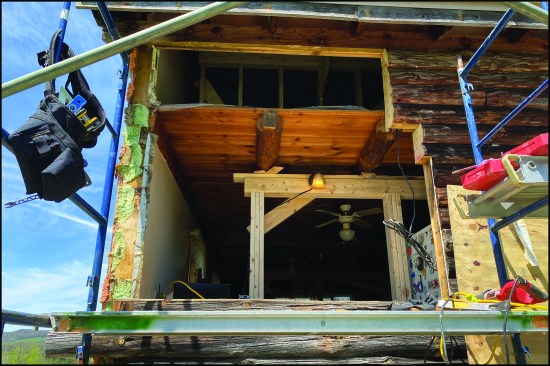
After isolating the living space from the exterior with plastic, the author removed the first-floor log courses. Here, the second-floor center girder (and roof) was supported by small sections of support wall running from the basement to the roof. The suspended upper log coursing stayed in place due its robust nailing (14-inch-long spikes 16 inches on-center).
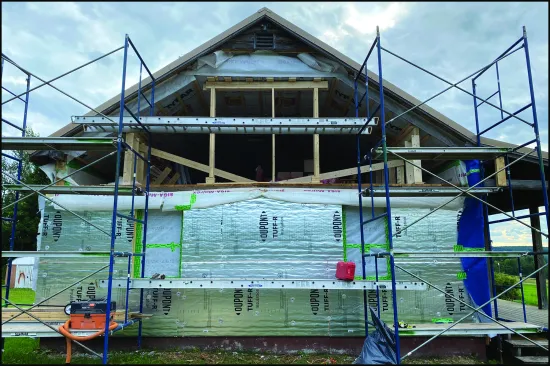
With the first floor framed and insulated, the upper east-facing gable end was opened up, ready to be infilled with the new wall components.
Finishing up. On the interior, some electrical circuits had to be rewired and a few new outlets and switches were easily installed (an added benefit of the new framed walls). The existing hydronic baseboard radiators running the perimeter of the exterior wall were protected during demolition, their covers later reinstalled.
The Siga Majrex vapor control membrane was thoroughly taped off from the interior side with Siga Rissan tape at seams, electrical boxes, window and door openings, and fastener locations. A pre-drywall blower door test showed a 72% reduction in airflow, which was a vast improvement considering the home still had a leaky basement bulkhead in need of replacement.
On the exterior, the home was clad with vinyl siding and although the “essence” of the log cabin was removed, the main goals were to improve the comfort and longevity of the home.
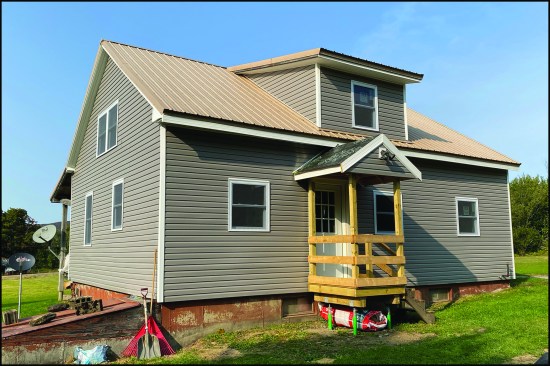
The completed home, clad with vinyl siding.
Photos by Matt Burstein and Tim Healey; Illustration by Tim Healey


