To prevent moisture from the high water table from welling up th…
I’m a builder and remodeler along the coast of Delaware. When we’re not building right on the beach, where we use piling foundations, local practice is to build shallow crawlspace foundations. The bottom of the footing is typically 24 inches below grade, and the foundation walls might be three to five blocks tall. The dirt inside the walls is typically roughly leveled and covered with loose-laid 6-mil poly. The walls have vents, but there is usually no perimeter drain.
Because the excavated dirt floor is below the surrounding grade, and we’re in an area where the water table is relatively high, wet crawlspaces are the rule.
So it was no surprise that the 1,200-square-foot crawlspace of the home I purchased in the late ’90s was consistently damp — and occasionally wet — in spite of the 6-mil poly. I knew that all that moisture wasn’t improving the long-term durability of the house and decided to do something about it. By that time, there was a growing consensus among building scientists that sealing up crawlspaces in moist climates was preferable to ventilating them, and I was convinced.
After some research I decided to replace the 6-mil poly with a CleanSpace liner — a sturdy white 20-mil reinforced polyethylene that is installed so that it extends up the walls of the crawlspace. I had the liner installed, along with a sump pump, by a local Basement Systems franchise, at a cost of $5,800. The installers cut and fit the liner around 20 block piers and taped all the joints and seams. On completion, the job looked good and I assumed I would benefit from lower moisture levels.
What’s With the Frogs?
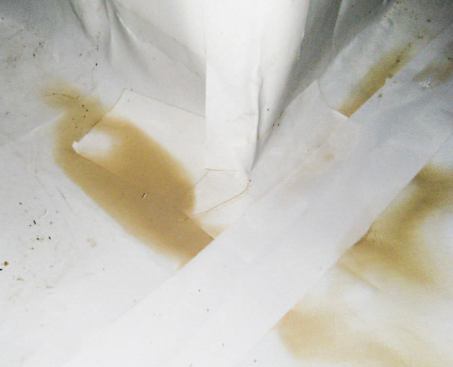
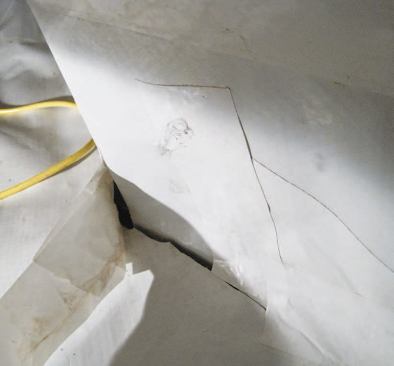
I don’t actually venture into the crawlspace too often. But a couple of years ago, while installing a new dryer vent pipe, I discovered a puddle on top of the liner. Closer inspection revealed that water was entering at the taped seams, then flowing and pooling at low points. The ground below the liner was saturated enough that the liner was actually floating in some areas. I took the thriving frog population as evidence that I had a chronic problem on my hands.
My first step was to do what I could to improve the overall site drainage. The site is very flat in the back, but the yard sits about 4 feet above the street in the front, with a drainage swale between the house and the street. So I trenched and installed drainpipes from the front downspouts to daylight in the drainage swale in front, and in back added drain pipes that terminate in pop-up emitters. These lie flush with the ground so you can mow over them; the flow of the water opens them, and then they close when the pressure subsides. Predictably enough, the daylight drains in front are more effective. The cost of these drainage measures was $1,250.
Next, a bit of shoveling in the planting beds revealed what the mulch was camouflaging: The soil at the foundation wall was lower than the surrounding grade, allowing rainwater to pool around the perimeter of the house. The fix was to remove the mulch and add topsoil to correct the grade — at a cost of $525.
Liner Still Leaking
These improvements made a big difference but didn’t completely eliminate the water leaking through the crawlspace liner. When I contacted the installers, they said that the warranty covered the entrance of water vapor, not liquid water. They recommended that I add a perimeter drain on the inside of the crawlspace, directed to the existing sump pump (at an estimated cost of $3,200), and offered to retape the liner (for $500). If I took both steps, they would then guarantee the liner against water leaks. (In fairness, another franchisee offered to retape the seams for free).
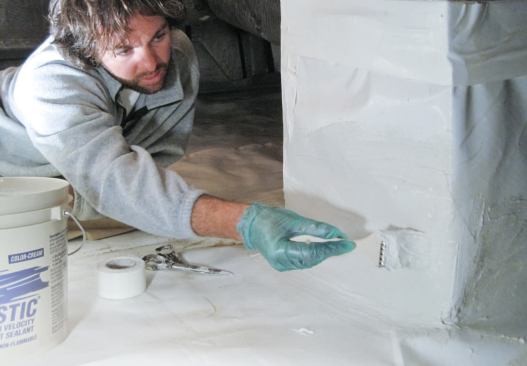
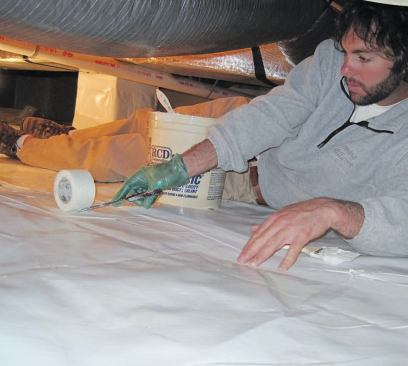
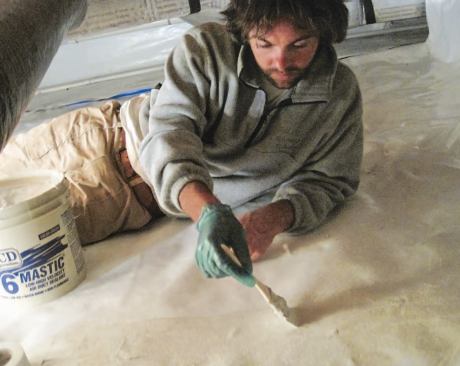
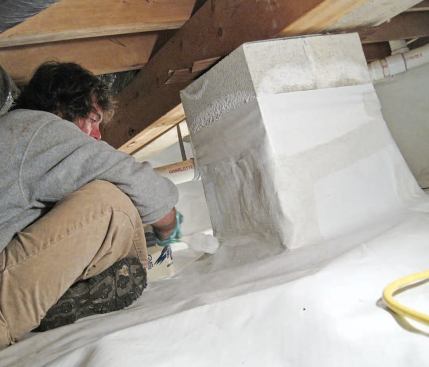
But by this point I had lost faith in tape as a suitable method for seaming polyethylene in the presence of both water and dirt. So I contacted the building scientists at Advanced Energy in Raleigh, N.C., who have extensive experience with conditioned crawlspaces (see “Building a Sealed Crawlspace,” 10/03). They suggested that I use duct mastic to seal the seams, specifically a fiber-reinforced product called RCD #6 (rcdmastics.com). Described by the manufacturer as a “fibrous adhesive sealant,” RCD #6 is a high-tech mud typically used to seal joints in ductwork, but it can also be used for joints in insulation boards and vapor retarders.
Being naturally dubious, I first bought a one-gallon container, along with some self-adhering fiberglass mesh tape made for drywall joints. Armed with a few inexpensive paint brushes, I squirmed into the crawlspace to do a test. I patched about 10 feet of seam, as well as the cuts around a couple of block piers, then retreated to observe the results. After watching for several of the rainiest months on record, I was convinced: The test area held tight, so I got serious about finishing the project and recruited a friend — local builder Scott Gaston — to help out.


