Recently, one of my customers hired me to add a doghouse dormer to the back of their house to create space in their children’s bedroom. After framing and drywalling the new dormer, I suggested adding a window seat. With a piano-hinged lid, the window seat would be a great toy box. At my clients’ suggestion, we sized the toy box to be 36 inches deep. Their plan was to add cushions on top so that it would double as a napping spot for the kids.
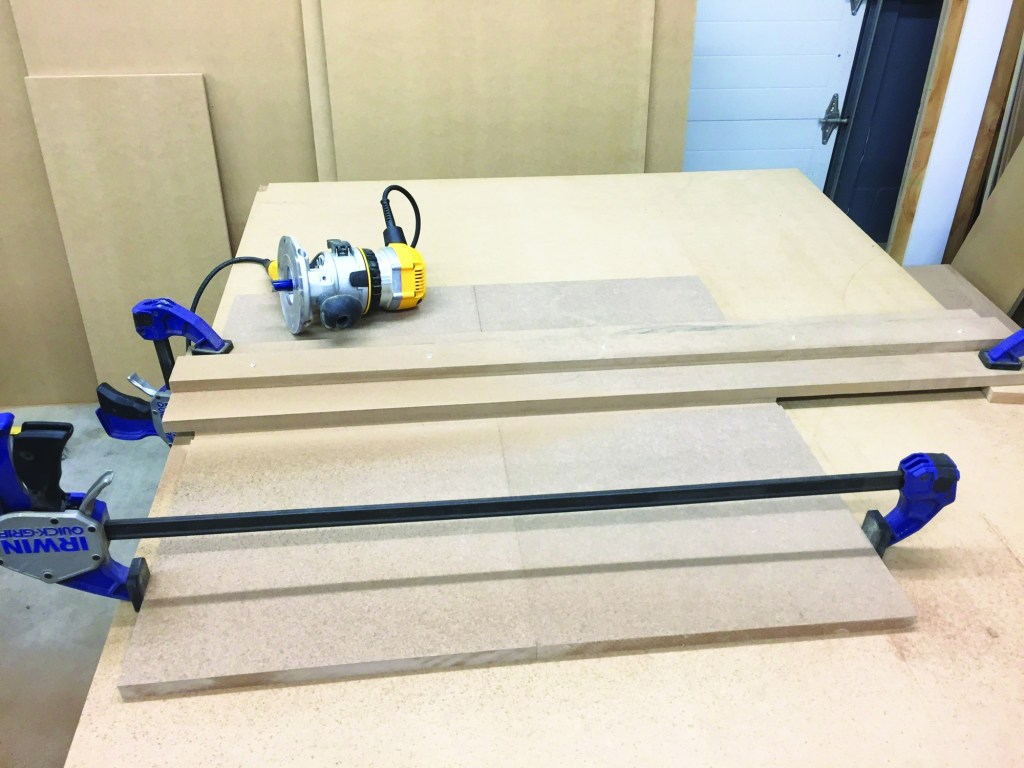
MDF parts. The simplest plan was to build the seat as a box that would fit inside the dormer walls. This strategy meant that I could fabricate and assemble the box in my shop. Because the project was paint grade and utilitarian, I made all the basic parts (top, bottom, front, back, sides, and divider) from MDF.
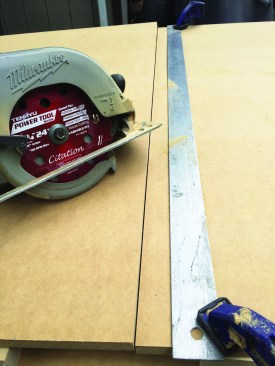
The author cut the toy-box parts from a sheet of 3/4-inch MDF, using an aluminum straightedge to guide the saw cuts.
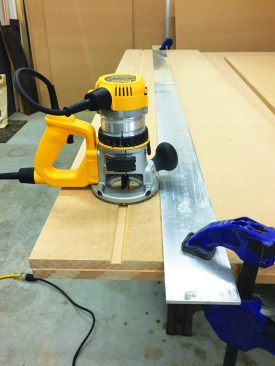
He used the same straightedge as a router guide for the long dado cuts.
I don’t own a track saw, so instead I used a length of 1/4-inch aluminum flat stock as a straightedge guide for cutting the pieces.
To position the straightedge correctly, I first measured the distance from the edge of my circular-saw base to the correct side of the saw blade. That number then became the offset for positioning the guide. I cut all of the larger pieces with my circular saw guided by the straightedge, and cut the smaller pieces on my table saw.
Routing rabbets and dadoes. For strong joints, I rabbeted the corners and dadoed the grooves where the bottom pieces fit between the sides and the divider. I used a router guided by the aluminum straightedge to cut the longer grooves along the front and the back. As with the saw, I measured from the edge of the router base to the edge of the bit to determine the offset for positioning the strip.

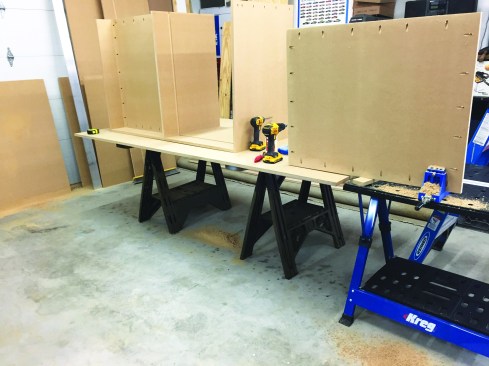
For shorter dadoes, he made an MDF guide, clamping the sides of the box together to make the dadoes identical.
For the shorter dadoes, I made a router guide out of pieces of MDF. The guide consists of a narrow fence strip that I glued and screwed onto a wider base strip. To position the fence on the base, I marked the offset from the edge of the base strip and then added about 1/8 inch. The extra width let me rout a fresh edge on the base. After routing the edge on the guide, I clamped it in place with the edge aligned with where I wanted the dado. Using a tip I got from Gary Striegler, I clamped the two sides of the box together and routed both at once.
Shop assembly. When all the pieces were cut and grooved, I applied beads of glue to the corner rabbets and attached the sides to the back, clamping the pieces and then driving 1/4-inch crown staples to hold the joint until the glue set. I also attached the divider to the back in a similar fashion.
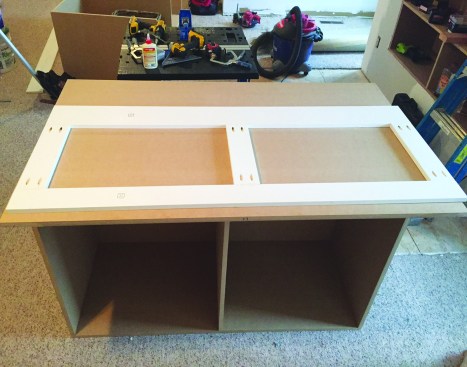
The box was then glued and pocket-screwed together.
Then I carefully tipped the assembly on its back to attach the bottom pieces. After making pocket-screw holes along all four sides of the bottom pieces, I lightly sanded the edges so that the bottoms would slip into the dadoes easily. Working one side at a time, I applied glue to the dadoes, spreading it in a thin, even layer. Each bottom piece slid into place evenly, and I pulled the assembly together with a long clamp to make sure the bottom piece was fully engaged in the dadoes. To hold everything together while the glue set, I drove pocket screws into the holes along the sides and back.
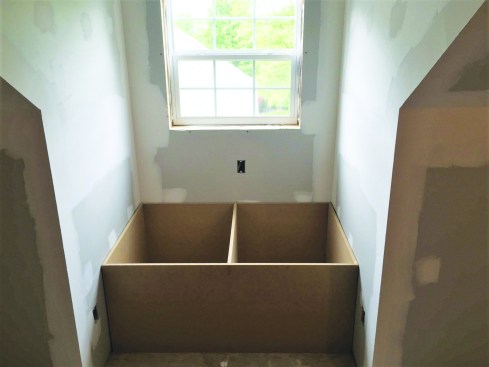
The MDF box was installed.
Installing the toy box. After attaching the front piece to finish the box, I brought everything to the site for installation. The box was slightly narrower than the opening, allowing it to easily slip into place. I wanted the face frame to fit tightly to the walls, so I built it on site, joining the pieces of primed poplar together with pocket screws. I used 1×4 for the top rail and the stiles and 1×6 for the bottom rail, to match the baseboard used to trim the room.
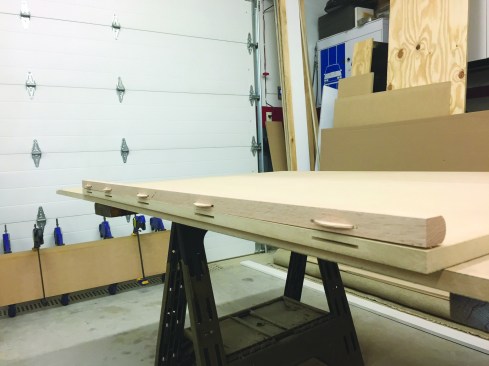
Then the author used pocket screws to assemble a simple face frame.
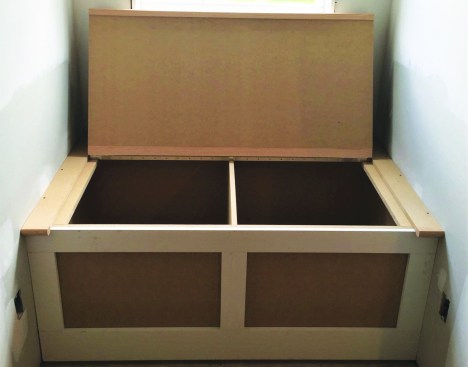
When applied to the front of the box, the frame provides a flat-panel look. The side pieces are reinforced with additional strips of MDF, which act as a stop for the lid.
Adding the top. After gluing and nailing the face frame into place, I turned to the top. First, I installed 3-inch-wide MDF strips on top of the box on each side to space the lid away from the dormer walls. I finished the front edge of these pieces with 3-inch lengths of 5/4 bullnose hardwood strips glued and biscuited to the MDF. The box divider would support the center of the lid, but I wanted to add support along the sides as well in anticipation of kids standing on the lid. So I glued and screwed 3-inch-wide strips of MDF to the underside of the side strips to act as stops.

A 6-inch-wide strip of MDF installed between the side strips provides an attachment point for the piano hinge at the back of the toy box. Before installing the MDF lid, I applied the same bullnose trim used on the side pieces to the front edge. Once the toy box was assembled, the only things left to do were applying the paint and filling it with toys.
Photos by Barrett Sites


