Custom woodworking projects are the bread and butter of my construction business. Built-in desks, beds, and window seats are examples of projects that are popular with our clients. While the function and design of these custom projects may be similar, no two are ever exactly the same, because every homeowner has a different space, need, taste, and budget. Instead of reinventing the wheel each time, I have developed methods for each project that can be modified to meet each client’s needs.
Recently, for example, we were asked to build booth seating that wrapped around a corner. I have done this at least three times before, but this was the largest bench that I have ever taken on—about 8 feet in one direction and 12 feet in the other—so I couldn’t cut the back or the seat out of a single sheet of plywood. Instead, I would have to splice the plywood back. In addition, the homeowner wanted the seat to be made of solid lumber rather than plywood. Finally, the whole assembly had to fit precisely under the bank of windows on each wall.
My method for building seating like this is to make a pattern for one of the plywood supports, then make multiple support pieces off the pattern using a flush trim router bit. For the CliffsNotes version of the project, I attach the supports to the wall, add a plywood back, then fit the solid wood seat and add a little trim. Of course, that skips a lot of important details.
Layout
On a project like this, I start by mapping out the available space so that I know the basic dimensions of the built-in. The homeowners were working with an interior designer who had provided us with a rough conceptual drawing of the bench, but we were left to sort out most of the structural details for ourselves.
Once I worked out the basic design, I made a pattern for the bench’s plywood supports. Most chairs are around 18 inches high, so I started there and subtracted for the thickness of the stock that I would use to make the seat. I also subtracted 3 inches for the cushion that the homeowners planned to use on top of the seat. Eighteen inches is about the average depth of a chair seat, and that works well for bench seating like this too.
I like to build bench backs with a 10-degree angle. In addition, the designer’s drawing called for a cantilever detail at the seat, which provides more room for feet when people are seated. The final piece of information for my seat-support pattern was the height of the seat back, as measured from the bottom of the window seat to the bottom edge of the window sill, minus an inch to accommodate the thickness of the 3/4-inch bullnose trim detail that I planned to use there with wiggle room to shim it level.
Template
I like to make my plywood supports out of 3/4-inch-thick Baltic birch plywood, which is strong, lays flat, and doesn’t have any voids in it, and that’s what I used for this project. If for some reason Baltic birch plywood is unavailable, I have successfully substituted a high-quality domestic birch or maple veneer core plywood.
Once I had the support marked out, I cut it out as accurately as I could using a track saw and sliding miter saw. Next, I counted the total number of supports and used the pattern to lay them all out on plywood that had been ripped to the width of the supports so that the grain would be oriented vertically.
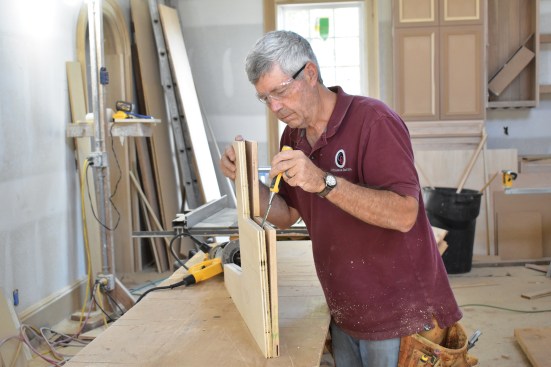
The author used the first plywood bench support that he made as a pattern to cut out the remaining supports, tracing its outline on sheets of plywood.
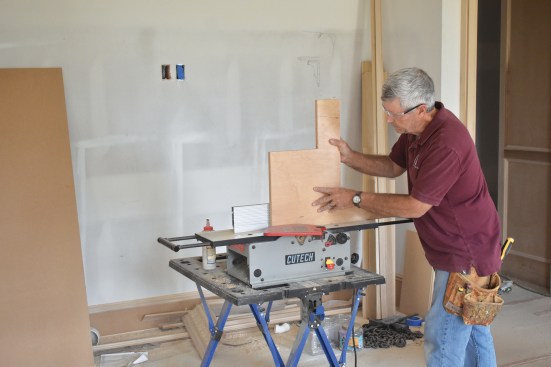
After cutting out the piece with a jigsaw, the author tacked the pattern to the workpiece and trimmed the supports to size with a router fitted with a flush-cutting bit.
Removing a lot of material with a flush trim router bit is hard on the router and makes a big mess, so I first used a circular saw and jigsaw to rough-cut each support, trying to stay within 1/16 inch to 1/8 inch of my layout line. Then I tacked the pattern on top of the workpiece with a few 18-gauge brads and ran the router around each support with the bearing riding on the pattern to give me an exact duplicate of the pattern. When I was finished, I just pried the two pieces apart and worked the brads back and forth until they broke off, then repeated the process for the next support.
Since the pattern was tacked to the workpiece with just a few brads, it was easy to pry the two pieces apart.
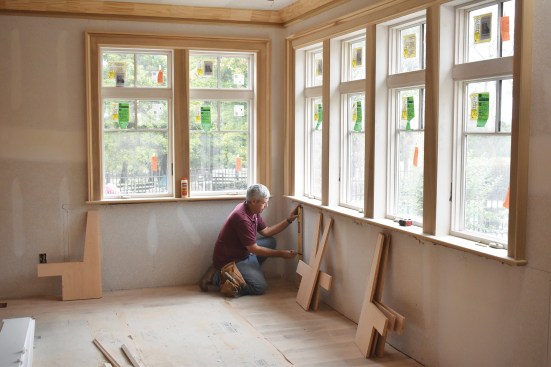
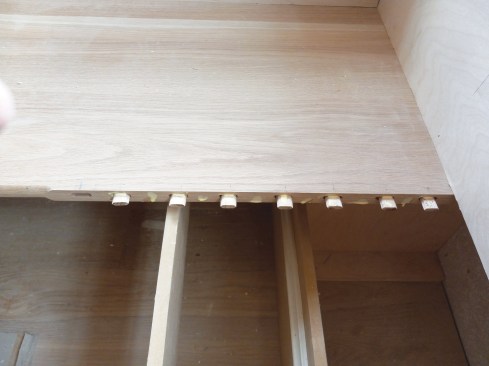
After cutting out the supports, the author marked their locations on the wall every 24 inches on-center.
Installation
The framers I work with are very good, but walls and floors are never perfect. That meant that I had to make small adjustments to the supports so that the seat and back of the finished bench wouldn’t have any dips or humps.
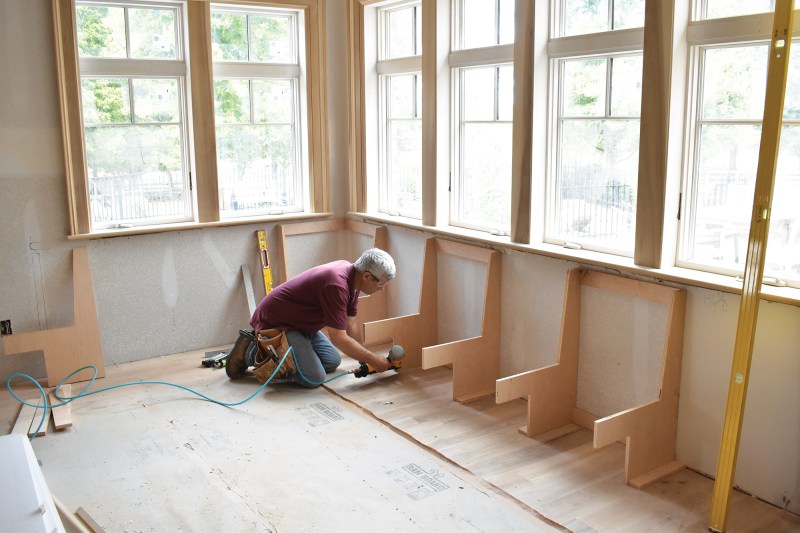
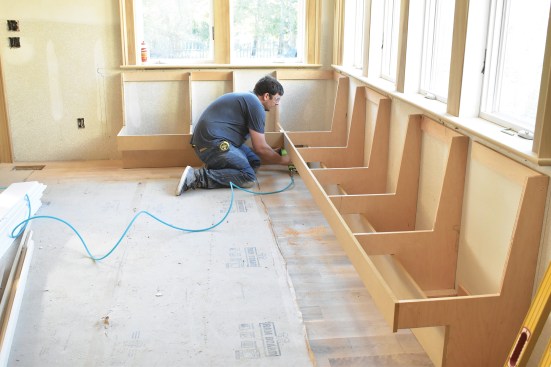
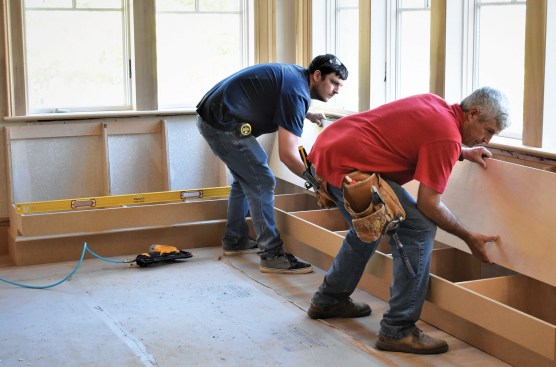
After laying out the support positions, I started my installation at the inside corner. I nailed and glued together the two corner supports with a small backing piece at the very outside edge where they meet at the front. Then I plumbed and leveled the supports and used cleats to fasten them to the wall and floor. I set the next support as far down the long wall as my 8-foot level would reach, using my long level to ensure that the supports were exactly horizontally aligned and a shorter level to make sure the support was plumb. Once the support was in the right position, I fastened two wall cleats through the drywall into the wall framing and a third cleat to the subfloor, then fastened the support to the cleats.
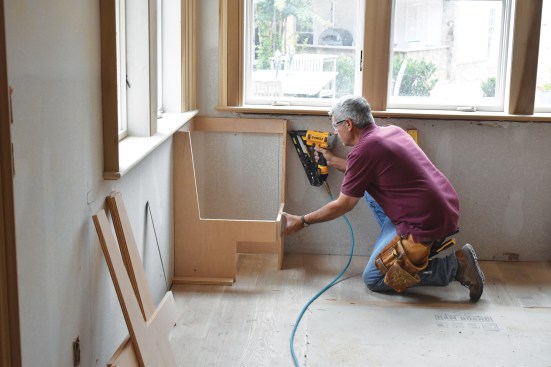
The author started installing the supports at the inside corner, nailing them to cleats fastened to the wall and the floor.
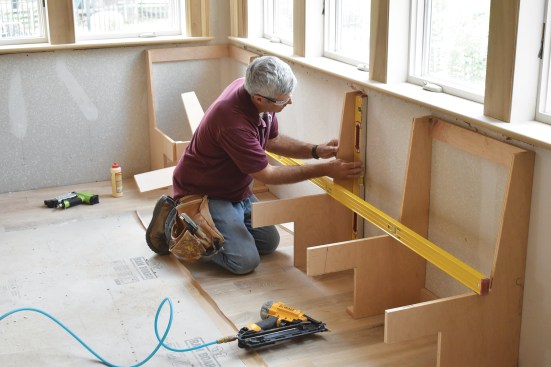
He installed the next support as far as his 8-foot level would reach, then worked back toward the corner, using the level as a straightedge to ensure that all of the supports were in the same plane.
I followed the same process to install the remaining supports, which are on 2-foot centers to support a 5/4 hardwood seat (for a bench with a plywood seat, we install supports 16 inches on-center). Once I finished setting a support with a cleat on the floor, I checked it for square against the back wall before installing the upper cleat. Setting supports was a slow process because I needed to check each one in multiple places with the long level for humps, and had to trim a few of the supports using a bench-top jointer (a hand-held planer would also work) to make sure the tops were level and the fronts were in plane.
I was able to use a long strip of MDF shelf material, which comes in lengths up to 16 feet, for my front band, the first part that ties all the supports together.
Some supports needed to be trimmed along either their base or back to account for variations in the wall or floor.
Long MDF trim pieces nailed to the bases and fronts of the supports tie the bench together.
Plywood back. Since one side of the bench was over 8 feet long, we had to splice the plywood back. We located the splice so that it would fall over one of the supports, and used Festool Dominos for alignment and pocket screws to pull the joint together.
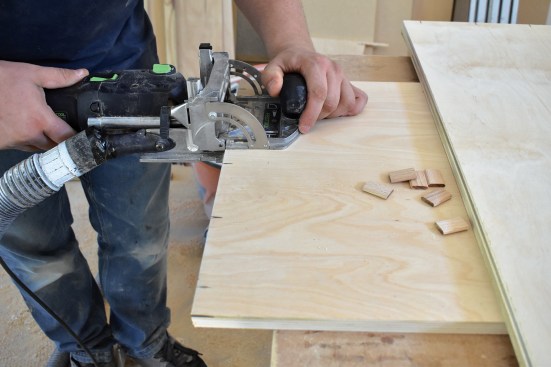
Because one of the plywood bench seat backs measured almost 12 feet in length, the author used Festool Dominos to help align the butt joint…
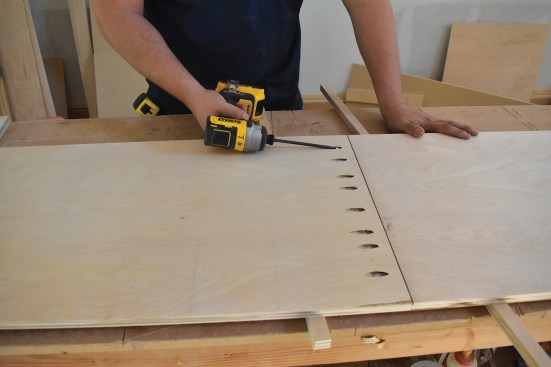
…then used pocket screws and glue to join the two lengths of plywood together.
The long seat back was installed first, with the shorter section scribed to the longer one to fit.
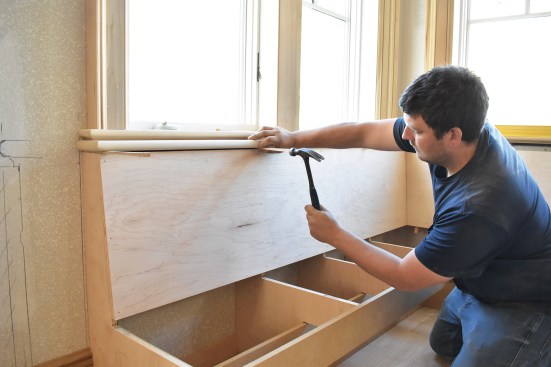
Then the seat back was topped with bullnose trim shimmed for an even reveal between the seat and the window.
When installing the spliced back, I let one end run long into the inside corner, then took a measurement to scribe cut the shorter back. Any time I fit a joint like this, I like to under-bevel the cut a little for the best possible joint. A track saw is the perfect tool to make this cut.
After nailing the plywood backs in place, we trimmed out the bench top with a 3/4-inch bullnose piece shimmed to fit. A simple 1/4-by-3/4-inch flat trim piece closed the gap between the bullnose and the plywood back and finished off the top. This was a good point to take measurements and go to the shop to glue up the seat.
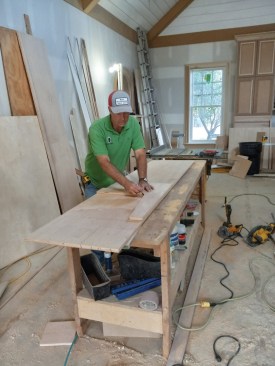
Seat glue-up. One of my guidelines for glue-ups is not to use pieces wider than 5 inches, which tend to cup. I rip the material to width using a sharp blade or run the rippings through a bench-top planer to get rid of saw kerfs. I use plenty of clamps when gluing up the material, alternating the growth-ring orientation on each strip, and locate the clamps about 6 to 8 inches apart, alternating top and bottom. It’s important to do the glue-up on a flat surface, using plenty of glue on both edges so that there is a little squeeze out—which can be wiped off with a damp rag or scraped off later (don’t try to plane your glue-up with big globs of glue on it). Let it dry for half a day, or overnight is even better. If you don’t own a planer big enough to plane a 20-inch-wide seat, make two glue-ups, plane them, and then glue them together using Dominos or biscuits for a flush top.
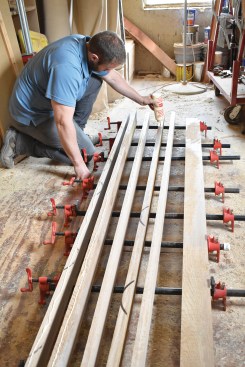
Back in the shop, a worker ripped 5/4 white oak into 3- and 4-inch wide strips, then arranged them on pipe clamps with an alternating growth ring pattern prior to glue-up.
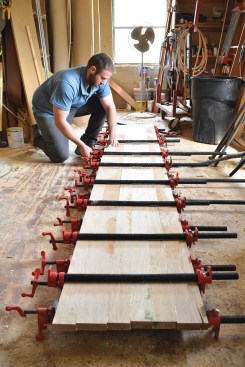
Working on a flat surface, the worker spaced the pipe clamps 6 to 8 inches apart and alternated them along the top and bottom of the glue-up while laminating the 18-inch-wide bench seat.
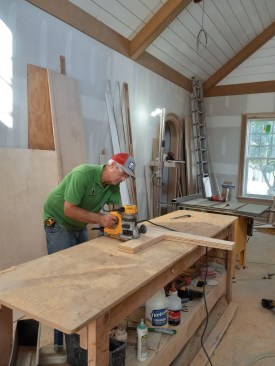
The final drawings showed a curved front apron and seat. I made the curved apron by stacking multiple layers of MDF (using the same flush trim router trick). Adding the curved apron was a challenge and it changed the amount of overhang for the seat, but it added a nice touch to the finished product.
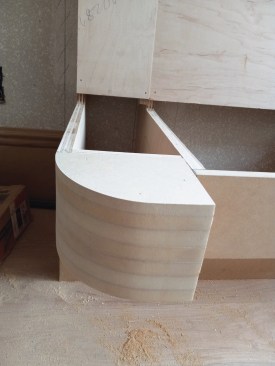
For the corners, the author used his pattern-cutting technique to make multiple identically curved pieces to glue into radiused blocks (left photo). Festool Dominos join the two parts of the bench seat together where they meet at right angles (above).
I couldn’t get 5/4 lumber long enough to make a miter corner joint in the seat, so we went with a simple butt joint using Dominos. After a dry test fit, we cut a curve at the corner of the top to follow the apron and rounded over all the edges but the very inside corner, which had to be done after the seat was in place. I wanted more holding power than nails, so we attached the top using 2 1/4-inch trim-head screws.
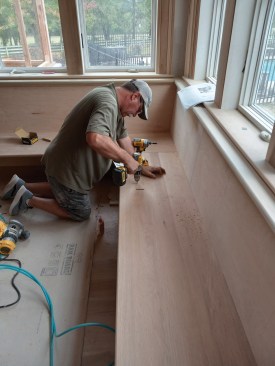
Trim-head screws were used to attach the oak bench seat to the supports.
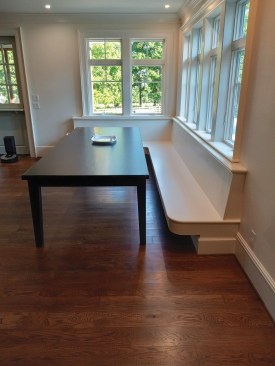
The bench seat was given a paint finish to match the rest of the room’s interior trim.
We had a few exposed plywood ends to cover with flat trim and a base trim to add before we could call it done and bring in the paint crew. The size and curved elements of the bench made this the hardest bench project we have done so far, but it turned out to be a beautiful addition to this remodeling job.
Photos by Gary Striegler.


