The author shares his tricks and techniques for hanging drywall …
Drywallers usually try to hang as much drywall as they can, as fast as they can. After more than 20 years of fast-paced production work, though, I wanted to work smarter, not harder. Instead of worrying that anything that slowed the job down would end up costing money, I began to realize that smaller, more complicated jobs could actually be more profitable, as well as less physically demanding.
At about the same time that I was having these thoughts, drywall tools, materials, and techniques began to change. Twenty years ago, for example, my supplier carried only one type of corner bead; now, ordering corner bead can be more complicated than ordering a cup of coffee at one of those specialty shops. But that’s okay, because I’ve made drywall upgrades using these corner beads and other types of architectural trim something of a specialty.
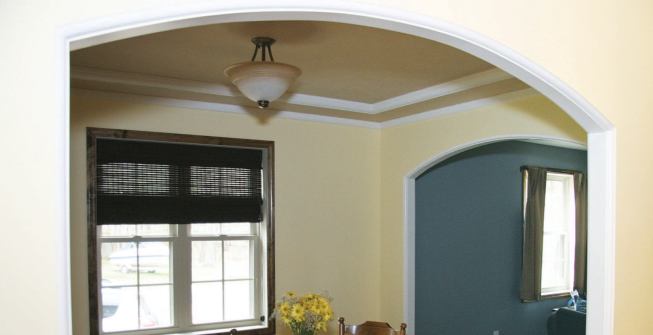
Arched entries, tray ceilings, wainscot, and other details differentiate my work from that of my competitors. They’re also reasonably priced and use up a lot of scrap drywall that would otherwise end up in the landfill — 12 percent of new construction drywall is wasted during installation, according to some estimates.
This kind of work requires an educated customer, however. Contractors usually don’t give much thought to drywall; to them, it’s just a plain surface that fills in the spaces between windows and doors. And decorative drywall isn’t the first thing new homeowners think of when they consider upgrading their house’s finishes — probably because they don’t realize that, for the same $10,000 they might spend for a new solid surface countertop, they could get all the upgrades shown in this article, with money left over.
Arches
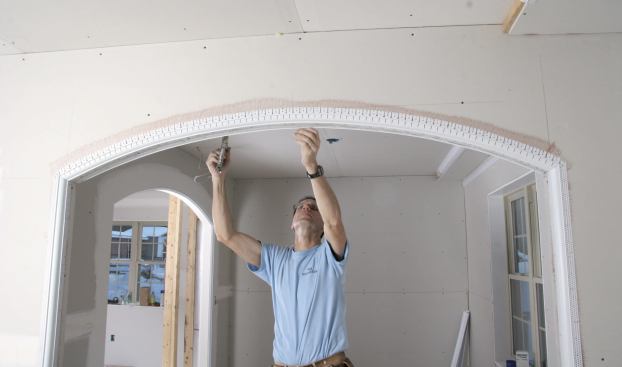
Drywall arches look elegant but don’t take that long to build, since they don’t require special framing or plywood. I just rough out the opening, hang the drywall so that it overlaps the opening by the necessary amount, and then cut the drywall to the shape of the arch.
When there are low ceilings and multiple entryways with different sized openings, I like to use segmented arches, since the arches can be made with the same spring line and rise. Elliptical arches can also have the same spring line, rise, and finished opening height, but some types of corner bead are difficult to bend along the tightly radiused areas of the arch.
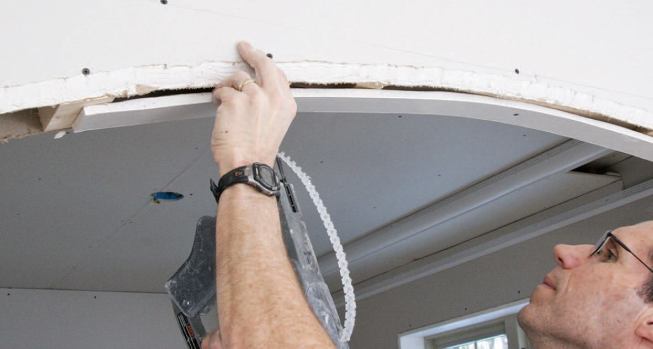
To calculate the arch radius of a segmented arch, I use the formula R = [x2 + (y/2)2]/2x, where x = rise and y = width of opening. Then I carefully lay out the arch on each side of the wall. As I cut the drywall to the shape of the arch, I bevel the edge to accommodate the profile of the bullnose bead. Scraps of 2×4 blocking screwed to the drywall act as backing for the strip of drywall used to finish the arch.
Like most of the plastic decorative drywall trim I use, this bullnose bead comes from Trim-Tex (800/874-2333, trim-tex.com), whose products are well-stocked by my local supplier. There are other companies that produce plastic, metal, and tape-on trims, including Strait-Flex (888/747-0220, straitflex.com), USG (800/873-4968, usg.com), and Pla-Cor (800/441-2724, placor.com), and many big-box stores and lumberyards now offer a limited selection of bullnose and cove-style cornerbead, along with standard metal corners and vinyl J and L bead profiles.
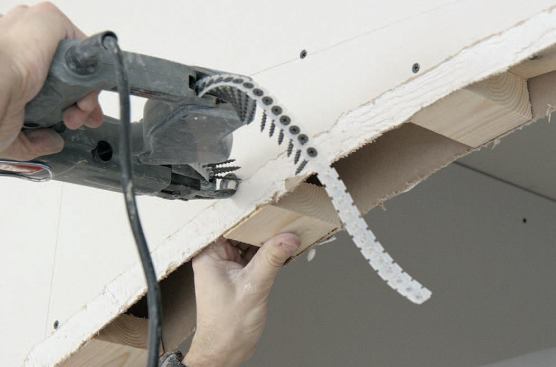
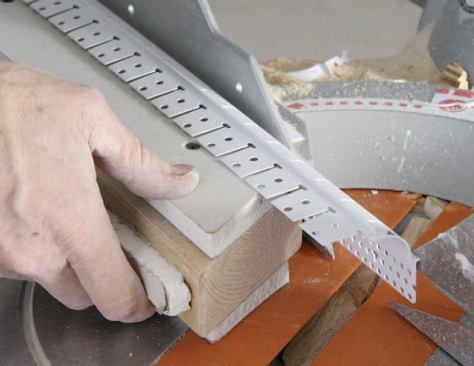
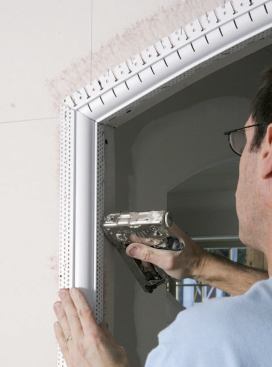
A good fit at the miters is important, so I use a jig to hold the flexible bead in position when cutting it with a miter saw. Archway beads are usually segmented so that they can flex, but because this bullnose profile has a stepped reveal edge on either side of the bullnose, it also has a sliding two-part design. To help position the bead, I mark the location of the edge of one leg of the bead on the drywall.
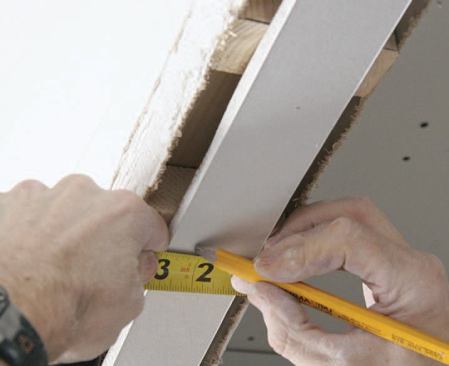
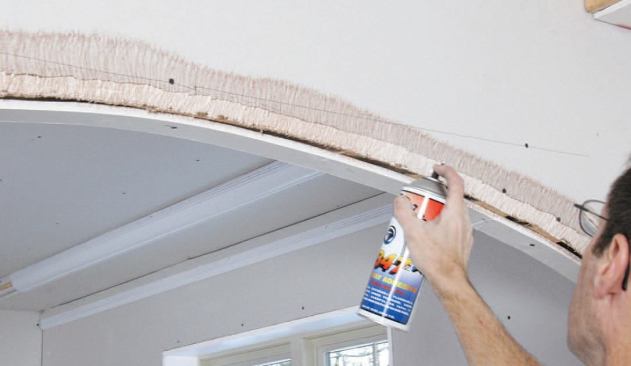
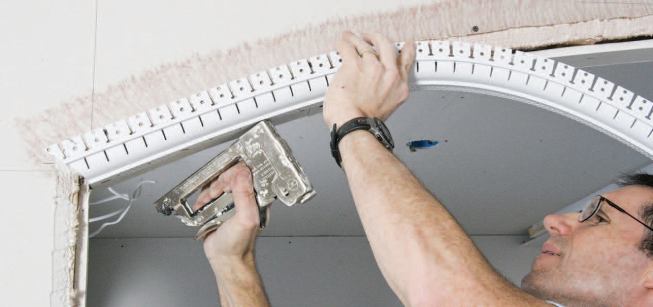
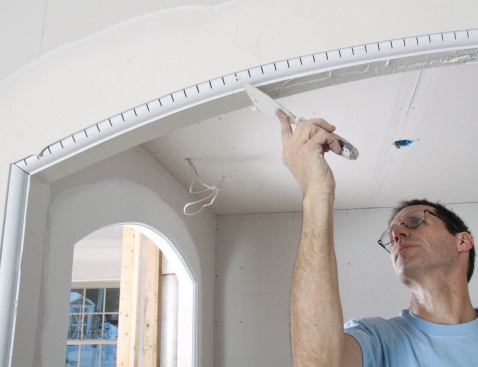
Using the spring line that I’ve drawn on the wall for reference, I fit the top arch beads first, fastening them in place with Trim-Tex 847 contact spray adhesive and 1/2-inch Duo-Fast staples. The vertical beads can be a little short, so I fit them last and make small adjustments with the miter for a good fit.
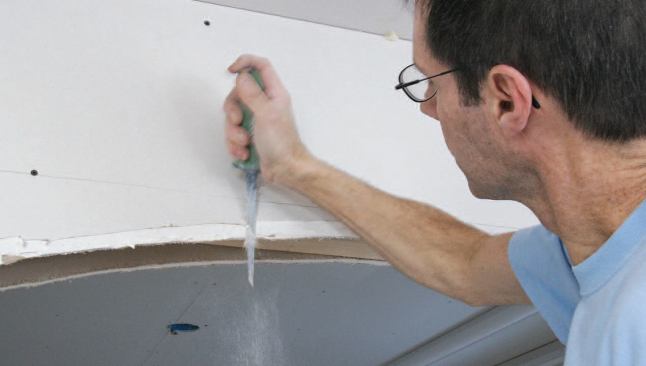
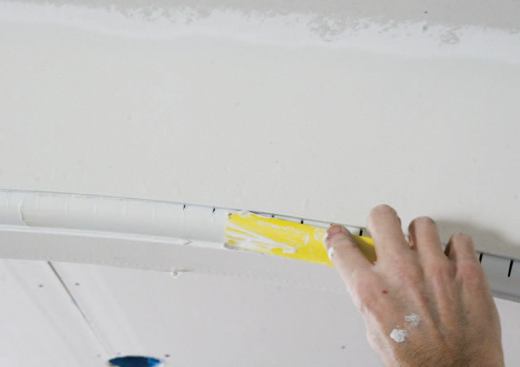
To finish the arch, I use regular drying-type joint compound, filling in the slots in the bead with a hand tool shipped with the stepped bullnose profile. I apply the first coat of compound with the small tool, then sand the bead lightly before applying the next two coats of thinned compound with a paint brush, again sanding lightly between coats. After priming, I fill in any gaps with latex caulk.
I used 16 feet of Trim-Tex 3/4-inch radius Step A Bull arch bead and 32 feet of 3/4-inch radius Step A Bull bead to build the arch (see slideshow). I charge a premium price for arches, typically about $200, even though they require only about $15 of specialty bead and three hours of labor to build.


