David Hanson
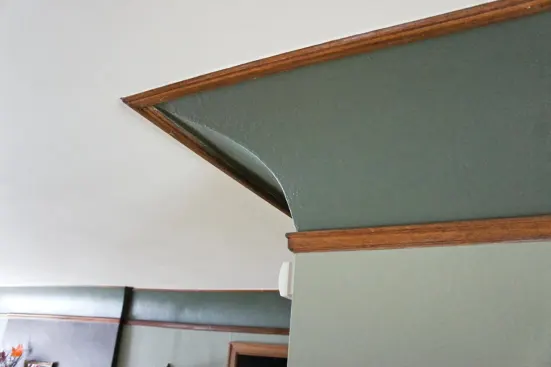
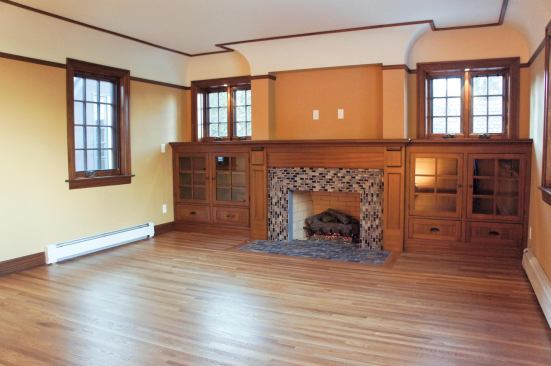
The ceilings in the original house had an interesting cove detai…
Older homes present more of a challenge to a carpenter’s abilities than today’s run-of-the-mill spec houses. There aren’t as many of them in our area (Washington state) as there are on the East Coast, but we enjoy working on them whenever we get the chance. On a recent project, we were contracted to remove a 1970s family room that had been grafted onto a classic 1920s house and replace it with a more architecturally appropriate addition. Coved ceilings were a prominent feature in most of the rooms on the main floor, and the homeowners wanted to replicate this detail in the addition.
As in most houses built before the mid-1930s, the home’s walls and ceilings had been finished with cement-based plaster applied over wood lath nailed to the framing. After World War II and up until 1959, houses around here were still plastered, but with a composition rather than wood lath — my father’s favorite was “gyp lath,” which was sold in 2-foot by 4-foot sheets perforated with 3/4-inch holes to allow the plaster to bond to the surface. It wasn’t until about 1960 that gypsum-based drywall systems similar to those used today were widely adopted, at which point coved ceilings and other decorative plaster details virtually disappeared from the repertoire of most builders.
Framing
In the case of this home, the original coved work was relatively simple — as long as the finishing was done by a skilled plasterer. Blocking cut at the desired radius had been fastened to the wall and ceiling framing before installation of the wood lath to make a curved transition between the wall and the ceiling.
A few years ago, we tried to duplicate this look by mounting sections of precut molded Styrofoam on top of conventional drywall. The foam cove molding was coated with fiberglass mesh, allowing it to be finished along with the wall and ceiling drywall with joint compound. While the product worked fairly well and the end result was satisfactory, it was expensive. I also had reservations about putting such a flammable material on the ceiling of a client’s home.
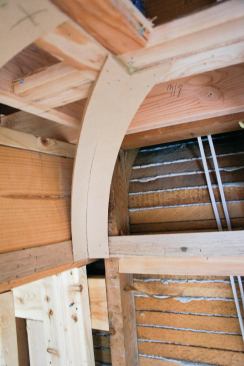
Looking for an alternative, I discovered an online company that offers prefabricated parts for framing various types of vaulted and coved ceilings (archwaysandceilings.com). For this project, we used prefabricated 1/2-inch-thick by 1 3/4-inch-wide MDF arches to form the coves, which we covered with flexible 1/4-inch-thick drywall.
We ordered the arch kit directly from the company, using its simple online form to provide details about the project, such as the perimeter of the room, the radius of the cove, and the number of inside and outside corners. Within about two weeks, a couple of well-packed boxes arrived at our job site with our parts.
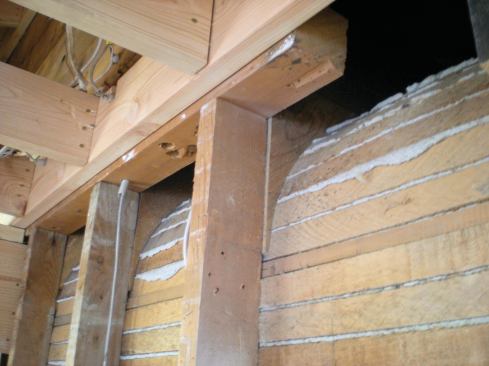
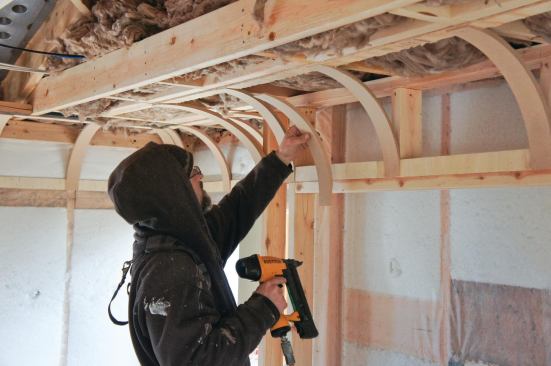
Arch installation was quite simple and fairly fast. First we installed blocking between the wall studs and rafters centered 12 inches down from the ceiling and 12 inches out from the walls — our arch radius. Then we snapped chalk lines across the wall and ceiling framing and blocking on our 12-inch marks to align the arches.
We needed to bring the various thicknesses of drywall (5/8 inch, 1/2 inch, and 1/4 inch) all into the same plane, so we fastened 1/4-inch plywood furring strips to the blocking. Incidentally, if we had wanted to create reveals, we could have furred out either the wall or the ceiling (or both) with thicker blocking.
An unexpected consequence of furring the walls and ceilings out to match the various drywall thicknesses was that it reduced the radius of our cove. Instead of the 12-inch radius that we had planned, the radius was now 5/8 inch smaller, so we set up the rip fence on our table saw to cut a consistent 1/2 inch off each arch.
Finally, we fastened the arches to the furring strips 16 inches on-center with a narrow crown stapler and construction adhesive.
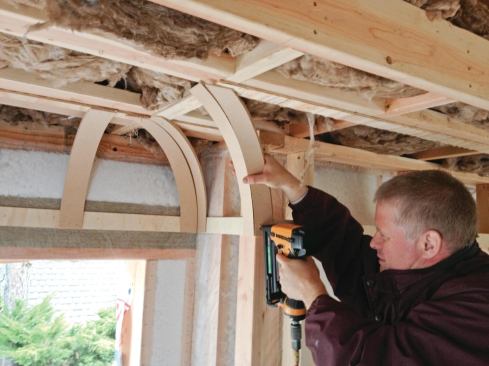
Corners. The kit also included prefabricated inside and outside corners. At first, it was a little difficult to figure out how the pieces fit together, but after trying a few different combinations it became clear which two arches needed to be paired together to form each corner.
Flexible Drywall
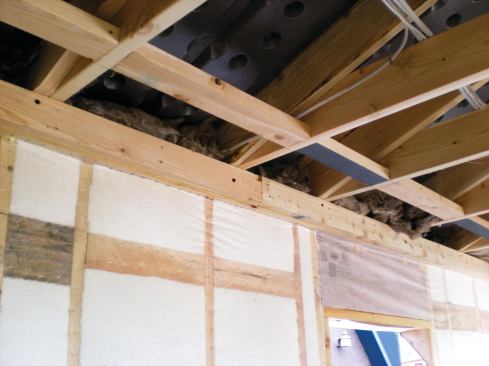
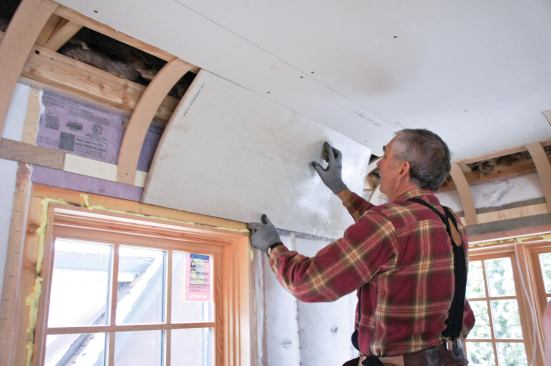
Once the framing was in place and we had finished insulating the walls and ceiling, we started hanging drywall, beginning with the ceiling. To form the coves, we used CertainTeed’s ProRoc Flex 1/4-inch flexible drywall panels. Flexible drywall is available from a number of manufacturers, and usually can be installed wet or dry. Wet panels are typically about twice as flexible as dry panels. As with a sheet of plywood, the strength axis is lengthwise, so changing the panel’s orientation can increase its flexibility.
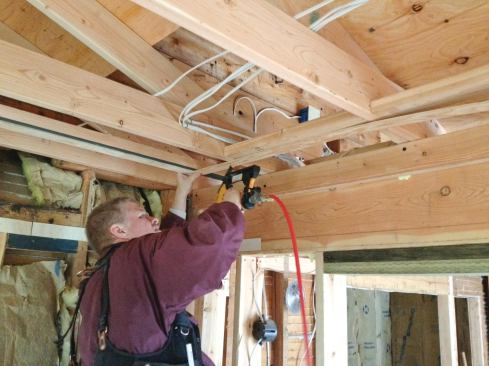
A 12-inch radius is pretty tight, so we wet each drywall panel after cutting it to size, by spraying both sides with a mister). To make the wet panels even more flexible, we allowed them to sit for a few minutes before installing them.
Before installation, we spread construction adhesive on the arches, then used regular drywall fasteners on 5-inch centers to pull the panels tight to the framing. Our preferred method was to work each 8-foot section with three guys, spending a few minutes to slowly press the drywall into place with our hands before finally screwing the panel in place.
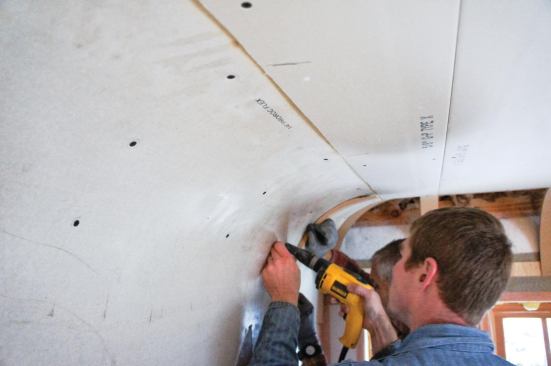
Cutting the drywall to fit the inside corners proved to be tricky. There may be some mathematical way to figure out the curve where the panels meet, but whatever the formula is, I can’t find it on my framing square or construction calculator. Instead, we scribed a pattern on a scrap panel through trial and error, then used that pattern for the remaining corners.
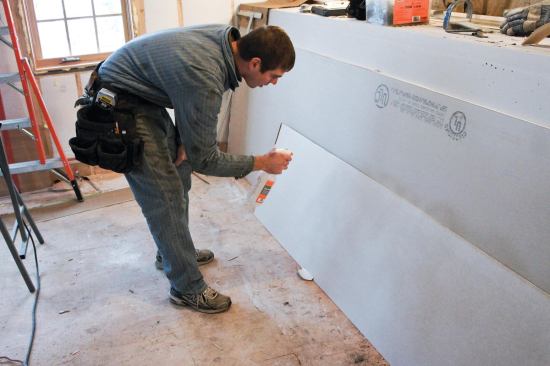
Finishing. Once the drywall was installed, finishing was straightforward — except (again) for the corners. In fact, the hardest part of the whole job was taping the outside cove corners around the fireplace chase. We installed some plastic flex bead that our local supplier had in stock, but found that the taping bead along its edge disappeared when we bent it enough to conform to the corner. To build up the edge so that our taping knives would have a smooth surface to glide over, we attached sections of thick plastic string from a WeedWacker to the edge of the bead with a hot-melt glue gun.
We could have saved a lot of time if I’d attended the JLC Live show in Portlandbefore we taped the corners rather than afterward. There I found Strait-flex’s Arch-Flex corner bead (straitflex.com), which would have worked perfectly in this application.
Cost
The cost of the arch kit was about $650, which included enough material to do two rooms, or about 120 linear feet of wall. The flexible drywall cost about $19 per sheet, so our total cost in extra materials for this project was about $810. I estimate that we spent an additional 37 man-hours installing the arch kit and hanging and taping the flexible drywall, compared with our standard wall treatment. When factoring our markup and labor costs, this added about $2,400 to the cost of the materials used on the project. To me that seems like a reasonable amount, considering the added style the coved ceilings contribute to the room.
David Hansonis a third-generation builder and a principal at Hanson Carlen in Spokane, Wash.


