The third panel, with corner frame attached, is slipped over the…
This carpenter-friendly design eliminates most of the nail holes…
To make the panels, oak cross rails are glued on the front.
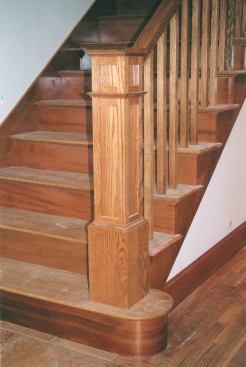
Recently, I completed a Craftsman-style stair and balustrade in natural oak for one of my regular contractor customers. Ready-made box newels are available in this style, but the size options are limited. The job called for a larger-than-standard starting newel, with a matching balcony newel that had to be smaller than a standard stock newel. So I decided to build from scratch.
This carpenter-friendly design eliminates most of the nail holes…
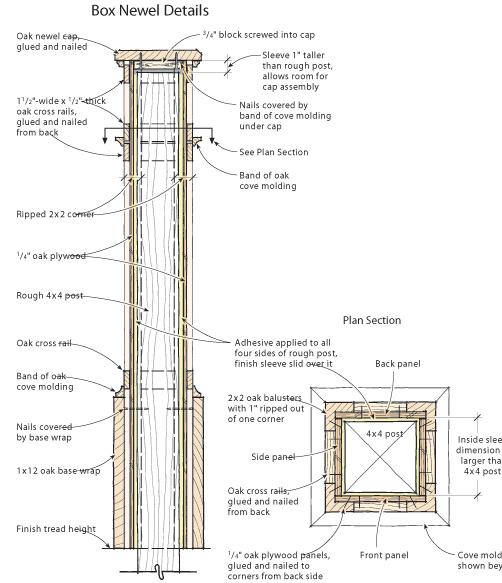
My first thought was to install a solid square post, tack on flat inset panels and mitered corner trim, then trim it out with oak panel molding. I’d done it that way before but was bothered by all the visible nail holes in the finished newel. This time around, I wanted a method that would conceal most of the fasteners. What I came up with was a finished sleeve that I could drop over a rough 4×4 post.
Compared with the price of an off-the-shelf post — around $325 — going custom actually cost less. The first newel took me about an hour to complete, and the second one went even quicker. Total materials ran about $65, and the assembly called for only basic job-site tools.
This newel-post sleeve can be made to any size and from any lumber species, making it an especially versatile design. The author calculates his total production cost (in red oak) at about $65 per post. Construction adhesive bridges the gap between the sleeve and post and, after it dries, provides a feeling of solidity.
To make the panels, oak cross rails are glued on the front.
Stock Materials
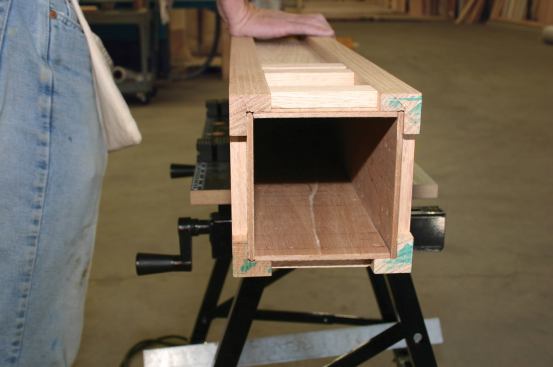
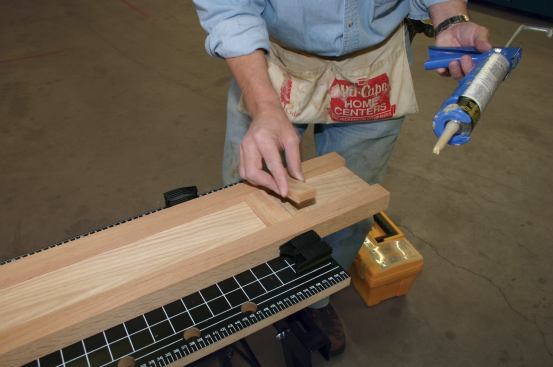
To begin, instead of applying individual mitered pieces to make the corners, as I’d done in the past, I took ordinary 2×2 oak balusters and ripped out one corner. This way, each corner of the newel is made from a single piece of oak, which eliminates glue joints at the corners.
I then treated the 1/4-inch oak plywood panels as part of the structure, using brads and glue to fasten plywood to the corners from the back side. Like corner boards, the outside corners of the newel stand in relief and outline the recessed panel faces.
When I ripped the corners on my table saw, I used the same fence setting to rip stock for the cross rails that define individual panel sections. This ensured a good, flush match at the butt joints. To make the plywood panels, I ripped two pieces of 1/4-inch plywood to the finished width of the post minus the 1-inch aggregate thickness of the corner stock. I cut two sides narrower by the combined thickness of two panels, so the corners would overlap and make a box with four equal sides.
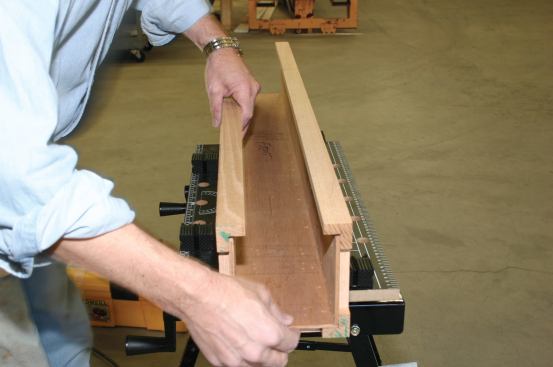
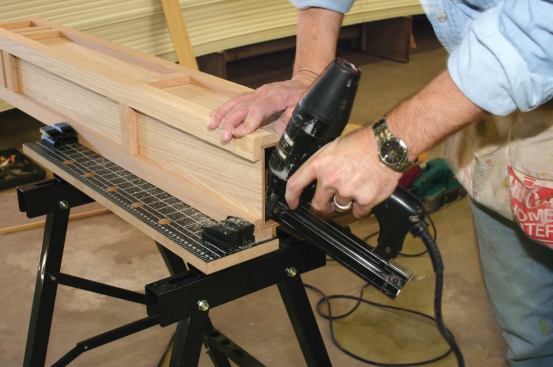
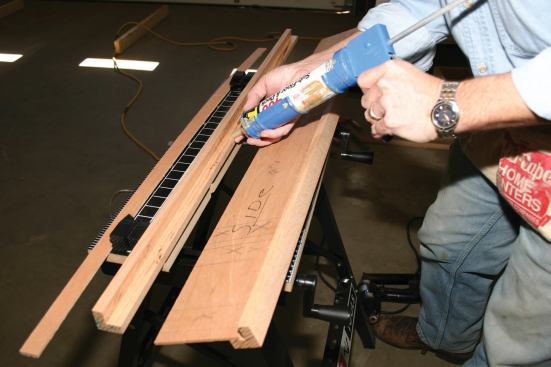
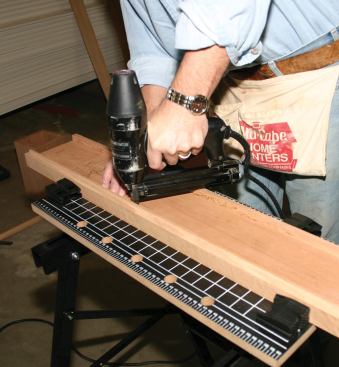
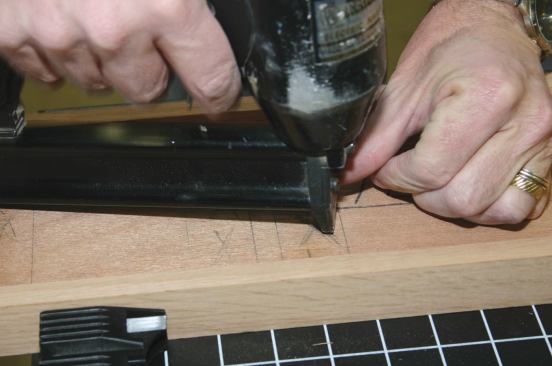
To keep the parts sorted during assembly, I labeled the narrower pieces “side.” I glued a side panel together first, using PL400 construction adhesive to bond the parts. PL400 develops an initial grab in about five minutes, which allowed me time to apply pieces to the finished face and then flip the panel over for nailing.
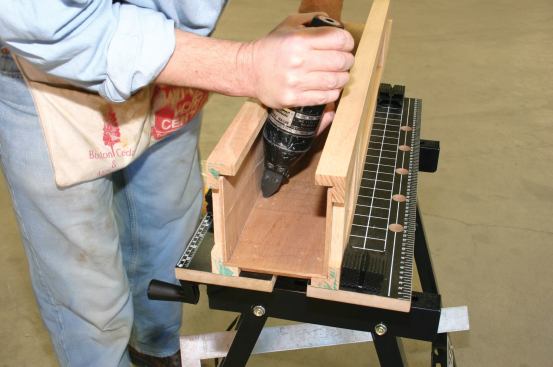
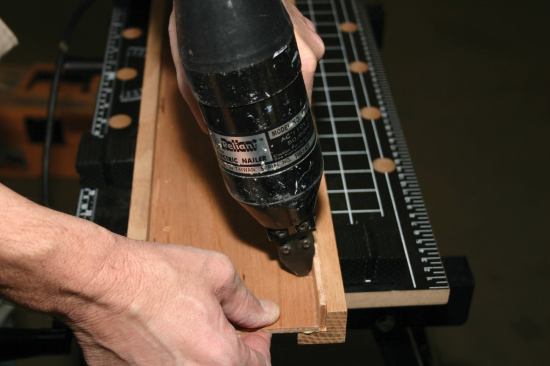
I used 1/2-inch brads to secure the oak cross rails, relying on wraparound layout marks to guide the nailing. With two sides completed, I temporarily clamped a front panel in place between them so I could glue the cross blocks onto its face in the right locations. After the glue set, I removed the panel and nailed the blocks from the back.
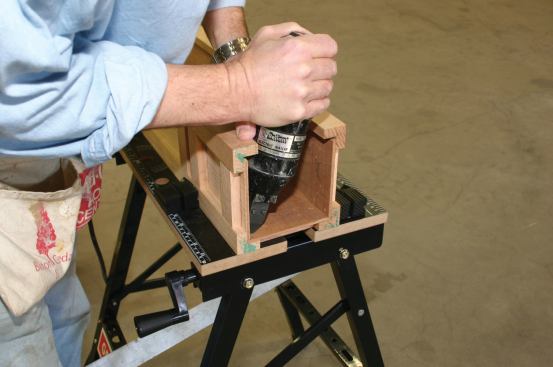
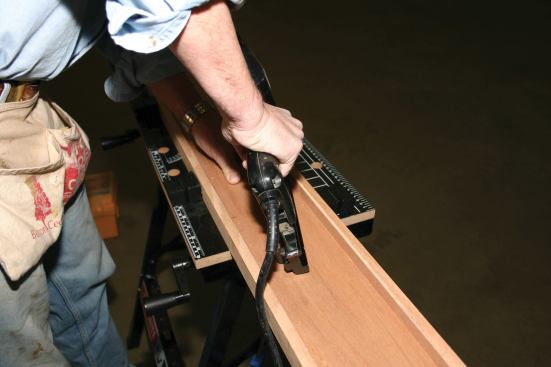
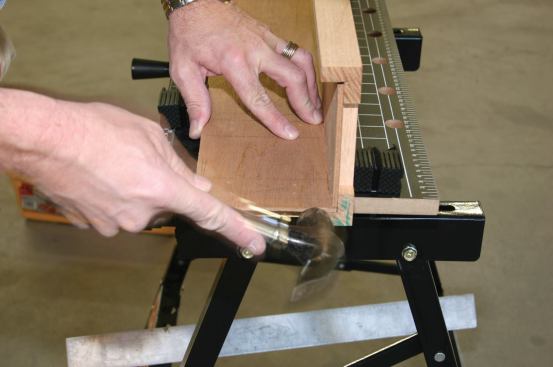
I then glued these three sides together to form a channel. To complete the fourth side, I sprung the two sides of the channel back slightly and “snapped” the plywood into place, temporarily at first so I could lay out and glue the crosspieces. After the glue set up, I removed the panel and nailed it from the back, then snapped it back into place, this time bedding it in a bead of PL400. I clamped the completed sleeve until the glue dried; with that, the newel sleeve was done without a nail in sight.
The third panel, with corner frame attached, is slipped over the…
Installation
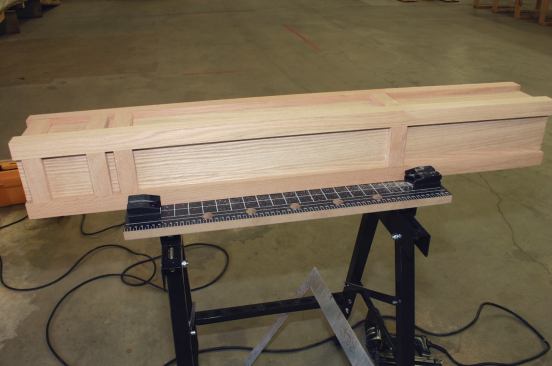
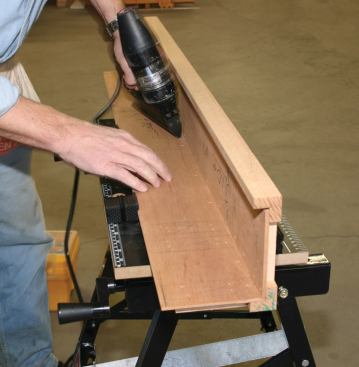
I purposely made the inside sleeve dimension 1/4 inch larger than the rough post, to give me a little play to plumb the sleeve around the 4×4. I applied adhesive to all surfaces of the post and slid the sleeve over it. Once it cures, the adhesive acts as a gap-filler, giving the sleeve a really solid feel over the post.
After plumbing the sleeve, I nailed it to the post, keeping the nails at the top of the sleeve where they’d be covered by a band of cove molding under the cap, and low enough to be covered by the base wrap.
The sleeve needs to be about 1 inch taller than the rough post to allow the cap assembly to drop in. I glued and nailed the cap, locating the nails where they’d be covered by a finishing piece of oak cove molding just under the cap. The base of the post is simply wrapped with 1×12 oak mitered at the corners and capped with a band of oak cove molding. The only visible brad holes are at the corners of the cove and base molding, far less noticeable than with my previous approach.
Ken Reisis an architectural sales rep for Mid-Cape Home Centers in Hyannis, Mass., and a freelance stair builder in Brewster, Mass.


