Corners Just Got Easier
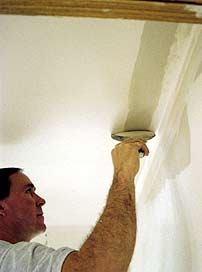
Conventional inside corners typically require at least three finishing steps. First, a bed of drywall compound is troweled on both sides of the corner; paper tape is cut to length, creased in the center, bedded in the compound, and troweled in tightly. Second, after the first coat has dried, compound is applied to both sides of the corner, covering the paper tape. Finally, additional coats of compound are applied and sanded until an acceptable surface is achieved and ready to paint. The number of “feathering” coats required depends on the skill of the finisher. Finishing inside corners has always been frustrating work for me. When it comes to bedding the tape, any large gaps where the sheets of drywall meet will often cause the tape to wrinkle. If I fill the gaps with compound to build a solid backing for the tape, it adds an extra step and drags out the job, because the filler has to dry before I apply the tape. Applying the second coat is also problematic. No matter how hard I try, making a pass on one side of the corner always seems to ruin the nice pass I just made on the other side of the corner. The more I fuss with the corner, the worse it gets. Corner trowels help, but tend to leave a hefty ridge of compound at the outside edges. Outside corners are no picnic, either. The corner bead has to be nailed or crimped in place just so, which can be difficult if the drywall doesn’t make a tight joint at the corner. If the corner bead is skewed slightly to one side, or if a nail head stands proud of the bead or goes in at a slight angle, it wreaks havoc with the finish coat. And when it comes time to run the baseboard, the metal bead can get in the way of a tight miter. Drying time is also an issue with both types of corner joints. The thick layers of joint compound applied to corners dry slowly — in low temperatures and high humidity, it can take 48 hours or more for the compound to dry completely. I’ve used quick-setting compounds like Durabond, but I don’t like having to mix the mud on site, and it’s nearly impossible to clean off my tools and buckets after it’s set. Durabond is also harder to sand.
Finish Tape
The No-Coat tapes address all of these issues. Unlike conventional paper tape or corner bead, which get completely covered with compound, No-Coat tapes are made with a heavy, smooth paper that accepts paint as well as the drywall surface itself. The finish paper is reinforced with two thin strips of flexible plastic, one on either side of the centerline, backed with two strips of regular paper tape. Because the paper surface will accept paint, only the edges of the finish paper, which overhang the plastic reinforcing by about 1/4 inch, need to be blended or feathered into the surface of the drywall. The basic No-Coat tape is called UltraFlex (see Figure 1).
Figure 1. No-Coat corner tape is made by sandwiching strips of rigid plastic between regular paper tape on the back side and a layer of heavy finish paper on the front that can accept paint. Shown here, backside-up, are (from left): UltraFlex, for inside and outside corners of any angle, and the narrower UltraFlex Lite, for inside corners up to 9 feet long, both of which come in 100-foot rolls; and UltraCorner and UltraBull, two preformed outside corner tapes that come in 8-, 9-, and 10-foot lengths. At right, a piece of UltraFlex is shown finished-side out and creased to fit an off-angle inside corner. It’s 4-1/4 inches wide — nearly twice as wide as regular tape, comes in 100-foot rolls, and can be used for inside and outside corners of any length. A narrower 2-5/8-inch-wide version called UltraFlex Lite is suitable only for inside corners up to 9 feet long. A preformed 90-degree outside corner called UltraCorner is also available in 8-, 9-, and 10-foot lengths, and costs about 25% less than UltraFlex. (A bullnose corner tape called UltraBull is also available in the same precut lengths.) The plastic backing on all of these tapes is rigid enough to bridge any voids or gaps in the corners that often cause regular paper tape to wrinkle or pucker. The result is a crisp-looking corner that is easier to achieve — particularly in remodeling situations where corners are often wavy.


