Finishes for wood floors fall into two categories: coatings and penetrating products. They have two jobs to do, protect the wood and provide an attractive surface. In that context, coatings have been the overwhelming favorite. The biggest rap against them, though, is how they wear over time and how difficult it is to repair them when damaged or worn.
The appeal of penetrating products is they don’t form a film that can be abraded and damaged; theoretically, they are absorbed into the wood without leaving one on the surface. They may not show wear or damage as much, but their Achilles heel is the inability to provide minimal protection from casual contact with just about any liquid. For that reason, they are often used under coatings as a sealer or stain.
What would be ideal, of course, would be a domestic stand-alone penetrating finish. Hardening oils appear to have filled that void. But do they work? To answer that, let’s start by comparing hardening oils to the solvent-based penetrating products that have been available in North America for decades. Open any can of a U.S.-made penetrating product and look inside. The product might be clear or could have color added to create a stain, but two-thirds to three-quarters of the contents of the can are solvents. The remainder is what I call “the good stuff” (TGS)—the resins, dyes, pigments, driers, and drying oils that give the product its working characteristics. The solvents are smelly hydrocarbons that can stink up a jobsite. They dilute the good stuff (TGS) and keep it in suspension so you can get it out of the can, spread it on the wood floor, let it penetrate, and then remove the excess to avoid any type of film formation. After proper application, the wood is supposed to be sealed and protected.
With a can of hardening oil, you may also be looking at a clear or an opaque product that may have color added to qualify it as a stain. The big difference is the lack of solvents. This is possible because the vegetable-base oils (linseed and soy being the most common) are highly refined and purified. Several manufacturers claim they use no solvents at all. If a solvent is used, it’s down around the 2% range, which, in my book, still qualifies as no solvents. So, everything you are seeing in that can of hardening oil is TGS. You can take the contents out of the can, spread it on the floor, let it penetrate into the wood, and buff off any residue. You end up with no film formation. You don’t have noxious, smelly, and flammable hydrocarbons saturating the air and posing a threat to a worker’s health and the natural environment. As good as that is, do not lose sight of the fact that when the solvent-based products are absorbed into the wood, most of what is absorbed is solvent and not TGS. On the other hand, the hardening oil that’s absorbed is nothing but TGS.
I’ve worked with tons of U.S.-made penetrating finishes over the years. But after applying them, I’ve always covered them with multiple layers of a film-forming coating, usually some type of urethane, because you cannot rely on a solvent-based penetrating stain or finish to protect wood from casual contact with most liquids. Like most wood flooring contractors, I know that conventional penetrating products wish they could seal and protect, but the reality is, they won’t without help.
In contrast, the hardening oils I’ve used have done an outstanding job of providing the needed protection without a topcoat of finish. When the oils saturate the wood, they work at a molecular level and attach to the walls of the wood cells. Since a solvent does not dilute the oils, you’re getting the full benefits of TGS. Once in the walls of the wood cells, the oils start to harden, bonding all that TGS that has been absorbed.
Available Products
I started out using Master Oil from WOCA and eventually included Magic Oil by Pallmann in my finish selection. For this article, I approached all the manufacturers I knew of who have a hardening-oil product and asked for an interview. These included WOCA, Pallmann, Rubio, Ciranova, Loba, Osmo, Bona Kemi, and Pro Coat. The first four agreed to the interview, and the others either never replied or declined an interview at this time. I also interviewed several contractors to evaluate their experience and measure it against my own feelings about the products.
Troweling method. Mike Somodean, a floor refinishing contractor …
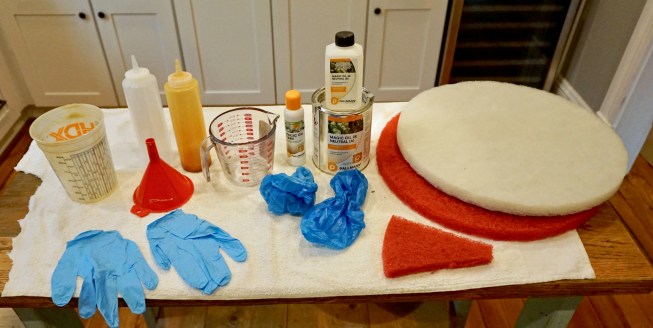
Getting It on the Floor
Before I get to the application process, two quick points:
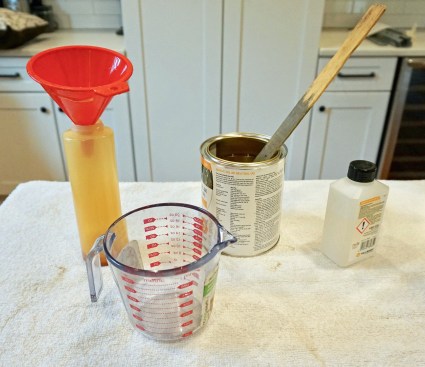
1. With few exceptions, all the oils come with a chemical hardener that you mix into the oil before starting the application. This expedites drying and curing and enhances the chemical resistance to liquids the oils will likely come into contact with over time.
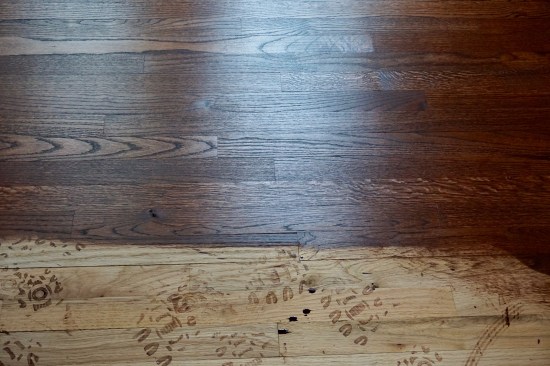
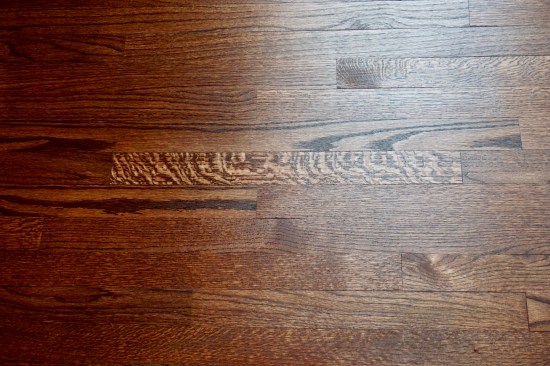
2. To maximize the amount of oil absorbed, it helps to wet the wood to pop open the grain before applying the oil. When the floor has dried, the surface will absorb the oil more evenly. Every contractor I talked to did this, especially if they were using a stain with color. Water is the great equalizer and helps create a uniform look.
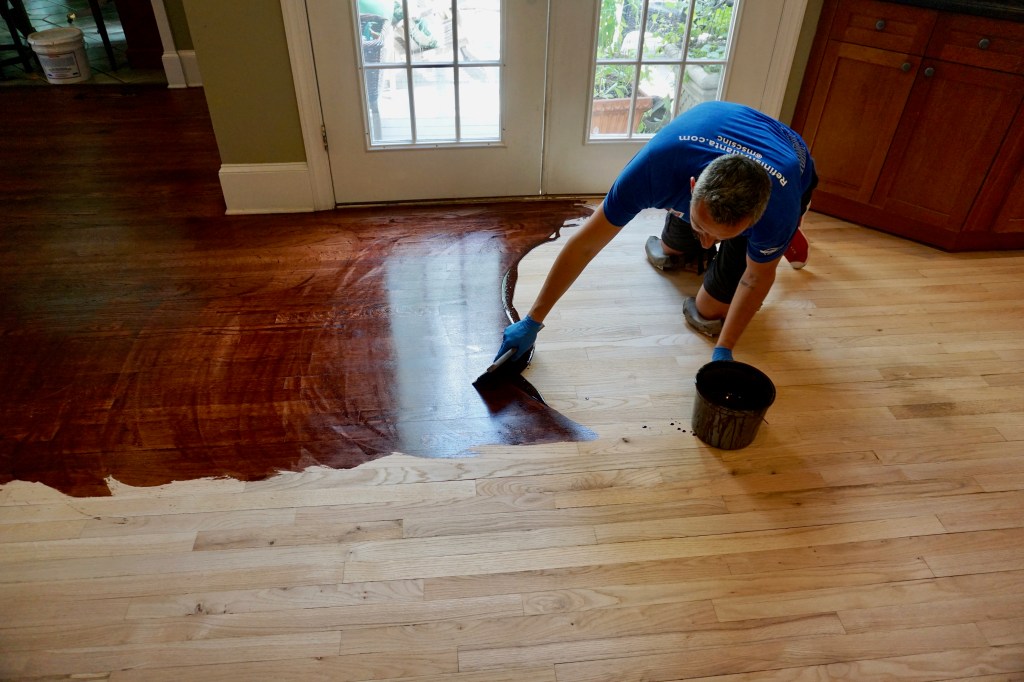
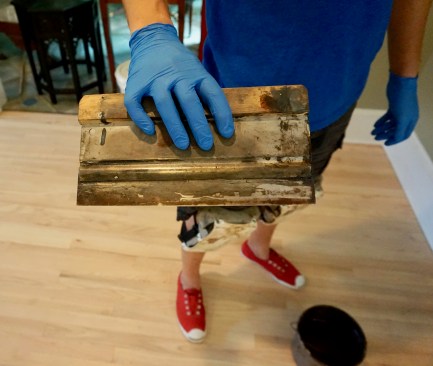
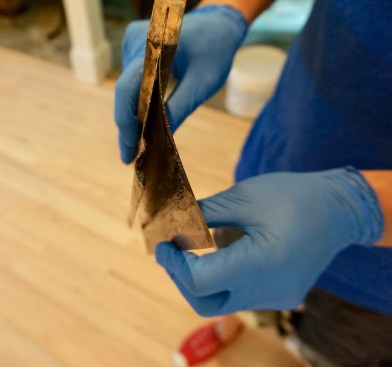
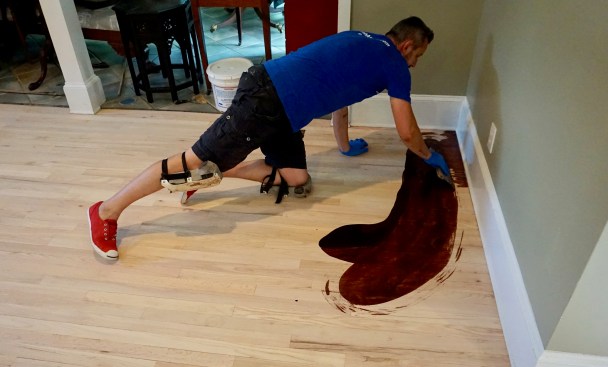
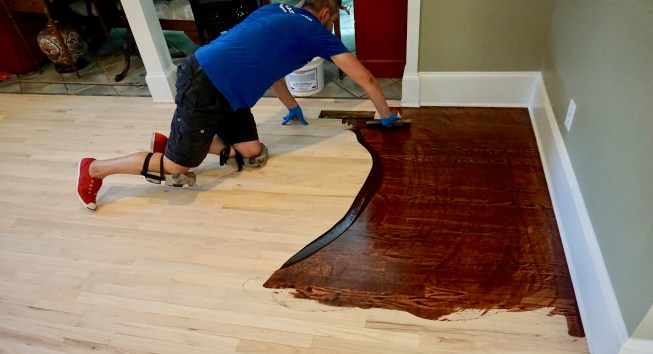
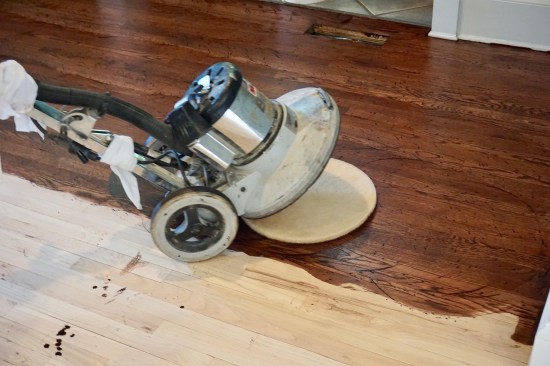
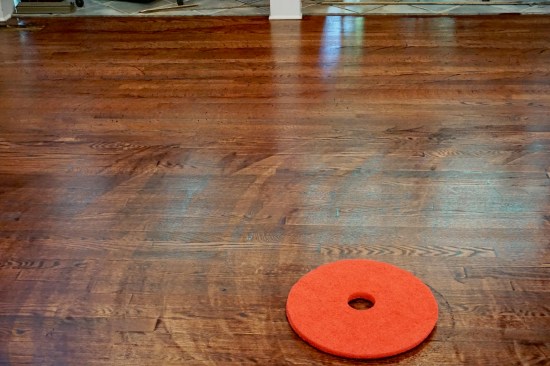
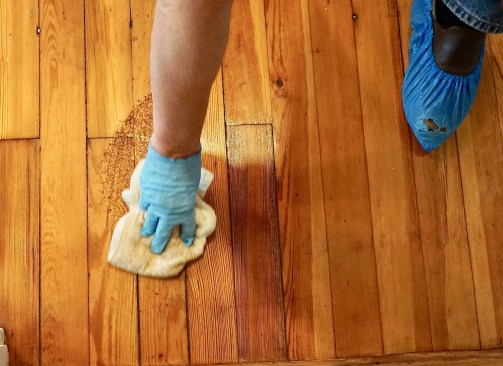
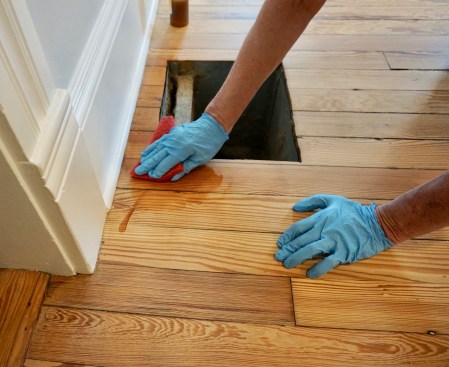
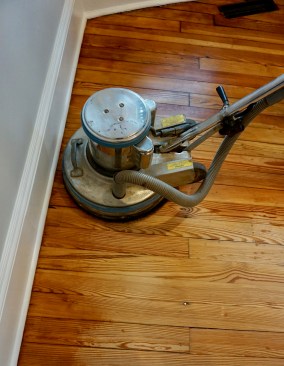
The three primary methods of getting the oil on the floor are troweling, rolling, and buffing. All of these methods physically force the oil down into the wood tissue. If you’re good with a trowel, you can cut in and do detail work with its blade. If you’re rolling the oil on or buffing it in, you will likely cut in using a small brush or a slice of a red buffing pad to rub the oil in. Most contractors agree it’s wiser to work in manageable sections as opposed to taking on a whole room at once. The size that’s manageable will depend on your level of experience, so be deliberate when you start. After applying the oil with the trowel or roller, let the oil sit on the floor and dwell for about 10 to 15 minutes, and let gravity do its thing.
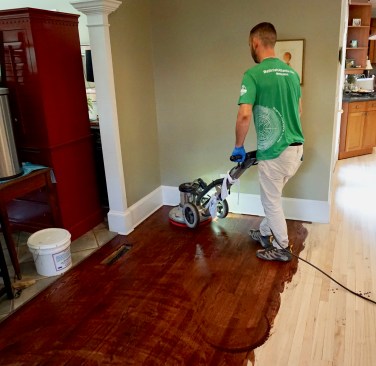
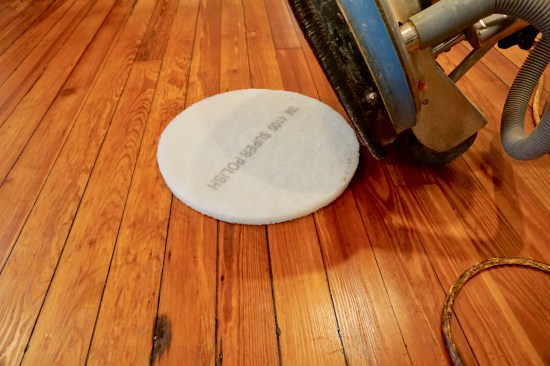
After the dwell time, use the buffer and the red pad to methodically buff the surface. I recommend buffing in patterns going against the grain and with the grain. This does two things: It forces more oil into the wood, and the red pad starts to pick up the excess. As the floor reaches its saturation point, the excess is thrown off the pad in small droplets, called spitting. As the spitting is minimized, what little oil is left is removed with a white polishing pad or a terry cloth–type rag. At this point, you will notice a dramatic reduction in the amount of oil your shoes track, as the majority of the residue has been removed. I strongly encourage wearing mesh booties to reduce tracking even more and keep your shoes cleaner.


Buffing method. Everything needed by the author for applying har…
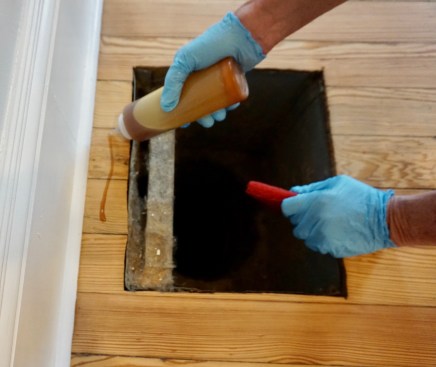
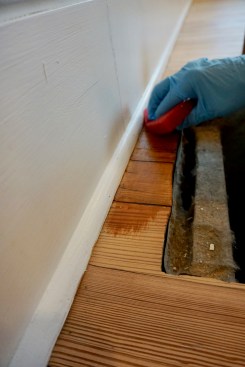
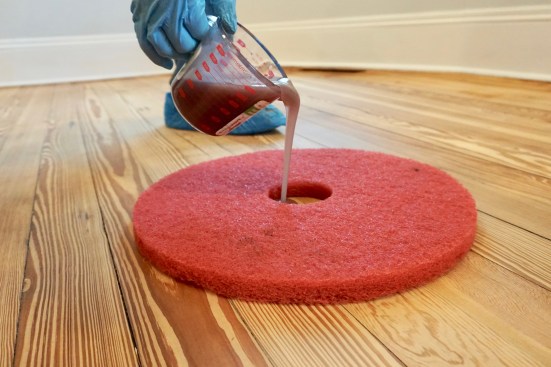
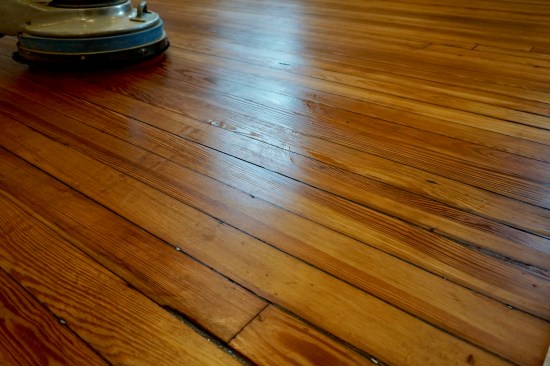
I prefer the third method of getting oil on the floor: buffing the oil into the wood. Prior to buffing, we cut in around the perimeter by using a brush or making small deposits of oil with a squeeze container and then rubbing it in with portions of a red pad. This keeps oil off the trim and makes for a cleaner application.
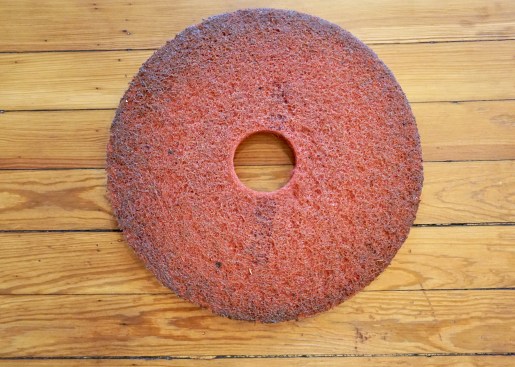
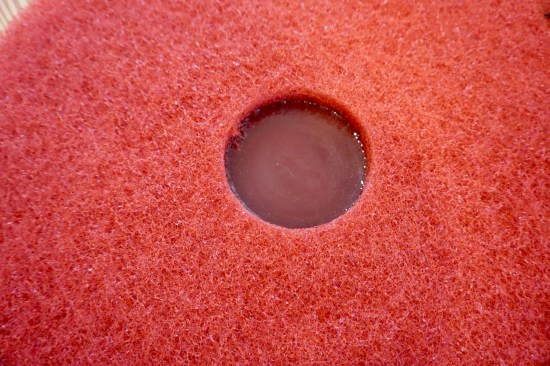
When we’re ready to buff the oil, we start by removing the center section of the red pad, creating a 3-inch hole to pour the desired amount of oil into. I put a drive pad on top of the red pad on the buffer and hit the switch. To get maximum coverage, I typically move the buffer quickly and in patterns that look like the number 8. Once the oil is deposited in the pattern, I work the oil into the wood by buffing against the direction the floor is laid. As I spread the oil, I gradually work my way to the perimeter of the room where we had cut the oil in, and blend the two areas. Once I’m confident I have sufficient oil on the floor, I buff in any direction I want.
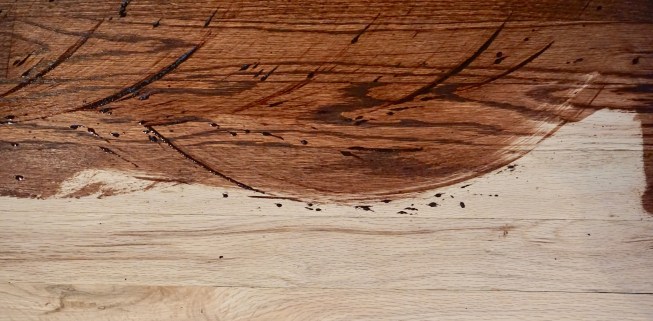
Since the biggest risk to this method is not getting sufficient oil on the floor, I monitor the amount of spitting coming off the red pad to determine if the oil is being absorbed or the wood is reaching saturation. I also look for any color variations in the wood, as those indicate areas that haven’t absorbed enough oil. If I feel I need more oil in an area, I make light applications.
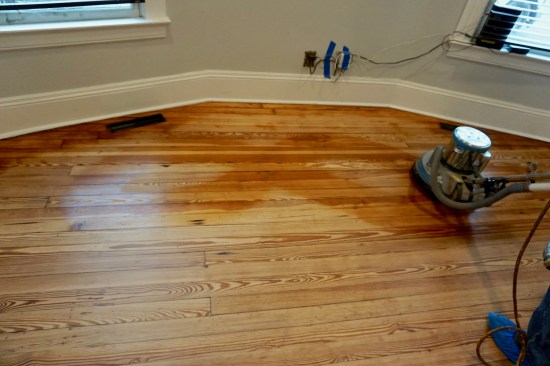
Once the majority of the excess has been removed with the red pad, the final buffing is done with a white polishing pad, a terry-cloth towel, or both. What you are doing now is making sure the oil has been applied and removed uniformly as the oil enters the drying/curing phase. Always back your way off a freshly oiled floor to ensure any shoe tracks are removed with the buffing pad.
The application processes are logical and easy for a seasoned operator. You do have to pay attention to the amount of pull on the red buffing pad, as it accumulates oil while the work progresses. The buffing creates friction and that means heat. Combine that with the hardener and it won’t take long for you to notice more drag as the heated oil is well into the drying phase. This makes the buffer more difficult to control, as it will grab at the surface, and eventually you will have to flip the pad over to the clean side or replace it. Pay particular attention to the circular residue left from a saturated pad when you lift it off the floor. I encourage you to quickly wipe it up with a terry-cloth rag. He who hesitates will think he’s wiping up Super Glue.
When you finish with the white pad, rely on the manufacturer’s suggestions and product specifications for what comes next. For some products, that’s it, you’re done. For others, you have the option to make another, much lighter application. Others will tell you that if you want to make another application, wait a day and make it a light application. If the initial application was done correctly, the wood should already be pretty much saturated. The most you would be doing with a second application would be to get oil in what I call the grain relief pattern. It won’t be much, but if you want to do it, you can. I typically use a plastic condiment squeeze bottle for getting the additional oil on the floor, as I don’t need much.
Drying and curing times vary, especially if the oil has color. Pay close attention to what the manufacturer requires and make sure the client does too.
It sounds easy, and it is for someone with experience. Take a second and breathe in the air that is remarkably clean and devoid of noxious solvent vapors. These are some of the most environmentally responsible finishes you’ll ever work with, and for me, they have been a joy to use.
Crunching the Numbers
The initial reaction to the price of hardening oils warrants some close inspection. On the low end of the pricing spectrum, you’ll be paying about $110 per liter. On the high end, by the time you add in taxes, you’ll be bumping up against $200 per liter. For those of you still clinging to the Imperial weights and measures scale, that puts a gallon of this stuff at around $400 to $750, depending on which end of the spectrum you’re purchasing. Once the sticker shock wears off, let’s run those numbers through a real-world example to get a good idea of the impact on your job pricing.
For simplicity, let’s say we have 1,000 square feet of wood flooring in a kitchen, family room, a couple of halls, and a powder room all needing the typical sand/stain/finish. Let’s compare two finishing options: One version calls for a hardening oil with color, the other calls for a solvent-based stain followed by multiple applications of a two-component waterborne finish. The prep work for either system is the same. Let’s assume all the prep work has been done and we are joining each crew on the day they start the staining and finishing.
The first crew (two workers) will be using the more expensive, one-coat application of colored oil at $200 per liter. After mixing the hardener in the oil finish with color, the crew starts the application at 9 a.m. They will go through roughly three liters of finish in about four hours for a total cost of $600 for the finish and the cost of the crew for a bit more than half the day. They should be through with the application and gone by 2 p.m. at the latest.
The second crew (also two workers) gets started the same morning with the staining of the floor using one of the faster drying solvent-base stains that are so popular. They start at 9 a.m. and use about a gallon and a half of the stain and pay about $75 for the product. They finish up around noon. Since they need to let the stain dry for about three hours before applying finish, they call it a day and head off. The crew returns the next morning to make one application of a waterborne sealer, using two gallons for about $100 in materials. The sealer will dry in a couple of hours. They take a long lunch and return to pad the floor, vacuum it, and make the first application of the two-component high-grade waterborne finish, using close to two gallons, or $250 in materials. It’s a full day of work. They show up the next morning and because they are within the 24-hour window since the finish was applied, they don’t have to do any prep work. The crew applies the second and final topcoat, and uses about a gallon and a half of the two-component high-grade waterborne finish for an additional $190 in materials. They are done by 11 a.m.
So the floor done with the hardening oil with color was completed in a bit more than half a day for $600 worth of finish, plus labor and one trip. The other project took two and a half days of labor and at least three trips, and consumed about $615 in stains and finishes. Materials costs are almost identical, but the time, labor, and trips make a huge difference. Several contractors told me this is the silver lining to these products. As one contractor sagely chanted, “It’s the trips, it’s the trips … you have no idea until you factor in the trips.” I can’t argue.
Detailed Comparison to Coatings
Hardening oils were the first true penetrating finishes I ever worked with, and for me, they provide the most accurate comparison to film-forming coating products. Let’s do the side-by-sides:
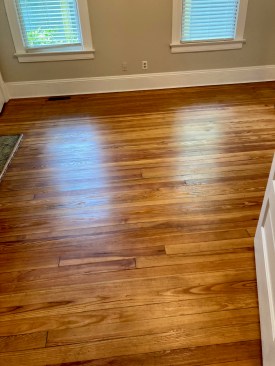
Appearance. Coatings are more decorative than hardening oils. Coatings can range from a flat matte to a high gloss. Lower-luster finishes, satin in particular, are more popular as they tend to not show wear as much. Hardening oils are low luster, period. Some manufacturers of hardening oils do offer products that will increase the luster, but I am hesitant to describe them as anything but low luster. The good news is that as consumers have gotten more accustomed to the look of hardening oil, they have become more accepting. We’re even seeing it used on some high-end prefinished and engineered flooring.
Protection. Both products do an excellent job of protecting wood. The high-tech, high-end waterborne finishes are more chemically resistant to common household liquids than ever before. Hardening oils are also protective of wood. Many of my historic preservation projects include rooms that see a lot of activity with food and beverage consumption and people celebrating in every manner. In this context, the hardening oils have done just fine.
Cleaning. Manufacturers of coatings did themselves a big favor when they started promoting a simple, straightforward cleaning kit for their finishes. They did a great job of marketing and distributing them. Hardening oil manufacturers have done the same but with slight variations. Along with cleaning products, some manufacturers offer refurbishing products to help maintain a healthy-looking floor. Do your homework and use the company’s website to drill down on this topic. I pay close attention because unless it’s simple, the homeowner will skip it.
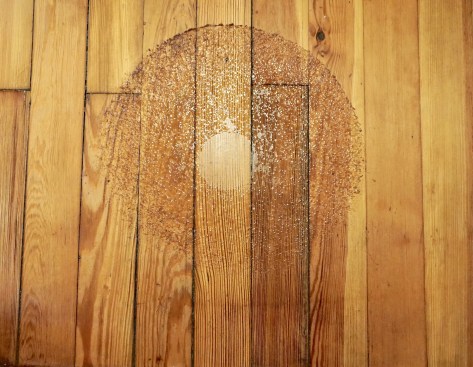
Wear. This is where we notice big differences. Even the toughest coatings are susceptible to scratches, gouges, indents, and wear patterns. They sit on top of the wood where use and abuse can be plainly seen. It’s difficult to mitigate areas of damage or wear without doing a full-blown clean and recoat of the entire area. With hardening oils, all the protection is in the wood so there’s no film on the surface to show abrasion and wear, even though it’s still occurring. If you do get some visible damage, touch-up is relatively easy in a single location without refurbishing or refinishing a whole room. Most manufacturers have touch-up products for doing just that.
Refurbishing an aging finish defines the long-term performance of a finish and life span of the floor. With coatings, you are pretty much limited to cleaning and recoating the surface. Major coatings manufacturers know this and have good products to support this option with cleaners that will remove most contaminants. The biggest downside is that you are increasing the buildup of finish by applying new finish over old. You eventually reach a point where the natural look of the wood is compromised and future refurbishing will likely require sanding.
The approach with hardening oils is slightly different. Most manufacturers offer what I call “interim” products to help deal with any wear patterns or a dry look after repeated cleanings. These products help address these issues with no buildup on the surface. Over time, many floors will need to be professionally re-oiled. All manufacturers have support products for this. The wood absorbs the new oil and you still avoid film formation. This can easily extend the life of the wood by avoiding the need for sanding.
When a coated floor starts looking shabby, the knee-jerk reaction is to sand the finish off, along with a lot of the wood. With hardening oils, everything is down in the wood and any crud that accumulates on the surface can be removed without a major sanding. These products can stain, seal, and protect a wood floor with one application instead of the multiple steps that coatings require. You do need to educate your clients on the look and maintenance so they will know what they’re getting. If they are comfortable with that, I can assure them that I’ve used these products in demanding situations with good, long-lasting results. Because of all of these advantages, there’s always room for them on the shelves of my truck.


