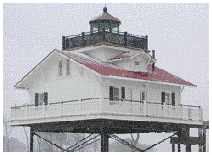
We’re builders who normally work along the North Carolina coast. But when the opportunity arose to build a replica of a historic lighthouse on the Chesapeake Bay shoreline, we were so intrigued we decided to extend our usual geographic reach to take the job.
The area where the lighthouse is located is experiencing rapid growth, and as newcomers we found it a real challenge to enlist qualified subs. Consequently, the task of building the central spiral staircase fell to our framing crew. The plans indicated the location of the stairwell and the size of the shaft, but we had to work out the construction details on site.
Framing the Radius Walls
The stairwell is enclosed by a two-story-high 6-foot-square shaft, which opens up at the third level into the octagonal cupola that houses the lighthouse’s lens.
We started the project by framing the 2×4 walls of the square shaft, then made a template for the curved plates of the stairway’s cylindrical walls.
To do this, we snapped out a 3-foot-by-6-foot rectangle — half of the shaft’s area — on a sheet of 3/4-inch plywood, then scribed a pair of tightfitting arcs to represent the plates. We cut the pattern out with a jigsaw and used it for the radius plates we’d need for any of the cylindrical walls that would be exposed on both sides.
For the most part, we used 1 5/8-inch-wide plates and 2×2 studs, though in a few loadbearing areas we used full-width 3 1/2-inch plates. We also made a pattern for plywood “corner plates” that would support the corners wherever the cylinder was enclosed by the square walls.
Because we would be using vertical 1×4 T&G paneling, we wanted to provide nailing plates at 3-foot intervals up the cylinder wall. Using the patterns, we cut enough plates and inside corner pieces from 3/4-inch plywood to build up double and triple laminations where needed all the way up the cylinder.
Then we nailed off the bottom plates on the first floor, toenailed the 2×2 studs in place, added another plate on top, and face-nailed the studs. We continued this process to the top, varying the parts as needed, depending on the stair layout: Where the stair was enclosed, we used the plywood corner plates; where the curved wall was visible from both sides, we used the narrow plates.
Center Pole
The one special-order item required for the stair was the 12-sided laminated oak center pole. We purchased this from a millwork company in Ohio (Woodsmiths, 800/874-2876), which shipped it to us in Virginia.
To position the pole, we cut the third-floor sheathing to form the landing and the stair cylinder at the very top, where the stair pivots 90 degrees to the right to emerge onto the floor of the cupola. We marked the pole’s center point on the sheathing and, after rotating the pole so that its 12 facets were in the proper orientation to the tread layout, secured it with structural screws at top and bottom.
The pole’s finished length was 21 1/2 feet. We received a 28-foot blank, which had been damaged near one end; fortunately we were able to cut off the damaged part.
Wall Paneling and Stringers
Next we installed the vertical 1×4 T&G paneling. We located the longest vertical run available to begin the installation and used this as a baseline to work in both directions as needed. We located butt joints where the stair stringers would conceal them.
Once the stairwell wall was fully paneled, we laid out the stringer on the cylinder wall, plotting the points where rises and runs intersected. Using a tall story pole for the rise, we marked these points at 30-degree intervals around the first full rotation of the stair. To plot the stair’s second rotation, we fastened a small plywood rip horizontally around the cylinder wall, level with the second-floor landing, and rested the story pole on that.
We set a trim nail at each stringer point to give us the line needed to begin laminating the stringer, which we made from four layers of 1/4-inch plywood strips, secured to the wall with adhesive and screws and braced with kickers while the adhesive set.
We made the seat and riser cuts on the bottom of the first piece, positioned it at the base of the stair, then bent it to the wall while pulling it up tightly against the trim nails. We followed with layer after layer, working our way up the cylinder and staggering the joints in successive layers. Since the bottom three layers would be covered, we could use as many screws as we needed in them.
To avoid placing screws where we might saw through them, we marked the rise and run on each layer, drawing plumb and level lines from the points indicated by the trim nails. We secured the top layer with trim nails and kickers until the adhesive set. Then we cut out the runs and rises with a circular saw and finished the cuts with a utility knife, chisel, or RotoZip.
Installing Risers and Treads
The flat facets of the center pole provided a convenient place to secure a router jig so that we could mortise pockets for the supporting risers.
To precisely locate the jig, we leveled from the stringers, marking each tread elevation on the pole. We made five or six passes to cut the 1-inch-deep pockets, which were 1 7/8 inches wide to allow room for a 5/4 support riser and a 3/4-inch finish riser, with a little play for installation. The height of the pockets exactly matched the height of the stringer rise cuts.
After ripping them to the correct height, we installed the 5/4 support risers by pushing them to the back of their pockets and nailing and gluing them to the pole. On the stringer end, we glued and screwed them.
The treads were made of the same 5/4×6 T&G heart pine used for the flooring. We glued up and sanded these, then shaped them using templates made from the plywood arcs left from cutting the plates earlier. We used the jigsaw, files, and sandpaper to get a good fit at the pole and the wall, then set the treads in place to mark the front and rear cuts along the risers. We left an extra 3/4 inch along the front of each tread to allow for the finish riser and a 1-inch overhang.
After cutting and rounding the front edges, we glued and nailed the treads in place.
Once all the treads were installed, we ripped the finish risers so they would fit snugly between the treads. We cut them 1/8 inch short and slightly beveled the face on the pole end so we could ease them into the routed pocket and rotate them into position. When we had the fit we wanted, we applied adhesive to the backs and nailed the finish risers to the stringer, the pole, and the support risers.
Twist at the Top
As noted earlier, the top four steps pivot up to the cupola landing in the opposite direction from the rest of the stair. The narrow ends of these four treads rotate around the lens pedestal.
To bend the stringer for this section, we framed a partial wall that hangs from the cutout floor that restrains the top of the pole. We used curved plywood plates and 2x2s for this upside-down wall, which radiates from the top landing to the center pole. Its main purpose was to act as a form for the final stringer section. Once the final short section of stringer was laminated and the treads and risers were installed, we cut off the bottom of the upside-down wall and capped it underneath, then paneled it above.
After a thorough sanding, we finished off this utilitarian stairway with wood filler and paint.
David Brothersis a framing contractor in Elizabeth City, N.C.


