Interior doors are often taken for granted, but they are crucial to the overall quality of a home. Well-installed doors open and close smoothly and stay open when you want them to—and should be able to withstand the occasional teenage or matrimonial slam!
Check the Framing
Interior door installation starts with the framing. Rough openings need to be the right size, in the right place, and framed with good stock. Each opening should be plumb, level, and in plane with itself and the surrounding wall. Trimmers need to be square in the opening and securely nailed, as well as exactly flush with the adjacent king studs to keep the wall thickness consistent. You can always hang a door in a bad opening, but it will take longer, and trimming the door neatly will be a challenge.
Good house plans call out the sizes of all interior doors, and some provide a schedule of rough openings. I always check the plans carefully, verifying that each door will fit with enough room left for trim, light switches, structural columns, and other details. I also verify that the opening height works with any special issues (such as the radiant subflooring heating used in the project shown here).
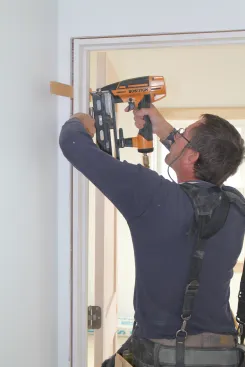
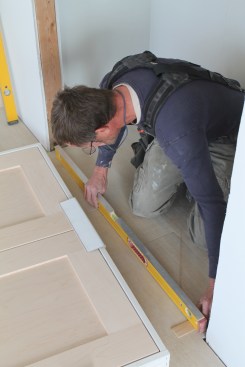
After the house is framed and all systems are roughed in—but before wall finishes are installed—I check every opening with a long level. Often, framing lumber will have bowed or twisted, or a plate will have shifted, or I’ll find some other problem that I can fix now to save myself trouble later. While I’m doing this, I also label every opening with the door’s nominal size and handing. For the benefit of the sub-tradespeople, I mark the hinge side and draw an arc on the floor to indicate swing direction.
Ordering Door
The order for pre-hung doors starts with a master list. I give each door in the house a number or letter, and to avoid mix-ups, I also include its location in the house. I generally start by listing general specifications: slab type and finish, jamb material, style and thickness, hardware, and so on. Often, individual doors will have specific differences, so the general spec will be followed by “except where noted.” Then each door is listed with information about it: size (height and width), handing, hardware prep, and any differences from the standard specs. Some suppliers will send a sales rep out to make the list for you, but I prefer to make my own.
Check the Rough Openings
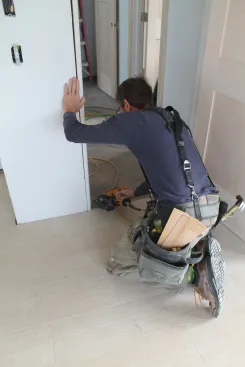
Start each door with a final check of the opening, making sure that the door will fit and that there’s nothing unusual to contend with. If door location within the opening is critical—to center it in a space, for example, or to align it with another component—note what its exact position needs to be. If there are other doors nearby, check the overall level of the floor to make sure the head jambs all line up. Next, check the floor across the doorway for level and under each jamb to make sure the opening is perpendicular to the floor. If the floor is sloped or stepped, adjust the jamb cuts for the best fit.
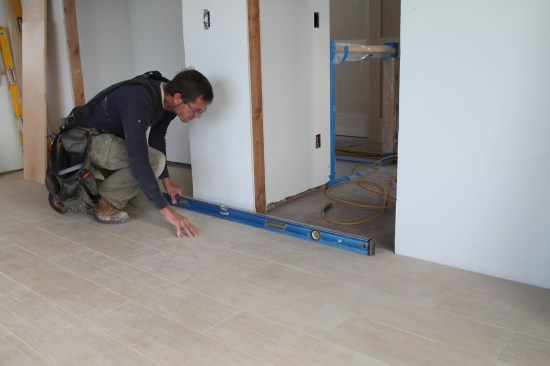
Installation starts with a check of the openings. Here floor level is checked between two adjacent door openings. If it is off, the head casings will not align without some adjustment.
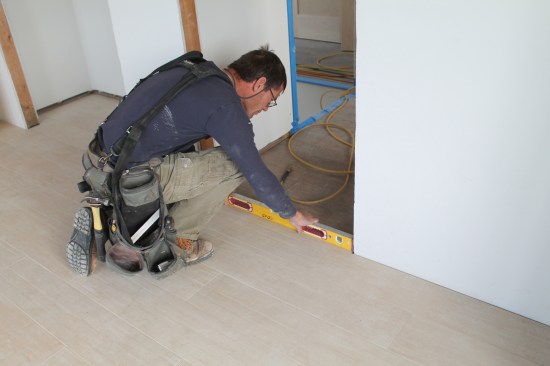
Check the level of the floor within the opening and note any discrepancies, which will be addressed when the jamb legs are cut.
The final check is that the floor is level under each jamb leg. If it's sloped, the cut should be adjusted accordingly.
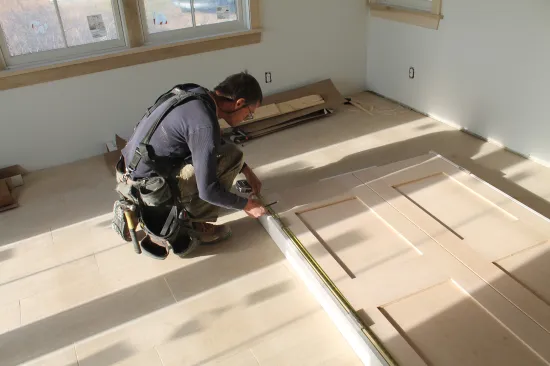
Measure and Cut the Jambs
Jamb-leg length is strictly a function of the door-slab height and the clearance that’s needed above the floor or threshold. In most houses, the height of the jambs rarely varies. Ideally, leave 1/2 to 1 inch of clearance between the top jamb and the header framing to allow for settling and to let the casing bridge slight differences between the jamb and wall finish.
With the temporary fasteners holding the door assembly together, start by marking the length of the jamb leg on one side.
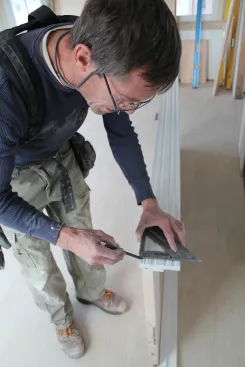
Next, square a line across the jamb leg at the mark.
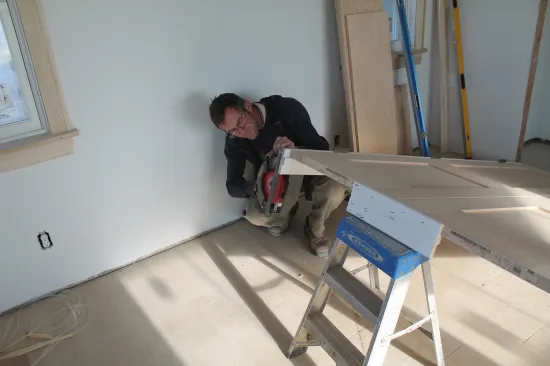
During the initial steps of cutting and fitting, keep in place the temporary fasteners that hold the door slab in its jamb. To cut the jamb legs, roll the unit onto one edge. Then measure the jamb leg, mark it, and cut it to length. Flip the unit onto its other edge and repeat the process. Check to be sure that the hinge screws haven’t come through the back of the jamb; they can quickly ruin a finished floor.
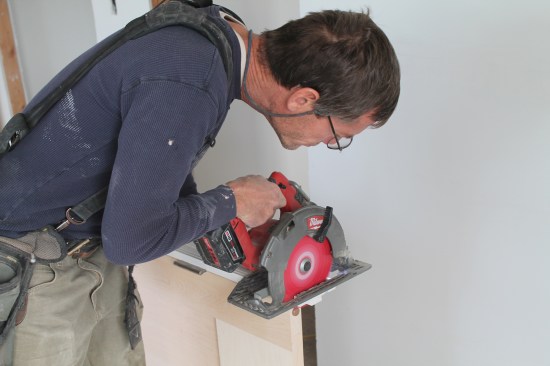
Finally cut the jamb leg to the proper length.
After cutting the first edge, flip the door over and repeat the process with the other jamb leg. Be sure the hinge screws aren't coming through the jamb on the other side—they can ruin a finished floor quickly!
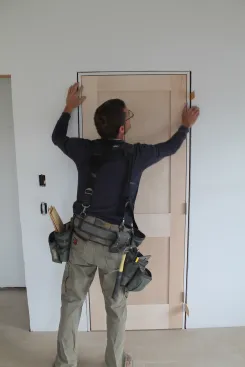
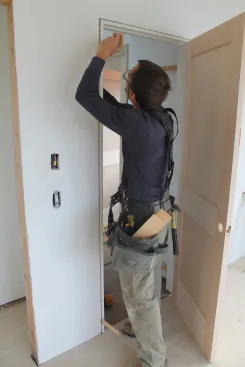
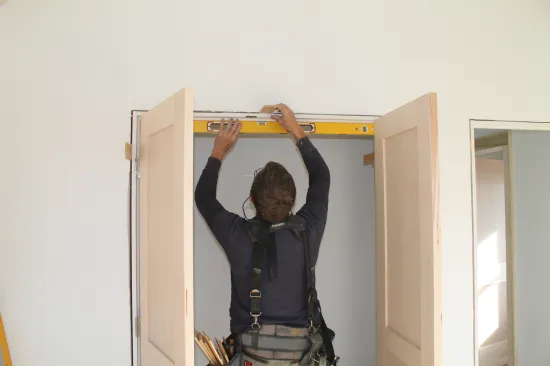
Level the Door Slab in the Jamb
With the door slab still secured in its jamb, stand the unit up in the opening and make sure the head jamb is perfectly level. If it’s not level, set the door down again and trim the appropriate jamb. When the bubble is dead center, release the temporary fasteners holding the door in its jamb, and set the unit in the rough opening. Unless you’ve noted differently, center the door in the opening and secure the hinge jamb just above the top hinge with a couple of shims and nails.

With the temporary fasteners still in place, set the door in the opening and check the head jamb for level. If it's not dead on, take the door out and make the adjusting cut.
If the head is level, release the temporary fasteners and secure the hinge jamb just above the top hinge with shims and a nail.
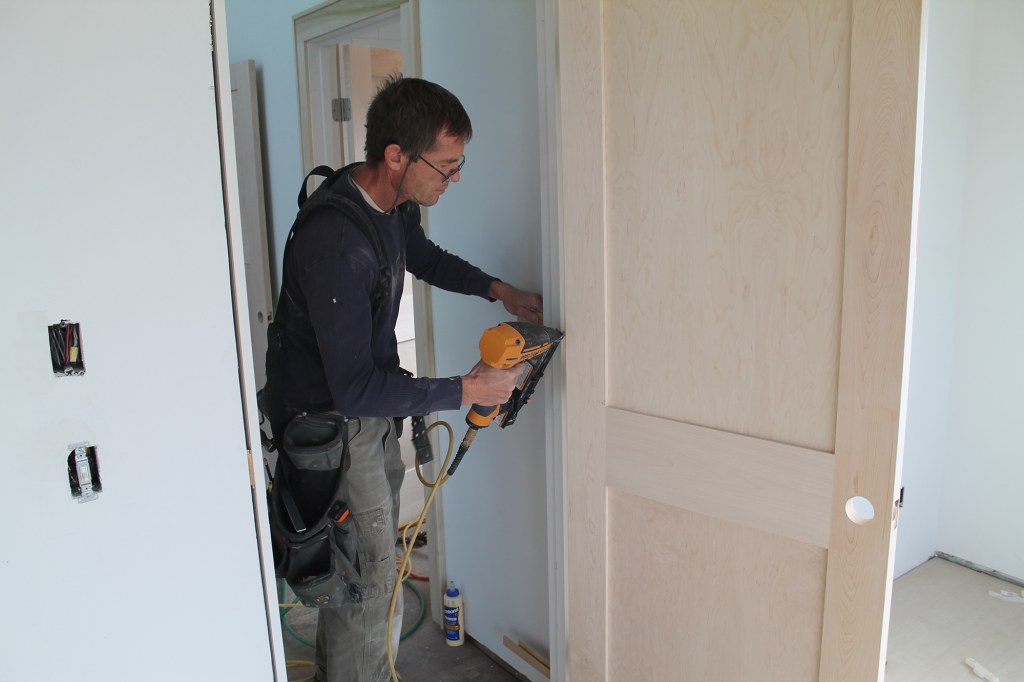
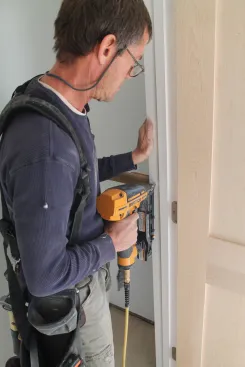
To anchor the assembly in the opening, shoot a single nail through the jamb at each of the other three corners. Then shim and nail the rest of the hinge jamb. Rather than using a level to plumb the slab, insert shims behind the bottom of the hinge jamb just below the hinge. Adjust the shims until the margin between the door slab and head jamb is perfect across the top. If the head jamb is level, then the door should be plumb, but double-check it with a long level. When you’re happy with the fit, drive a couple of additional nails to secure the bottom of the hinge jamb. Then shim and nail just above the middle hinge to make sure the jamb stays straight.
Next drive a single nail into each of the other three corners to hold the door in the opening.

Slip shims behind the jamb just below the bottom hinge and adjust the shims until the gap between the head jamb and door slab is perfectly even.
When the margin between the door slab and head jamb is perfectly even across the top, drive additional nails to hold the bottom of the hinge jamb in place.
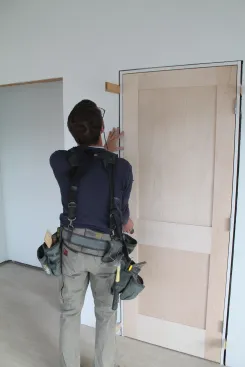
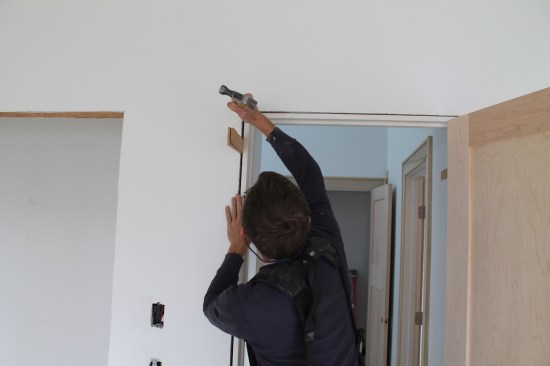
Fine-Tune the Rest of the Fit
When the hinge jamb is straight and secure, turn your attention to the strike jamb. Starting at the bottom, adjust the jamb in or out to keep an even space between the door slab and the jamb. Once that space is even, insert shims between the jamb and the framing close to the floor, and snug them in place before nailing through them. At the top of the strike jamb, insert shims just below the head jamb.
When the hinge jamb is straight and secure, turn your attention to the strike jamb. Starting at the bottom, adjust the jamb leg in or out until the gap between the jamb and the slab is even. Then snug shims behind the jamb near the floor before driving nails.
Insert shims just behind the jamb leg just below the head jamb.
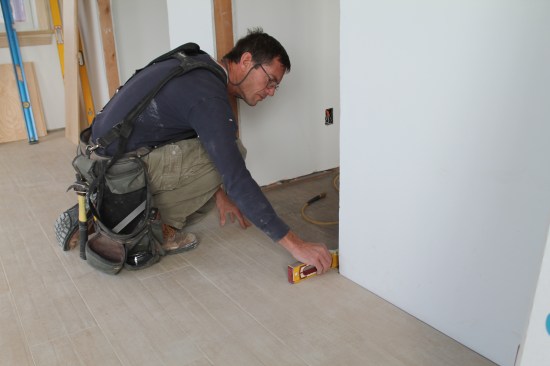
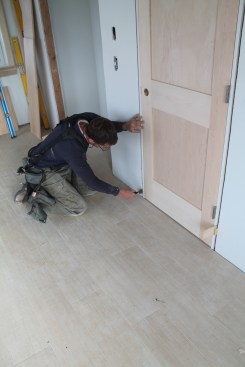
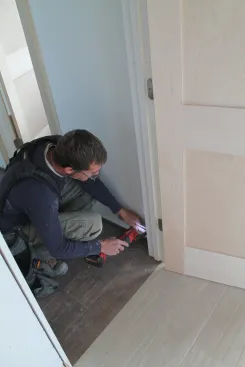
Next, check to make sure the door is hitting the stop evenly. If it’s not, give the jamb a gentle tap until it’s perfectly even before securing the top with additional nails. Finally, shim and secure the middle of the latch jam just above the striker location. When finished, the door should open and close smoothly, show a perfect margin all the way around, and hit the stop evenly with a satisfying solid clunk.
Before nailing the top of the strike jamb, make sure the door slab is hitting the stop evenly.
Adjust the slab/stop alignment with a gentle tap on the corner of the jamb. When the door hits the stop perfectly, drive additional nails to hold the jamb in place.
To make shims, rip stacks of shingles into 2-inch to 3-inch widths. Insert the same number of shims from each side, except to make up for twisted framing. When each door is hung, cut the shims flush with a utility knife or multi-tool.
When the jamb is secured, go back and cut the shims with a utility knife or a multi-tool.
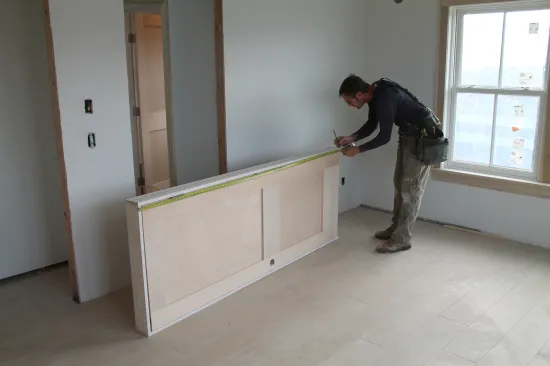
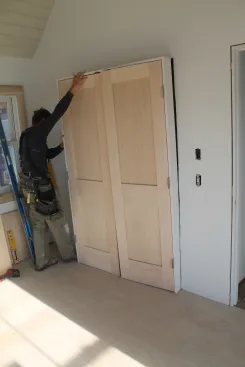
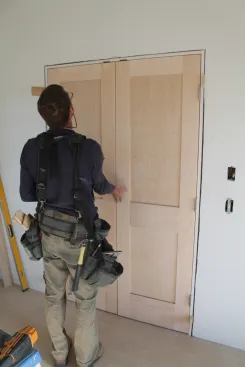
Double Doors: Cut and Set Up
Double doors are trickier to hang than single doors, but the basic process is the same. With the double door shown here, the floor was out of level. Placing a shim under the level showed how much had to be added to the jamb leg to make the head jamb level. That amount was added to the measurement of the longer leg and then both jamb legs were cut. As with a single door, the unit was set in the opening—this time with the temporary fasteners removed—and the head jamb checked to make sure it was level.
For a double door, first check the opening. If the floor isn't level, shim under the level until the bubble is in the middle.
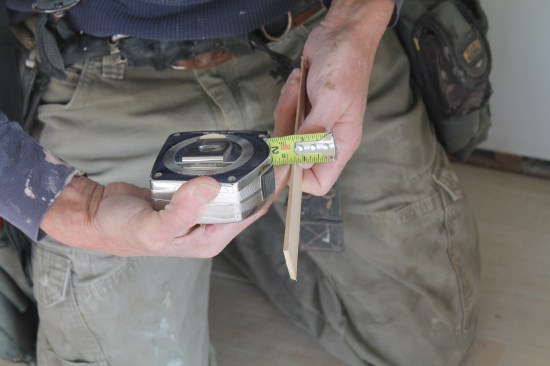
Measure the thickness of the shim where the level was sitting.
Measure the length of the jamb leg, adding the amount of the difference to the length of the leg.
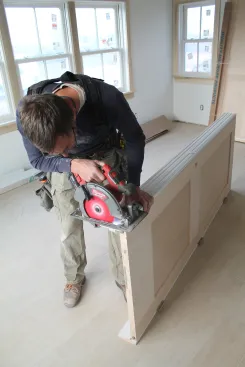
Keeping the double doors temporarily secured in the jamb, elevate the bottom to cut the jambs to length.
As with a single door, set the door in the opening—this time with the temporary fasteners removed.
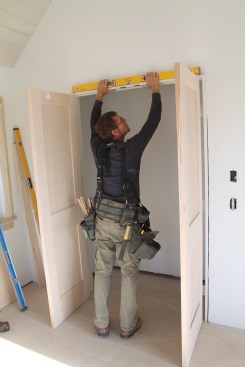
As with the single door, check the head jamb to make sure it's level before proceeding.
Double Doors: Tweaking the Fit
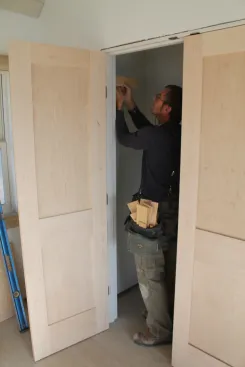
To hang double doors, instead of starting with a set of shims on one side, swing the doors open and shoot a single 2 1/2-inch 15-gauge finish nail through the jambs at each of the four corners. These nails hold everything loosely in place and let you adjust the jambs as needed. Next, shim the top of each side jamb, centering it in the opening. Shoot only one nail through the shims—it’s important to be able to shift the jambs slightly to align the door. At this point, shim and nail the top jamb, using the edge of a level to get the jamb perfectly straight. Don’t nail through the head-jamb shims though; those shims will be removed later after casing is installed on one side. Then, the header framing can’t push on the door jamb if it settles in the future.
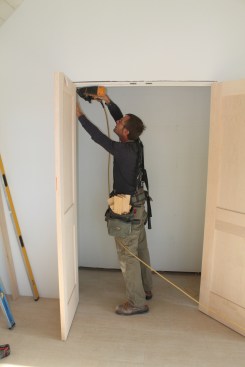
To install the double-door unit, start by driving a single nail through the jamb at each of the four corners.
Insert shims above the top hinges on both sides to center the door in the opening, and shoot just one nail through the shims to allow for adjustment.
Using a level as a straightedge, shim the head jamb until it is perfectly straight. Don't nail through the shims, they will be removed when the casing is installed to hold the jamb straight.

Shim the side jambs until the gaps between the slabs and along the top are perfectly even. The top corners of the door should align perfectly as well.
Check that gaps around the doors are even and that the doors are sitting in the same plane when closed.

To make the doors hang in exactly the same plane, lightly tap the corners in or out until satisfied with the alignment.
When completely satisfied with the fit, go back and drive nails at each shim point along the sides to secure the assembly in the opening.
With the top of the frame secure, shim and adjust the side jambs, making sure that:
- the gap between the doors and head jamb is even.
- the top corners of the doors are level with each other.
- the center gap between the doors is even.
- the door slabs are in the same plane when fully closed.
This last part is done by tapping all four corners in or out slightly with a block. Once everything is aligned properly, shim and nail the rest of the jamb securely.
All photos by Rick Luck


