Because a pocket door disappears into the wall instead of swinging into the path of travel, it can often solve awkward design problems, as it did in the basement renovation project I completed recently in a home in Reading, Mass. With the basement’s long hallway and doors providing access to a laundry room, a garage, a staircase to the main level, and the living area shown in this article, pocket doors were a good fit.
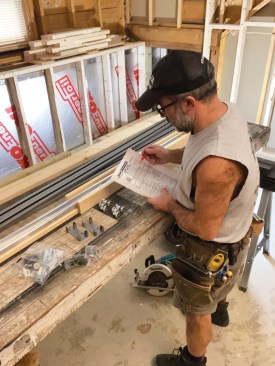
A pocket-door kit typically includes a frame header assembly, split steel studs, door hangers, and all other components needed to assemble the frame. The author carefully reviews the installation instructions and parts list prior to every installation.
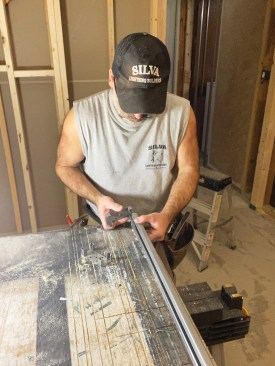
I’ve installed dozens of pocket-door kits over the years, including Johnson’s heavy-duty, commercial-grade frame (the one shown here). But kits change as manufacturers tweak their products, so I carefully read the installation instructions for every kit I install. To re-familiarize myself with how everything fits together and figure out what I’ll need from the lumberyard, I start by unpacking and laying out all the kit parts and fasteners.
In new construction, floors and ceilings are usually level, which makes framing a square, plumb, and level rough opening straightforward. In a renovation, floors and ceilings are rarely level and walls rarely plumb. On this project, the basement floor had been covered by a carpet over a pad that concealed the waviness of the slab. And because the ceiling drywall had been fastened to the floor joists instead of to furring strips, the ceiling was a little wavy too.
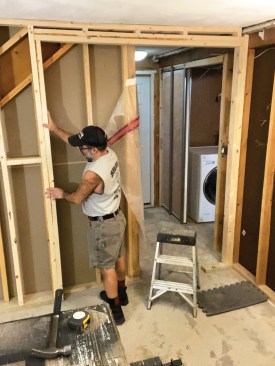
Following the frame manufacturer’s installation instructions, the author framed the new pocket door’s rough opening so that the width was equal to twice the door width (2 x 32 inches) plus 1 inch, and the height at least 84 1/2 inches (the height of the door plus 4 1/2 inches). Visible in the background is another recently framed pocket door leading from the basement hallway into a laundry room.
Renovation plans called for new, vinyl plank flooring after the existing carpet had been removed. Over old concrete slabs, I usually install pressure-treated 2×4 sleepers—which are easy to shim over low spots—followed by 3/4-inch plywood subfloor sheathing. To gain a little headroom, I installed thinner-profile 2-by-2-foot Dricore panels over the slab, followed by 1/2-inch AC plywood sheathing to make the subfloor feel more solid and provide a smooth substrate for the click-lock vinyl flooring. The thickness of the panels (and the shims needed to level them) along with the sheathing had to be accounted for when I established the height of the header for the new door.
1
of 22
To help locate the frame header brackets, the author partially n…
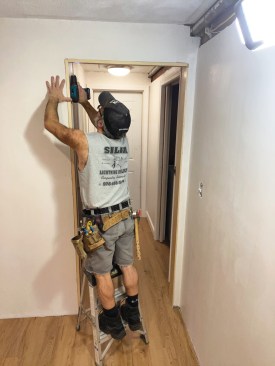
To help locate the frame header brackets, the author partially nailed a flat-head nail into each trimmer on either side of the opening so that the nails were 80 3/4 inches above the finish floor and centered on the trimmers. He left the nail heads proud by about 1/8 inch so that the end brackets of the frame header could slip over the nails.
Because a subfloor will be installed over the concrete slab base…
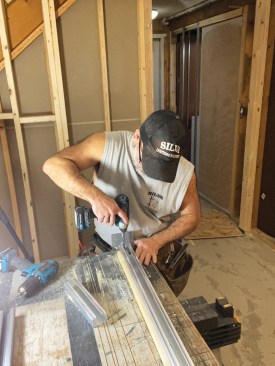
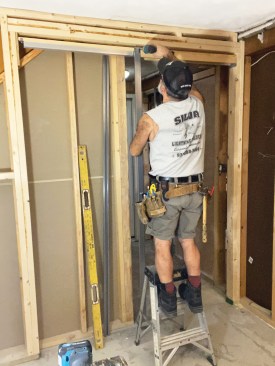
Because a subfloor will be installed over the concrete slab basement floor, the author set up a laser line to establish a benchmark elevation. This frame was sized for a 3'-0" x 6'-8" door, so the author had to cut the frame header to fit the narrower, 2'-8" x 6'-8" door used on this project. He started by unscrewing an end bracket.
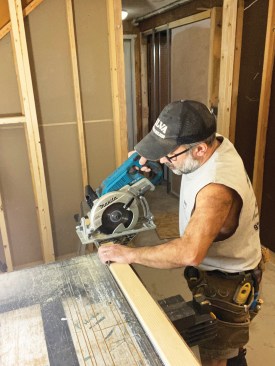
Then he carefully cut the track to length, first cutting the woo…
Then he carefully cut the track to length, first cutting the wood header, then flipping the assembly over and cutting the metal track 1 3/8 inches shorter than the wood header.
Finally, he refastened the bracket to the track.
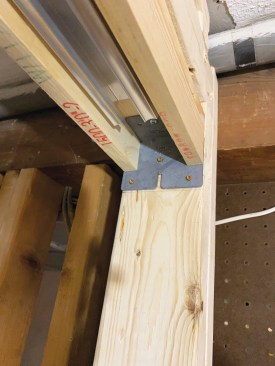
The end brackets on the frame header have slots that allow them …
The end brackets on the frame header have slots that allow them to slide down over the nail heads, making it easier to accurately locate the frame header.
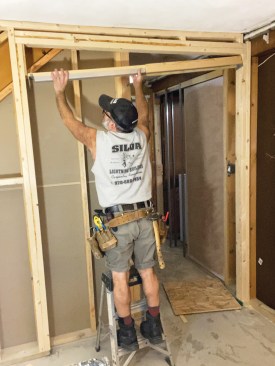
After making final adjustments so that the frame header would be…
After making final adjustments so that the frame header would be perfectly level, the author fastened the brackets to the trimmers with screws supplied by the manufacturer.
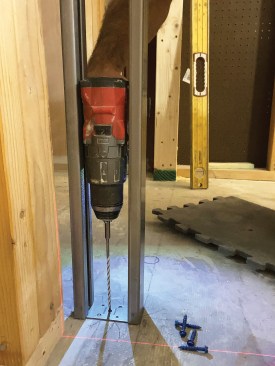
Next, he inserted a floor plate into the ends of one of the two …
Next, he inserted a floor plate into the ends of one of the two pairs of split steel studs.
He positioned the first pair of split steel studs so that the to…
He positioned the first pair of split steel studs so that the tops of the studs butted against the header nailer, then fastened them with pan-head screws.
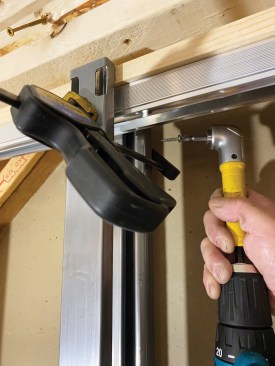
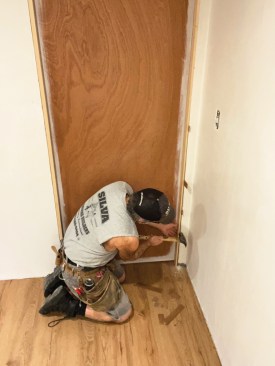
Tight clearances between the new door opening and an existing wa…
Tight clearances between the new door opening and an existing wall required a right-angle drill to drive some of the screws.
The author snapped chalk lines on the concrete floor to mark the…
The author snapped chalk lines on the concrete floor to mark the rough opening. He used them to align the floor plate, which he fastened to the slab with Tapcon concrete screws.
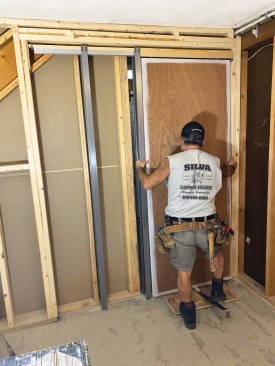
The second pair of split steel studs was installed in the same m…
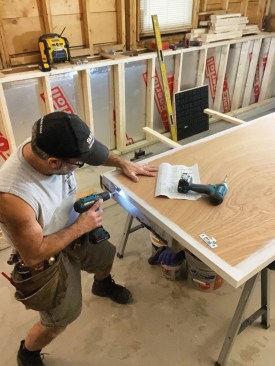
The second pair of split steel studs was installed in the same manner midway between the end pair and the trimmer. Prior to installing hardware and mounting the door onto the track, the author primed and painted the edges of the solid-core door, then mounted the two door plates on the top edge of the door 2 3/4 inches from the edges.
The author also mounted a rubber bumper on the back edge of the …
The author also mounted a rubber bumper on the back edge of the door 40 inches from the bottom. He then inserted the wheeled hangers into the track and used a flat bar to lift the heavy door so that the hanger pins engaged the door plates.
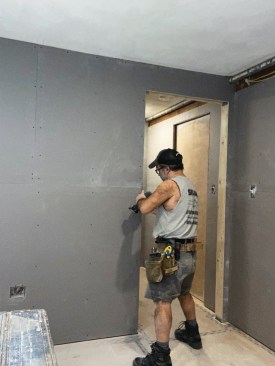
With the pocket door installed in the frame, the author laid dow…
With the pocket door installed in the frame, the author laid down Dricore panels over the concrete slab floor, shimming them as needed to level the floor, then installed 1/2-inch plywood subfloor over the panels, staggering the seams and covering the new subfloor with Ram Board temporary protective floor covering. When installing the drywall, the author used short self-tapping screws to attach the drywall to the steel split studs.
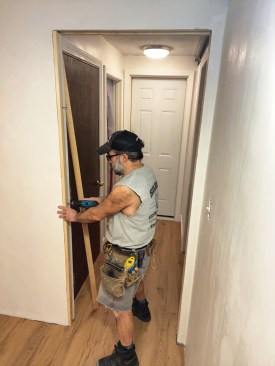
Once the finish flooring was installed, it was time to trim the …
Once the finish flooring was installed, it was time to trim the door opening. To accurately locate the holes in the narrow edges of the split steel jambs for the trim screws and avoid deflections that could bend the flexible steel jamb, the author first partially drilled through the wood trim to mark the screw locations, then removed the trim piece to finish drilling the holes through the steel.
He followed the same careful process when installing the split h…
He followed the same careful process when installing the split header trim.
Note that these trim pieces must be removable in order to remove…
Note that these trim pieces must be removable in order to remove the pocket door from the pocket-door hardware. Before casing the door opening, he shimmed the latch-side jamb to evenly contact the edge of the door …
…then prefabricated the casing for tight miter joints.
Next, he installs the casing.
Plastic guides are included with the pocket-door kit, but the au…
Plastic guides are included with the pocket-door kit, but the author made his own guide blocks out of scrap PVC that provided a better fit and more durability.
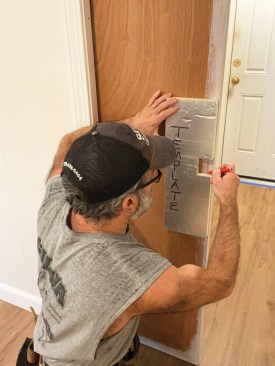
To accurately position the latch, the author first made a templa…
To accurately position the latch, the author first made a template to mark its location.
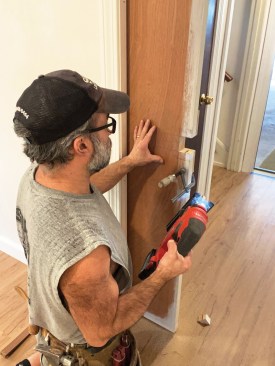
The author clamped a plywood backer to the back of the door befo…
The author clamped a plywood backer to the back of the door before cutting out the latch opening with a jigsaw to prevent tear-out.
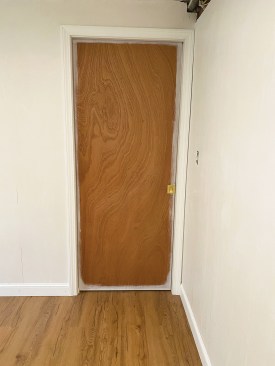
Ready for finish paint, the installed door may rarely be needed,…
Ready for finish paint, the installed door may rarely be needed, but when a little privacy is desired, it will slide smoothly out of the wall to provide it.
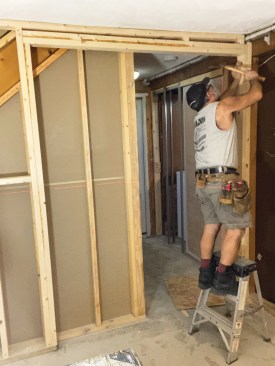
As I framed the rough opening in the new 2×4 wall separating the living area from the hallway, I used a laser level to establish a benchmark elevation for setting the door header and aligning the heights of my new door openings with the existing ones. Following the instructions that came with the kit, I added 4 1/2 inches to the height of the door (80 inches) to establish the minimum height of the header. Then it was time to tackle the installation of the frame for the 2′-8″ x 8′-0″ solid-core door. To follow the process, flip through the photos in the slide show, above.