Tile isn't a waterproof surface and neither is the mudbase, so t…
Tile isn't a waterproof surface and neither is the mudbase, so the membrane must be sloped toward the drain to keep water from collecting. To add the slope, first a layer of modified thinset is spread on the subfloor as a bonding agent.
Roe Osborn
Spread a layer of dry-pack mortar (four parts sand to one part P…
Spread a layer of dry-pack mortar (four parts sand to one part Portland cement, and enough water so that it compacts in your hand), pitching it toward the drain at a slope of about 1/4 inch per foot. Pack and screed the mortar to eliminate flat or hollow spots.
Roe Osborn
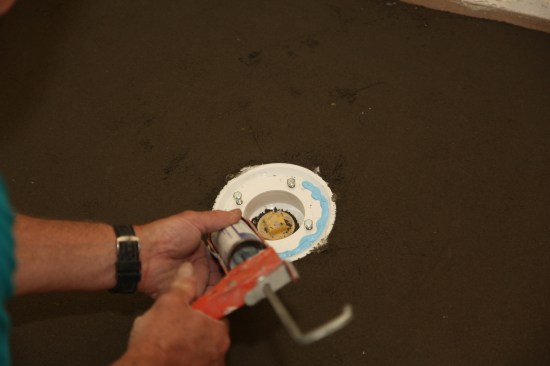
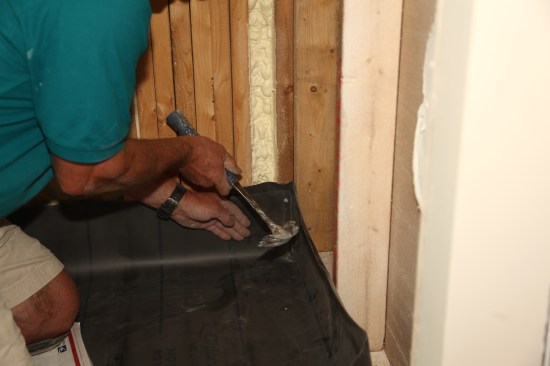
The final step before cutting and fitting the membrane is applyi…
The final step before cutting and fitting the membrane is applying an elastomeric sealant, such as NobleSealant 150, around the drain assembly. This will create a seal between the membrane and the drain.
Roe Osborn
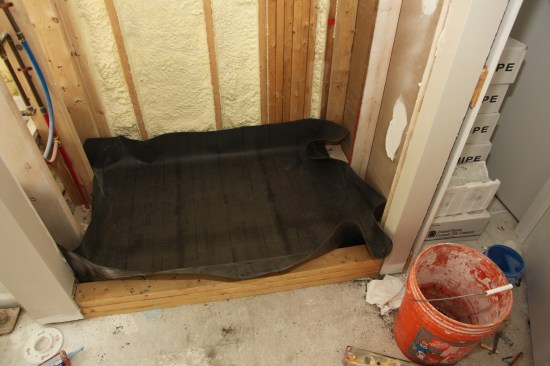
Always use a waterproofing membrane specifically meant for showe…
Always use a waterproofing membrane specifically meant for shower floors. When measuring the membrane, be sure there’s enough to go up the walls at least 2 inches above the threshold around the perimeter of the shower. There also needs to be enough material to wrap over the top and down the outside face of the threshold. Place the membrane in the shower with the same overlap on all sides.
Roe Osborn
In the corners, neatly fold the membrane flat against the framin…
In the corners, neatly fold the membrane flat against the framing. Attach the membrane to the framing with nails, at least 2 inches above the top of the threshold.
Roe Osborn
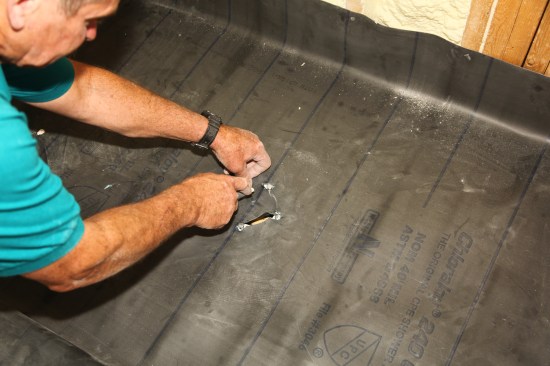
To connect the membrane to the drain, carefully cut the membrane…
To connect the membrane to the drain, carefully cut the membrane from around the drain-assembly bolts, always cutting toward the middle of the drain.
Roe Osborn
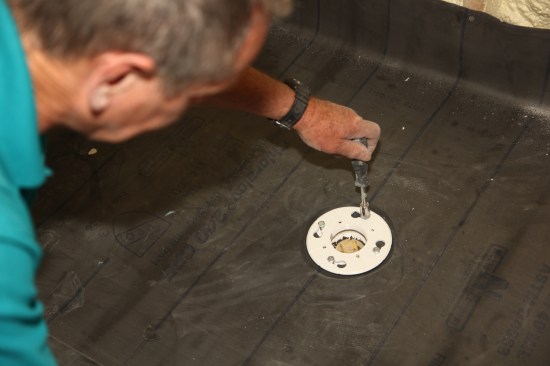
Cut out the center of the membrane by letting the knife follow t…
Cut out the center of the membrane by letting the knife follow the inside ring of the drain. Then press the membrane into the sealant that was spread earlier.
Roe Osborn
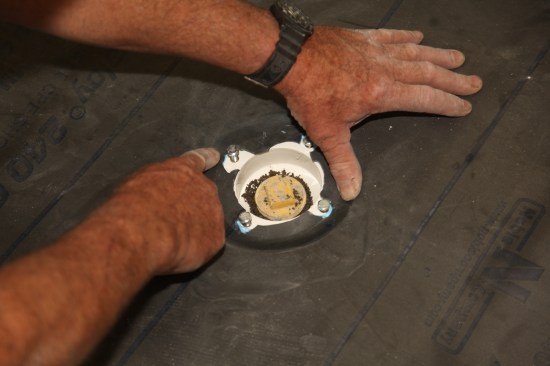
Slip the clamping ring into place and tighten the bolts incremen…
Slip the clamping ring into place and tighten the bolts incrementally, alternating sides until they are all tight.
Roe Osborn
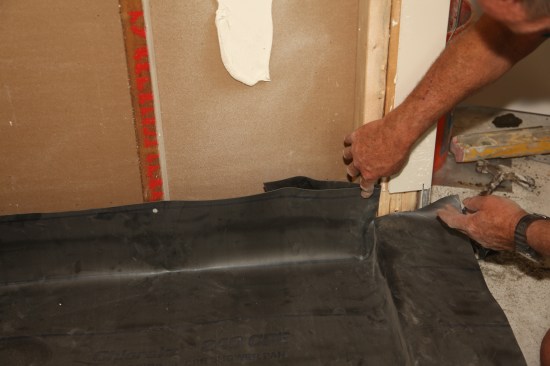
The membrane needs to be cut where it transitions from the verti…
The membrane needs to be cut where it transitions from the vertical plane of the walls to the horizontal plane of the threshold. This area demands close attention to keep it waterproof.
The first step is to cut the membrane tight to where the top of the threshold meets the jamb framing, allowing the membrane to wrap over the top of the threshold.
Roe Osborn
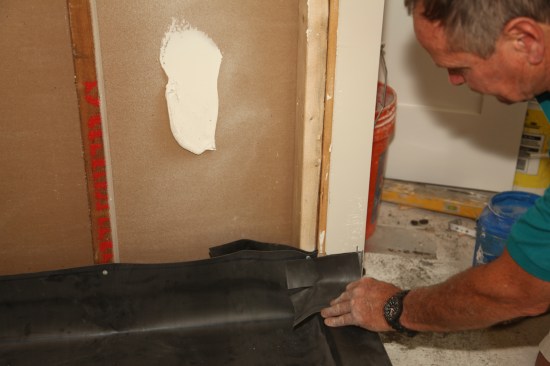
Carefully fold the flap inside the shower and attach it to the f…
Carefully fold the flap inside the shower and attach it to the framing with a nail 2 inches above the threshold. Nail the membrane to the outside of the threshold. No nails should be driven on the inside or through the top of the threshold.
Roe Osborn
Cut an overlapping corner piece of membrane for each side of the…
Cut an overlapping corner piece of membrane for each side of the threshold.
Roe Osborn
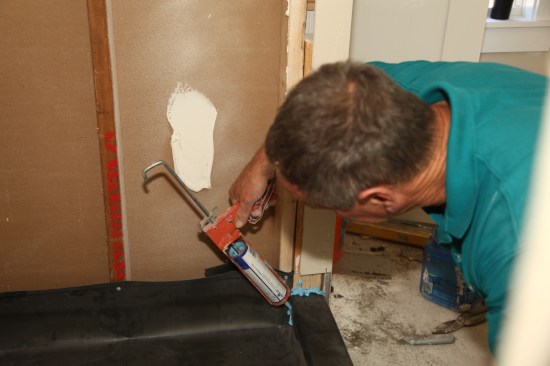
Apply a generous bead of sealant to the joint underneath, as wel…
Apply a generous bead of sealant to the joint underneath, as well as to the overlapping piece and then press it into place to seal the corner.
Roe Osborn
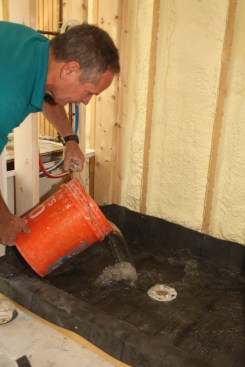
When the membrane is installed and all the joints are appropriat…
When the membrane is installed and all the joints are appropriately sealed, insert an expansion plug into the
drain and dump about 10 gallons of water into the shower pan. Let the pan sit filled with water for three to four hours. Carefully inspect the drain and the floor below the shower for leaks before proceeding to the next step.
1
of 9
Roe Osborn
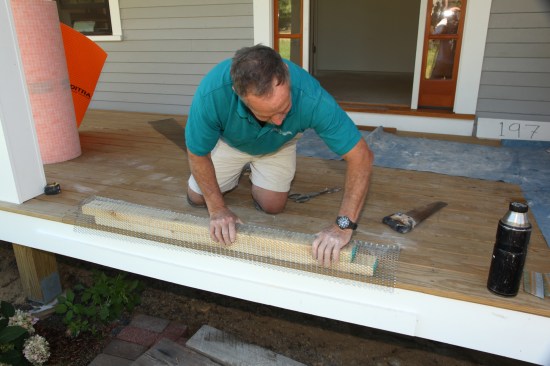
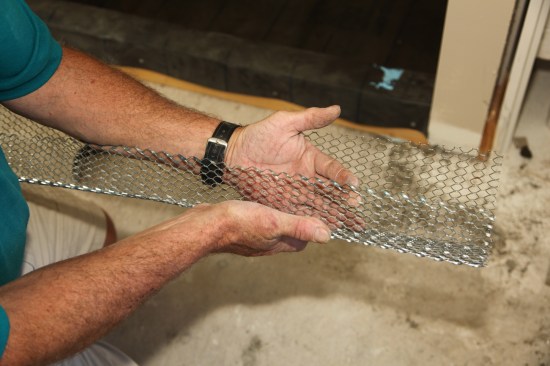
Instead of using cement board on the threshold, pre-form a sleev…
Instead of using cement board on the threshold, pre-form a sleeve of galvanized expanded metal by bending it over 2x4s. Pinch the legs of the metal in slightly so that the folded metal grabs the threshold.
Roe Osborn
Hold the wire 1 1/2 inches off the bottom of the shower pan, wit…
Hold the wire 1 1/2 inches off the bottom of the shower pan, with the factory edge (without sharp edges that could puncture the membrane) on the inside of the pan.
Roe Osborn
After slipping the mesh over the threshold, nail it from the out…
After slipping the mesh over the threshold, nail it from the outside only to hold it in place.
Roe Osborn
Coat the expanded metal with thinset to finish prepping the thre…
Coat the expanded metal with thinset to finish prepping the threshold.
Roe Osborn
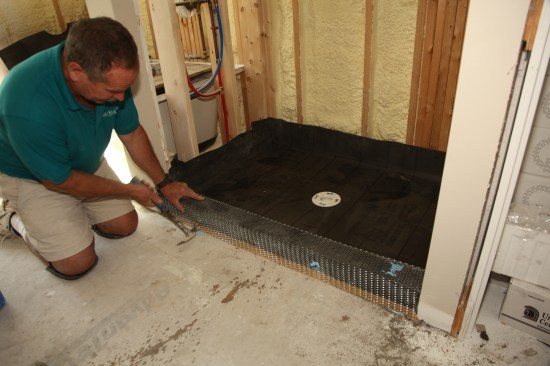
To keep the weep holes in the drain clear, spread a small amount…
To keep the weep holes in the drain clear, spread a small amount of pea stone around the base of the drain.
Roe Osborn
Dump several buckets of dry-pack mortar (the same mix that was u…
Dump several buckets of dry-pack mortar (the same mix that was used to create the sloped layer) onto the membrane.
Roe Osborn
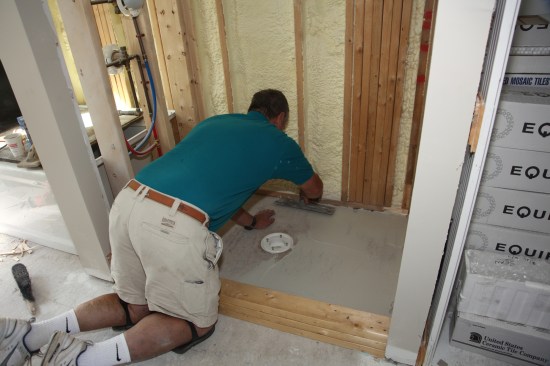
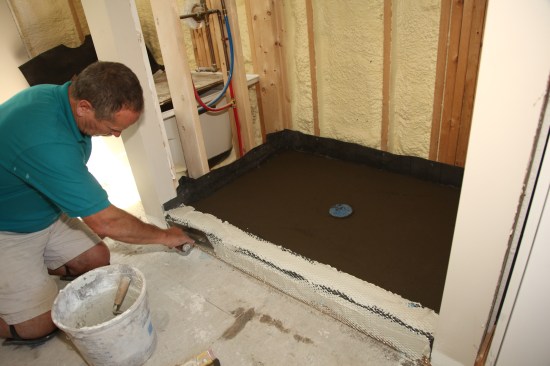
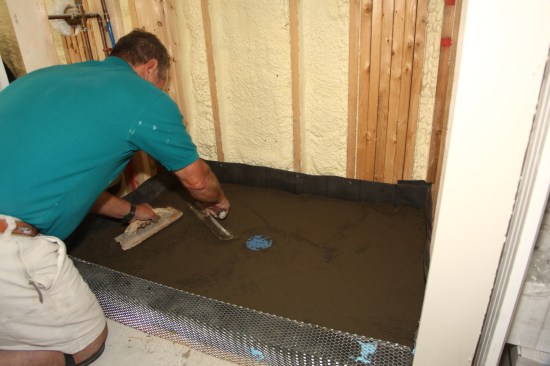
Pack the mortar tight to the membrane, especially in the corners…
Pack the mortar tight to the membrane, especially in the corners, along the perimeter of the shower, and around the drain. Smooth the mixture using a wood float and a steel floating trowel.
Roe Osborn
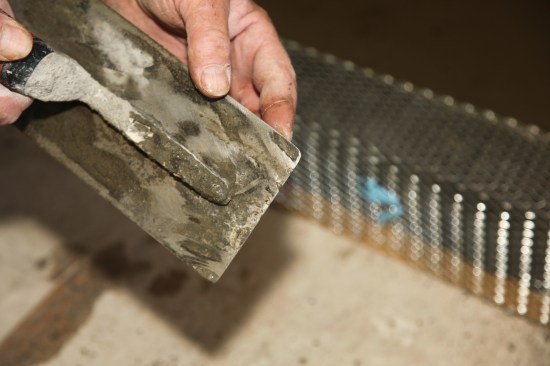
Be sure the corners of the steel trowel are rounded to keep them…
Be sure the corners of the steel trowel are rounded to keep them from damaging the membrane.
Roe Osborn
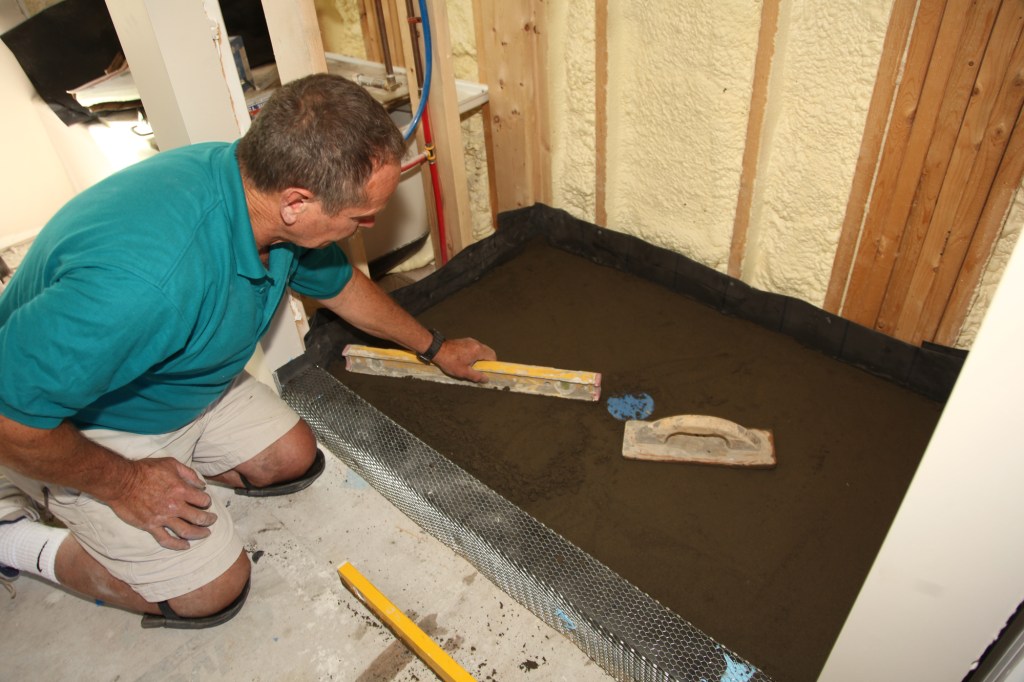
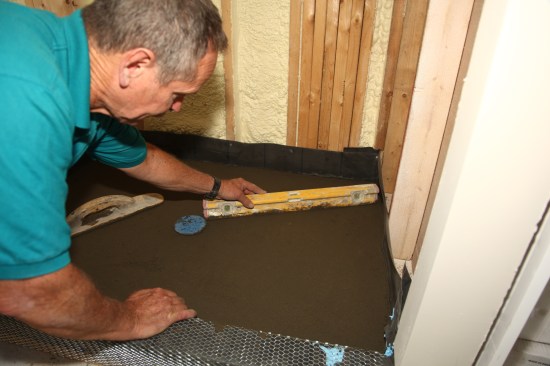
Screed the final surface perfectly flat with no voids. For this …
Screed the final surface perfectly flat with no voids. For this step, a level works well to make sure that the surface of the mud base is sloped at around 1/4 inch per foot toward the drain.
1
of 5
Roe Osborn
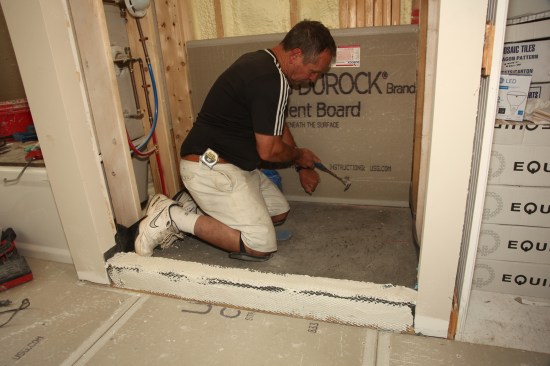
Many tile installers put the backerboard on before installing th…
Many tile installers put the backerboard on before installing the mud base, which is acceptable if the board is kept off the surface of the pan—where it could wick up moisture and cause discoloration of the tiles. But this method requires the installer to step on the membrane, potentially exposing
it to damage.
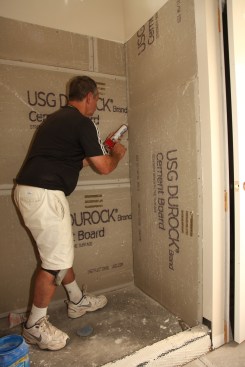
Instead, wait until after the mud base is installed to install the backerboard, so that you never have to step on the membrane. With this method, the board can sit directly on top of the mud layer. Attach the board with 1 1/2 -inch galvanized roofing nails, keeping all the nails at least 2 inches above the top of the threshold.
Roe Osborn
After the backerboard is nailed in, seal the corners with a bead…
After the backerboard is nailed in, seal the corners with a bead of silicone caulk.
Roe Osborn
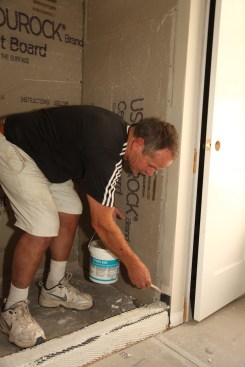
If there are areas where the tile will overlap onto a finished w…
If there are areas where the tile will overlap onto a finished wall surface—like the sides of the shower entry on this project—brush a liquid waterproofing membrane, such as Hydro Ban, on the overlapping area.
Roe Osborn
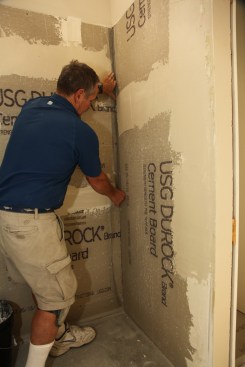
Apply heavy-duty mesh tape to the corners, as well as to the sea…
Apply heavy-duty mesh tape to the corners, as well as to the seams between the boards.
Roe Osborn
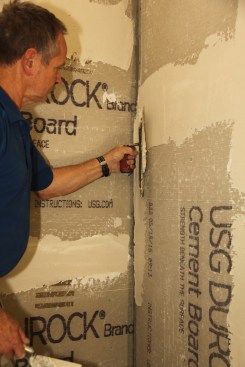
Spread a coat of thinset mortar over all the seams before beginn…
Spread a coat of thinset mortar over all the seams before beginning the tile installation.
When I started tiling, we didn’t do our own shower pans—that job fell to the plumbers. They put down a lead or copper liner in the framed shower, and then we put in the sloped mud base. When vinyl membranes came along, the plumbers could whip through the process quickly—too quickly, actually. As we put in the mud layer, we often felt chunks of debris under the membrane that would almost certainly wear through and cause leaks.
On one job, the shower developed a leak, and when I tore out the tile, I found that a roofing nail had been left under the membrane. The thin edge of the nail head had sliced through the membrane under the weight of the mud layer. Not wanting to get into a finger-pointing session with the plumber, I fixed the problem and ate the expenses. At that point, I decided to do my own shower pans—start to finish.
Taking over the whole process made sense. Leaks became all but nonexistent, which meant happy clients and fewer callbacks. But it also let us control every step of creating a tiled shower. A leakproof shower starts with the shower pan, but there are other critical steps, as well—most of which happen before any tile is installed.
A strong floor under a shower pan is crucial, but less so than under a tiled floor. The 2 inches or so of mud base adds even more rigidity to the floor of a shower. In new construction, the floors almost always meet the Tile Council (TCNA) guidelines for deflection; in remodels, I reinforce the floor framing from underneath the shower if I have any doubts.
I also make sure the wall framing is finished with adequate nailing for the membrane and the backerboard. The TCNA suggests blocking around the bottom perimeter of the shower to back up the membrane as the mud layer goes in and to support the bottom edge of the backerboard. But when I use 1/2-inch Durock as backerboard, I find that this blocking isn’t necessary on my installations.
Lastly, I make sure that the shower drain is permanently installed, and that all the parts are there. The last thing I need to find out when I start to install the pan and mud layer is that the plumber has to remove the drain for some reason, or that I’m missing a part.