You don’t have to be a stair builder with a shop full of expensive equipment to successfully build great-looking stairs. Any carpenter with a working understanding of the fundamentals of finish carpentry and some patience can build a strong and attractive staircase on site.
I’m a carpenter in a small town where there’s not much specialization in the residential remodeling world. This means that I have my hands on just about all of the carpentry needed in the remodeling projects that I build.
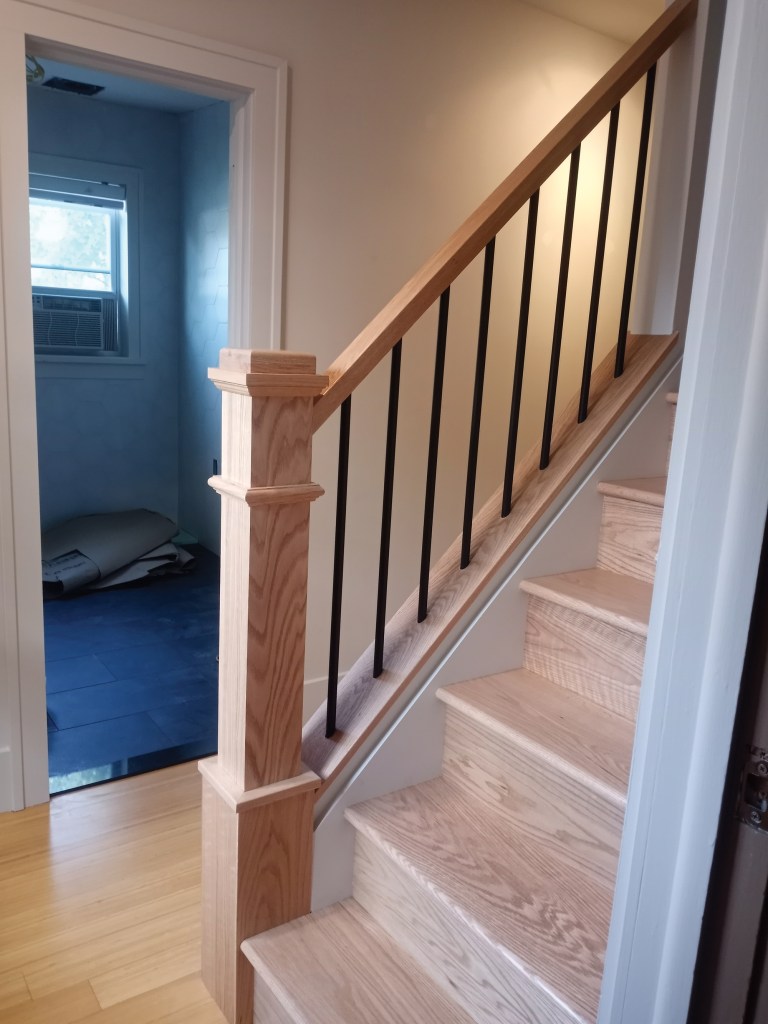
I recently had the opportunity to build a set of interior oak stairs for a customer. The design the customer wanted was simple and tasteful; the project provides a great example of how I approach building stairs.
Measure the Space
First, I determined the overall rise and run of the stair. I measured the run from the start of the opening to the farthest point the stairs could reach into the hallway. To find the rise, I set up a horizontal laser level on a toolbox (the elevation of the laser level is arbitrary, so I set it up on whatever is handy), measured up from the finished floor at the bottom end of the run to the level, then added that measurement to the distance from the finished upper floor down to the level.
Next, I punched those numbers into a construction calculator app. The calculator provided all the relevant information for cutting the stringers: unit rise, unit run, number of treads and risers, angle of incline, stairwell opening, and stringer length. I like to write this information down on a scrap board that I hang onto until the job is done.


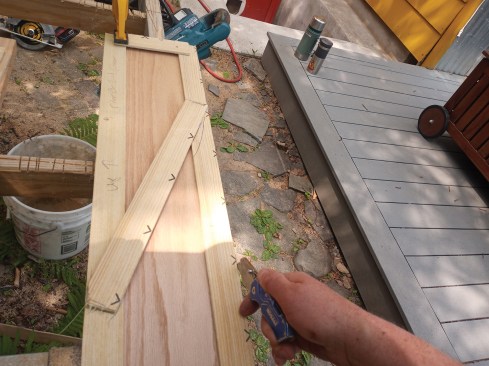
By including all the necessary measurements on a story pole, the author created a layout tool and point of reference for the duration of the project (left). He cut the first stringer and placed it in the opening to confirm fit and make any necessary adjustments. This stringer would be the template for the remaining two (above).
Layout Is Key
For stairs, I always create a story pole with each subtread, tread, riser, and the finished floors marked on it. A fairly straight 10-foot 2×4 does the trick. I place this story pole in the stairwell to check my math, or I simply measure from the finished floor to finished-floor marks on the story pole to make sure the layout matches the overall rise measurement I took of the space.
Once I’m satisfied that the rise math is correct, I lay out the cuts on the stringer. On this project, I used LVL, a solid choice for stringers because it is straight, strong, and stable. Rather than rely on framing-square stair gauges, which can accumulate error, I use the hypotenuse of the notch I’ll be cutting to lay out where I’ll place the framing square. To find the hypotenuse of the triangle, I just punch in the unit rise and unit run and hit the hypotenuse button on the calculator. Then, I add the hypotenuse to itself to establish the first mark and hit the equals button for each following mark. I align the framing square to the hypotenuse marks and trace the square. Once I cut the notches, I set the stringer in place temporarily to check my run math before using it as a template to lay out the remaining notched stringers.
Build the Treads and Risers
I prefer to build treads and risers in the shop, as I did for this project, but they can be built on site if space allows. I ripped the subtreads to width from a good-quality, AC-grade plywood. Because the other trades would use the framed stairs before I applied the finished treads and risers, I added subrisers for strength.
For stain-grade treads, I prefer mail-order premade treads, which I used here, from a good stair-parts manufacturer; the oak treads at the home centers are usually littered with finger joints or repetitive veneers that are applied to a poplar core. I plowed a groove just behind the nosing on the underside of the treads and cut them to their final dimensions so that the finished risers and treads would protrude beyond the stringer by a minimum of 1/8 inch per side.
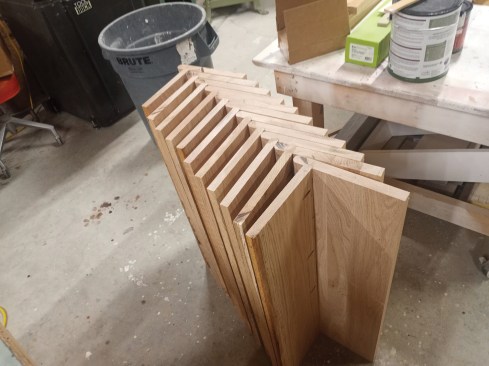
I made the stain-grade risers with 4/4 boards from the lumberyard. I cut them to their final dimensions, making sure the miter saw was dialed in as close to perfect as possible to avoid accumulating errors.
At this point in the process, I prefer to sand the treads and risers to a minimum of 180 grit, then prefinish them with stain (where applicable) and two coats of polyurethane. Once I had done that here, I preassembled the treads and risers in pairs using PL oil-based construction adhesive, followed by pocket screws and corner blocks to hold things square while the glue cured (See slideshow below). The riser fit into the groove I routed earlier on the bottom of the tread; this negated the need for a scotia/cove molding and ensured that the unit run would be exactly the same from tread to tread, even if the stringer cuts were a little bit off. I didn’t preassemble the bottom riser and tread, however, because I like to scribe them to fit at the end.
Assemble the Framing
With the treads and risers ready to go, I put together and installed the framing assembly. I assembled it on the floor, using the subrisers and subtreads to keep everything square (temporary diagonals would work if you were not installing subtreads). I set the assembly into the stairwell and applied the subtreads flush to the outer stringers with PL adhesive and framing screws.
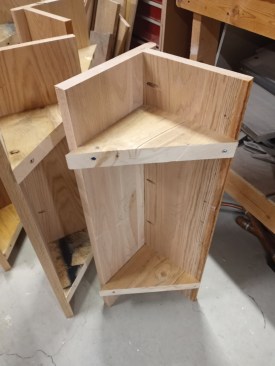


Reusable corner blocks kept each assembly square while the glue …
Install the Finished Treads and Risers
Starting with the top tread assembly (not the landing tread), I glued the tread-riser assemblies down with PL (See slideshow left). I face-screwed each tread through the back of the riser, predrilling first to prevent blowout or snapped screws.
Alternatively, I could have used a framing or washer-head screw, then blind-screwed the treads to the subtreads from below. And if you don’t have subrisers, you can toenail through the stringers to blind-screw the riser to the stringers with a fine-thread pocket screw.
With this stair design, it made sense to install newel posts at this time. Lastly, I installed the lowermost tread.
Attach the Skirtboards
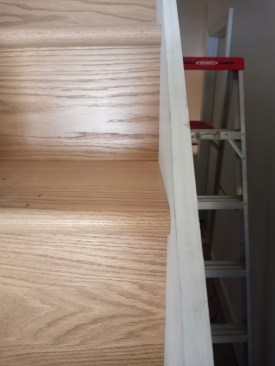
When the stairs are penned in by finished walls on both sides, I attach the skirtboard by toenailing through the underside of the nosing, which draws the skirtboard tight to the nosing. But since here I could access the sides of the stringers, I face-screwed the skirtboards directly to the end grain of the treads and risers. I used a pants jig with a backing block to mark where to place the screws (the depth of the nosing determines how thick the backing block needs to be). I traced the risers and treads onto the back of the skirtboard, then predrilled and fastened the skirtboard to the treads and risers with countersunk framing screws.

The pants jig the author created allowed him to trace out where the fasteners could be placed.
Proper placement allows for a tight fit of the skirtboard. This jig can be saved for future projects.
Bottom and Top Risers and Landing Tread
With the stairs in place and both skirtboards attached, I could scribe and attach the bottom riser, top riser, and landing tread. I templated the space for these components using strips of lauan and a hot glue gun. For the bottom riser, I scribed the lauan strip that contacted the floor and then built the rest of template to fit the space. Next, I placed the template on the finish material and traced it with a sharp utility knife. Using those lines, I cut the riser to size for a perfect fit. I repeated this process as needed with the other components.
With a lauan template placed on top of the riser, scored lines can be made to match the floor and tread.

Using the template, the author creates a tight, scribed fit at all the edges.
I glued the finished components in place and blind-fastened where I could. There are usually a couple of fastener holes to fill on the top riser and the landing tread, but I keep them to a minimum by toenailing through the top of the top riser and the back of the landing tread.
Balustrade
As with the stairs, I created a story pole for the balustrade, with lines representing the thickness of the balusters at 4 inches on-center. I clamped the story pole at an angle so the lower newel post just barely hid the first baluster mark and the upper newel post (or termination point of the balustrade such as a wall) just barely hid the upper baluster mark. Then I plumbed down from the center of the story pole baluster marks and marked the wall cap (or shoe rail).

With the story pole clamped in place, lines are plumbed to the wall cap and marked to the handrail. By templating, the author could visualize the completed product before drilling finish material.
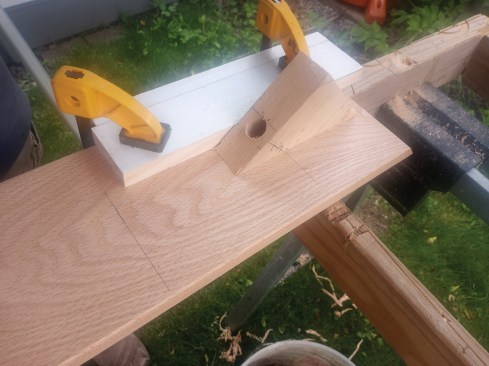
Angle blocks and clamps kept drilling consistent for spindle installation. Drilling was done on site allowing for double checks and adjustments.
I drilled out the wall cap and underside of the handrail using angled guide blocks that I made from the stringer cutouts. After starting the holes with a hole saw, I chiseled away some of the waste in the workpiece, then finished drilling the holes with a Forstner bit. An offcut from the handrail served as a guide block for drilling the hanger-bolt hole in both the newel post and the handrail. Then it was a matter of installing the hanger bolts, toenailing the handrail to the wall, and plugging all the holes. I trimmed the plugs flush and lightly sanded the handrail before finishing it with polyurethane to complete the project.
On-Site Advantages
Building a staircase on site is especially helpful if you don’t have access to a local stair builder or if you are on a tight time line that local subcontractors can’t meet. Site-built stairs with notched stringers, subtreads, and subrisers provide a safe, temporary staircase for use during a new build or a large remodeling project. At the end of the project, the subtreads and subrisers can simply be scraped and mopped clean before the finished treads and risers are installed. On a remodeling project, individual components are easier to stain and finish outside the customer’s home, and these smaller parts are easier to move and scribe to fit.
Photos by Nathan Clark.


