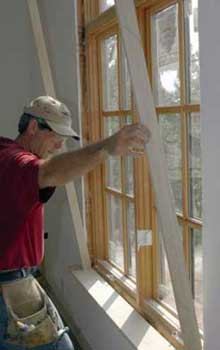
Just about all my trim details could be described as old-fashioned; I like to build new houses with the traditional look and feel of homes built a century ago. I still cope molding joints rather than resort to corner blocks, and I still build railings with balusters and handrails rather than using drywalled cripple walls with wood caps. I don’t take shortcuts when it comes to trimming the windows, either: Instead of picture-framing the units, I always build stools with aprons underneath and fitted window casings.
Years ago, when I was trimming apartments, I could make a window stool and install it with casings and an apron in less than 30 minutes. Today I spend several hours to trim out a single window using the method described in this article. I consider it time well-spent, however, because nearly everyone notices how attractive my windows are. I’ve even gotten a couple of new homes to build because of my window detailing.
Even though I own a high-end custom residential construction company, at heart I’m basically a trim carpenter. This approach — careful detailing of traditional trim — reflects my passion for fine interior millwork and has been responsible, in part, for our success in the lucrative custom-home market.
The Look Starts With the Stool
The window stool is critical to giving new windows the character of homes built 100 years ago, so that’s where I focus much of my attention. Instead of 3/4-inch stock, I always use material of at least one inch thick, which better matches the standard stools of that era. I typically use 5/4 poplar for paint-grade work, choosing the flattest, straightest lumber I can find. I clean up both faces with my planer and belt sander while leaving as much thickness as possible — preferably more than an inch.
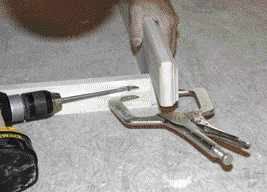
I also think that a traditional-style stool should have a routed cove-and-bead profile that faces down, with the top edge simply rounded over. That seems to best match the stool profiles I’ve seen in photos and old millwork catalogues. While the exact underside profile isn’t critical, I generally use a 5/16-inch roundover bit to profile the upper edge. A smaller bit doesn’t take enough off, and a larger bit can interfere with the underside profile, particularly when you’re using thinner stock. Before routing the stool, I carefully check that the edge of the stock the bearing rides on is defect-free, since any small void or irregularity will be transferred to the profile.
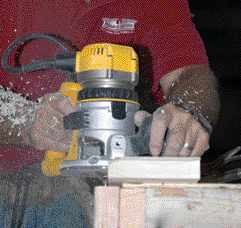
For the look of a traditional stool, the author uses full 1-inch-thick stock profiled with a router. He shapes the bottom edge with a cove-and-bead bit and the top edge with a 5/16-inch roundover bit.

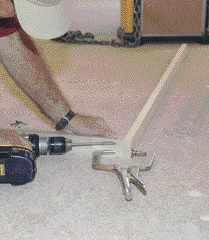
The finished edge profile with the router and trimmer held in place.
To determine the stool’s length, I measure between the inside faces of the window jambs and add 3 inches to allow for stool overhangs, jamb reveals, and casing reveals, plus twice the width of the casing trim.
For the apron style that I use here, the stool must be wide enough to leave 2 1/2-inch-wide ears after it’s notched around the drywall. I start the cuts for the ears with my table saw, then finish them with a jigsaw.
Install the Jamb Extensions And Stool as a Unit
Before installing the stool, I first cut and assemble the jamb extensions from 3/4-inch stock. I carefully measure from the outer edge of the window jamb to the surface of the finish drywall at the window’s four corners, then do a quick drawing of the required jamb extensions. Unless you are living in a perfect world, these widths will vary slightly, and so should your jamb extensions.
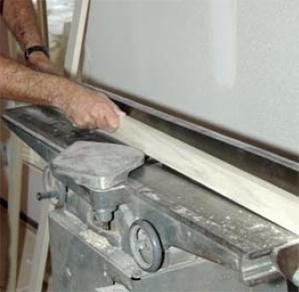
A jointer tapers the extensions so they match the plane of the drywall next to the window.
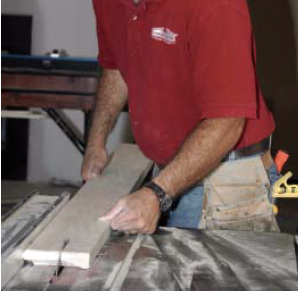
It helps to have the right tools: The author uses a table saw to cut the ears on the stool.
I take the time to taper the jamb extensions with my jointer to the correct width for each corner, though this same taper could also be cut with a power planer or even a block plane. I also back cut the extensions with a 2-degree bevel on their face, with the high point on the inner edge (a good reason to use a jointer). This extra step helps me get precise mitered casing joints, because it allows the miters (which I also back cut) to lie flat against the wall even if the jamb extensions extend slightly past the wall plane.
When working with larger windows, I like to install the jamb extensions and stool together as a unit. First I fasten the jamb extensions together at the top butt joints with pocket screws, and then I pocket-screw the side extension jambs to the stool. The pocket screws offer a very strong, tight connection without requiring glue, allowing me to shim and install the whole assembly at one time. On smaller windows with shorter stool stock, where extra joint strength isn’t necessary, it’s okay to simply use pins or staples to fasten the extensions together and the stool to the extensions from underneath.
I size the jamb extensions to leave a 1/4-inch reveal where the extension meets the window jamb. On casement units, I like to leave a larger 1/2- to 3/4-inch reveal along the bottom of the window above the stool, so the crank can turn freely.
On large windows the author attaches the stool with screws; on small ones he pins the stool to the side jambs from beneath.
Pocket screws hold the jamb extensions together so they can be installed as a unit.
After setting the jamb extension and stool assembly in place against the window, I center and shim the stool to have an even reveal along the bottom of the window. For twin window units, I use a straightedge to make sure there are no humps or dips in the stool.
I also use the straightedge to check the window jambs. While the windows may not always be perfectly plumb, it’s more important that the jambs and their extensions are straight and square. When the head jamb extension is centered with an even reveal at each side jamb, I check the side jambs and extensions with the straightedge, shim to fit, then secure the jamb extensions and stool by nailing through the shims into the framing.
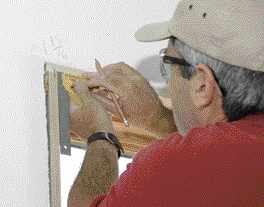
The author marks the 1/4-inch reveals around the perimeter of the window.
He then sets the side casings in place on the window stool and transfers the mark to the casing.

He joins the miter together with glue, and cross-pins the joints.
Tight Miters
After I’ve installed the jamb extensions, I begin casing the window by first marking the 1/4-inch reveals along the faces of the jambs with a tri-square. Most of the time, I’m installing a profiled casing with mitered corners, which typically requires more careful fitting than flat casings with butt joints. I get the best results by nailing both of the side casings on first, then fitting the head casing.
Rather than use a tape measure, I mark the side casings in place, using my reveal markings on the jambs. After cutting the 45-degree miters, I like to block-plane a little back relief on each miter cut, which makes it a lot easier to get a tight joint later on.
With the side casings nailed in place, I cut the head casing about 1/8 inch too long. This allows me to check the fit at each corner when I’m centering the head casing, and to make small adjustments in the miter cuts for near-perfect joints. I think it’s worth making a couple of extra cuts to get great joints. Also, with the back-cut on the casing miters and the 2-degree bevel on the outer edge of the jamb extensions, I can get tight miters even if the jamb extensions are slightly proud of the wall in spots. No matter what type of material I’m using, I always glue and cross-pin the joints.
Three-Piece Apron Dresses Up the Trim
Finally, I build a detailed apron by wrapping the two long edges of a 1×3 with a decorative molding. For this window, I used stock panel molding, but any base cap or similar molding that has a square shoulder would also work.
Building up a three-piece molding is a lot more work than using the standard piece of casing as the apron. By the time you’ve completed the last return of panel molding, you’ve actually cut and assembled seven pieces, including the four mitered returns. But I’ve found that just about everything in construction that looks better requires a little extra work.
The 1×3 apron is wrapped with panel molding top and bottom.
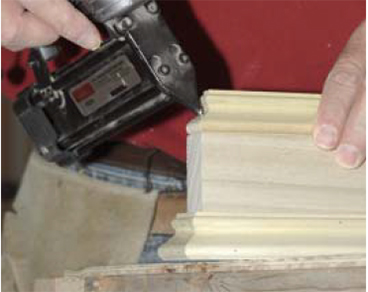
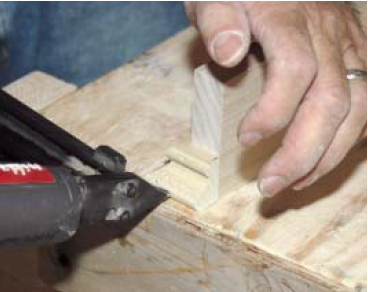
The author glues and pins the small pieces together with a 23-gauge headless pinner.
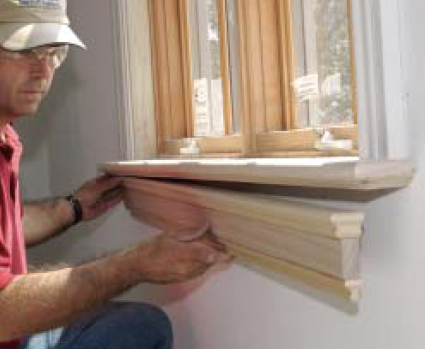
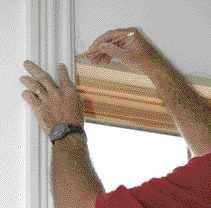
Then he installs the apron in one piece.
To find the length of the 1×3 apron, I measure across the window from outside to outside of the casing and subtract 1 1/2 inches to allow for the two 3/4-inch-thick molding returns. After cutting the 1×3 to length, I typically glue and nail in place the panel molding pieces that wrap the top and bottom of the apron. I use a 23-gauge headless pinner for this because it won’t split the short return pieces of molding, and it leaves small holes that are easily filled.
The last step is nailing the apron assembly under the stool. I take care to center it accurately, using centerline measurements marked on both the apron and the drywall, since any offset will appear visually exaggerated by the built-up trim. If I have done everything right, the outside edges of the panel mold returns should line up with the outside of the casing trim.


