
Roe Osborn
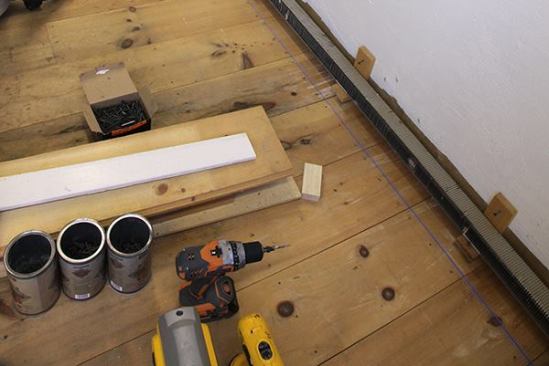
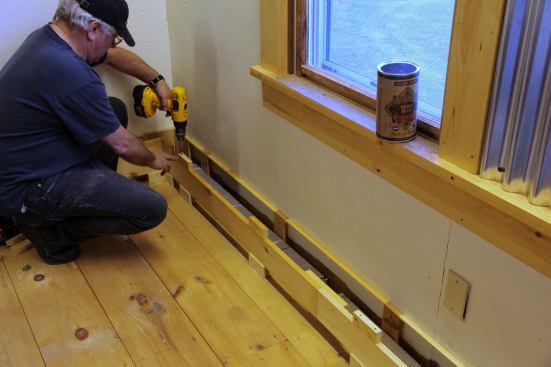
Before laying out the 2-foot centers for the base blocks, we sna…
My New Year’s resolution for 2014—besides writing a blog entry every week—is to finish the studio/gallery in my barn in time for Spring. The barn is a story and a half structure that sits about 50 feet in back of my house—bright yellow, with the old barn doors built into the siding during a past renovation (hero). The walls and floors are insulated, and hydronic baseboard heat piped over from the house keeps the place warm enough so that I don’t have to wear mittens to work in my upstairs office—All-in-all a pretty cool space.
The owner responsible for the last renovation sold floor coverings (mostly carpet) out of the barn. Like any of us, he finished the inside of the barn with the material at hand. So when I bought the place in ’05, the first-floor walls were covered with dark grey indoor/outdoor carpet, with caca brown industrial-grade carpet on the floors. In 2010, with a vision of creating a place to display my sculpture and photography, I got a dumpster and started removing the carpet from both the walls and the floor. The carpet on the floor was as gross as it gets, with dog stains and mouse droppings, so removing it required a face mask and a haz-mat suit. Conversely, the carpet on the walls was fairly clean and came down with little effort. The best part was that the wall carpet had been glued to CDX plywood—a perfect wall material for displaying art in a barn. I could hang stuff anywhere! The worst part was that the baseboard heat had gone in after the walls were carpeted. After trying various strategies to remove the bottom section of carpet from behind the covers, I opted to get rid of the dented and rusty old covers while I still had space in the dumpster. I needed to support the heating element that ran along two walls, so I used what I had and what I knew—wood—making T-shaped support brackets screwed to the wall every couple of feet. In the years since then, I’ve added windows, painted the walls, replaced the entry door, and put in new wide-board pine floors inside, while outside I built a new entry with a ramp and a pergola.
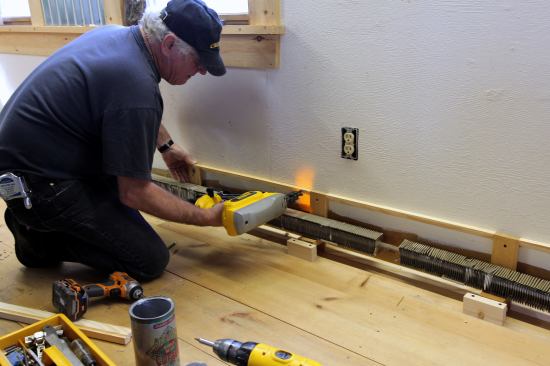
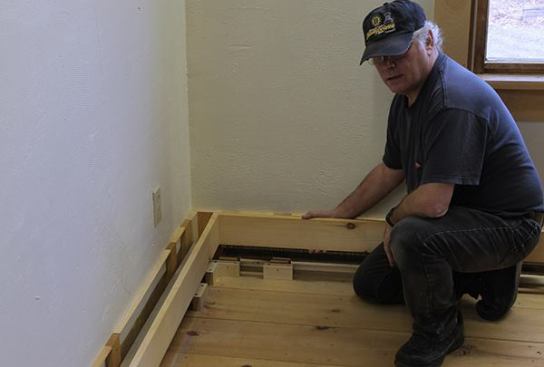
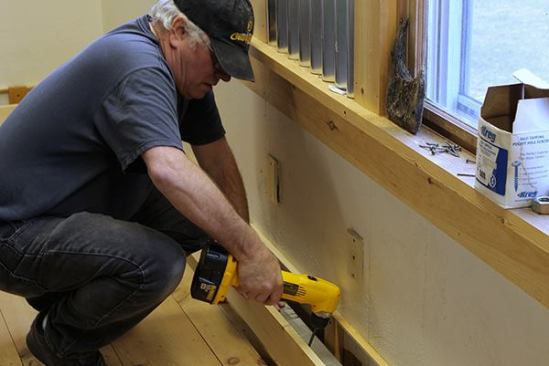
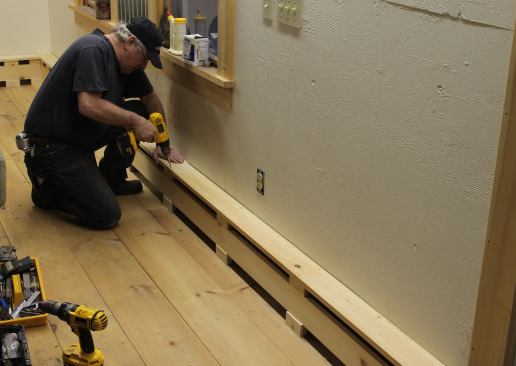
Which brings us to the present and the real topic of this blog: As of last Sunday morning the bare heating element was still perched on those funky brackets I’d installed years before. I’d decided early on to make custom wooden covers, but didn’t finalize the design until the end of last year. In the name of speed and my established “rustic barn aesthetic” (read: quick and dirty finish work), my design combined stock 1×5 boards with simple ripped blocks to create the ventilated enclosure. Randy Patterson, a musician buddy of mine who does remodeling, came to help me with the install last Sunday.
I had all the materials ready and moved stuff like my orange and bay laurel trees away from the wall to give us room to work. Randy pulled up in his old Toyota pick-up at around ten. By four o’ clock the enclosures were done except for a light sanding and the band molding that will cover the gaps from the wavy walls (see slide show of the process). In keeping with the unrefined décor, I will keep the #2 pine natural and unfinished and we made all visible attachments with exposed finish-head screws. I’m hoping that our efforts will appear in an On the Job piece for JLC in the near future, not as a lesson in fine finish carpentry, but more as a strategy for building custom hydronic baseboard covers, that could be modified or adapted to any level of finish to fit any type of décor.
We’d love to hear from any readers who have done their own custom baseboard covers. Please share your design ideas or methods with us.


