Q: Does the bottom of a niche in a tiled shower have to be a single piece, or can I use multiple tiles?
A: Tom Meehan, a second-generation tile installer and co-author of Working with Tile who lives and works in Harwich, Mass., responds: Either option is acceptable if you have waterproofed the inside of the niche completely and carefully. That waterproofing can come in a few forms.
One way to create a waterproof niche is by using a preformed manufactured niche pan or insert. Most of these products fit within standard 16-inch stud spacing and the depth of 2×4 walls. The materials that these niches are made of can vary tremendously, but most are a type of plastic or composite material. These factory-made units come in a variety of configurations—many with integral shelves. Many companies, including Laticrete and Schluter, that make tile installation materials also offer choices in preformed niches.
Factory-made niches come with attachment flanges around the perimeter of the openings. These flanges go over or are let into the wallboard of the shower and must be integrated with the system for waterproofing the wallboard. One caution when installing a preformed niche is to make sure that the flange does not cause the tile around the opening to flare out. Schluter makes preformed niches from Kerdi board, its own waterproof wallboard. The flange (made out of the same wallboard) installs flush with the walls of the shower, making it easy to integrate the niche without a significant raised area around the perimeter.
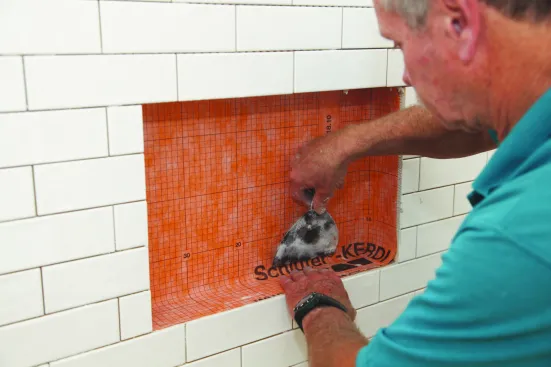
Next, apply waterproof membrane, bedding it in unmodified thinset.
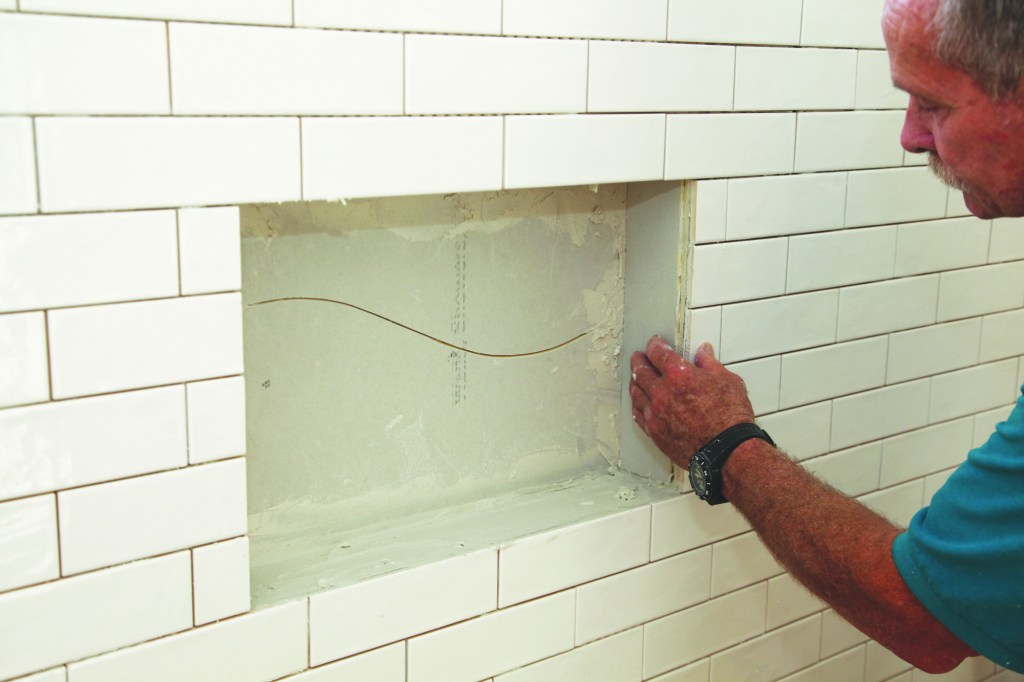
Although I have installed manufactured niches, I most often custom-make niches to fit in specific places in a shower. In the project I wrote about in “Tiling a Walk-In Shower” (Nov/19), we lined up a niche below the window in the shower. I first lined the inside of the niche with waterproof Johns Manville GoBoard backerboard (the same board that we installed in the rest of the shower), bedding it in modified thinset. Then I cut and installed a layer of Schluter’s Kerdi waterproofing membrane. At that point, the niche was essentially waterproof, so it didn’t matter that I used two pieces of stone tile to cover the bottom of the niche.
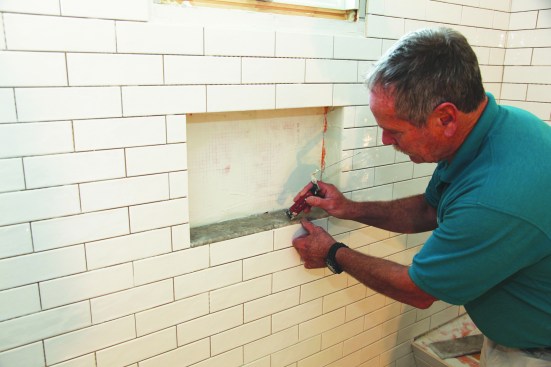
With the waterproofing complete, install the tile starting with the bottom of the niche, which should have a slight pitch for drainage.
That said, there are a few key points that I always try to address when installing shower niches. First, I encourage clients to locate the niche on a wall that receives a minimal amount of direct water from the shower. After waterproofing the niche, I install the bottom pieces with a slight pitch so that the water runs out and doesn’t pool in the niche. Also, if using porous tile (such as the limestone for this niche), I make sure that the tile is sealed properly before the clients use the shower.
Photos by Roe Osborn


