Gary Striegler
Composition ornament is a time-tested, fast, and inexpensive way…
I do a lot of high-end finish work on the houses I build, and I’m always looking to upgrade the look of my work. Applying composition ornament is the fastest, most economical way I know. Composition ornament is available in literally thousands of patterns for just about any application you can imagine.
Composition ornament, made from pressing a bulk material called “compo” into molds, has been around for centuries. With its beginnings in Europe, composition ornament eventually made its way to this country. Recipes for the compo vary from manufacturer to manufacturer, but they all contain glue that is activated by heat and water. The supplier I use, Bomar Designs, won’t divulge the details of its recipe, but it does sell compo in bulk along with instructions for making your own ornamental pieces.
Composition ornament can be installed by applying glue to the back side and securing the piece in place using brads or small nails. But the beauty of composition ornament is that once it’s heated, the glue in the material itself is activated and the material becomes self-adhering. It also turns flexible when heated, making it easy to form curved or irregular surfaces. I have applied patterns to standard crown molding or 1-by stock, instantly giving me deep relief detail at a fraction of the price of carved molding. I can also make just the amount of molding I need; in fact, my supplier will sell single pieces if needed. But if you’re using composition ornament for the first time, get a little extra, just to be on the safe side.
Application
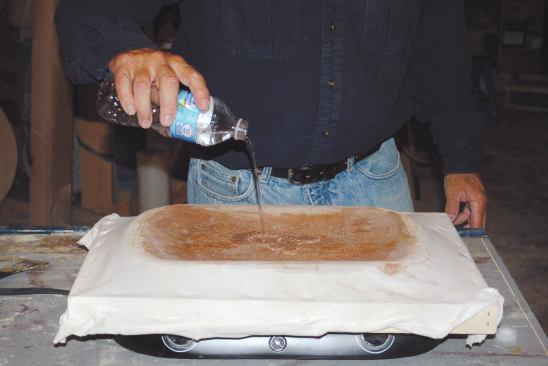
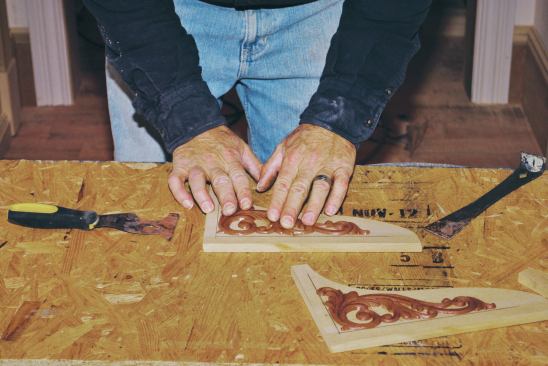
Applying composition ornament is a fairly simple process, although a little experience goes a long way. The equipment I use for heating is low-tech: a roasting pan on top of a two-burner hotplate. I made a wooden frame that is a little bigger than the roasting pan and stapled a piece of fabric over the frame. The type of cloth doesn’t matter; some folks use cheesecloth or even an old T-shirt.
I start by putting water in the roasting pan and turning on the heat to get the water steaming. Then I set the cloth frame over the roasting pan and pour some more water over the cloth to dampen it. Some people use a spritzer bottle to moisten the cloth. When a lot of steam starts to form, I lay the pieces of composition ornament on the cloth with the relief side facing up. I have the material I’m applying the ornament to all ready to go—cleaned and free of any dust or debris.
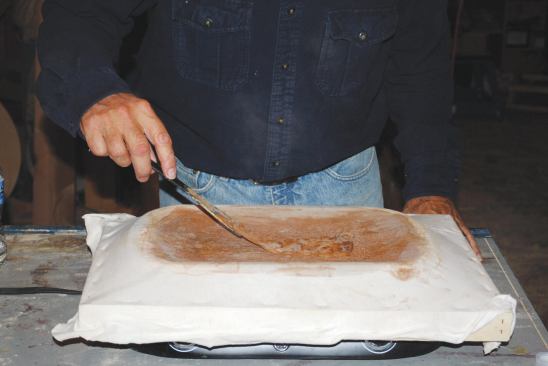
It takes practice to know exactly when to remove the ornament from the steam. The thinnest material takes just 30 seconds or so, but thicker profiles can take a couple of minutes. With a little experience, you’ll know when it’s ready. If you remove the piece from the steam too soon, it will be stiff and the glue won’t be activated. But you can always reheat it and then reapply it. If you leave a piece in the steam too long, it will become too flexible and can distort when you try to move it. I feel the top face of the ornament, and when it’s warm to the touch, it’s ready to be applied. At that point the back side gets sticky as the glue in the material activates.
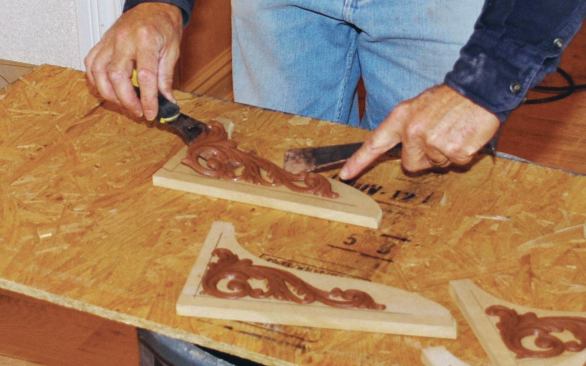
I pick the piece off the cloth and set it in place. I generally use my bare hands—if the piece is too hot to handle, it has probably been left on the heat too long. You have a minute or so to adjust the exact positioning. If there is more than one piece of ornament to be aligned on a single piece of molding, I’ll steam two ornament pieces at a time. As I pull one piece out and apply it, I put another in the steam. That way I develop a rhythm and can install the ornament as a continuous process.
Thinner pieces of composition ornament tend to get very flimsy when they’re heated, so I remove them from the heat using putty knives or similar flat tools to support them and prevent them from stretching or distorting. I use these tools for large pieces as well, where it also helps to have an extra set of hands.
After sliding the ornament off the putty knives, I position it and press it down until it begins to cool and the glue adheres, usually in a minute or less. If the surface is curved, as with crown molding, it might take a little longer for the piece to conform and fully adhere to the curve. As soon as the ornament is completely cooled, the embellished piece of trim that you’ve made can be cut and installed using regular tools. I try to install any trim that I make with composition ornament as soon as possible.
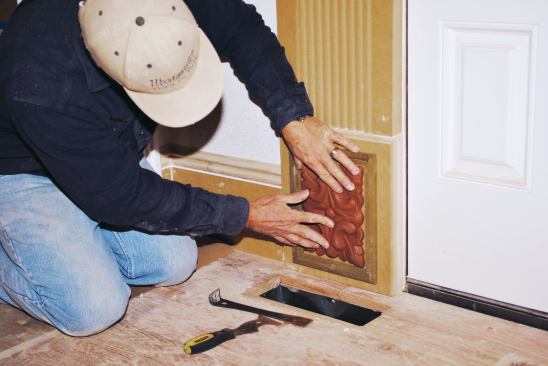
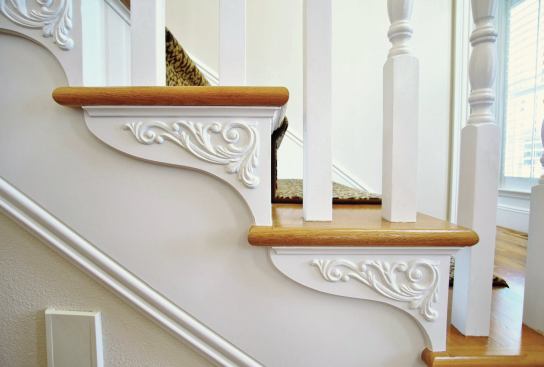
In addition to making embellished molding, I often install medallions or rosettes as part of a pediment over a door or to dress up plinth blocks. Composition ornament can be installed on ceilings as well. When installing pieces on vertical surfaces or overhead, you may have to hold them in place longer to make sure they are completely adhered.
Finishing
Another plus with this material is that it takes a finish really well, and it is paint-ready without needing to be sanded. I like to wait a couple of days after I’ve applied the ornament before I finish the work. After priming, I caulk any small gaps, then apply the finish coats of paint. Composition ornament can also be stained with full-bodied dark stains to cover the dark color of the material.
Within a couple of weeks of exposure to the air, composition ornament becomes rock hard. In fact, Bomar Designs recommends putting unused ornament pieces in a plastic bag and then in the freezer if they are not being applied within a week or so. If left out, the pieces become hard and are unusable.
Gary Striegler is president of Craftsman Builders, in Fayetteville, Ark.


