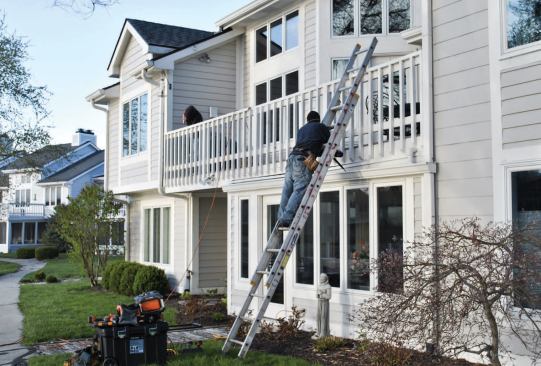
Roof repairs are completed on a second-story pocket deck that le…
In April 2011 I got a call from some Indianapolis homeowners who had a pocket deck that leaked heavily during rainstorms. (They’d placed seven buckets around the room below to catch all the water.) The roof had been installed only three years earlier, but the owners didn’t want to call the original contractor back; instead, they contacted me, because they’d heard that my company had a history of successfully completing low-slope roofs.
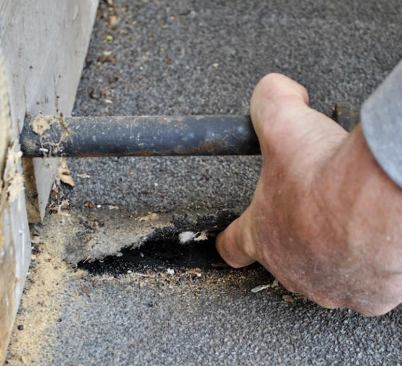
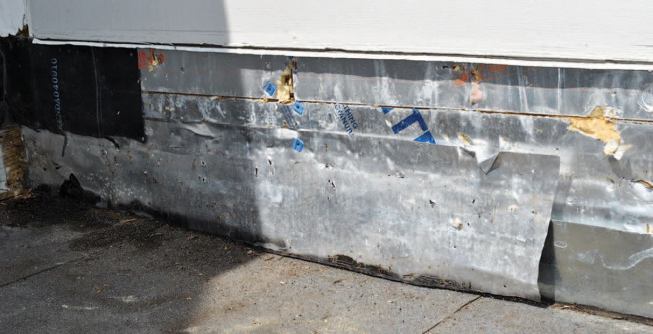
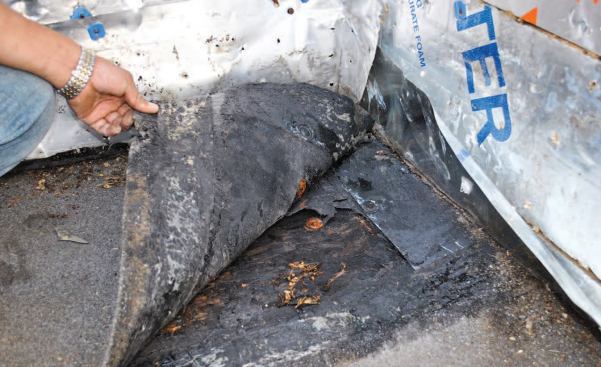
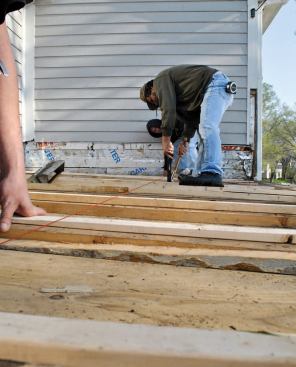
The previous contractor had covered the roof with granulated modified torch-down roll roofing, then installed a walking deck over it. The roof pitched just 1 inch over a span of 11 feet – way too shallow for roll roofing. When we pulled the decking we found that the roof surface had cracked, letting water into the structure. At the wall, where the roll roofing terminated, the contractor had installed coil-stock flashing, but unfortunately he’d used many overlapping short lengths of coil stock instead of long ones, further increasing the likelihood of leaks. The plywood decking below was rotted and moldy.
My roofer, Steve Cuffe of Indy Exteriors, and I came up with a plan: We’d remove the old deck, reroof with EPDM rubber – installed over fiberboard underlayment and glued down with latex bonding adhesive – then rebuild the deck using as many of the old pieces of decking as possible. EPDM is perfect for shallow-pitched roofs, because it can be installed as a single sheet with no seams. And unlike roll roofing, it can be folded up the wall without tearing, helping to make roof-wall intersections watertight.
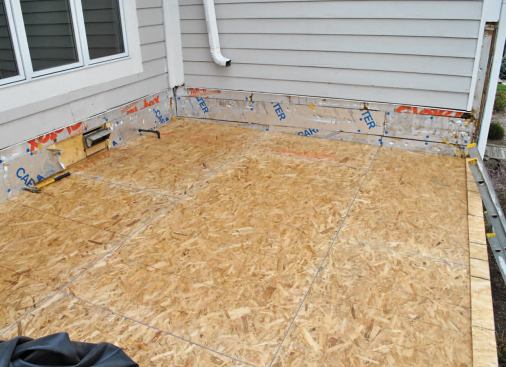
We also decided to pitch the roof a bit more to help with water runoff. Once the old plywood was removed, we placed new 2-by sleepers over the existing sleepers, tapering them to create a slope of about 4 inches over 11 feet. Then we installed new OSB roof decking. Now we were ready for the rubber roof.
Since the sheathing had to be replaced anyway, the author increa…
Installing the Membrane
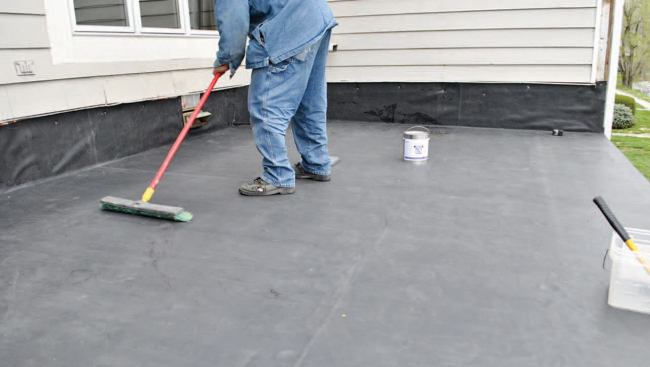
We used .060-inch-thick EPDM on this project, just as we do for all our rubber roofs. It costs about 10 percent more than the .045-inch version, but the extra expense is worth it because the thicker membrane is less prone to punctures during installation.
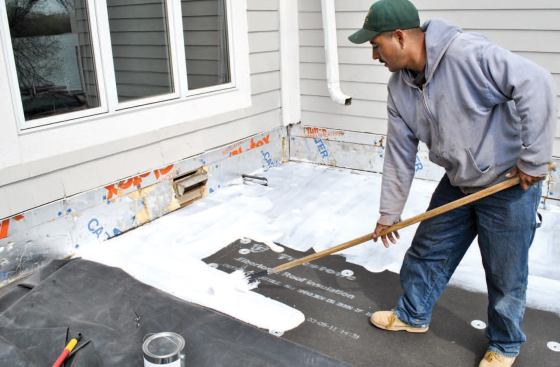
We began by covering the roof surface with 1/2-inch fiberboard underlayment. This material has enough porosity to form a bond with roofing adhesive, and it’s easy to install: You score and cut it like cement board, then fasten it in place with galvanized screws and large-diameter washers.
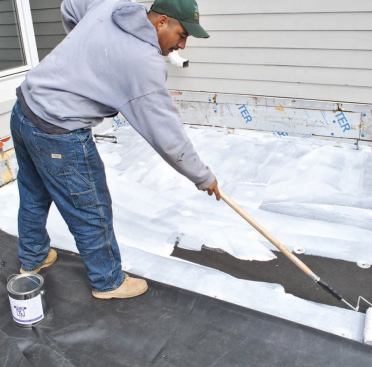
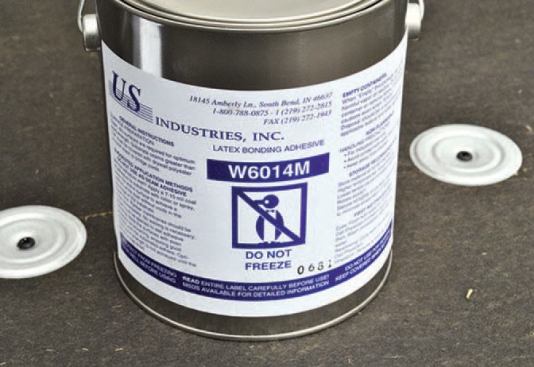
To ensure a good bond, we made sure that the fiberboard was swept clean. Then we poured latex bonding adhesive on the surface and spread it with a 1/2-inch-nap paint roller. The adhesive has the consistency of paint and needs to be spread in such a way that there’s no puddling.
Once the adhesive is on the roof, you have to be prepared to move quickly. The EPDM roofing membrane can be installed as soon as the adhesive is tacky, which takes about five minutes. After that, the installer has only 15 minutes or so to get the membrane smoothed out. Despite the need for speed, the membrane must be handled very carefully. Although it’s unlikely to tear, even the thicker membrane that we use can be punctured by a stray nail.
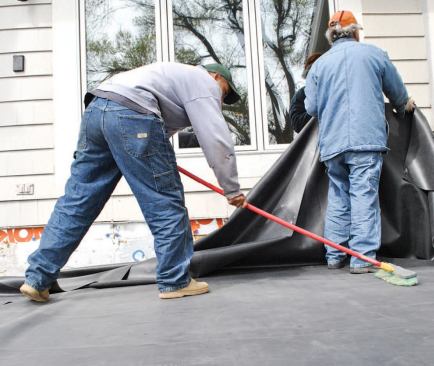
The best way to deal with the time pressure – and encourage proper handling – is to cover the roof surface in sections rather than all at once. On this job, for instance, we cut a piece of roofing big enough for the entire roof but glued down only half of it at a time, folding the extra membrane back over the installed half while we spread the adhesive for the second half. This strategy also makes it easier for the installers to work without stepping on wet adhesive.
The membrane needs to be pulled as tightly as possible over the roof surface, then worked with a push broom. Brooming is a good way to help the membrane bond to the adhesive, work the membrane into edges and corners, and smooth out any bubbles. On a two-step roof like ours, bubbling tends to be more of a problem for the second half of the membrane, because it’s easier to pull the first half tight.
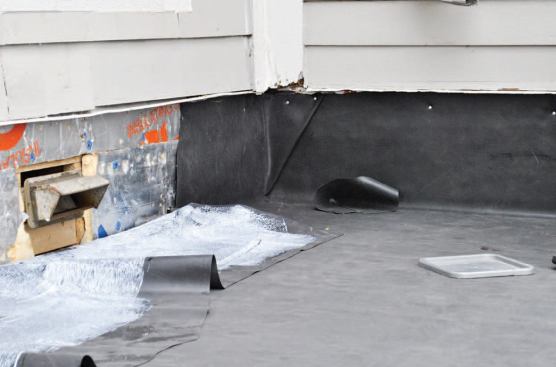
Since this job had a roof-wall intersection, we cut the rubber long in all directions. Once the main part of the roofing was installed and smoothed out, we folded the excess up the wall and trimmed it to its final dimension. Then we rolled some adhesive onto the back of this flap and tacked the top edge to the wall with roofing nails. The glue and nails were a temporary measure – they would hold the wall portion of the membrane in place until we got the ledger and siding installed.
Wall corners are a common source of leaks, so we didn’t make any cuts or seams there; instead, we folded the membrane over. The only cuts on this job were around the kitchen exhaust vent and a nearby gas pipe that penetrated both the roof and the wall.
Once the wall membrane was installed and held in place, we went over the main roof surface with the broom once again to make sure that all bubbles had been removed.


