
Kyle Diamond
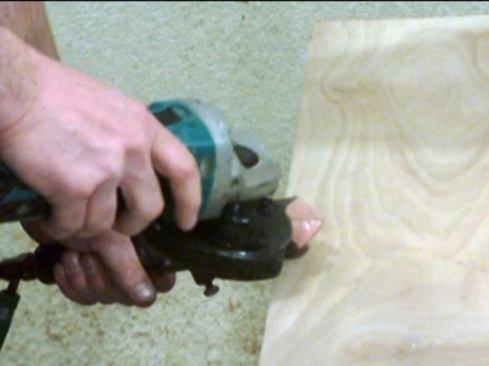
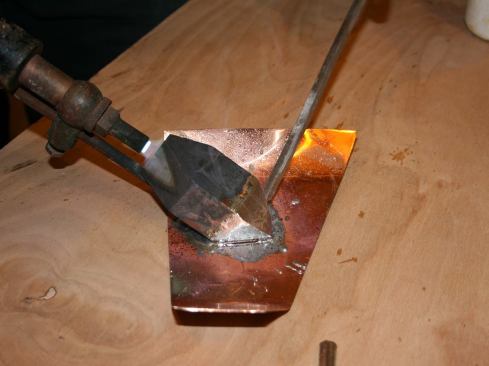
We use a pyramid-tipped, acetylene-fueled soldering iron for our… We use a pyramid-tipped, acetylene-fueled soldering iron for our roof and gutter work; propane models and other types of tips are available. Regardless of the iron or tip used, soldering requires some prep work. This photo is prior to cleaning.
Kyle Diamond
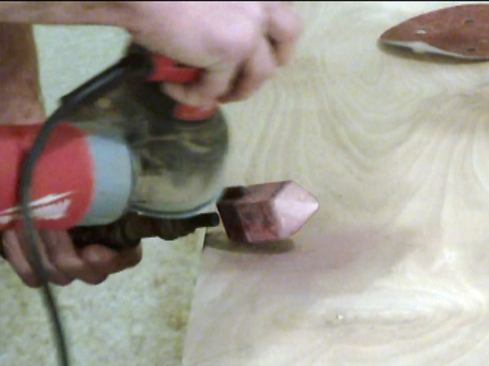
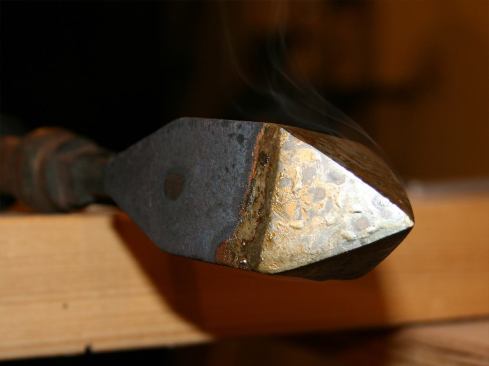
The tip erodes over time and deposits build up on it after repea… The tip erodes over time and deposits build up on it after repeated use. We use a grinder with a metal wheel to flatten the facets, using the flat part of the grinder, not the edge of the wheel. Make sure the four facets are flat, not curved, and meet at a sharp point; otherwise it will be difficult to control the flow and direction of the solder.
Kyle Diamond
After shaping the tip’s facets with the grinder, we sand them … After shaping the tip’s facets with the grinder, we sand them using an orbital sander with 80-grit paper to get some of the rough burrs off. Then, switch to 100 to 120-grit to get a smooth surface.
Kyle Diamond
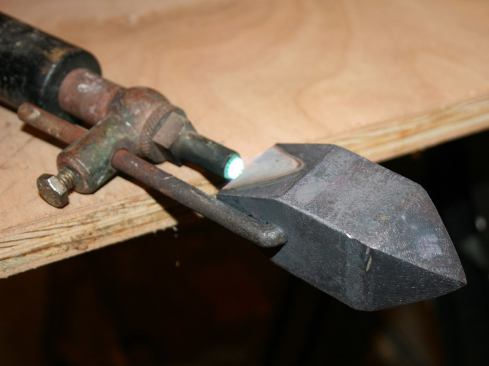
Light the iron and keep it on a low setting so it heats up slowl… Light the iron and keep it on a low setting so it heats up slowly.
Kyle Diamond
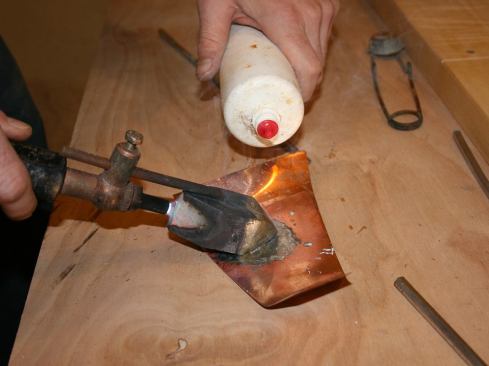
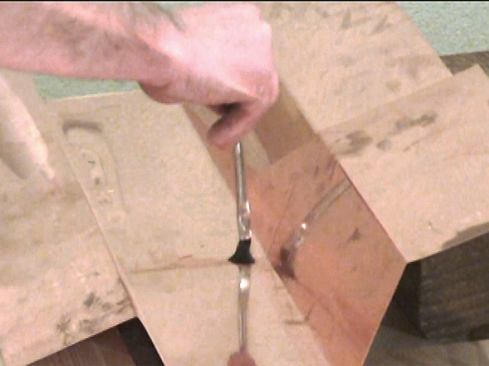
When it’s hot enough, “tin” the tip on a scrap piece of co… When it’s hot enough, “tin” the tip on a scrap piece of copper. Squirt some flux, and then melt some solder. Helpful tip: we put soldering flux into an empty, contact-lens solution cleaner in lieu of dipping a dirty flux brush into a large container of flux.
Kyle Diamond
Spread flux, and then melt enough solder to spread evenly on all… Spread flux, and then melt enough solder to spread evenly on all four facets of the tip.
Kyle Diamond
Tinning makes for a smooth flow of solder when working a seam.
Kyle Diamond
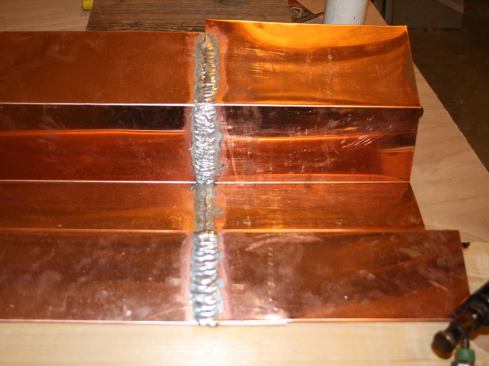
On this mock-up of the gutter liner, I’ll show how to solder a… On this mock-up of the gutter liner, I’ll show how to solder a lap seam. We lap the gutter sections approximately 3 inches. Starting at the trough’s bottom seam, brush flux on both sides of the seam, making sure it flows between the sheets.
Kyle Diamond
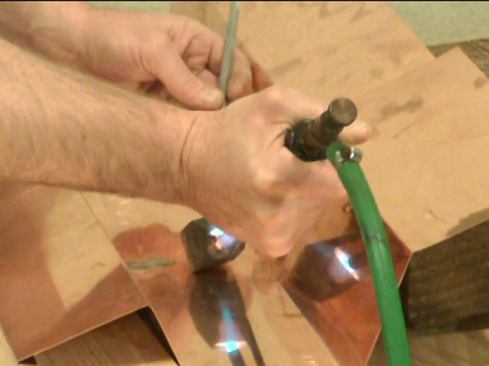
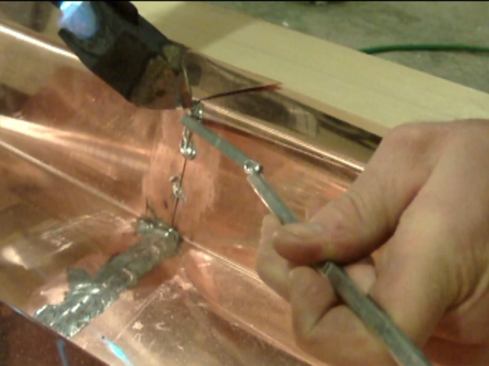
Then “tack” the seam in several places with a spot of solder… Then “tack” the seam in several places with a spot of solder. This keeps the two pieces of copper in close contact with each other so that they will heat up evenly. Soldering is two-handed work: one hand works the iron, the other controls the solder stick.
Kyle Diamond
While holding the iron at a shallow angle with the tip against t… While holding the iron at a shallow angle with the tip against the metal, press the solder stick against one facet of the tip until a drop of melted solder forms, then use the iron to spread the drop across the seam.
Kyle Diamond
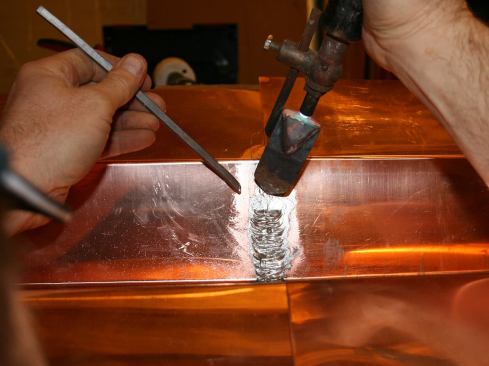
Each drop adds another layer, and the heat of the iron on the co… Each drop adds another layer, and the heat of the iron on the copper draws the solder into the seam to make a water-tight seal. Slowly walk the soldering iron across the surface of the seam, building up the solder as you go; adding flux as needed. I like to get a nice buildup of solder.
Kyle Diamond
Vertical seams take more time. Also, it’s important to reduce … Vertical seams take more time. Also, it’s important to reduce the heat on the torch for vertical seam work. Start by applying flux on both sides, and again, “tack” the seam in several places with a spot of solder. Helpful tip: when a solder stick gets too short, splice it on to a longer one with the soldering iron.
Kyle Diamond
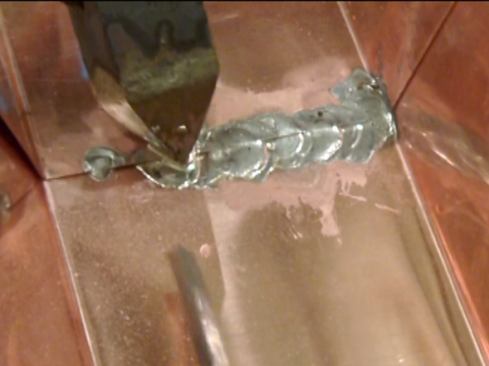
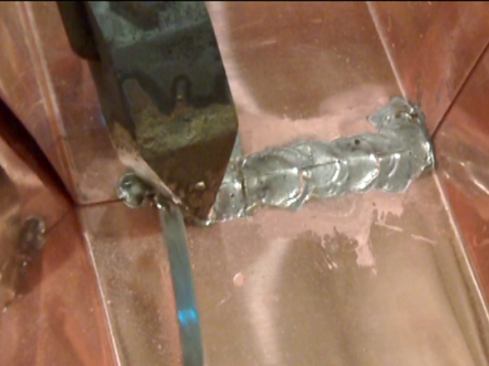
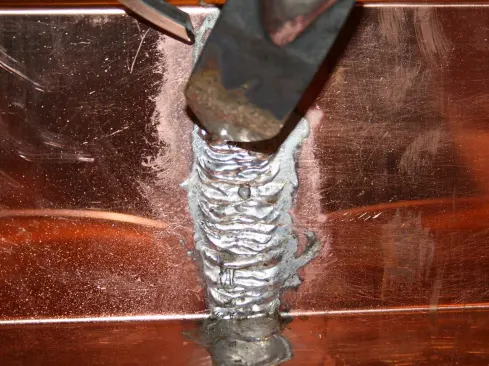
For vertical seam work, the temperature needs to be just right: … For vertical seam work, the temperature needs to be just right: if the iron is too hot, the solder starts running away too quickly off the tip; and if the iron is too cold, it won’t get sucked back underneath the top piece, weakening the weld. Also, this where having a sharp tip really pays off. Starting at the bottom…
Kyle Diamond
…hold the iron at a shallow angle with the tip against the met… …hold the iron at a shallow angle with the tip against the metal, press the solder stick against one facet of the tip until a drop of melted solder forms, then use the iron to spread the drop across the seam. Each drop adds another layer, and the heat of the iron on the copper draws the solder into the seam to make a water-tight seal. The thick “ribs” reinforce and strengthen the seam. Move up a little bit and repeat; building up the joint as you go along.
Kyle Diamond
After soldering the vertical seam, I finish the sloped seam on l… After soldering the vertical seam, I finish the sloped seam on leg running up the roof, starting from the bottom, working my way up. I turned the torch’s temperature up a little on this shallower slope. I then soldered crown-side vertical seam; and lastly, the horizontal leg covering the crown cap. On site, weather conditions impact soldering quite a bit and I tend solder by “feel”. When it’s cold or windy, you need more heat. Though not a hard-and-fast rule, I install only as much copper as I can solder in a day.


