
Charles Wardell
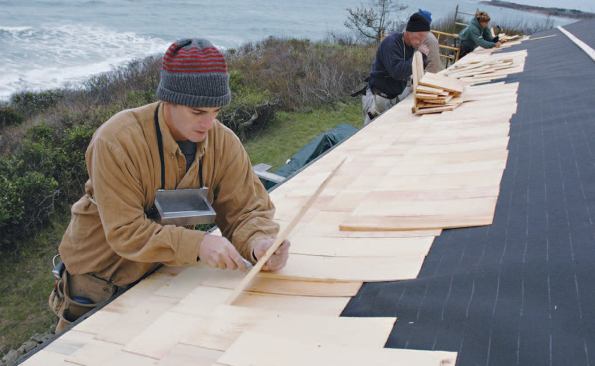
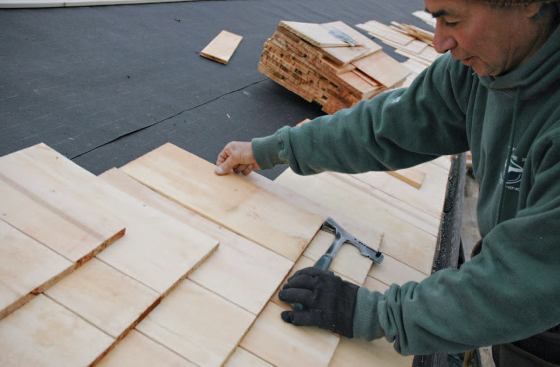
On a typical job, each carpenter works a section of the roof, which helps avoid confusion; courses are checked regularly and adjusted as needed.
I’ve been in the roofing and siding business for 30 years, and during that time have installed hundreds of cedar shingle roofs. They’re a great option in coastal New England, where I live and work, and are a natural fit for the area’s many capes and shingle-style homes. Also, a lot of the homes we work on are just steps from the Atlantic Ocean and have to endure frequent high winds. Knowing that wood shingles are more wind-resistant than asphalt helps us sleep better during winter storms.
On the downside, a wood roof costs more than an asphalt one – about twice as much, on average. And a good cedar roof’s service life of around 30 years trails the 35 years you can expect from today’s best architectural-grade asphalt shingles. Still, for many of our clients, the pros of wood outweigh the disadvantages.
A few years ago JLC published a good introduction to shingle roofing (see “Roofing with Cedar Shingles,” 11/09). It went into great detail about how to choose the right shingle species and grade, and provided an overview of what goes into a shingle roof system. Instead of covering the same ground here, I’ll explain how our production techniques help keep costs down on what’s already an expensive roof, and describe how we weave hips and valleys – elegant touches that help our jobs stand apart. Compared with open hips and valleys, weaving is time-consuming, and it has to be estimated correctly if you want to make a profit. To help with that, I’ve provided a cost breakdown at the end of the article.


Charles Wardell
The author demonstrates the weaving details that set his jo…
Working with Alaskan Yellow Cedar
Red cedar shingles are most common in this area, but recently we’ve been getting more jobs that specify Alaskan yellow, as on the house shown here. These shingles are a full 18 inches long, like cedar perfections, but thicker – 5/8 inch, compared with less than 1/2 inch for perfections – which I think looks better. They’re also denser than red cedar, so they’re tougher to cut and trim but also less likely to split.
Flashing and Underlayment
We use lead-coated copper flashing, which doesn’t react with the lead typically used by masons around chimneys. Also (although it’s not an issue on this roof), raw copper reacts with red cedar – another reason lead-coated copper is our metal of choice.
It’s well known that cedar shingles last longest when installed over a ventilating underlayment. The traditional way of doing this was to install them over horizontal strapping, but that’s rarely seen anymore. We recommend Cedar Breather as a good alternative, but many contractors and homeowners don’t want to add it to the roofing budget. So on most of our jobs, we cover the roof sheathing with 30-pound felt (rather than the 15-pound felt we use under asphalt shingles), and line all eaves, rakes, and valleys with Ice & Water Shield.
Layout and Exposure
Wood shingles are installed as a three-ply system, which means that the exposed portion of every shingle has two layers of shingle beneath it. The 18-inch Alaskan yellow shingles maintain this triple coverage with as much as a 5-1/2-inch course spacing, which is our most common exposure.
We typically ignore the exposure rating printed on the shingle bundles. For instance, the shingles used on this roof were rated for a 7-inch exposure because of their thickness. That’s only double coverage, which is acceptable if you put a strip of felt beneath each course. In our climate, we’re more comfortable with three layers of protection.
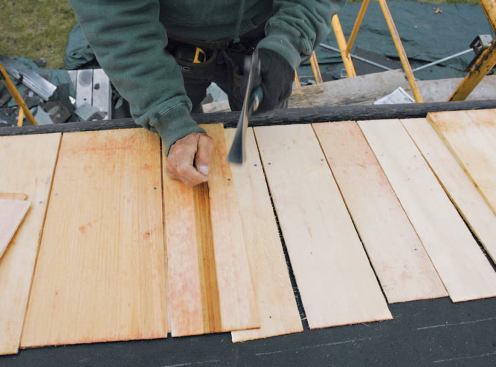
Shingles swell and shrink considerably with changes in moisture. To ensure that they don’t buckle when they swell or let water into the roof when they shrink, you need the proper gap between shingles, the right offset between courses, and the right nail placement (see slideshow) – details that I often see handled incorrectly. We leave about a 3/16-inch gap, or “keyway,” between shingles. (If the shingles are really wet – not just on the surface, but all the way through – we may install them so they touch.)
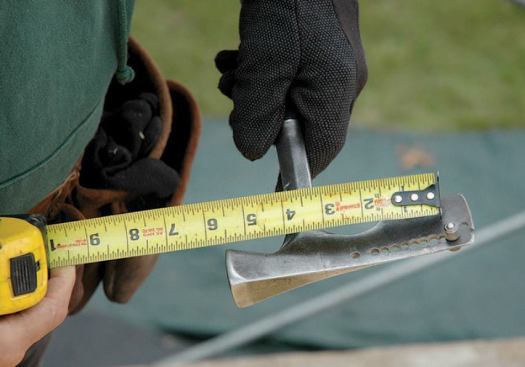
We use a minimum 2-inch offset between keyways in successive courses, and place nails an inch or two above the course line and about 3/4 inch from the edges of the shingle. When we install a really wide shingle – say, 9 inches or more – we score it vertically with a knife after it’s in place, nail on either side of the score, and treat the score like a keyway. Otherwise the shingle may split when it shrinks, leaving an unplanned gap.
Nailing by Hand
We don’t use nail guns; we hand-nail with a shingling hatchet and use stainless steel ring-shank nails. This may sound slower than pneumatic nailing, but it’s not. Rather than tacking a length of strapping to the roof to line up each course, we use the shingling hatchet’s gauge buttons. This speeds the work because one guy can install several courses at a time across the roof, just as if he were installing asphalt. Each carpenter can work vertically up a single section of the roof, which keeps crew members from tripping over one another.
I’ve also found that the guys do a better job when they’re hand-nailing. For instance, if the roof has board sheathing, as the older homes around here typically do, we always know if a nail misses the sheathing and ends up in one of the gaps.
Starters and Overhangs
The starters are generally installed with a 1-1/4-inch overhang; if there’s a gutter, we make the overhang deep enough to direct water to the center of the trough. At the rakes, we use a 1-inch overhang.
To align the bottom of the starter courses, we nail shingles near each end of the roof and stretch a string between them. We then bring the butts of the starter shingles up to the string so they don’t quite touch it. If the roof is long enough for the string to sag, we nail an additional support shingle near the center of the roof. The first course is nailed a bit lower than subsequent courses – about 5 or 6 inches up from the eaves.
To keep courses parallel to the ridge, we stop every 6 feet or so and measure to the ridge line. If the courses are running out of parallel, we snap lines for a couple of courses and install one course at a time until we’re back on track.
We also make sure that we don’t end up with a narrow course at the top, by adjusting the last five or six courses below the ridge cap so they’re roughly the same width.
Weaving a Valley
I prefer open valleys with metal flashing, especially on shallow roofs. An open valley lets water flow out more easily, minimizing the chance of leaks and extending the life of the valley shingles. However, some customers – including the owners of this house – want the woven look. Weaving a valley takes time, but the end result blends nicely into the roof.
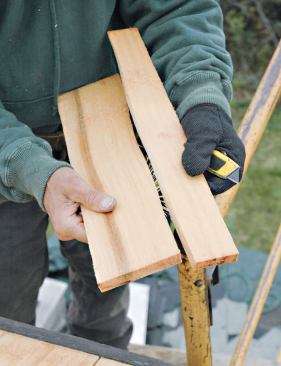
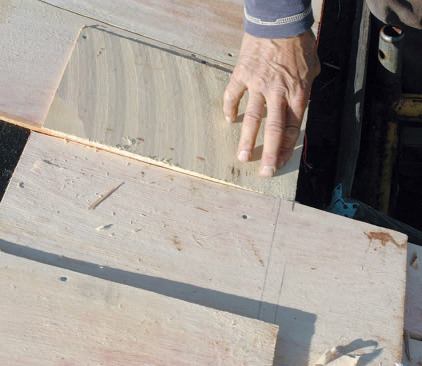
We use a portable table saw to put a compound angle on the butts of the valley shingles (see slideshow). They’re mitered to match the angle between the course lines and the valley line, and the blade is set to 45 degrees, creating a bevel that lies flat against the roof.
Every opposing pair of valley shingles gets step-flashed with lead-coated copper, which I precut into 12-inch squares at the shop, then bend with a brake to match the roof pitch.
Each valley has a double starter course consisting of two layers of shingles and two layers of flashing. So I’ll put down a piece of flashing, a pair of shingles, another piece of flashing, and another pair of shingles. This process continues right up the valley. Some roofers will flip-flop the valley shingles, starting with the left-hand shingle on one course, the right-hand shingle on the next course, and so on. The theory is that doing this keeps debris from clogging the seam and trapping water. I prefer to put the same side down first all the way up, as it makes for a straighter line. I’ve had no problem with clogged seams.
Note that the valley shown here did not end right at the inside corner of the two roof planes. This small offset created a slight height difference where the valley shingles meet the field shingles of the higher roof. I spent a few minutes feathering the upper surface, using a couple of shim shingles and the hatchet blade. Where the valleys die into the upper roof, we install metal flashing first, followed by peel-and-stick rubber, then apply a standard ridge cap.
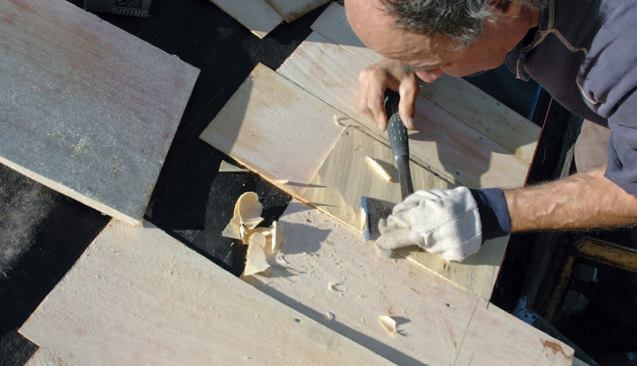
Weaving Hip Caps
Unlike a standard hip cap, which sits on top of the shingles and leaves a gap underneath, a woven cap is tight to the roof surface. Because every shingle has to be trimmed and planed, we hand-select shingles with straight, open grain – ones that will split straight and are easy to trim. Every shingle is fitted in place and trimmed to lie flush to its neighbor. It’s slow going, and even slower with Alaskan yellow cedar, which is denser and more difficult to plane than red cedar. But whatever the wood species, the steps required for a tightly woven cap are the same.
We bring the field shingles to the hip and snap lines on both sides to indicate the edges of the cap. At the bottom, we run the two starter courses to the corner from each side (see slideshow). We then follow with two more pairs of hip starters, which are oriented diagonally up the hip, and which we trim with a circular saw to follow the eaves. Now we can work up the hip.
Moving Up the Hip
We mark and cut hip shingles to fit tight against the field shingles above, always splitting excess off with the shingling hatchet and, if necessary, finishing with a block plane. Sometimes filler pieces are needed to keep the shingle tight and flush to the course below; we add these shim shingles as needed and trim them as we go (see slideshow). After the top shingle in each pair has gotten its final planing, we use a single nail to pin the two opposing shingles together.
Capping the Hips
We bring both sides of the hip up to the ridge and trim them, then cover the intersection with a triangular face piece cut from a wide shingle. Then we add the starter course for the ridge and trim it flush with the triangular piece. With two layers of starter on, we can now install a standard ridge cap.
Job Costs
Here’s a cost breakdown for the roof featured here, which has 30 squares of surface area, about 32 feet of valley, 80 feet of hip caps, and a 55-foot main ridge. The job took around 450 hours of labor over three weeks, which included tearing off the old asphalt roof. The total cost to the client was around $30,000, including materials, labor, and the dumpster fee. The shingles alone cost around $16,000.
As I mentioned above, we went with a tighter 5 1/2-inch exposure, which required seven bundles per square. Had we used a 7-inch two-ply exposure with felt paper interlayment, we would have needed five bundles per square. It also took about a bundle for every 11 feet of ridge. When I bought the shingles in the fall of 2011, they cost about $55 per bundle, or $275 per square at a 5 1/2-inch exposure. (By comparison, red cedar currently costs around $75 per bundle, but there’s more in a bundle, so you only need four per square.) We use 3-1/2 to 4 pounds of 1-3/4-inch, 7/32-inch-diameter nails per square (fatter nails can cause the shingles to split when it gets cold).
We charge $50 per bundle ($250 per square) for installation. I also add an extra $14 per foot for valleys, cheeks, and standard ridge caps. Woven caps are charged at $28 per foot. Each of my guys can put on about two squares of field shingles per day, about 30 feet of standard cap per day, and about 15 feet of woven cap per day.
Stripping the old roof is $150 per square. We charge the same for asphalt and wood; although it obviously takes longer to strip a wood roof, that’s the going rate around here.
Jim Airasian is a roofing and siding contractor from West Tisbury, Mass. Photos by Charles Wardell.


