Chicago has one of the nation’s most stringent electrical codes, and with good reason: Ever since the Great Chicago Fire of 1871, anything related to fire safety has been taken very seriously. The city requires that all electrical work — even in residential settings — be protected by metallic conduit, with no exceptions. Contractors and electricians in other areas may view this as an unnecessary and expensive precaution, but running wiring in conduit — otherwise known as EMT — does in fact offer several advantages over nonmetallic sheathed cable (commonly referred to as NMS or Romex).
Chief among them, of course, is safety. Anyone who’s been in the trades knows what happens when an errant fastener finds its way into an unprotected part of the cable. With conduit, the likelihood of that happening is dramatically reduced. Fasteners that come in contact with the pipe tend to simply bend or glance off the wall. Also, when conduit is used the building’s entire electrical system is grounded — not by a lone wire, but by all the components: pipe, connectors, and boxes.
And then there’s the convenience factor. Adding a circuit to a room fed by nonmetallic sheathed cable usually involves opening up walls to pull new cable. With a conduit-fed room, however, the job requires little more than pulling the new wire through the existing conduit and boxes. There’s rarely a need to disturb existing finishes.
The same holds true when a whole building needs to be rewired. My company routinely does extensive renovations in old structures, and replacing old wiring is generally part of the job. When the building has conduit, this is a fairly straightforward task: After mapping out the conduit runs, my electrician simply ties new wire to the old and then simultaneously pulls the old wire out and the new wire in.
Locating Boxes
As part of our permitting process, we submit a detailed electrical plan along with the building-permit application and any other drawings. Once everything’s been reviewed and the permit issued, we give the plan to our electrician — but only for general guidance; ultimately, he decides the best routes and locations for his pipe and boxes.
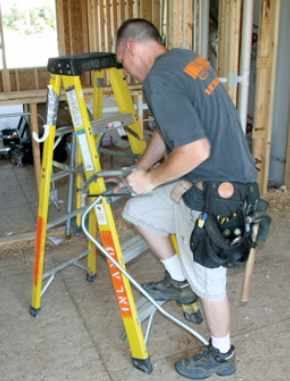
To begin, he secures the work boxes with screws or roofing nails, making sure to keep the front of each box flush with the stud or joist he’s attaching it to. The galvanized-steel boxes most often used in residential conduit jobs — “1900 boxes,” as local electricians call them — are about 4 inches square and 1 1/2 inches deep. On their faces are two screws for attaching either the plaster rings that receive the electrical devices or blank covers and extensions.
Once the boxes have been secured, the electrician drills holes in the framing members for the conduit. Until recently, he did this by measuring up from the floor and making a series of marks on the studs between the boxes; then he’d drill a 7/8-inch hole through the center of the studs, which put the hole about 1 1/4 inches from the stud faces. Now he uses a laser hole locator from Stabila (800/869-7460, www.stabila.com).
After marking and drilling the first hole, he inserts the laser and clamps it to the stud; from there it projects a beam onto each successive stud as the holes are drilled.
Up until this point, rough-in is the same as it would be with Romex, but now the real artistry begins: The galvanized metal conduit needs to be fitted between the boxes and run to the service panel. On residential jobs, 1/2-inch conduit is used for the vast majority of the rough-in. Occasionally, 3/4-inch conduit is used when more wires are necessary — for home runs, say, or when a heavier gauge is required.
Bending and Installing Pipe
Even for seasoned electricians, bending conduit can be a challenge. Unlike plumbers, who rely on dozens of fittings to get their pipes from point A to point B, electricians have only a handful of fittings to choose from when they install conduit — and most of them are used to terminate the pipe into a box or to couple pipes. That leaves all the directional transitions for the electrician to do with his pipe bender.
Watching my electrician — who has more than 20 years of experience — bend pipe is like watching a sculptor at work. Most impressively, he uses only a few simple hand tools. In addition to the normal tools found in any toolbelt, the work requires a hacksaw, a couple of sizes of pipe benders, and a reamer.
For each run of conduit, he measures the length of travel and the distance to the nearest bend or offset; then he marks the pipe accordingly and bends it with one of the pipe benders. The whole process of getting a pipe to fit a given space follows a plan that exists only in the electrician’s head; he knows exactly where to bend the pipe and to what degree, an ability that comes from experience.
After bending the pipe, he installs it. Different kinds of connectors of varying sizes can be used to connect conduit to boxes and other pipes; all clamp securely to both of the items they’re connecting, for a continuous ground. Depending on how and where the pipe’s being connected, he uses the following fittings:
• a pipe-to-box connector for attaching the pipe to the work boxes;
• a coupler for connecting or splicing together two pipes;
• a chase nipple — or box-to-box connector — for connecting two boxes either back to back or side by side;
• a greenfield-to-pipe connector for adapting rigid conduit to flexible conduit (used with lighting whips);
• a Jake — or offset — connector for spots where a tight offset is needed and can’t be made by bending pipe.
While other, more specialized connectors are also available, the five mentioned above are the most common ones in residential installations.
The fittings used for box connections have a male end that fits into a box knockout and secures with a locknut. The other end slips over the conduit and secures with a set screw that tightens against the pipe. Compression fittings are another option, but most electricians I know prefer to use set-screw connectors because they provide a faster connection that’s just as secure. Compression fittings are required in plenum ceilings and any other place that an airtight installation is needed.
Running Wire
While not as labor-intensive as installing conduit, running wire still requires careful planning so that all devices are fed properly and no conduits are overfilled — a definite red flag for inspectors.
Home runs are usually done first. Starting at the panel, the electrician feeds insulated copper wire (coated in different colors of PVC jacketing) back to the junction or splice boxes. On short or fairly straight runs, he often just pushes it through the pipe to a helper on the other end.
On longer runs, or ones with a lot of bends, he uses a fish tape: He threads it through the pipe, then attaches the wire to it by stripping the insulation from the conductors and feeding the wire through the hook on the tape. To prevent snags, he wraps the stripped conductors and the end of the fish tape with several layers of electrical tape. Next, he pulls the wire back through the pipe to its final location, and repeats the process until all the wire is pulled.
There’s nothing unusual about the wire itself. Depending on the load, it’s typically either #14 for 15-amp circuits or #12 for 20-amp circuits. It comes in solid and stranded versions; each has its own loyal following among electricians. Stranded wire is easier to pull, according to its advocates, because it’s more flexible; proponents of solid wire say that getting single conductors around device terminals is easier, making trimouts faster.
After all the wire has been pulled, any connections that can be made are completed inside the boxes. Ideally, splices are kept to a minimum; thanks to 500-foot spools of wire, long uninterrupted runs are possible. The splices that are necessary are done with wire nuts. Some electricians wrap the wire nuts in electrical tape for added insurance.
Plaster Rings
Next, the electrician “rings” the work boxes with plaster rings, which are essentially box adapters that allow a 1900 box to receive one or two devices — or a light fixture, a smoke detector, or the like.
The rings come in various configurations and depths. For a drywall finish, either a 1/2-inch-deep or a 5/8-inch-deep ring is appropriate; on walls slated to receive tile or paneling over drywall, rings of up to 1 1/2 inches deep are used. Boxes can be converted in the future from one use to another simply by swapping the plaster rings.
Rough-in is now complete, outside of a couple of temporary outlets and perhaps some pigtail lights that still need installing. Wires are pushed as far to the back of the boxes as possible to keep them from getting hit by a drywall router.
Inspection
During rough inspection, the inspector checks that the following conditions are in place:
• All boxes are securely fastened so they don’t work loose over time.
• Pipes are securely connected at both ends and properly supported along their length. Sagging pipes can cause chafing of the wires and put undue stress on the devices, leading to shorts.
• All connectors are securely fastened to both the boxes and the conduit so the ground path isn’t interrupted.
• Pipes and boxes are not overfilled. The concern is that heat generated by the wires won’t be dissipated in an overloaded pipe or box, which can cause the wire’s insulation to break down and, ultimately, lead to a short or even a fire.
• Connectors are installed correctly both at the panel and on the conduit. The panel itself needs at least one 10-foot ground rod and a bare copper wire run to the building’s water-service entrance.
As with any other type of electrical installation, final trim-out takes place after most finishes are complete.
Greg Burnet owns Manor Services in Chicago.


